Apple just released new versions of all its operating systems—iOS, macOS, watchOS, and tvOS—fixing bugs, plugging security holes, and, best of all, adding a few new features. Here are four things you can do once you’ve updated. (If you’re concerned that installing the updates may cause other problems, check with us first, but it’s best to stay current.)
1: Sleep better after using your Mac late at night.
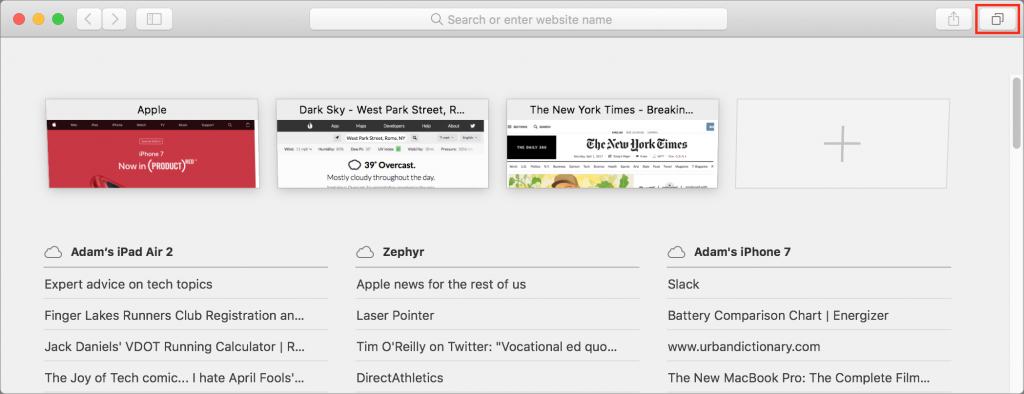
macOS 10.12.4 Sierra has gained Night Shift, a feature from iOS that automatically shifts the colors of the screen to the warmer end of the spectrum after dark. Night Shift may help you sleep better by reducing the amount of blue light that tricks your body into thinking it’s earlier than it is.
To set up Night Shift, open System Preferences > Displays > Night Shift and choose Sunset to Sunrise from the Schedule pop-up menu. Night Shift knows when the sun rises and sets wherever you are, but if you prefer, you can also set custom on and off times. (If you don’t see the Night Shift button in the Displays preference pane after upgrading to 10.12.4, your Mac is unfortunately too old to support Night Shift.)
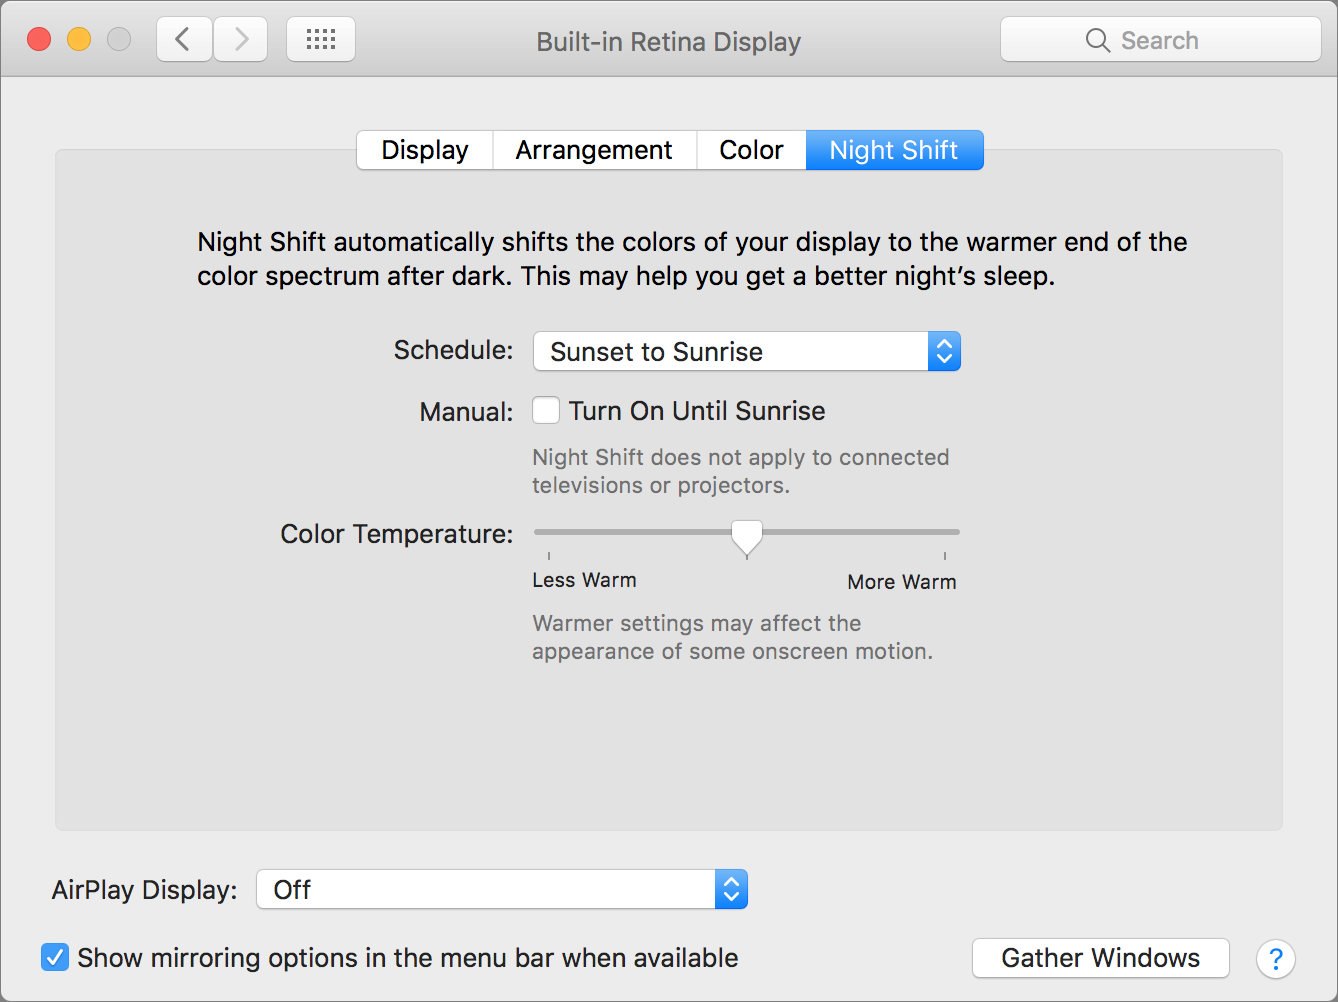
If you’re working with graphics at night, or if video looks odd, you can turn off Night Shift manually. Do that either in the Displays preference pane or by scrolling down in Notification Center (click it in the upper-right corner of the screen) to see the Night Shift switch.
2: Find the AirPod that fell between the couch cushions.
Apple’s wireless AirPods earbuds are cute, but they’re also easy to misplace. If you can’t find yours, iOS 10.3’s Find My iPhone app can help. Bring it up, tap the AirPods icon in the display, and then tap the Play Sound button to make them play a locator sound. If you’ve lost only one AirPod, you can mute the other so it’s easier to hear where the sound is coming from.
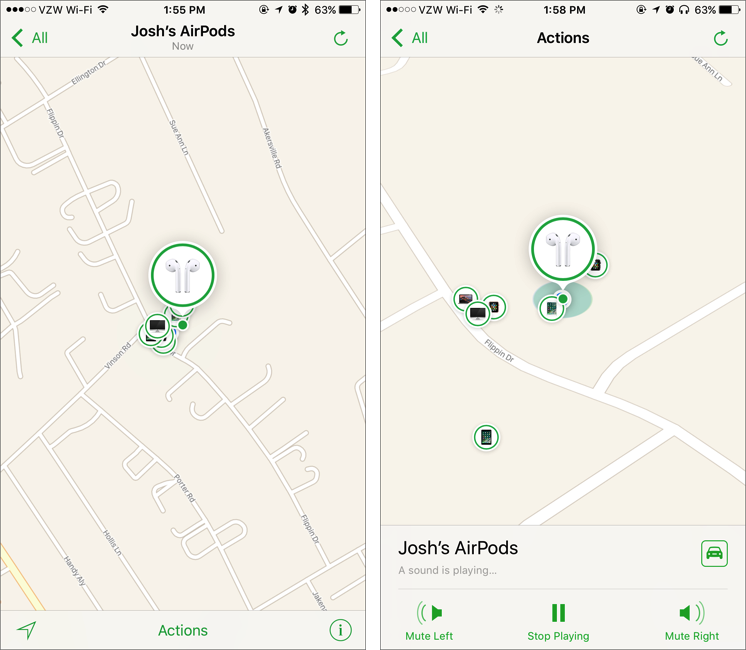
Note that Find My AirPods works only when in range of a paired iOS device, so it may not help if you lose an AirPod while running.
3: Don’t be “that person with the Apple Watch” at the theater.
You’re in a darkened theater, at a movie or a play, and when you move in your seat or cover your mouth to cough, your Apple Watch’s screen turns on, annoying the people around you. Even worse is when a notification rolls in, causing the watch to make a sound. Embarrassing, we know. Happily, watchOS 3.2 adds Theater Mode, which turns on Silent mode and keeps the screen dark by disabling its standard “raise to wake” behavior.
To enable Theater mode, open Control Center by swiping up from the bottom of the screen. Then tap the Theater Mode button, which is emblazoned with theater masks. After the performance, you’ll need to disable Theater mode manually by tapping its button again.
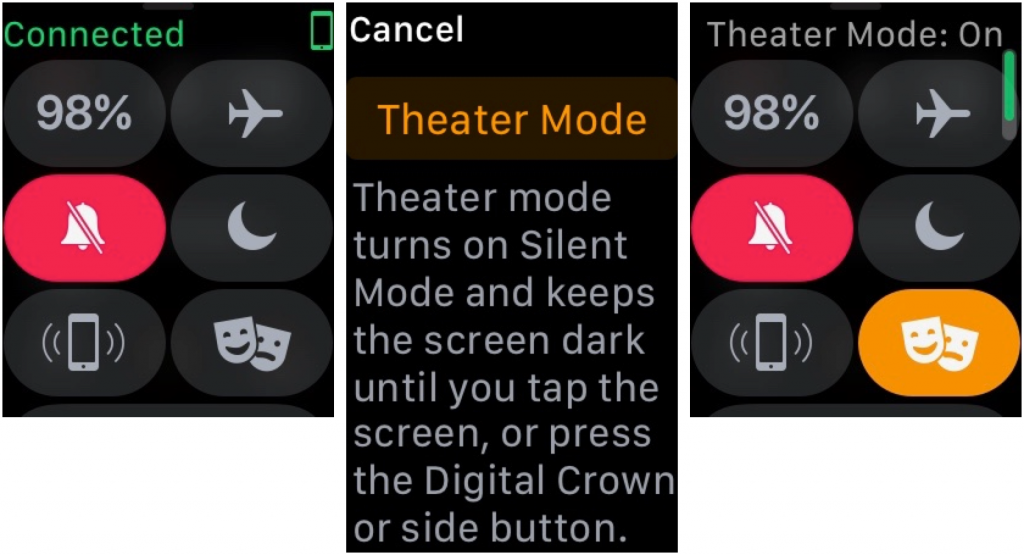
If you do need to check the time surreptitiously (who knew this performance would go so long!), tap your Apple Watch’s screen, or press the Digital Crown or side button.
4: Ask Siri to find your car in a humongous parking lot
We’ve all been there. You parked at the mall, but got turned around while you were inside, and now you can’t find your car in the sea of automobiles. In iOS 10.3, you can now search for “parked car” in Maps, or just ask Siri, “Where did I park?”
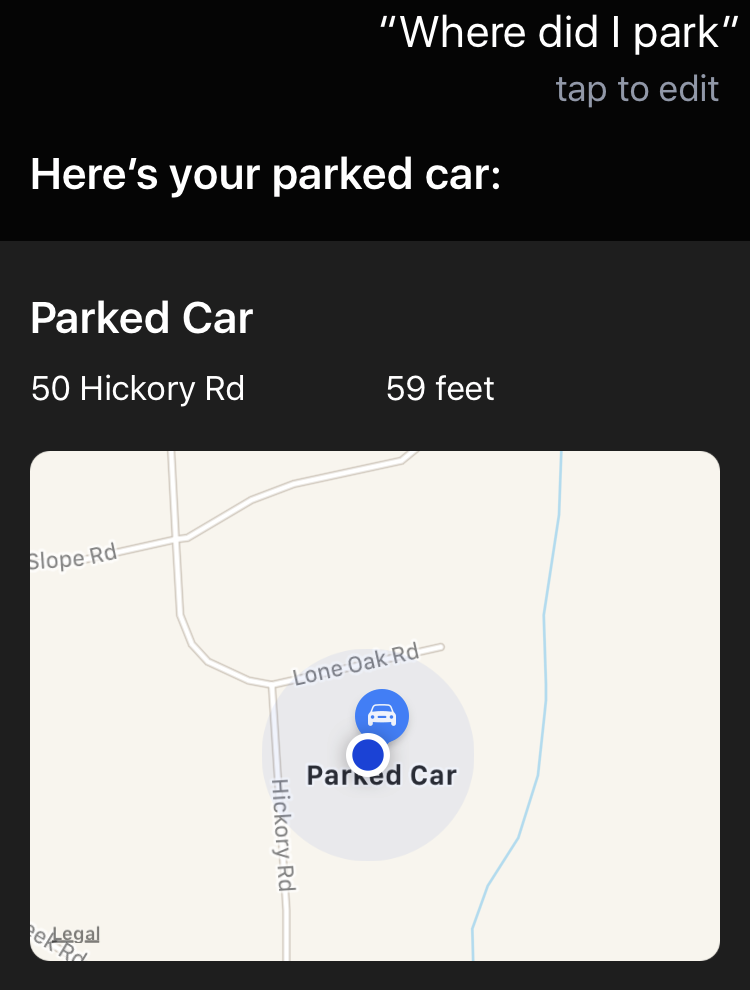
And if you ever lose your car at a place like Disney World, this feature alone will be worth the price of the iPhone!