Use Tabs in Apps in Sierra
We’ve all become accustomed to opening Web pages in separate tabs in Safari, Google Chrome, and Firefox. And in OS X 10.9 Mavericks, Apple gave us the capability to open different folders in tabs in Finder windows, making it easy to work in multiple folders with limited screen real estate.
In macOS 10.12 Sierra, Apple has gone one step further, building tab support in system-wide so you can open windows in tabs in most Mac apps. Tab support is “free” for apps; developers don’t need to do anything to support it and you won’t need to download an update to take advantage of it in most of your apps. (Some apps based on older code don’t support tabs at all, but those will be few and far between.)
So how do you get started with tabs and how can you use them in your everyday work?
First, to determine whether Sierra was able to add tab support to a particular app, look in that app’s View and Window menus. If you see View > Show Tab Bar and tab-related commands in the Window menu, you’re good to go.
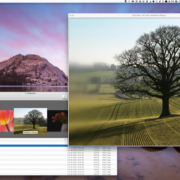
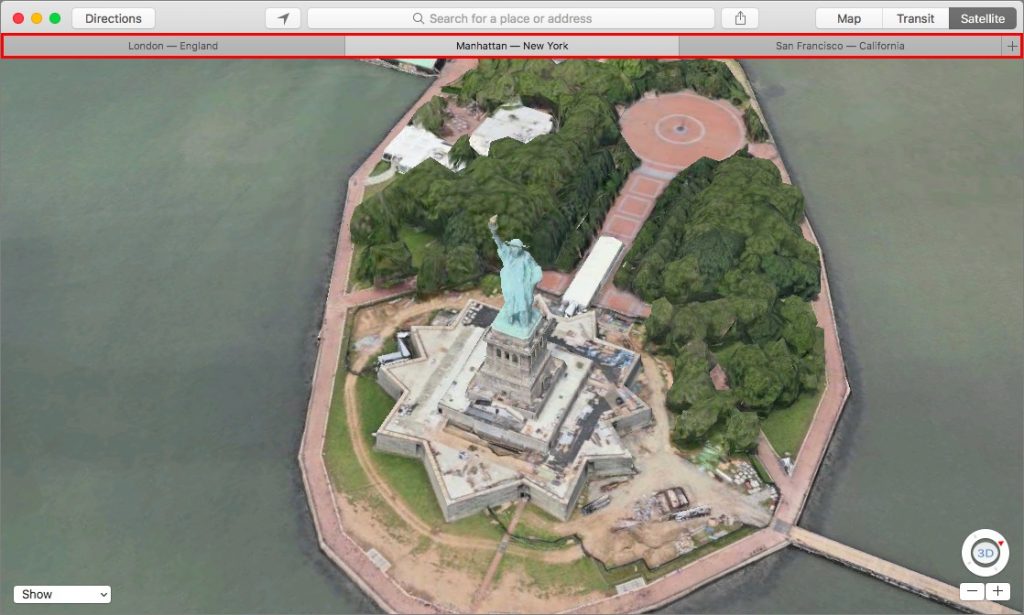
Next, if Show Tab Bar doesn’t have a checkmark on the View menu, choose it to reveal the tab bar, which appears between the app’s main toolbar and the document itself. You’ll see a tab for the current document or window, and (in most apps) a + button at the right side of the tab bar. Here we’re showing three tabs in Maps.
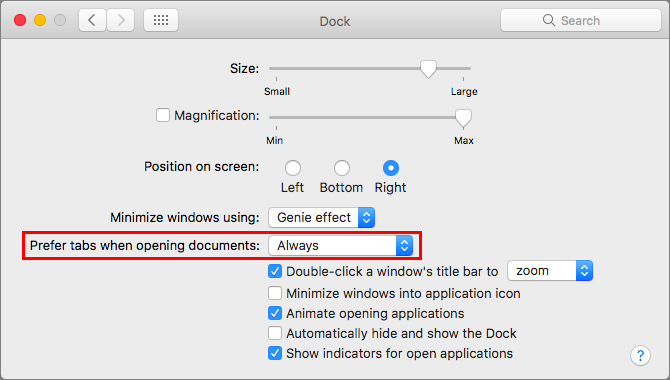
One final setup step: By default, documents open in separate windows. To make them open in tabs, open System Preferences > Dock, and choose Always from the “Prefer tabs when opening documents” pop-up menu. This setting applies both to existing documents and those you create by choosing File > New.
Now that everything is configured, here’s what you can do:
- Create a new, empty tab: Click the + button in the tab bar.
- Move between tabs:
- Click the desired tab.
- Choose Window > Show Next Tab (to the right) or Show Previous Tab (to the left).
- Press the Control-Tab (next) and Control-Shift-Tab (previous) keyboard shortcuts.
- Choose Window > Tab Name.
- Merge multiple windows into tabs in one window:
- Drag a document’s tab from one window’s tab bar to the tab bar in another window.
- Choose Window > Merge All Windows.
- Move a tab to its own window:
- Drag the tab out of its tab bar until it becomes a thumbnail of the document.
- Choose Window > Move Tab to New Window.
- Rearrange the order of tabs: Drag a tab to the desired position in the tab bar.
- Close a tab:
- Hover over the tab to see the X button at the left side of the tab. Click the X.
- Choose File > Close Tab.
- Press Command-W.
Getting used to tabs may require a little adjustment, but if you configure your Mac to always prefer tabs when opening documents, using tabs will quickly become second nature, just as it is in Web browsers.