You’ve chosen Apple devices to run your business. That’s great, but are you still dealing with each of those devices individually? If you hire a new employee, do you go to the Apple Store to buy a new Mac, bring it back to the office, spend a few hours installing the right software, and then sit down with the employee to get them started with email accounts and other logins?
That self-support approach can work when your company has only a few users, but as your business grows, how much of your time can you afford to spend on IT? You might enjoy it, but it distracts you from what you need to do to make your company thrive. Sure, you might think you’re saving money by doing this work yourself instead of hiring an IT professional, but that amount may pale in comparison to the amount you could make in your primary role. There’s a better way: managed IT services with device-management software.
In essence, with managed IT services, we become part of your team, creating systems that simplify and speed up the process of onboarding new devices, monitoring their usage, ensuring their security, and providing ongoing support. Here are some of the ways managed services can help your business.
Faster and More Accurate Setup
With managed IT services and properly configured device-management software, you can order a Mac or iOS device from Apple (through an Apple Business Manager account) and when it arrives, your employee can take it out of the box, log in, and have the entire device automatically configured over the network with required apps, server settings, security policies, and more.
If you’ve spent several hours configuring devices manually, it’s magical to watch a device pick up apps and settings automatically. And it’s not just for new devices. If an employee leaves or you need to repurpose a Mac or iOS device, device-management software can automatically wipe it and set it up for its new role with minimal effort.
Increased Security
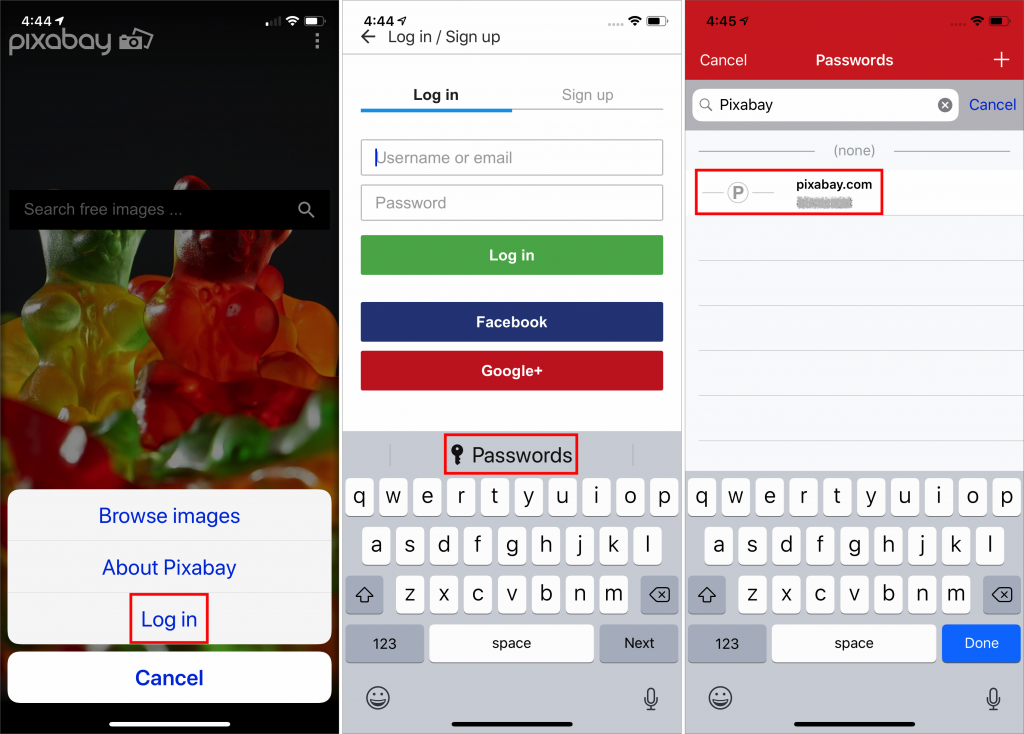
An important aspect of switching to a managed IT services model that relies on device-management software is requiring security policies. If you’ve ever worried about an employee losing a company device containing confidential data, device-management software can eliminate those concerns by automatically enabling FileVault for Macs or enforcing non-trivial passcodes on iOS devices. Lost devices can even be locked or wiped remotely from a central management console.
Also, device-management software can restrict what apps users may install, so you don’t have to worry about apps that could leak confidential information or malware that could be stealing passwords.
Proactive Monitoring
A managed IT services support model lets your users focus on their work, rather than on their Macs. Monitoring software can report if Mac hard drives start to fail, when laptop batteries start to go, if RAM is faulty, and more. It’s better to know that a drive is dying before you lose data.
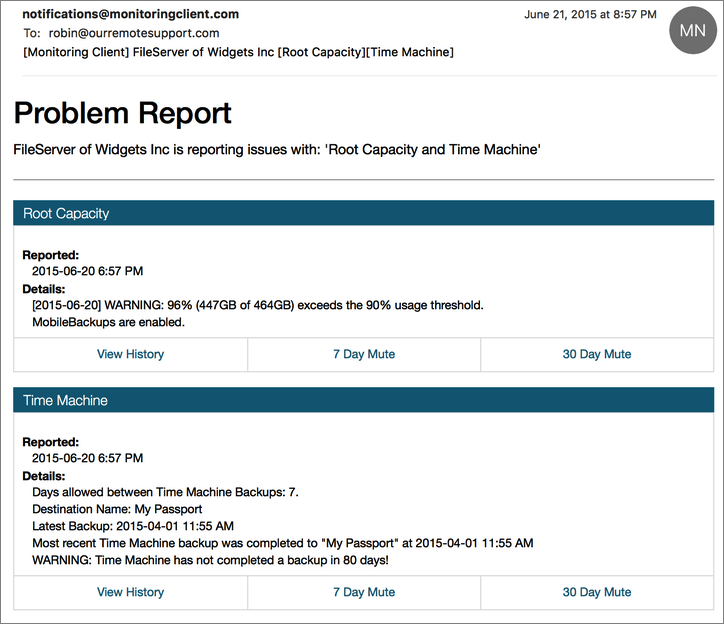
Monitoring software can also check on important events, making sure that backups are happening regularly, warning if a user has downloaded a potentially problematic operating system update, and making sure anti-malware software is up to date.
Proactive Maintenance
Monitoring helps identify issues early on, but perhaps the most important aspect of a managed IT services solution is how it combines proactive monitoring with proactive maintenance. It uses software and services that go beyond identifying problems to fixing them—blocking undesirable software upgrades, automatically deploying essential security updates, and removing malware—before they impact your workflow. This saves your users downtime and frustration, and lets you focus on your work rather than troubleshooting problems.
Improved Reporting
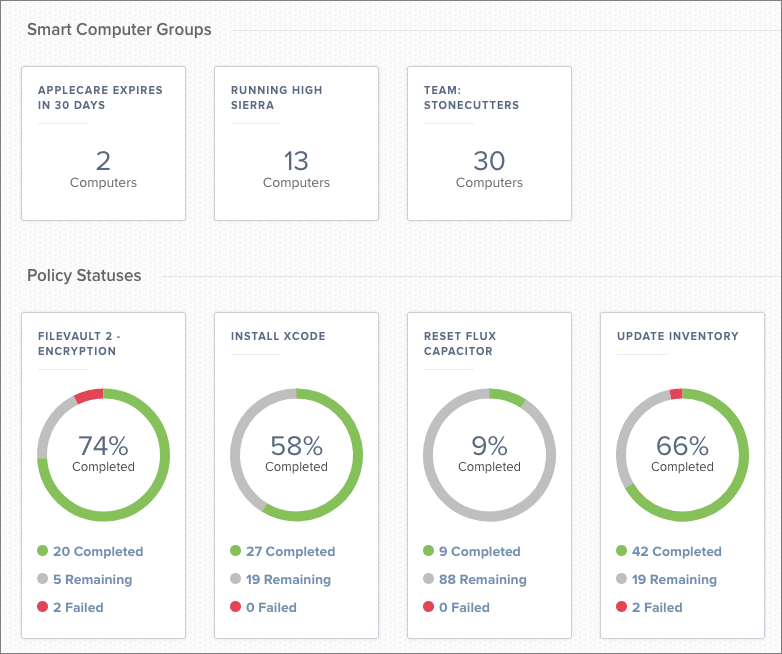
It may not be difficult to keep track of a handful of Macs and iPhones, but as your business grows, inventory can become daunting. A managed IT services solution helps you know exactly what devices you have, who is using them, and more. It can also report on installed software to make sure you’re in compliance with your software licenses.
Predictable Pricing
If your company pays for support on an hourly billing model, there’s no way to budget accurately for expenses, since no one can predict what will go wrong. Plus, it takes longer to investigate and resolve problems because of the time necessary to figure out the status of the device in question. Solving complex or recurring problems can get expensive in such a scenario.
With managed IT services, we instead charge a flat monthly fee based on how many devices you have. Thanks to proactive monitoring and device management, we can fix many problems before the user even notices. And if a user does need in-person support, it’s faster and easier to help them when we know exactly what device they’re using, what version of the operating system it’s using, what software they have installed, and more.
A managed IT services model isn’t for every situation, but if your business has more than a handful of Macs, iPhones, and iPads in use by your employees, it could reduce downtime, save you money, and increase security.