The holiday shopping season is fast approaching! Given the significant stresses placed on society’s fulfillment, distribution, and delivery systems by the pandemic, we recommend you start thinking about your holiday gift-giving sooner rather than later. Even Apple, which generally does an excellent job predicting demand and shipping products quickly, has been suffering from delays this year. But if you order in time, Apple has a wide variety of products that would make great gifts for your Apple-using loved ones.
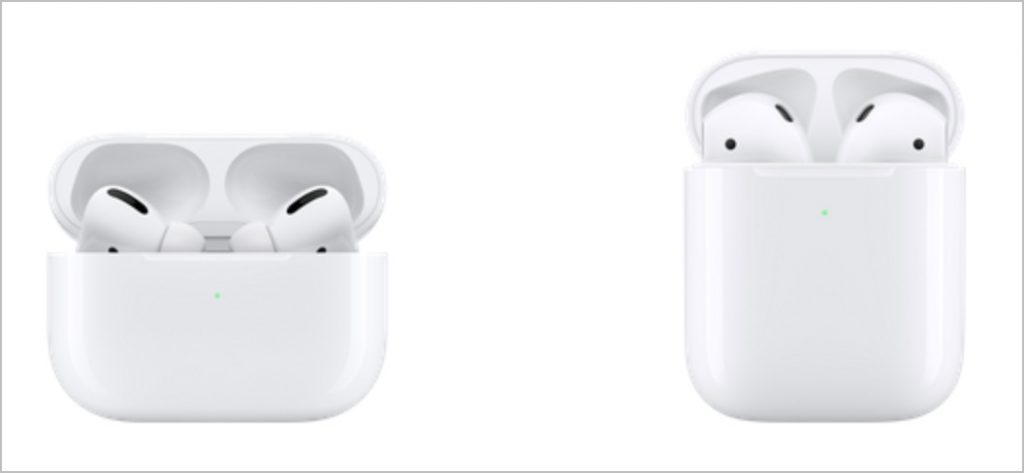
AirPods and AirPods Pro
Apple makes two models of its insanely popular wireless earbuds: the original AirPods and the noise-canceling AirPods Pro. Although it’s tempting to assume that the AirPods Pro are simply better than the AirPods, the decision isn’t that simple. The AirPods are cheaper ($159, or $199 with a wireless charging case) and don’t block the ear canal. The AirPods Pro are smaller and cost $249, and you also get active noise cancellation, a customizable fit, a wireless charging case, and sweat and water resistance. However, the AirPods Pro block the ear canal, which many people dislike, and don’t stay in as well for some.
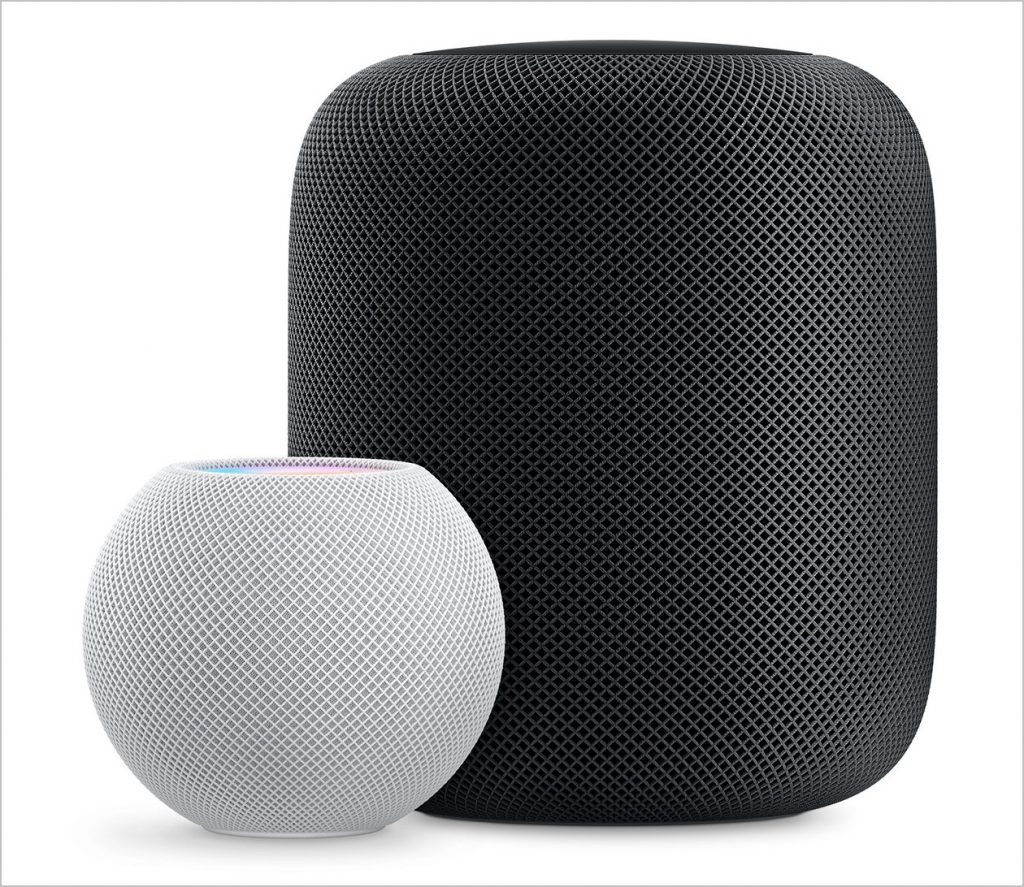
HomePod and HomePod mini
Apple’s HomePod smart speaker lags behind Amazon’s Alexa and Google Home devices in large part because of its price, which started at $349 and later dropped to $299. But the sound that the HomePod puts out is top-notch, and Apple has done a good job of integrating the HomePod into the overall ecosystem of Apple devices, so you can use it as a speaker for an Apple TV. It also works well for controlling HomeKit-compatible lights and plugs.
Cognizant of the price problem, Apple has just introduced a new HomePod mini that enters the market at $99. It’s also a lot smaller than the original HomePod, and while its sound probably isn’t as good due to fewer bits of audio hardware, we’re betting that it’s still excellent. A HomePod mini can do nearly anything a HomePod can do, including creating a stereo pair with another HomePod mini (but not with a HomePod). It’s a cheaper introduction to having a Siri-enabled smart speaker and a nice way to bring audio into other parts of a home or office.
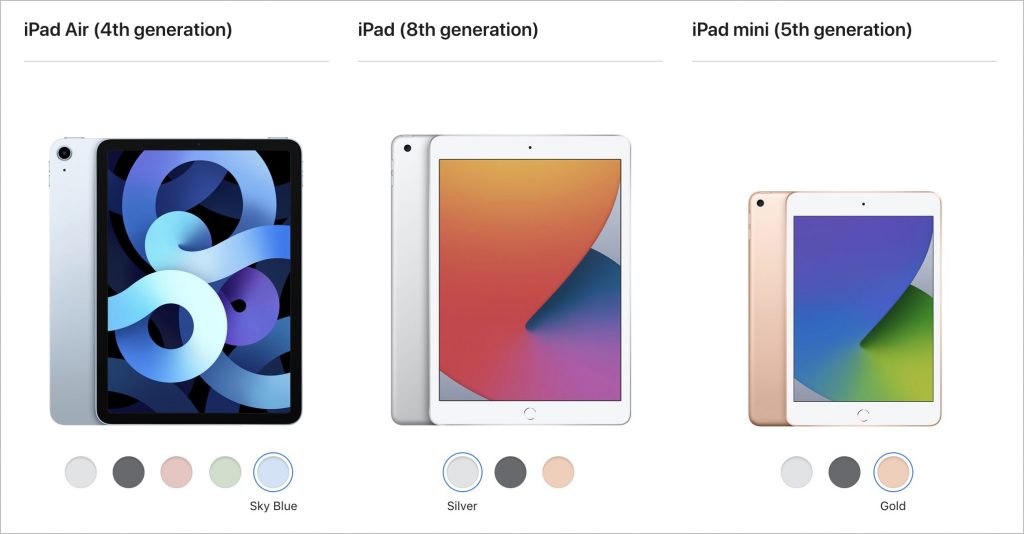
iPad
Apple’s iPad line is stronger than ever. At the top, the iPad Pro comes in 11-inch and 12.9-inch models, and while they’re bursting with power, they’re also on the high end of the price spectrum (starting at $799 and $999), which makes them less attractive as gifts. Plus, they might be due for updates soon.
Instead, for a demanding iPad user, look at the new fourth-generation iPad Air ($699), which combines the flat-edged industrial design of the iPad Pro with Apple’s latest chip. It’s compatible with the second-generation Apple Pencil ($129) and the Magic Keyboard for iPad ($299).
For kids or those who want an iPad for simpler purposes like browsing the Web, reading books, watching TV, and playing casual games, you won’t go wrong with the new eighth-generation iPad, which combines thoroughly respectable specs with a low price starting at $329. For additional input options, it works with the first-generation Apple Pencil ($99) and the Smart Keyboard ($159).
Finally, don’t count the fifth-generation iPad mini out. At $399, it’s a little more expensive than the 10.2-inch iPad, but its 7.9-inch screen makes it a lot smaller, which many people like. It too is compatible with the first-generation Apple Pencil, and although Apple doesn’t make any keyboards for it, it will work with any Bluetooth keyboard. If you’re having trouble deciding between the iPad and the iPad mini, check out Apple’s comparison tool.
Apple Watch gift certificate
Finally, we love the Apple Watch, and it would seem to make a great gift. However, we urge caution when considering it as a present. The problem is Apple provides a dizzying number of options, and everyone has their own preferences, so it’s difficult to know what to get. You can choose from the new Apple Watch Series 6 (starting at $399), the equally new but less expensive Apple Watch SE (starting at $279), or the older Apple Watch Series 3 (starting at $199). Get the Series 6 if you want an Always-On Display, blood oxygen sensor, and ECG capabilities. The Apple Watch SE lacks those three options but has the same screen size as the Series 6, along with its compass, altimeter, and fall detection feature. And the Series 3 has a slightly smaller screen and just the core Apple Watch features. Apple has a helpful comparison tool.
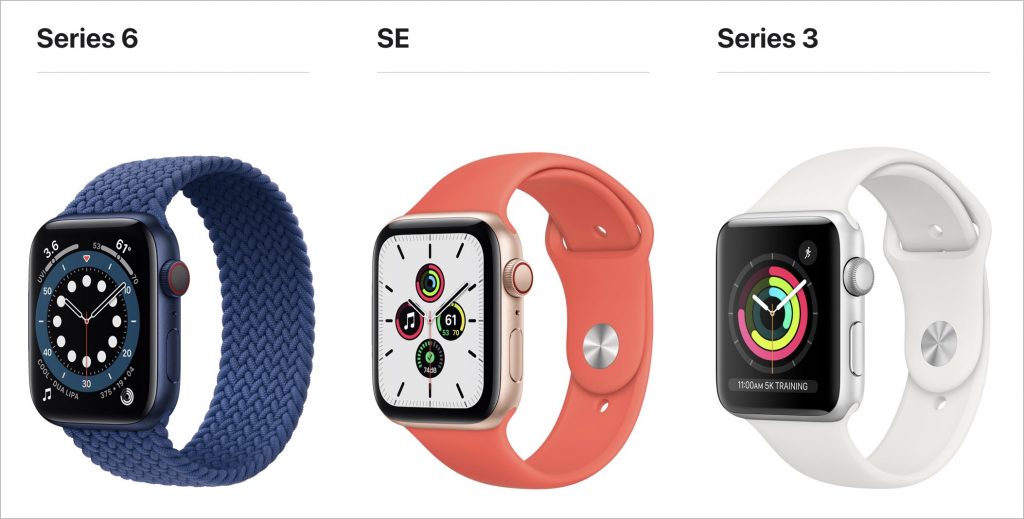
Within each model, you have to choose between larger and smaller case sizes, pick a case material (aluminum for all, or stainless steel or titanium for the Series 6), a case color, a band type, and a band color. And then there’s the question of whether Wi-Fi–only is sufficient or if a cellular-capable model makes more sense.
So unless you think you know exactly what the recipient would like, we’d encourage giving a certificate that’s good for a conversation about what would be most appreciated. Then sit down with the Apple Watch Studio to run through all the aesthetic decisions.
(Featured image by Adam Engst)


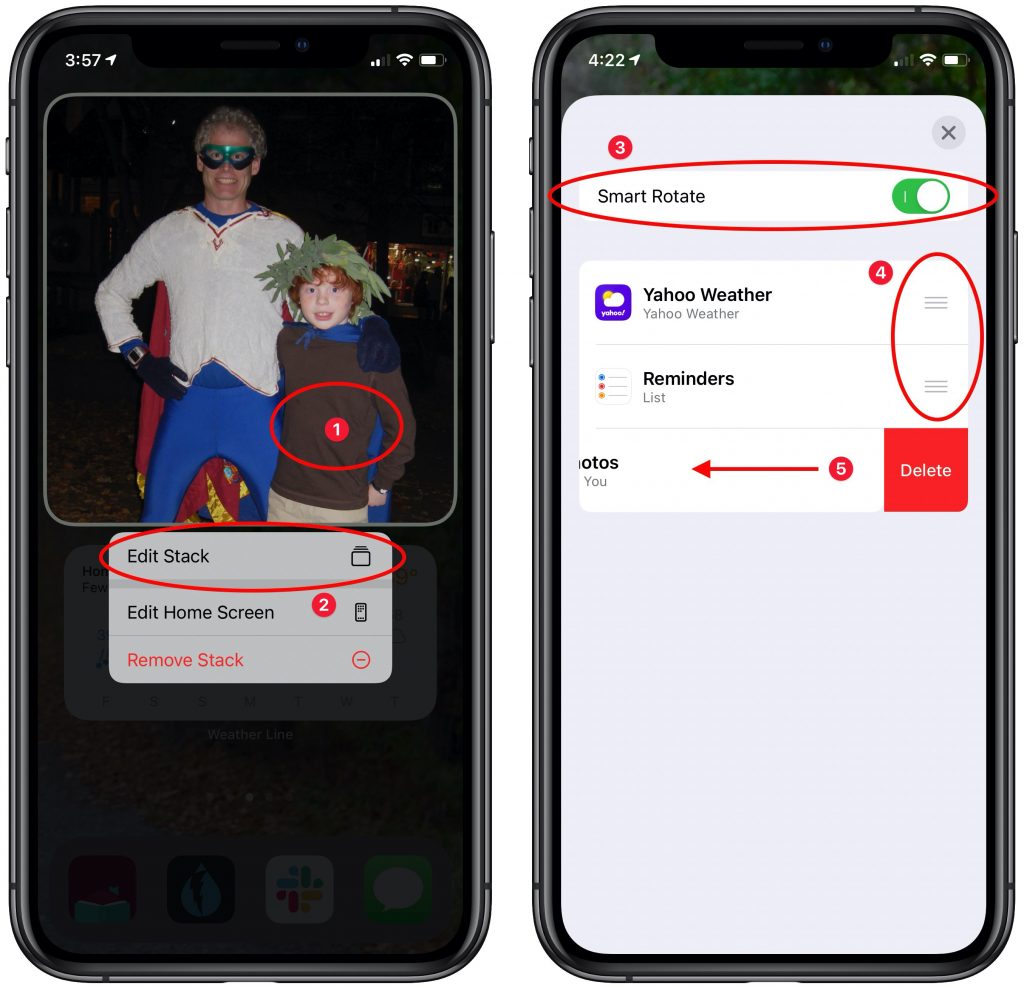
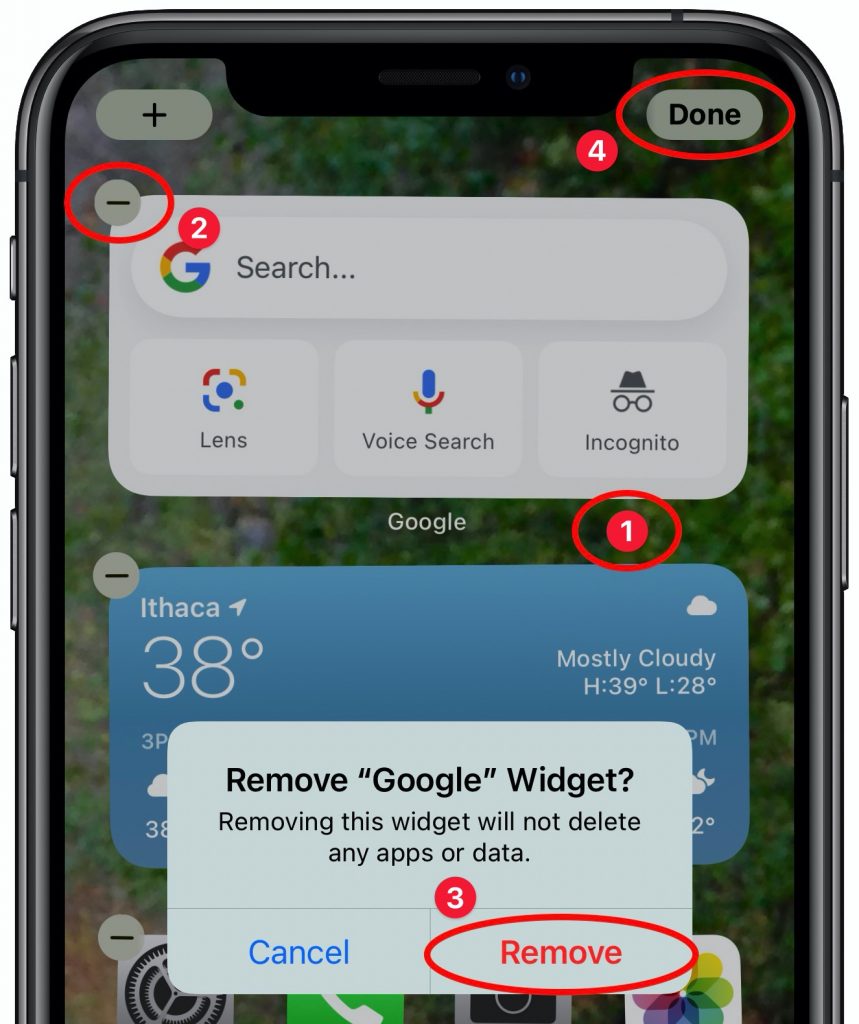 It will take some experimentation to hit upon a set of widgets that show the information you want, so don’t be shy about removing widgets or stacks that aren’t being helpful. To do so: