9 Tricks that Make It Easier to Save Files on the Mac
There’s nothing sexy about the Save dialog in Mac apps. It’s not pretty, you can’t tweet from it, and Apple hasn’t changed anything about it in years. But every time you create a new document in a Mac app, you have to save it. Once in the Save dialog, you name your document, pick a location, and click Save. (Many apps also add their own options, such as picking a file format.)
Using the Save dialog isn’t hard, but there are a bunch of ways to simplify the act of naming and positioning your document. Here are our favorites:
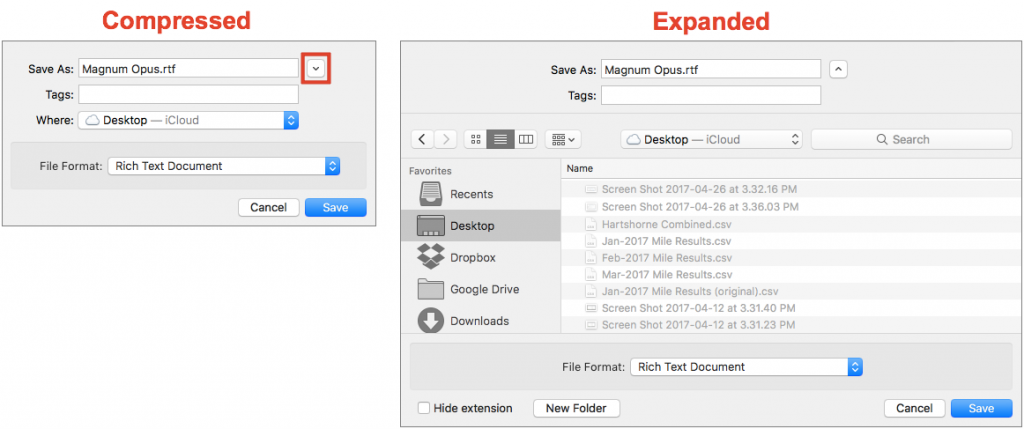
- Expand the Save dialog. By default, it appears in an abbreviated form that shows only fields for the file name and entering Finder tags, plus a destination pop-up menu that includes favorites from your Finder’s sidebar and recently used folders. What if the folder in which you want to store the document isn’t in the menu? Click the expansion triangle to the right of the Save As field to get the full-fledged Save dialog.
- Change the view. Once you’re working in the expanded Save dialog, note that you can switch between Icon, List, and Column view using the view
 buttons at the top. Icon view isn’t terribly useful, but it’s much easier to see what’s in the destination folder in List view, and much easier to navigate around your drive in Column view. You can even press Command-1 (icon), Command-2 (list), and Command-3 (column) to switch to specific views.
 - Search for a folder. Not sure where the folder you want is located? Ask macOS to find it using the Search field, which limits itself to finding folders.
- Resize the dialog. If the Save dialog feels cramped, particularly in Column view, move your pointer over an edge or bottom corner until it turns into a double-headed arrow. Then click and drag to change the size of the dialog.
- Use the sidebar. The folders you’ve put in the Finder window sidebar appear in the sidebar here too, and a single click on any one teleports you to it instantly.
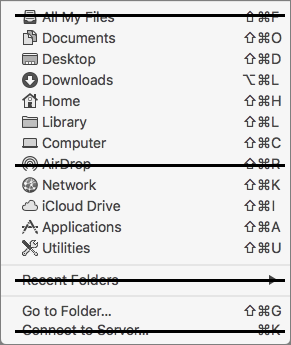
- Take advantage of keyboard shortcuts. Many people like to save new documents to the Desktop and file them later. If that’s you, try pressing Command-D in the Save dialog to jump instantly to the Desktop. In fact, nearly all the keyboard shortcuts listed in the Finder’s Go menu work in the Save dialog too.
- Make new folders. In its expanded form, the Save dialog gains a New Folder button you can click to make a new folder in the currently shown location. Or just press Command-Shift-N. Once you make the new folder, you can save your file into it.
- Pre-fill the file name. For some new files, you want the same name as a previous file, but with a version number or month appended. To pre-fill an existing file name in the Save As field, simply click the file in the listing. Then click in the Save As field to edit as necessary.
- Pre-fill the file name and destination. For our final trick, bring up the Save dialog, switch to the Finder, and drag a file from the Finder into anywhere in the Save dialog apart from the sidebar. Presto—the Save dialog pre-fills the file’s name and jumps to its location; you can now edit the file name in the Save As field as desired. If you drag just a folder, only the location changes. (The item that you dragged doesn’t move anywhere.)
So the next time you save a new document, think about all you can do in the Save dialog to spend less time fussing with file names and destinations.

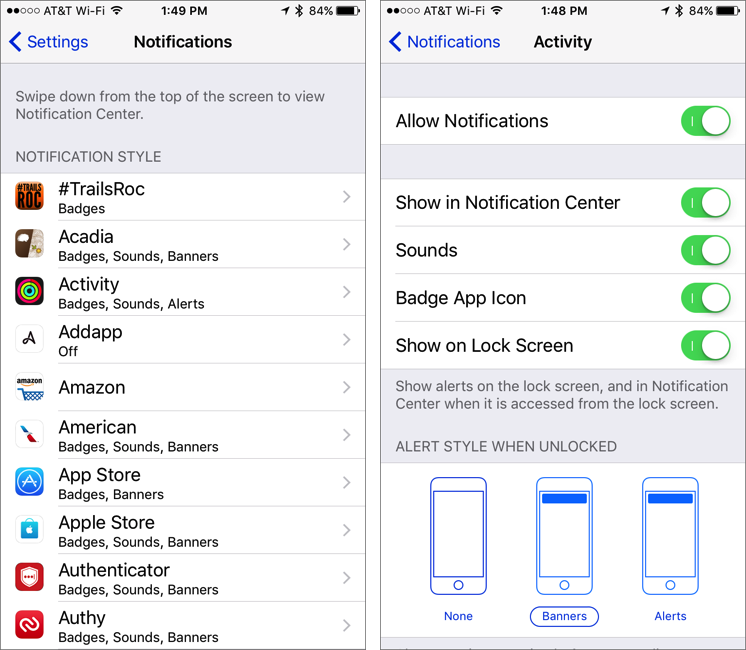
 Allow Notifications: