In iOS 12, Do Not Disturb Can Turn Itself Off—No More Missed Alerts!

We love the Do Not Disturb feature in iOS—it’s essential for keeping notifications from waking us up at night or causing embarrassing light and noise in dark movie theater. But it’s long had a problem. When you invoked Do Not Disturb manually for a movie or doctor’s appointment, you had to remember to turn it off manually when you were done, or risk missing important notifications. No more!

In iOS 12, Apple enhanced Do Not Disturb in two ways: enabling it to disable itself automatically after a certain amount of time or when your location changes and adding a Bedtime mode that holds all notifications until you wake up.

An Automatic End to Do Not Disturb Sessions

In previous versions of iOS, you invoked Do Not Disturb manually by tapping its button in Control Center. However, if you forgot to turn it off after your meeting, say, it would stay on forever unless you had a Do Not Disturb schedule set, and even then, not until the end of that schedule. So if you forgot to turn Do Not Disturb off after a 10 AM meeting, it could stay on until the next morning or until you realized you weren’t getting any calls or messages.

If you start Do Not Disturb sessions in the same way in iOS 12, they’ll act the same way. But if you force-touch or press and hold the Do Not Disturb button in Control Center, that brings up the Do Not Disturb card with five options:
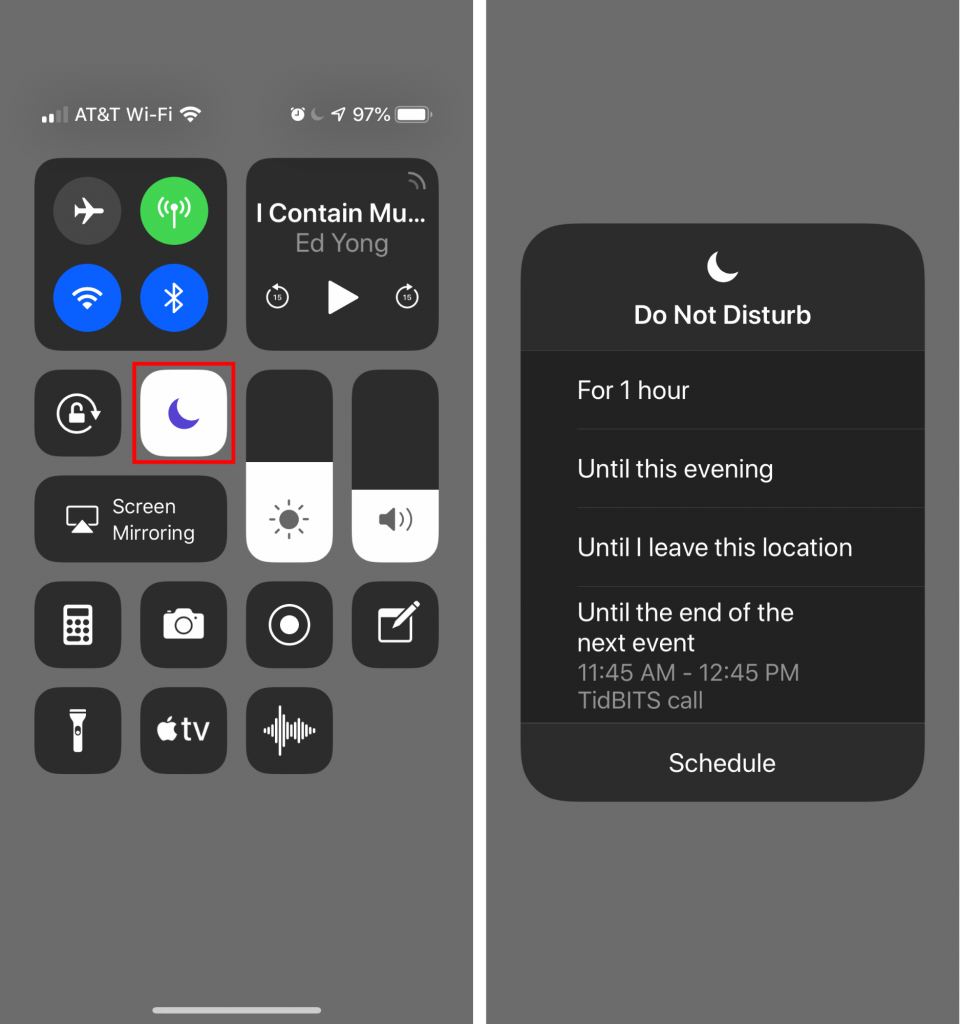
  • For 1 hour: This first choice tells Do Not Disturb to hold all your calls for an hour, after which it will turn off automatically.
  • Until this evening/Until tomorrow morning: If you invoke this option during the day, it will silence calls and notifications until 7 PM. Select it at night, however, and it will quiet your iPhone until 7 AM.
  • Until I leave this location: Use this choice when you’re invoking Do Not Disturb in conjunction with being in a particular spot that you’ll leave as soon as you’re done.
  • Until the end of the next event: When you enable Do Not Disturb during an event on your calendar, this choice appears, giving you the option of turning off Do Not Disturb at the end of the event.
  • Schedule: Tap this button to open Settings > Do Not Disturb.

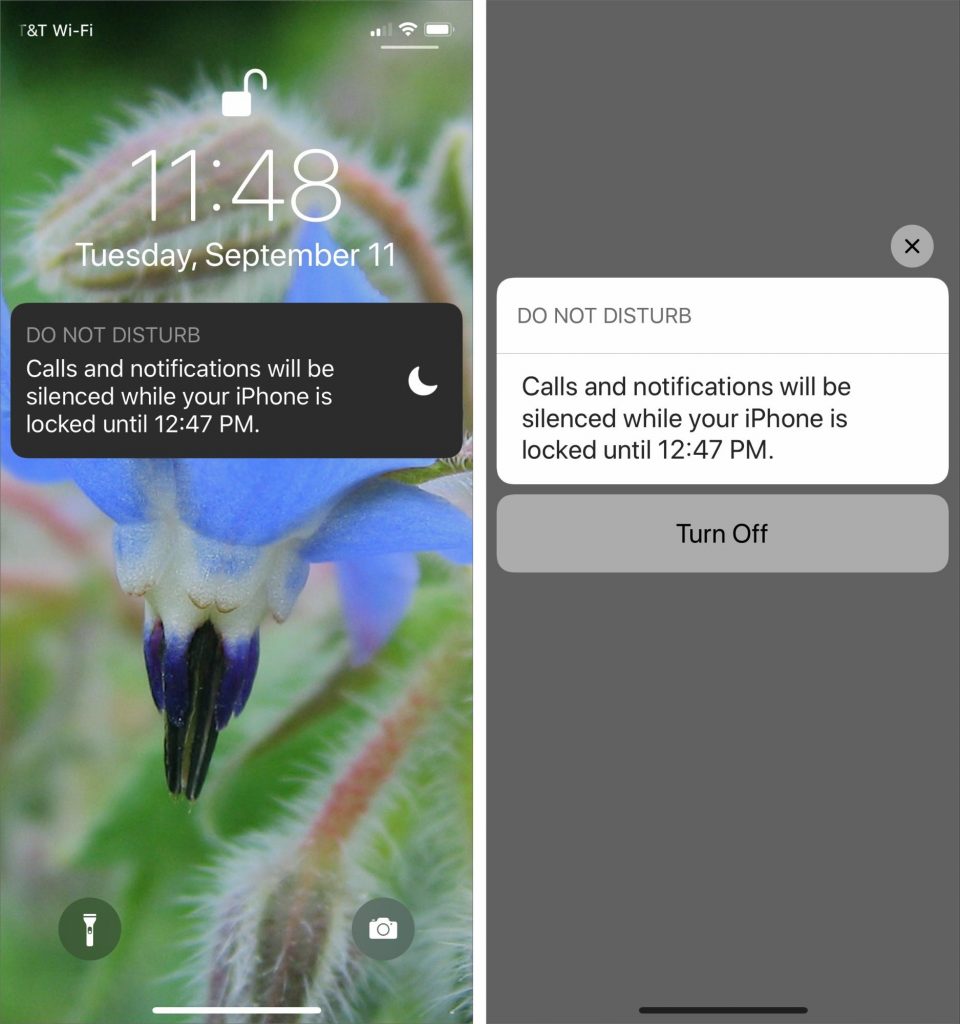
While Do Not Disturb is on, iOS 12 puts a notification on the Lock screen telling you when it will turn itself off. At any time before then, you can tap the Lock screen notification to allow calls and notifications again.
Do Not Disturb During Bedtime

In Settings > Do Not Disturb, you’ll find a new Bedtime switch. When enabled during the times for which you’ve scheduled Do Not Disturb, it dims and blacks out the Lock screen, silences calls, and sends all notifications to Notification Center instead of showing them on the Lock screen.
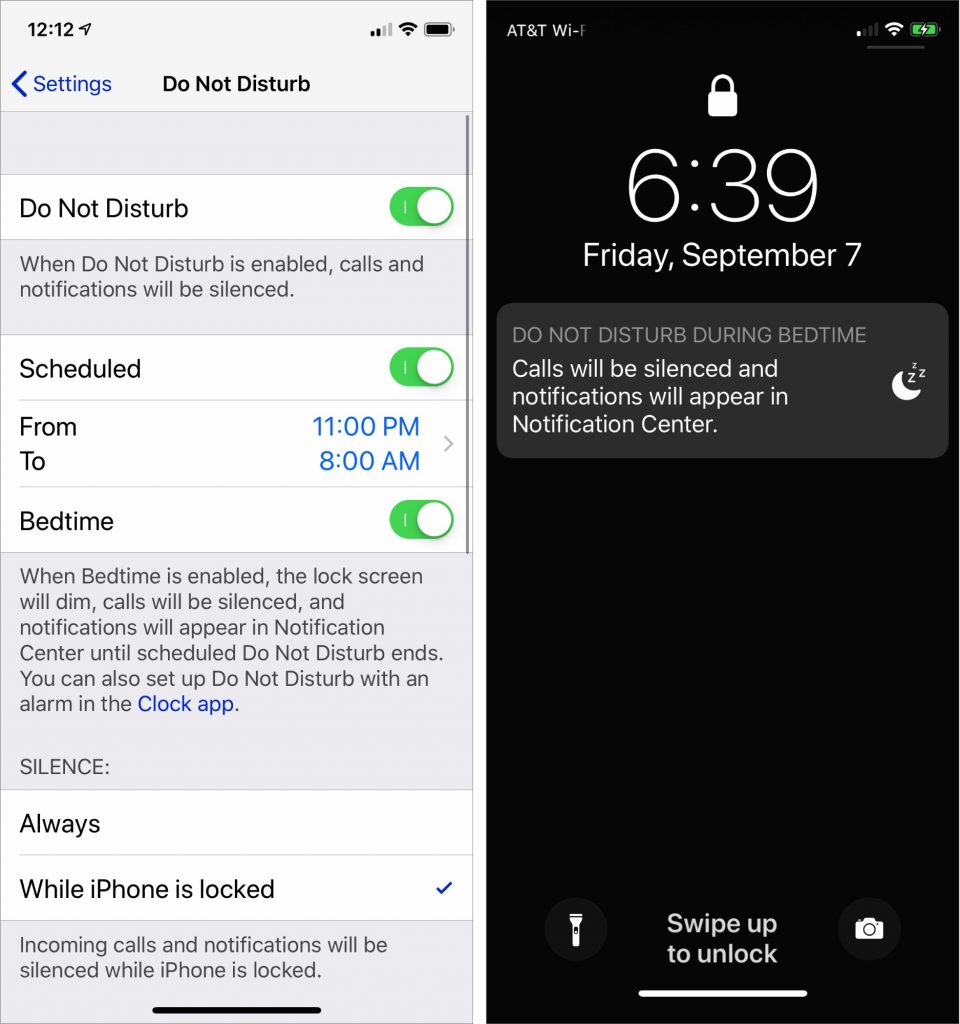
The idea behind the Bedtime switch is that it reduces the chances that glancing at your iPhone in the middle of the night to see what time it is will shock your eyes or engage your brain. Sleep is good! But if you get up early and want to allow notifications through again, tap the Do Not Disturb notification on the Lock screen to turn it off.

That’s not all you can do with Do Not Disturb During Bedtime. You might know that there’s a Bedtime screen in the Clock app that’s designed to help you go to bed and wake up at the same time every day. If you use it to set your desired sleep schedule and enable the Do Not Disturb During Bedtime switch in Clock > Bedtime > Options, you get another Do Not Disturb schedule.
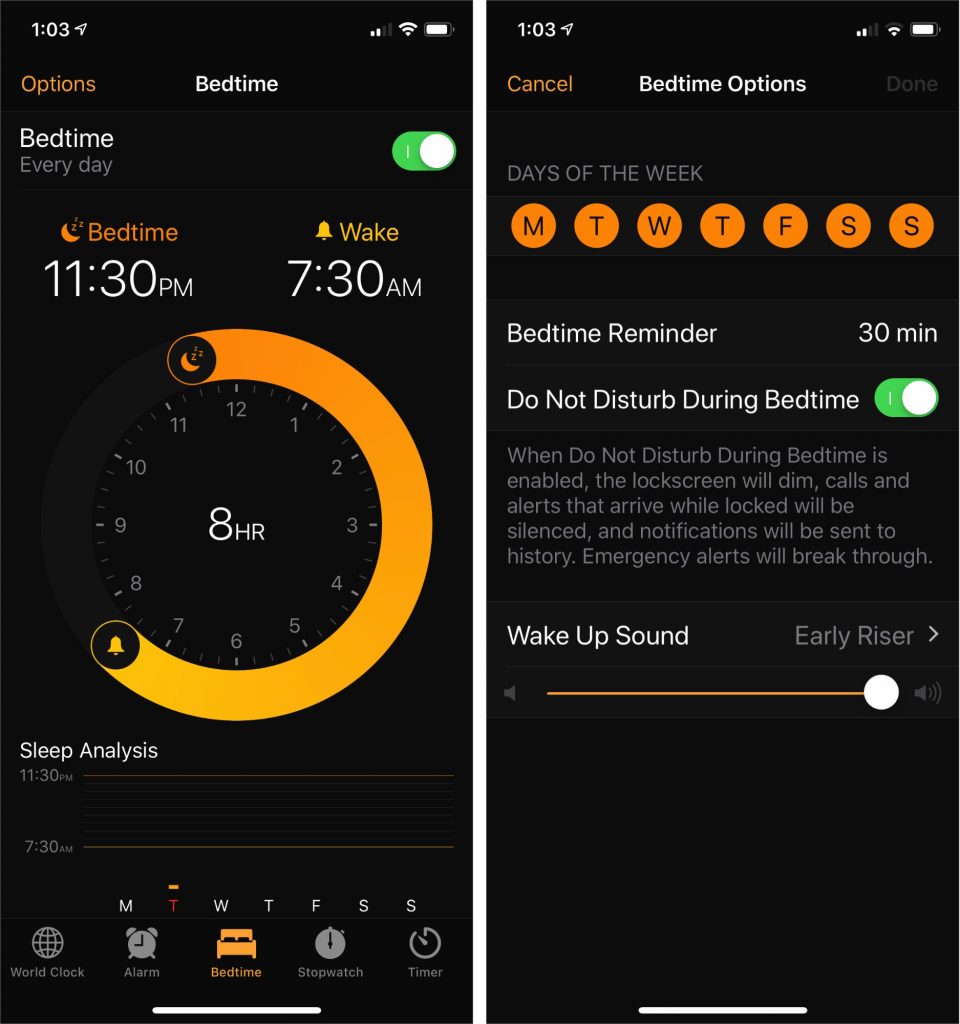
That could be extremely welcome if, for instance, you want Do Not Disturb on automatically both at night when you’re sleeping and also during a regularly scheduled class or meeting.

Give these new Do Not Disturb options a try! They go a long way toward ensuring that our iPhones fit into our lives better, rather than forcing us to pay attention to every last alert or message.

Here’s Why You Should Always Keep the Find My iPhone Feature Enabled

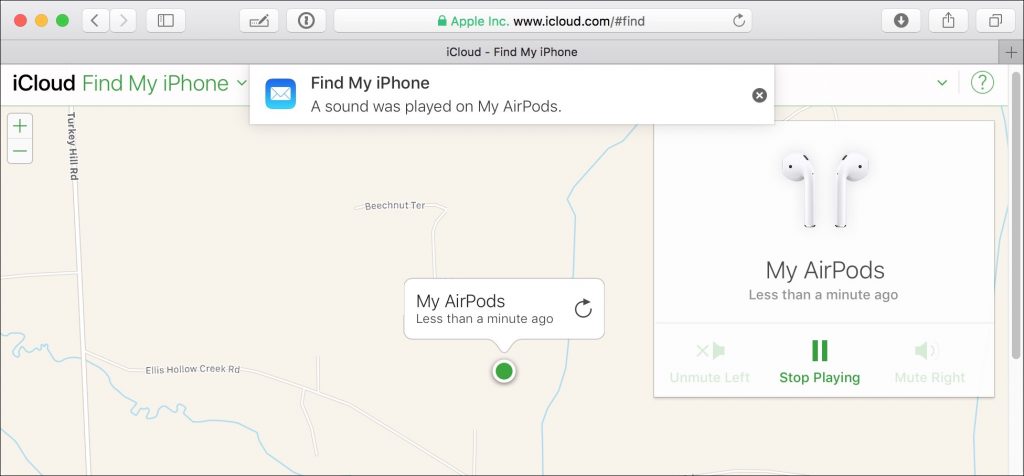
On the face of it, Apple’s Find My iPhone feature does what it says. If you lose your iPhone, you can identify its last known location by looking in the Find iPhone app or on the iCloud Web site, and you can make it play a sound. It’s great for tracking down a missing iPhone, whether you misplaced it in the house or left it behind at a restaurant.

But Find My iPhone does much more! For starters, it works with nearly any Apple device. You can use it to locate a missing Mac, iPad, iPod touch, Apple Watch, and even AirPods. Find My iPhone also helps protect your data if a device is stolen. It even works with Family Sharing to locate devices owned by anyone in your family—a boon to any parent with a forgetful teenager.

You must turn on Find My iPhone before your device goes missing!

  • In iOS, tap Settings > Your Name > iCloud > Find My iPhone and enable Find My iPhone. (On the iPad, it’s called Find My iPad.) Also on that screen, turn on Send Last Location. Finally, go back to the main level of Settings, tap Privacy > Location Services, and make sure Location Services is turned on.
  • On the Mac, open System Preferences > iCloud and select the Find My Mac checkbox—if you see a Details button beside Find My Mac, click it and follow its instructions for setting necessary preferences.

Be sure to practice viewing where your devices are located and playing tones on them so you’ll know what to do if a device goes missing.

Find My iPhone has a few tricks up its sleeve for when you want a device to show a message or if you think it was stolen:

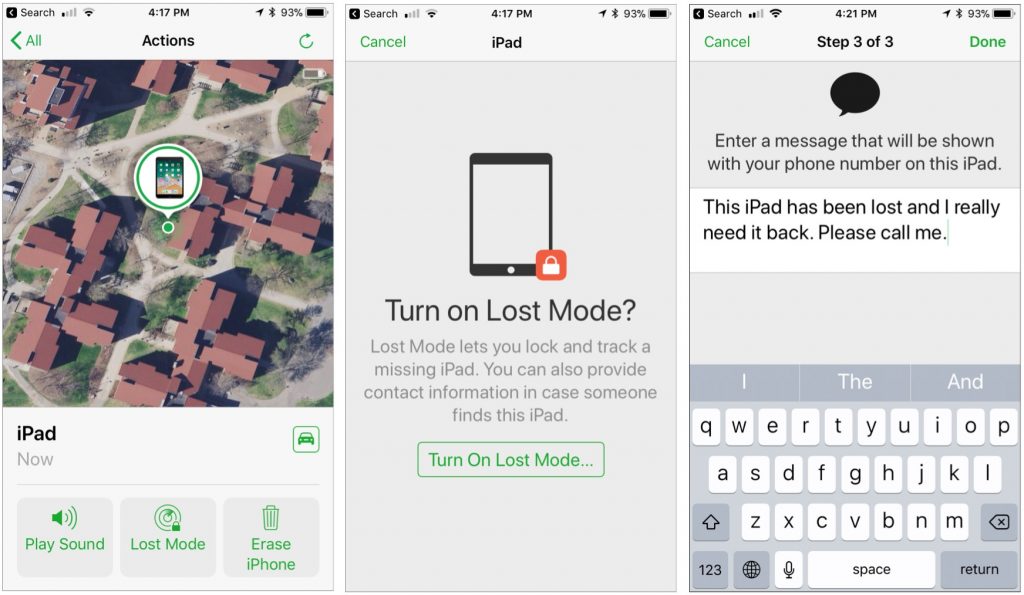
  • Lost Mode: When invoking this mode for an iOS device or Apple Watch, you’ll be asked to enter a phone number where you can be reached and a message. After that, Lost Mode will kick in as soon as the device is awake and has an Internet connection. Anyone who tries to use the device will see your message along with a place to enter the device’s passcode. If you get it back, you can enter the passcode to dismiss the message and use it normally.
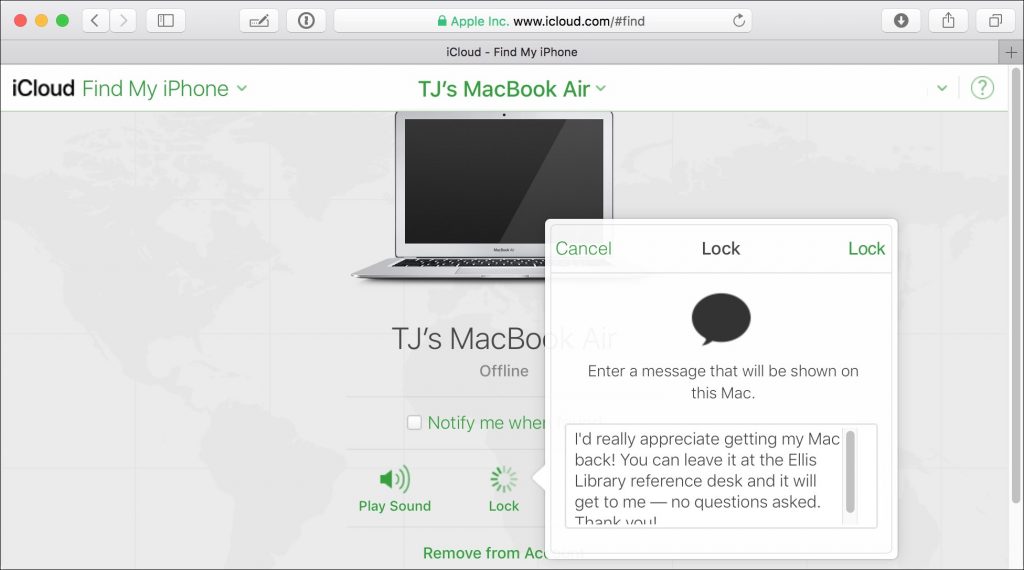
  • Lock: Available only for the Mac, the Lock feature enables you to protect an entire Mac with a 4-digit custom passcode. You can also enter a message that will appear on the Lock screen. This is a good choice if you think you’ll get your Mac back but would prefer that nobody mess with it in the meantime. Note that if you lock a Mac, you can’t erase it, as discussed next, so lock it only if you think it can be recovered.
  • Erase: Even if your device has an excellent passcode or password, you might worry that a thief will access your data. Fortunately, you can erase your device. Erasing a device makes it impossible for you to see its location in Find My iPhone, so it’s a last-ditch effort.
  • Activation Lock: If the stolen device is an iOS device or an Apple Watch, when you turn on Find My iPhone, you also enable Activation Lock. This feature prevents someone who has your passcode but doesn’t know your Apple ID and password from turning off Find My iPhone, erasing the device, or setting it up for a new user. In other words, Activation Lock makes it so there’s little reason to steal an iOS device or Apple Watch, since the stolen device can’t ever be used by anyone else. If you get the device back, you can restore your backup—you do have a backup, right?

Find My iPhone works only while the device has power, so if you think you’ve mislaid a device, try locating it right away, before the battery runs out. But even if you are unable to retrieve a lost device, you can prevent others from accessing your data or taking over the device.

New MacBook Pros Provide More Speed and RAM, plus a Quieter Keyboard and Hey Siri

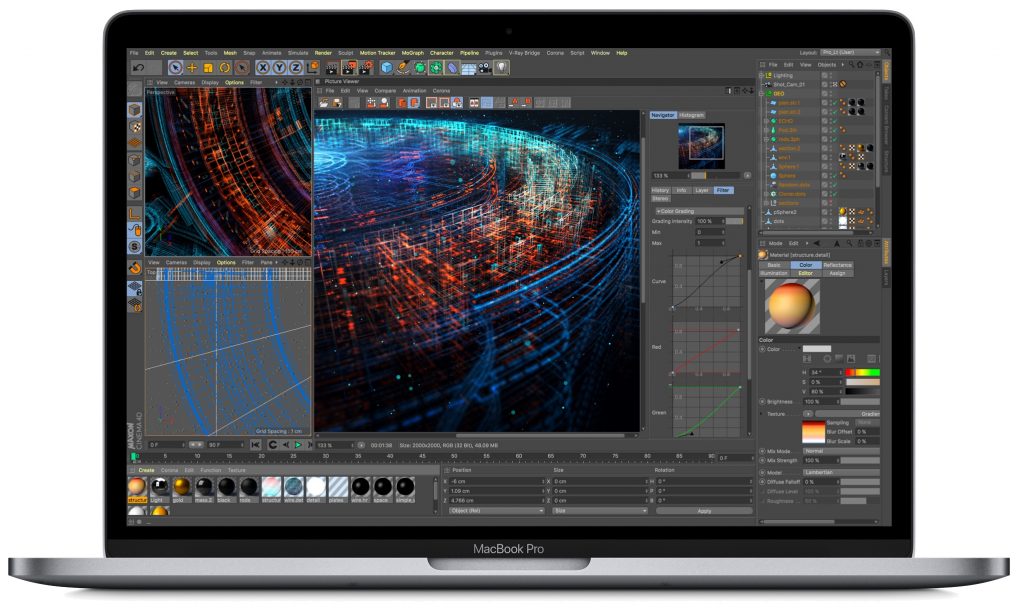
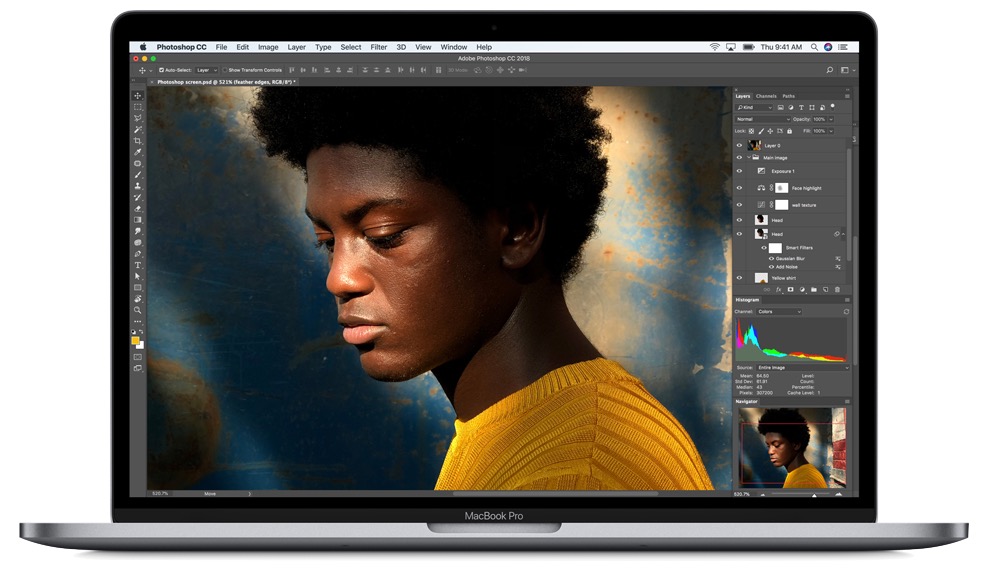
As students prepare to head off to college, Apple has updated the Touch Bar-equipped MacBook Pro line to provide even more powerful options for students and professionals alike. The changes are primarily under the hood, focusing on faster performance, more RAM, and larger SSD-based storage, but there are a few modest physical changes too, including a quieter keyboard and a True Tone display.

Despite these improvements, pricing remains the same as for last year’s models.

The 13-inch MacBook Pro that has function keys instead of a Touch Bar remains the same, as do the 12-inch MacBook and 13-inch MacBook Air.

Performance Boosts

The new MacBook Pros move to Intel’s 8th-generation Core i7 and Core i9 processors. Previously, the 13-inch MacBook Pro used dual-core CPUs, but they now get quad-core chips. And the 15-inch models jump from quad-core chips to processors sporting 6 cores. More cores are better because more tasks can be split up between them, preventing one processor-intensive task from bogging down others.

Processing power is just one aspect of overall performance. If your Mac doesn’t have enough RAM for the apps you’re using, it has to fall back on much slower virtual memory. For those who use memory-intensive apps, the new 15-inch MacBook can now take up to 32 GB of RAM, up from a maximum of 16 GB. RAM in the 15-inch models is also DDR4, which is faster and uses less power than the DDR3 RAM used before.

Finally, if you don’t have enough fast SSD storage in a MacBook Pro, you may be forced to store large items like your Photos library and Parallels Desktop virtual machines on a slow external hard disk. The new MacBook Pros can have a lot more built-in SSD storage, but it’s pricey. The 13-inch models max out at 2 TB, which will add $1400 to your bill, and the 15-inch models can go to 4 TB, assuming you have $3400 to spare. The 512 GB ($200) and 1 TB ($600) upgrades are more reasonably priced.

Physical Changes

Apple continues to tweak the controversial butterfly-switch keyboard. Some people haven’t liked the shallow key travel and how much noise it makes, and its keys have a tendency to stick. The new MacBook Pros feature a keyboard that’s quieter and hopefully more reliable.

You’ll also notice the new Retina displays with True Tone. First introduced with the iPad Pro and added to the iPhone in 2017, True Tone adjusts the white balance of the screen based on ambient light to make the screen more comfortable to view. It should be particularly appreciated by students working late into the night.

Other Improvements

You know how you can issue commands to Apple’s virtual assistant on your iPhone or iPad by saying “Hey Siri”? That’s possible in the new MacBook Pros also, thanks to the inclusion of Apple’s new T2 chip. The T2 also manages the Touch Bar, facilitates a secure boot feature, and encrypts files on the fly to increase security.

These MacBook Pros are the first to support Bluetooth 5.0, which is backward compatible with Bluetooth 4.2. As Bluetooth 5.0 peripherals become more widespread, they’ll be able to communicate with the MacBook Pro at higher data rates and longer ranges—think of Bluetooth working across your entire house, rather than being limited to a single room.

Price and Availability

The entry-level 13-inch MacBook Pro starts at $1799, and the 15-inch model at $2399. With both models, you can choose between silver and space gray, and they’re available now.

Our take is that, like most of Apple’s speed-bump upgrades, these new MacBook Pros are simply better than the previous models—who turns down better performance for the same price? The True Tone display is also welcome, as is the quieter keyboard. And it’s nice that we can finally talk to Siri without having to hold down a key or click a button.

The Secret Keyboard Shortcut for Comparing Before/After Edits in Photos on the Mac

Photos on the Mac provides so many editing tools that it’s easy to lose track of how an edited image compares to the original. You can always use the Revert to Original command and then undo it, but that’s fussy. Instead, Photos provides a Show Original  button in the upper-left corner, between the window controls and the Revert to Original button. Click and hold it to see your original image; let up to see the edited version again. Even easier, press the M key on your keyboard. The only thing either of those techniques won’t do is show the effect of cropping; to see the uncropped original, press Control-M. And if you just want to see how a particular set of adjustment controls affected the image, click its blue checkmark  to turn it off and back on.

Did You Know This Hidden Trick for Opening System Preferences Panes Directly?

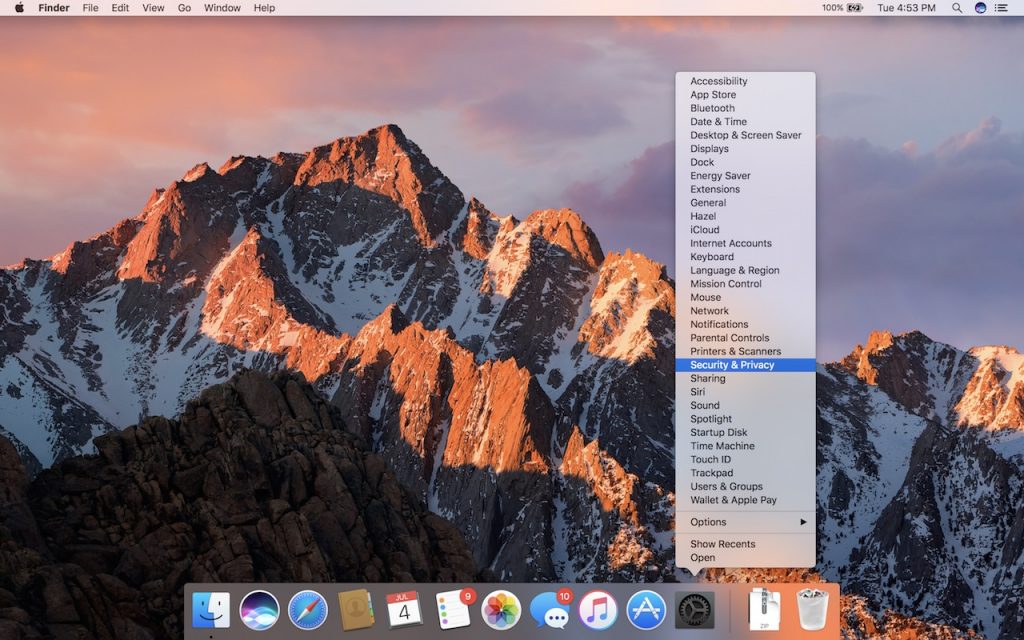
The System Preferences app on the Mac contains about 30 icons, each leading to additional settings panes. Rather than opening System Preferences, scanning the collection of icons, and clicking the one you want, you can jump directly to the desired pane. Just click and hold on the System Preferences icon in the Dock, and choose a pane from the pop-up menu.