Do you frequently reach for your iPhone for a quick check of Facebook or Messages? It’s all too easy to let social media, the latest hot game, or even your work email intrude on your real life. If you’re uncomfortable with how much—and when—you use your iPhone or iPad, iOS 12’s new Screen Time feature can help you limit your usage in two ways, by time of day and by time spent in an app.
(Screen Time can help you monitor and limit your children’s iOS usage too. This article focuses on setting it up for yourself; we’ll examine Screen Time parental controls another time.)
Get Started with Screen Time
To enable Screen Time, go to Settings > Screen Time and tap Turn On Screen Time. After you see an introductory splash screen, tap This Is My iPhone to go to the main Screen Time screen.
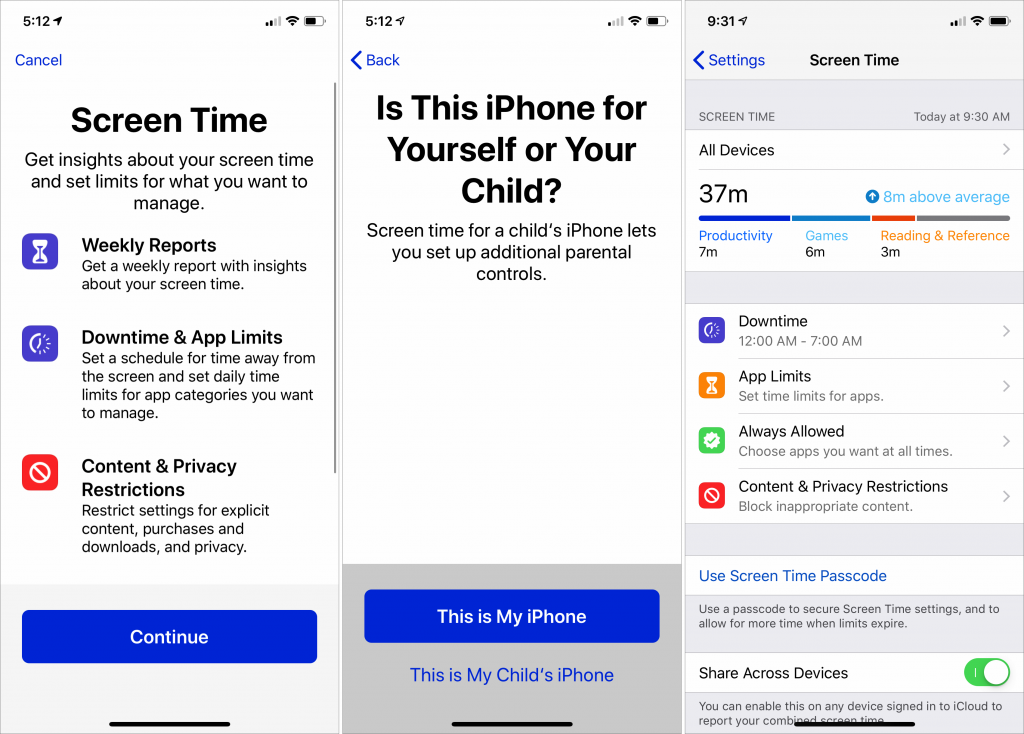
Two options on the lower portion of this screen help you customize Screen Time overall. Tap Use Screen Time Passcode to create another passcode that controls access to Screen Time settings and lets you extend time limits. It’s designed for parents who let their children use their devices, but you could use it as a speed bump when overriding your self-defined limits.
If you use both an iPhone and an iPad, enable Share Across Devices to aggregate your usage. This syncs settings between your devices, so if you want different setups, keep this option off.
Downtime
To limit your usage according to a schedule, perhaps so you don’t get caught up in a game before bed, tap Downtime, turn on the Downtime switch, and set start and end times. Unfortunately, you can’t create multiple schedules for different portions of the day.
App Limits
When you tap App Limits and then Add Limit, Screen Time presents you with a list of categories and examples of your apps in each one. Select one or more—say Social Networking and Games—and then tap Add. Then set the amount of time you want to allow yourself overall for apps in that category. You can create multiple category limits with different amounts of allotted time.
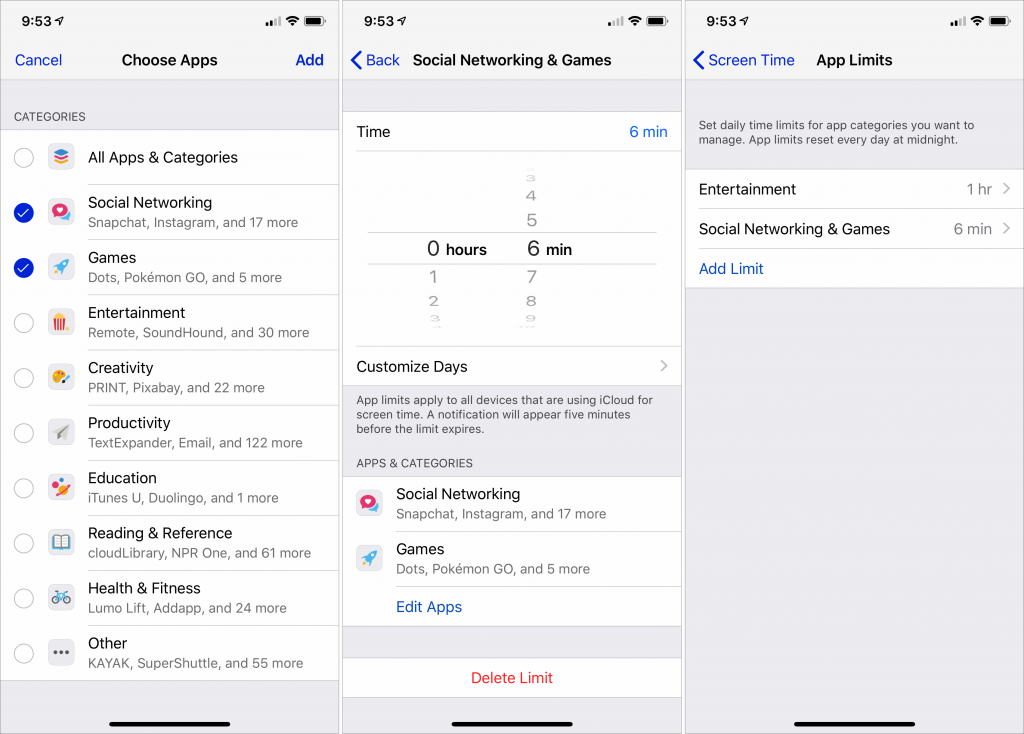
If an app category is too broad, you can limit a particular app. Tap the Screen Time graph at the top of the screen, scroll down to the Most Used section, and tap an app in the list. At the bottom of that screen, tap Add Limit and specify a time limit.
There are a few exceptions to the apps limited by both Downtime and App Limits, regardless of your settings. The Phone app is always available, and Clock, Find My iPhone, Safari, and Settings appear to be exempt. For other apps you never want limited, tap Allowed Apps on the main Screen Time screen, and then tap the green plus button next to any app you want to allow. Apple adds FaceTime, Maps, and Messages to the Allowed Apps list by default, but you can remove them if desired.

Living with Screen Time
Screen Time alerts you 5 minutes before a time limit expires and displays a Time Limit screen when time runs out. Although the point of Downtime and App Limits is to help you stop playing the latest addictive game or reflexively checking Facebook, you can tap Ignore Limit to keep using the app, either for 15 minutes or for the rest of the day.
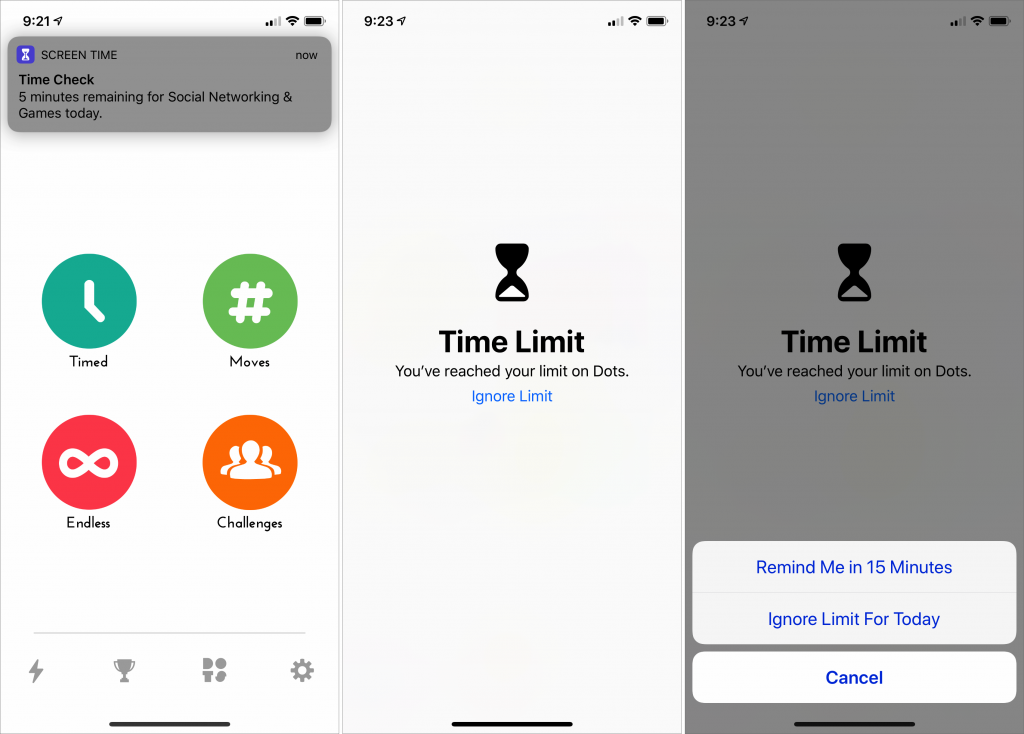
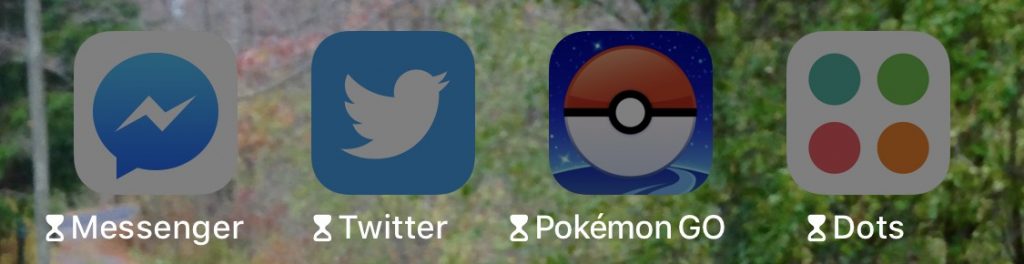
Screen Time also dims the icon for any affected app on the Home screen and puts a tiny timer icon next to the name. You can still open such apps, but you’ll go right to the Time Limit screen.
Equally as helpful is the way Screen Time reports on your usage so you realize how much you’re using different apps. It provides a weekly report, but you can always go into Settings > Screen Time to see your daily usage.
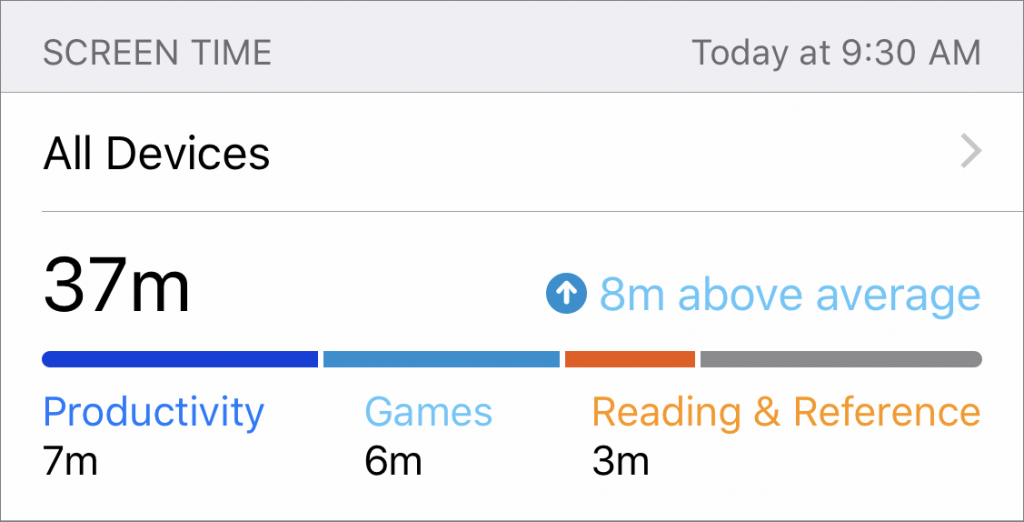
Tap that graph, and Screen Time lets you dive into the details, for example, by revealing your most-used apps, how often you pick up your device, and how many interrupting notifications you receive. Much of the information in this screen is interactive—tap various items to see more details or adjust settings.

Only you can decide if you’re using your iPhone or iPad more than you like, and only you can exercise the self-control to restrict your usage. But Screen Time highlights how you’re actually spending time, both as you’re doing it and after the fact. Give it a try!