Live Text Digitizes Text in Photos in iOS 15, iPadOS 15, and macOS 12 Monterey

The most magical feature of Apple’s latest crop of operating systems—iOS 15, iPadOS 15, and macOS 12 Monterey—may be Live Text. You’re probably familiar with the concept of optical character recognition (OCR), which turns all the text on a scanned page into normal text you can select, copy, and edit. Live Text does exactly that in Photos, Safari, and the Camera app, plus lets you search for text in photos. And it does it in not just in English, but also Chinese, French, German, Italian, Portuguese, and Spanish.

Thanks to the incredible processing power of Apple’s recent devices, this digitization of graphics to text takes place instantly—hence “live” text. Apple says it works on any Mac that can run Monterey, but on the iPhone and iPad, it requires a model with an A12 Bionic processor or later, which means anything in this list (check your device in Settings > General > About > Model Name):

  • iPhone XR, XS, XS Max, and later, including the iPhone SE (2nd generation)
  • iPad Pro 12.9-inch (3rd generation) and later
  • iPad Pro 11-inch
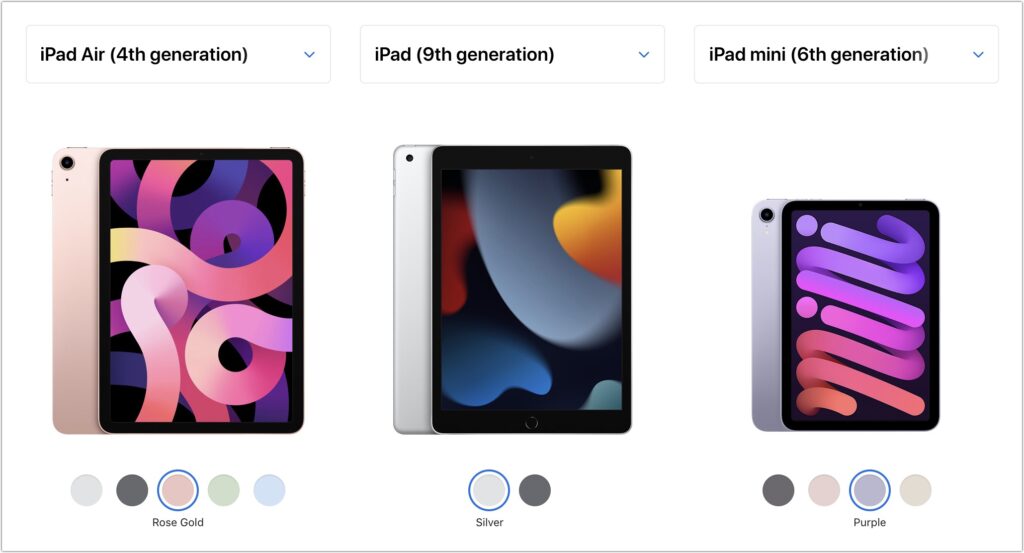
  • iPad Air (3rd generation) and later
  • iPad (8th generation) and later
  • iPad mini (5th generation) and later

Live Text in Photos

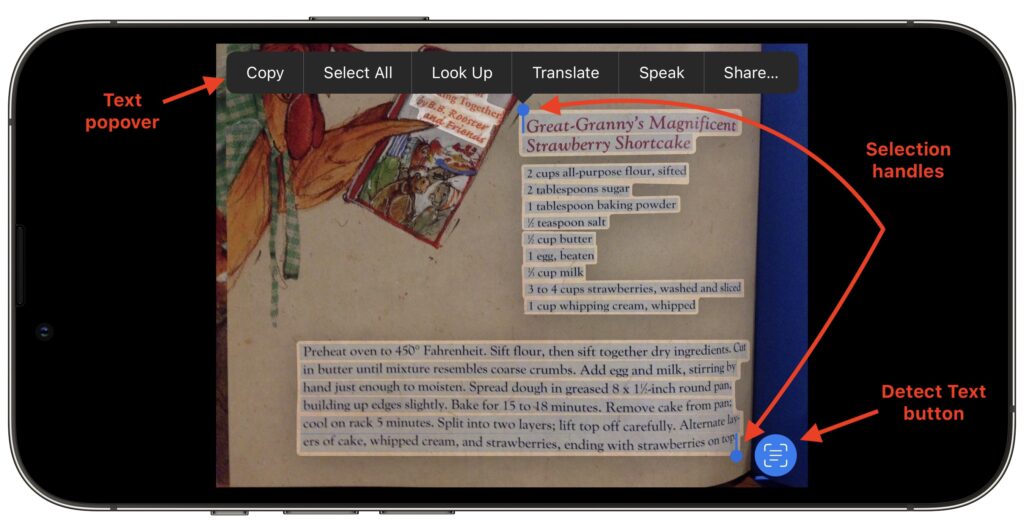
The main place you’ll use Live Text is in Photos. In iOS and iPadOS, when viewing a picture containing text, touch and hold a bit of text until it highlights in blue. (For text-intensive images, Photos displays a Detect Text button in the lower-right corner; tap it to highlight recognized text.) The familiar text popover then appears. Drag the blue selection handles to adjust the selection as desired or tap Select All. Then you’ll most likely want to copy the text, switch to another app, and paste, though you can also do a Web search by tapping Look Up or have the device read the text out loud by tapping Speak.

Two quick tips:

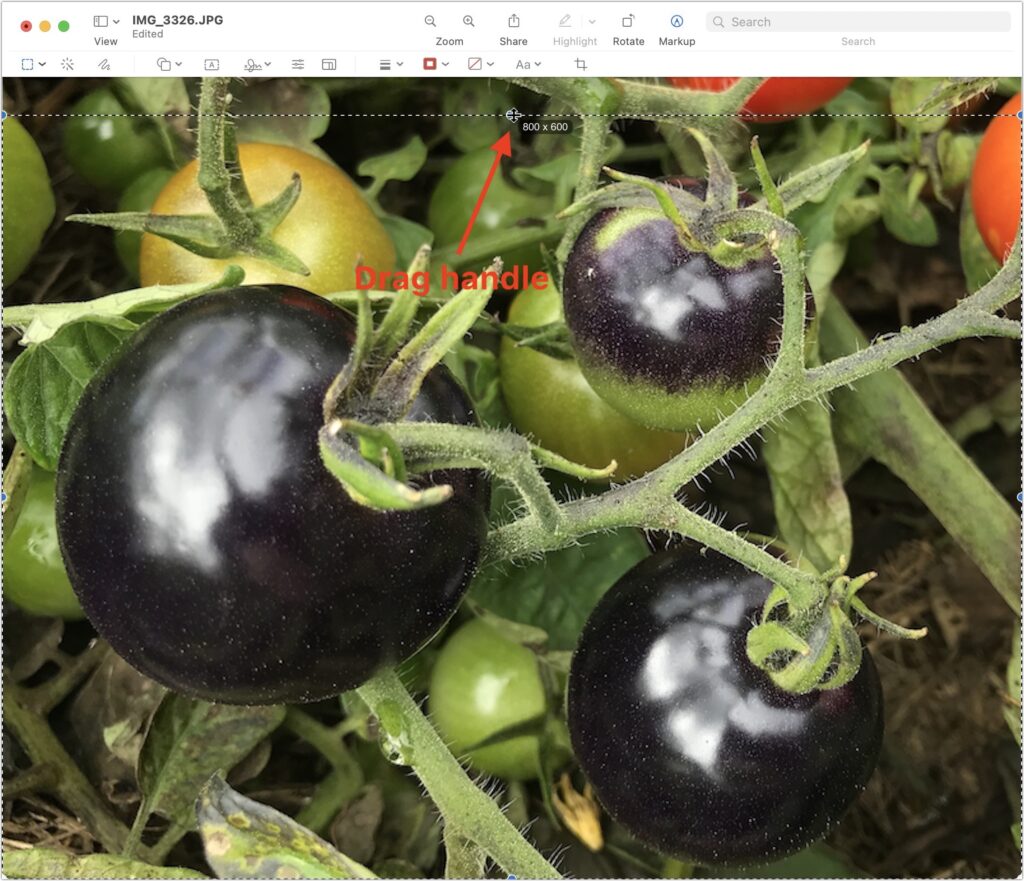
  • Want to copy text from an app that doesn’t even let you select text? Take a screenshot of the app and use Live Text to copy it.
  • If you have an animated Live Photo that contains text, touch and hold the text to select it; touch and hold away from the text to animate the photo.

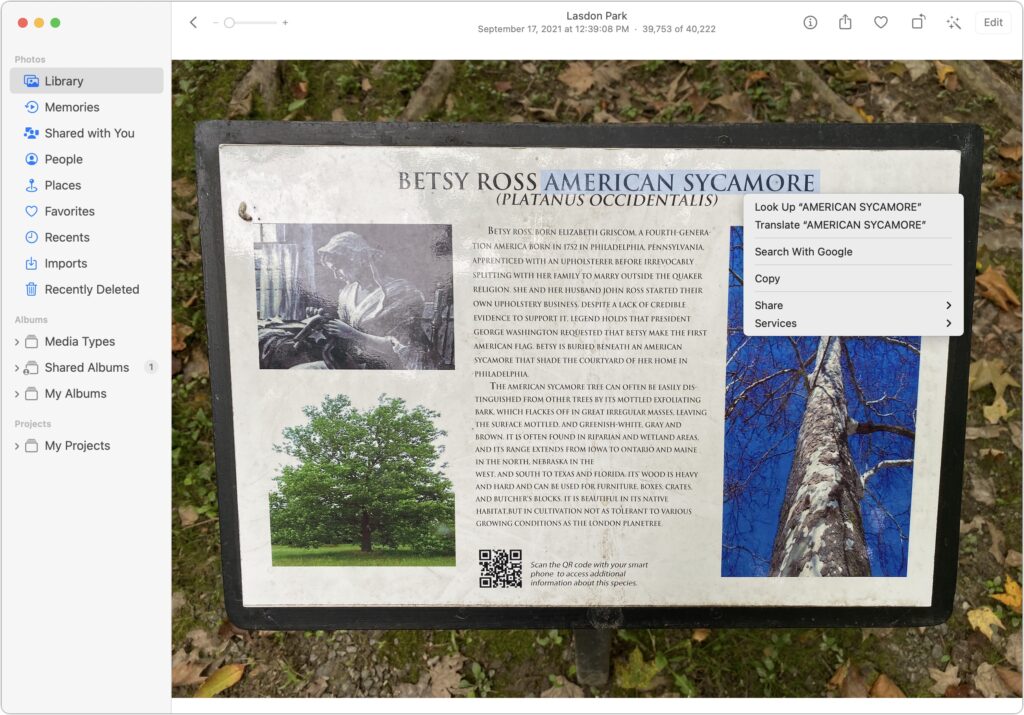
In Monterey, move the pointer over the text so it turns to a text selection cursor, then select the text, after which you can copy it as you would any other text. You can also Control-click the selected text to access Look Up or Translate.

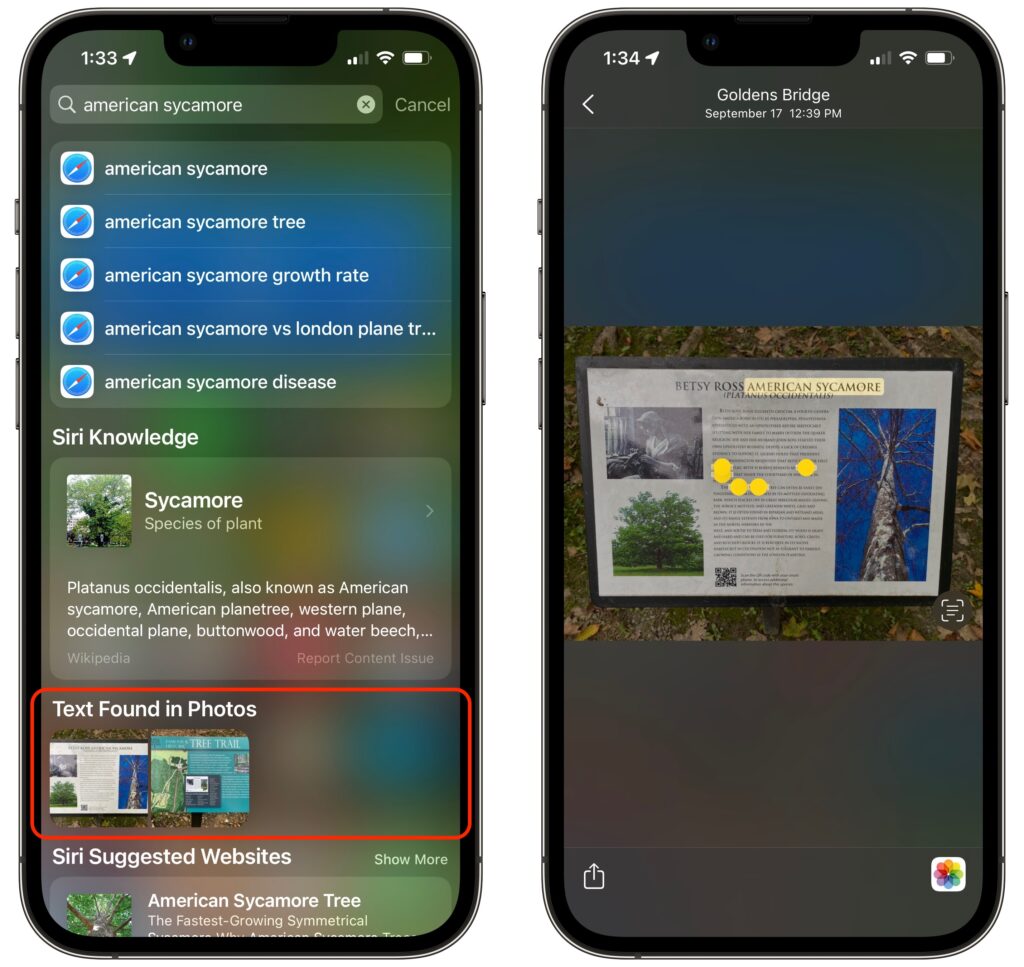
As a bonus in iOS 15 and iPadOS 15, text from Photos that Live Text has recognized is indexed by the system-wide search. So when you pull down from the middle of the Home screen and search, a Text Found in Photos section shows images that contain the search text. Tap one to view it, and note that there’s a Detect Text button in the preview that identifies text you can select right there. Or tap the Photos button in the lower-right corner to open the image in Photos.

Live Text in the Camera App

Sometimes you may want to capture some text in the real world without having a photo to store and later delete—getting an appliance’s model or serial number is a perfect example. When Live Text detects text in the Camera app’s viewfinder, it puts a faint yellow outline around it and displays the Detect Text button. Tap the Detect Text button to freeze and zoom the selection—it even rotates sideways text to be readable—and then tap the text to select and copy it. Tap the Detect Text button again when you’re done.

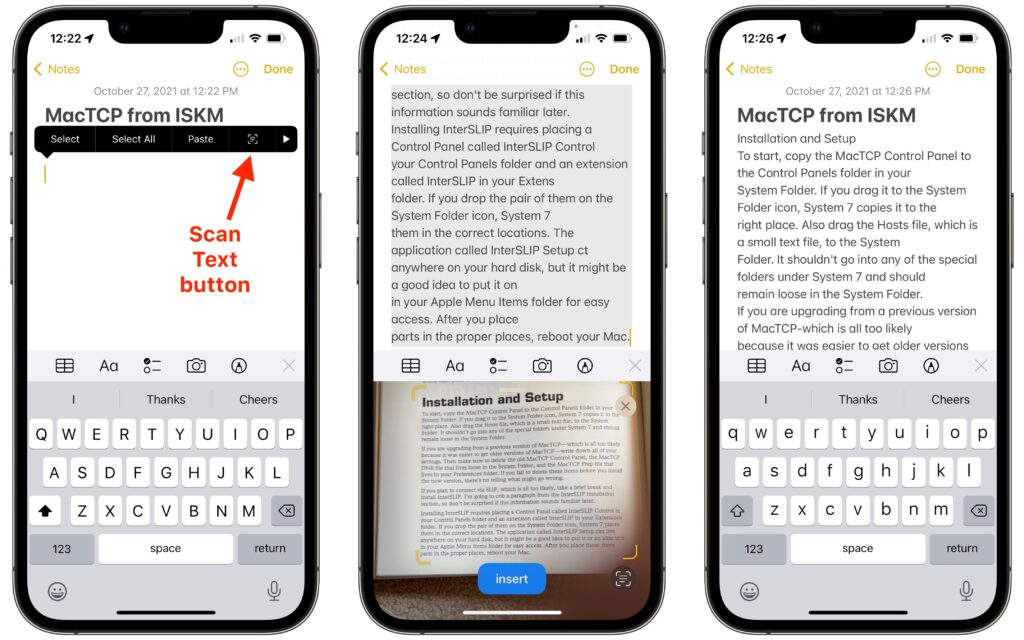
There’s another way to use Live Text in conjunction with the iPhone or iPad camera that’s useful if you need to insert a large amount of text directly into a document. In an app that supports Live Text, like Notes, tap in the text entry area and then tap the Scan Text button. A viewfinder appears on the bottom half of the screen, with a yellow outline around detected text, and the recognized text above. If that’s what you want, tap the Insert button to put the text into your note or document.

Live Text in Safari and Other Apps

Because Apple integrated Live Text into its operating systems, it’s available nearly anywhere you might see an image that contains text. For instance, in Safari, you’re likely to run across such images, or you might have embedded photos in Notes that contain text. Selecting text using Live Text works exactly the same as in Photos—either touch and hold on an iPhone or iPad, or just select the text on the Mac. And on the Mac, Live Text even works when you select an image in the Finder and press the Space bar to view it in Quick Look.

Other Live Text Tricks

  • Identify types of data: When Live Text recognizes text that contains an email address, phone number, postal address, or date, you can touch and hold it to bring up special options to send an email, call the number, map the address, or make an event or reminder.
  • Translate Live Text: The Translate app in iOS 15 and iPadOS 15 is now a system-wide service, so it can translate any text you can select, including text recognized by Live Text in a photo or in the Camera app. Just select it and tap Translate.
  • Hear Live Text: If you rely on VoiceOver to help you navigate your iPhone or iPad, note that you can leverage Live Text to get VoiceOver to read text in your photos out loud. Go to Settings > Accessibility > VoiceOver > VoiceOver Recognition and turn on Text Recognition. Then, while viewing a photo, tap the text in the photo to have VoiceOver read to you.

It may take a little while to remember that you can select and copy, look up, or translate nearly any text you see in a picture—or in your camera viewfinder—but once you’ve tried Live Text a few times, we’re betting that you’ll find it surprisingly useful.

(Featured image by Adam Engst)

Need to Resize Images in Various Ways? Give Preview a Try

Even those of us who don’t work with graphics professionally often find ourselves needing to resize images. Perhaps you have a large square headshot, but the site to which you’re uploading requires it to be exactly 100 by 100 pixels. Or maybe you have an iPhone 13 Pro photo that’s 4032 by 3024, but you need the long side to be 1280 pixels and the short side to be 800 pixels. You might even need to cut out an 800-by-600 rectangle from a much larger image.

These tasks are easily accomplished with professional graphics apps like Photoshop, but you don’t need to pay for or learn Photoshop for a quick resizing and cropping of an image. That’s because Preview, which is built into macOS, can do many of these tasks with aplomb.

One note: You can resize images to be smaller with little or no loss of quality, but you can’t make images bigger without them looking fuzzier unless you employ specialized tools.

Shrink an Image without Changing Aspect Ratio

Let’s take our first example above. We have a square headshot that we need to upload to an account, but the site won’t accept an image larger than 100 pixels square. To shrink the image to the specified size, we’ll first make a copy in the Finder or we’ll open the file in Preview and choose File > Duplicate. Then, with the image open in Preview, we’ll choose Tools > Adjust Size, make sure “pixels” is chosen to the right of the Width and Height fields, and enter 100 into the Width field. Because Scale Proportionally is selected, Height automatically changes to 100 to match. We’ll click OK to exit the dialog and then save the file.

Shrink an Image and Crop to Different Dimensions

Let’s move on to our second example above. We have a photo of some home-baked bread loaves that we’ve taken with the iPhone, and we need to resize it to 1280 by 800 pixels before uploading it to our food blog. There are two problems: the image is much larger than we need to start, and when we try resizing it to the desired pixel count in one dimension, the other dimension is wrong.

We’ll start the same way we did before, by making a copy of the original and in Preview choosing Tools > Adjust Size. In the Image Dimensions dialog, we’ll first type 1280 into the Width field. In this example, doing that causes the Height field to change to 752, which is too small (below left). Remember, shrinking images is easy and works well, but expanding them is hard. So instead, we’ll type 800 into the Height field, which causes the Width field to change to 1361 (below right). That’s good; we’ll click OK to resize the image. It will look small, but we can zoom it back to the window size by choosing View > Zoom to Fit.

For the next step, we need to get the image width down from 1361 to 1280 pixels, which we do by cropping. Choose Edit > Select All (or just press Command-A), and notice that there’s a selection rectangle around the entire image, with blue drag handles in the middle of each side and at each corner. We’ll need to take some off each side to keep the loaves centered, so we’ll drag the left side in a little to start. If you have trouble grabbing the blue drag handles instead of the edge of Preview’s window, choose View > Zoom Out to zoom out one step and separate the handles from the window edges.

Next, we’ll drag the right side in. Notice that as we drag, Preview displays the image dimensions in a little lozenge (at the right in the screenshot)—we’ve stopped at 1280. Since we’re moving only the edges, only the width changes—resizing from the corners would be much harder because both dimensions would change simultaneously.

One tip. If you’ve gotten the selection rectangle to 1280 by 800, but the content under it isn’t centered as you’d like, press and hold the left or right arrow key to move the selection rectangle to the left or right.

Once we have the selection rectangle at the right size and in the right place, we’ll choose Tools > Crop to discard the image content outside the selection.

Extract a Portion of an Image with Specific Dimensions

For our final example, let’s assume that we have a large picture of cherry tomatoes, and we need to cut out just the black tomatoes for a Web page that requires an 800-by-600 image. Once again, the image is too large, but the trickier problem is that we only need a small portion of it.

We’ll start by dragging out a selection rectangle that’s roughly 800 by 600, using Preview’s measurement lozenge. All we’re doing here is getting a sense of what the shape of 800 by 600 looks like. Then we make another selection around the black cherry tomatoes that’s roughly the same aspect ratio, wider than it is tall. The details don’t matter much at this point.

The next step is to crop the photo to the selection with Tools > Crop. Then we choose Tools > Adjust Size and set the Width field to 800 to get the width correct. That reveals that the height of our rough crop was slightly too large, at 630 pixels. We’ll click OK to resize the image to those dimensions.

Finally, we’ll use the same technique we did in the example above, with Select All, dragging the top handle down until the dimensions are 800 by 600, and then using Tools > Crop to discard the extra content.

As you can see, you can do a lot with just three basic techniques in Preview:

  • Using Tools > Adjust Size to resize the entire image
  • Dragging out selection rectangles while paying attention to the measurements
  • Using Tools > Crop to get rid of content outside the selection rectangle

We won’t pretend that Preview is the ultimate graphics tool, but it’s capable, easy to use, and on every Mac.

(Featured image by iStock.com/Gearstd)

The Best Apple-Related Gifts for 2021

It may seem early to start thinking about the holiday shopping season, but with the global supply chain suffering pandemic-related slowdowns, there’s no telling how long it will take to get something you order today. Apple has generally done a good job of managing its supply chain issues, but even still, if you want to make sure you have an Apple something for that special someone, we recommend buying it soon. Here are our recommendations.

AirTag

Do you know someone who’s always misplacing their keys, purse, or backpack? Apple’s new AirTag tracker is the perfect gift for such a person. Attach one to a keyring (with a separate $29 AirTag Loop or $39 AirTag Leather Loop) or drop it in a bag, and from then on, the person can use the Find My app to see where they left their stuff. Support for ultra-wideband enables precision finding with an iPhone 11 or later—with earlier iPhones, the detected location won’t be quite so precise. AirTag uses the Find My network, so even if the item is far away, passing Apple devices that detect it can securely share its location with you. One AirTag costs $29, or you can get a pack of four for $99. You can even have Apple personalize each AirTag with custom text and emoji.

AirPods and AirPods Pro

Apple’s wireless earbuds remain popular, and the company just released the third-generation AirPods to supplement the second-generation AirPods and the AirPods Pro. All three make excellent gifts. The second-generation AirPods cost $129, have a relatively long stalk, and boast up to 5 hours of listening on one charge. The $179 third-generation AirPods shrink the stalk, switch to a force sensor for controls, add support for spatial audio with dynamic head tracking, feature sweat and water resistance, have a MagSafe wireless charging case, and last up to 6 hours on a single charge. For $249, the AirPods Pro include the features of the third-generation AirPods and add silicone ear tips and active noise cancellation with optional transparency mode, but they have only 4.5 hours of listening time. All three have charging cases, support Hey Siri commands, and automatically switch between Apple devices.

HomePod mini

Earlier this year, Apple discontinued the full-size HomePod, which wasn’t a big hit at its relatively high price of $299. However, the $99 HomePod mini remains available, and Apple is now selling it in five colors, with blue, orange, and yellow joining white and black. (The new colors will become available at some point in November.) The grapefruit-sized HomePod mini may be small, but it produces great sound for its size, and it can do pretty much everything the larger HomePod could do. You can control it entirely via Siri, pair two for stereo sound, use it as a hub for your HomeKit home automation accessories, and even have it play the sound from your Apple TV. Put a HomePod mini in different rooms in the house, and you can use Intercom to communicate with family members using your voice. If you’re giving it as a gift, remember that it’s best when paired with an Apple Music subscription.

iPad and iPad mini

If you’re looking to give an iPad as a gift, you have a lot of choice. The top-of-the-line iPad Pro may be overkill for most given its power and price—$799 for the 11-inch model and $1099 for the 12.9-inch model. But the fourth-generation iPad Air, which starts at $599, provides sufficient power for even the most intensive tasks, especially when coupled with a second-generation Apple Pencil ($129) and either a Magic Keyboard ($299) or Smart Keyboard Folio ($179).

If those possibilities seem pricey for an iPad that’s destined for a kid or an adult with basic needs, look no further than the new ninth-generation iPad, which remains a bargain at $329. It works with the first-generation Apple Pencil ($99), and those who need to write can add the $159 Smart Keyboard. Finally, don’t forget the sixth-generation iPad mini, which benefited from a major redesign back in September. It’s now more like a diminutive version of the iPad Air, with more colors and a squared-off industrial design compatible with the second-generation Apple Pencil. It’s $499, and if you need a keyboard, you’ll have to look to a third-party manufacturer or use a standard Bluetooth wireless keyboard.

Apple Watch Gift Certificate

Last but far from least, we love the Apple Watch, and it would seem to make a great gift. However, we urge caution. Apple provides a dizzying number of options for case size, material, and color, plus the band and color, making it difficult to know what would be most appreciated. So we’d encourage giving a certificate that’s good for a conversation about what to purchase. Then sit down with the recipient to run through all the decisions in the Apple Watch Studio.

There are three options this year: the new Apple Watch Series 7 (starting at $399), last year’s less expensive Apple Watch SE (starting at $279), or the much older Apple Watch Series 3 (starting at $199). Get the Series 7 if you want an Always-On Display, blood oxygen sensor, and ECG capabilities—it also boasts a larger screen than last year’s Series 6 while remaining compatible with all the bands. The Apple Watch SE lacks the Series 7’s advanced sensors and has a slightly smaller screen size, but it still provides the compass, altimeter, and fall detection features. The screen on the Series 3 is smaller yet, and it lacks a number of key features. Unless keeping the cost to a minimum is essential, we have a hard time recommending the Series 3—it’s getting too old. Apple has a helpful comparison tool.

You may have noticed that we didn’t include any Macs in this article. They are worthy gifts, but they’re quite a bit more expensive and more difficult to select without extensive discussion of the recipient’s needs. Let us know if you need help choosing the right Mac for someone on your list, but we’re partial to the M1-based MacBook Air and 24-inch iMac for many users.

(Featured image by Adam Engst)