Install Minor Operating System Updates to Maintain Herd Immunity

It seems like Apple releases updates to iOS, macOS, watchOS, and tvOS nearly every week these days. It has been only a few months since iOS 11 and macOS 10.13 High Sierra launched, and we’ve already seen ten updates to iOS and seven updates to macOS. Some of these have been to fix bugs, which is great, but quite a few have been prompted by the need for Apple to address security vulnerabilities.

Have you installed all these updates, or have you been procrastinating, tapping that Later link on the iPhone and rejecting your Mac’s notifications? We’re not criticizing—all too often those prompts come at inconvenient times, although iOS has gotten better about installing during the night, as long as you plug in your iPhone or iPad.

We know, security is dull. Or rather, security is dull as long as it’s present. Things get exciting—and not in a good way—when serious vulnerabilities come to light. That’s what happened in November 2017, when it was reported that anyone could gain admin access to any Mac running High Sierra by typing root for the username and leaving the password field blank. That one was so bad that Apple pushed Security Update 2017-001 to every affected Mac and rolled the fix into macOS 10.13.2.

Part of the problem with security vulnerabilities is that they can be astonishingly complex. You may have heard about the Meltdown and Spectre hardware vulnerabilities discovered in January 2018. They affect nearly all modern computers, regardless of operating system, because they take advantage of a design flaw in the microprocessors. Unfortunately, the bad guys—organized crime, government intelligence agencies, and the like—have the resources to understand and exploit these flaws.

But here’s the thing. Security is an arms race, with attackers trying to take advantage of vulnerabilities and operating system companies like Apple, Microsoft, and Google proactively working to block them with updates. If enough people install those updates quickly enough, the attackers will move on to the next vulnerability.

The moral of the story? Always install those minor updates. It’s not so much because you will definitely be targeted if you fail to stay up to date, but because if the Apple community as a whole ceases to be vigilant about upgrading, the dark forces on the Internet will start to see macOS and iOS as low-hanging fruit. As long as most people update relatively quickly, it’s not worthwhile for attackers to put a lot of resources into messing with Macs, iPhones, and iPads.

That said, before you install those updates, make sure to update your backups. It’s unusual for anything significant to go wrong during this sort of system upgrade, but having a fresh backup ensures that if anything does go amiss, you can easily get back to where you were before.

Call 911! Or, with an iPhone or Apple Watch, Invoke Emergency SOS.

Have you ever needed to call emergency services from your or someone else’s iPhone? Almost by definition, such calls take place at stressful times, and it can be hard to remember what to do. Or, if you’ve been in an accident, it might be difficult or impossible to navigate the iPhone’s interface. In iOS 10.2 and watchOS 3 and later, Apple added the Emergency SOS feature to help.

Emergency SOS does three things:

  • First, it calls emergency services, using whatever number is appropriate for your location, which could be particularly helpful when you’re traveling abroad.
  • After your emergency call ends, Emergency SOS sends a text message with your location to emergency contacts that you’ve set up previously in the Health app.
  • Finally, it displays your Medical ID for first responders so they can be aware of things like medication allergies. You create your Medical ID in the Health app as well.

How you invoke Emergency SOS varies slightly depending on which Apple device you have:

  • On the iPhone 8, iPhone 8 Plus, and iPhone X, press and hold the side button and either of the Volume buttons until the Emergency SOS slider appears. Either drag the Emergency SOS slider to call emergency services right away, or just keep holding the side and Volume buttons. If you continue holding the buttons down, a countdown begins and an alert sounds; at the end of the countdown, the iPhone automatically places the call, a feature that Apple calls Auto Call. 


  • On the iPhone 7 and earlier, rapidly press the side button five times to bring up the Emergency SOS slider. Drag the slider to call emergency services. (The quintuple-click can work on the new iPhones too; it’s an option in Settings > Emergency SOS.) 
  • The Apple Watch acts like the newer iPhones. Press and hold the side button to bring up the Emergency SOS slider, or keep holding the side button to start a countdown after which the Apple Watch will call emergency services automatically via Auto Call. The Apple Watch must be connected to your iPhone, be on a known Wi-Fi network and have Wi-Fi Calling enabled, or be an Apple Watch Series 3 with a cellular plan.

It’s only human to want to test this in a non-emergency situation, and you can do so without actually placing the call. On both the iPhone and the Apple Watch, there will be a red hangup button you can tap, followed by an End Call or Stop Calling button. Similarly, you can cancel notifications of your emergency contacts.

You’ll also want to stop calls if they’re placed accidentally—we know someone who had his hand in his pocket in such a way as to press the Apple Watch’s side button long enough to start the call, and since he was in a noisy environment, he didn’t hear the alert or notice anything until the 911 service called his iPhone back.

To add emergency contacts—the people who you’d want notified if you were in an accident, for instance—follow these steps on your iPhone:

  1. Open the Health app, and tap the Medical ID button at the lower right.
  2. Tap Edit, and then scroll down to Emergency Contacts.
  3. Tap the green + button to add a contact.
  4. Select the desired person, and when prompted, pick their relationship to you.
  5. Tap Done to save your changes.

Two notes. First, if you’re concerned about activating the Auto Call feature inadvertently, you can turn it off in Settings > Emergency SOS on the iPhone, and for the Apple Watch in the Watch app, in My Watch > General > Emergency SOS.

Second, bringing up the screen with the Emergency SOS slider also automatically disables Touch ID and Face ID, such that you must enter your passcode to re-enable them.

We sincerely hope that you never have to use Emergency SOS, but that if you do, it proves to be a faster and more effective way of contacting emergency services.

Taking Out the Garbage: Tips for Working with the Trash on the Mac

One of the great innovations of the Mac, way back when, was the concept of the Trash. Instead of deleting files immediately, you’d put them in the Trash, where they’d sit until you either took them out or removed them for good by emptying the Trash. You undoubtedly know the basics of working with the Trash: drag files in, drag mistakenly trashed files out, and choose Finder > Empty Trash to delete the files and recover the disk space.

But instead of just dragging files to and from the Trash, you can take advantage of a few special techniques that make working with the Trash faster and easier.

Move Files to the Trash

The most obvious method of trashing a file is to drop it on the Trash icon in the Dock, but on a large screen that can be fussy. Once you’ve selected one or more files in the Finder, try one of these alternatives:

  • Press Command-Delete. This is our favorite!
  • Control- or right-click on one of them, and choose Move to Trash.
  • Choose File > Move to Trash.

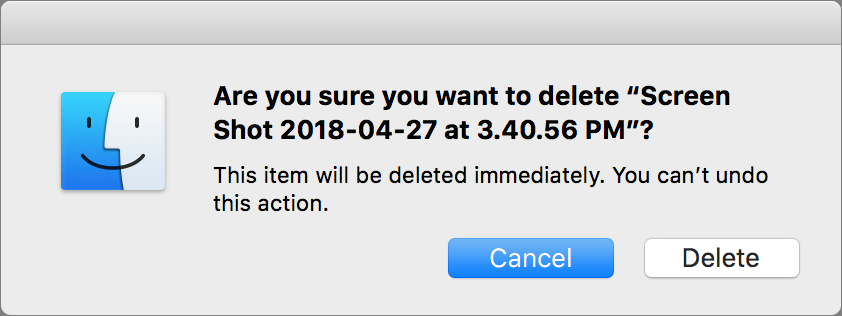
What if you want to live dangerously and delete a file immediately, perhaps because you need to recover the disk space right away? Hold down Option and choose File > Delete Immediately, or press Command-Option-Delete. The Finder always asks whether you want to do this.

Remove Files from the Trash

We all make mistakes and trash files by accident, or sometimes realize later that a file we put in the Trash is still needed. Taking something out is easy: click the Trash icon on the Dock to open its window, and then drag the file out of the window. But, there is more to know about the best ways to remove files from the Trash.

First, if you trash a file and immediately realize it was the wrong thing to do, press Command-Z or choose Edit > Undo Move to Trash to put it back where it started

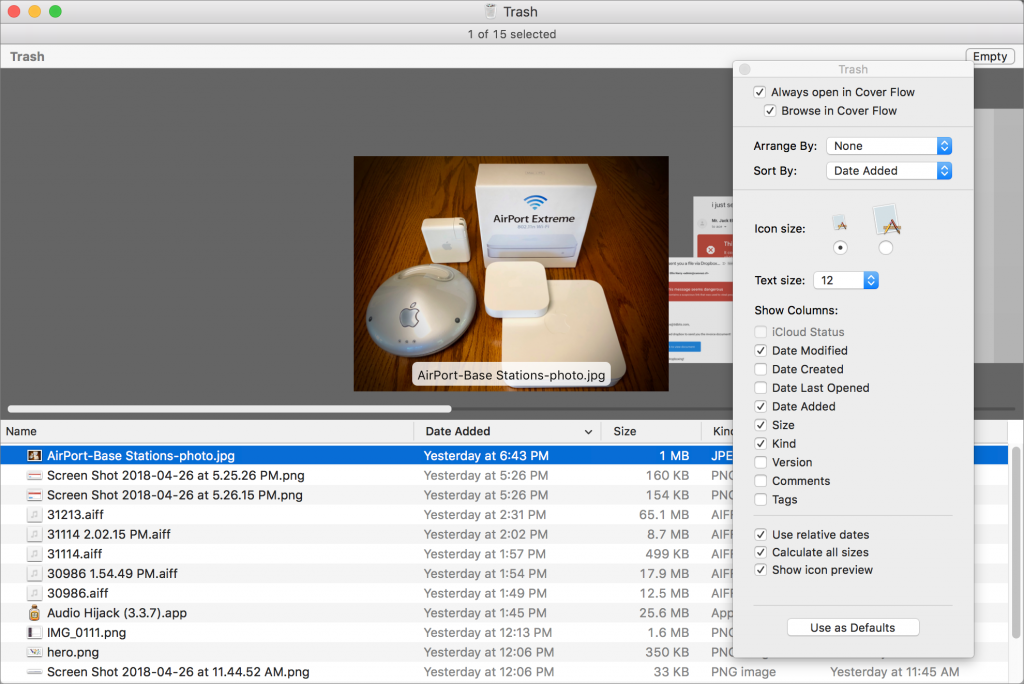
We like viewing the Trash window in Cover Flow view (open it, and then choose View > as Cover Flow) because of the document preview at the top of the window. We also like to sort by Date Added so that we can see the items we’ve trashed most recently (if the Date Added column isn’t showing, choose View > Show View Options and select the Date Added checkbox).

In the Trash window, you can select an item and use the Put Back command to return it to its original location. Try one of these techniques:

  • Press Command-Delete. It’s the same shortcut as for Move to Trash, but does the reverse when the selection is in the Trash window.
  • Control- or right-click on one of them, and choose Put Back.
  • Choose File > Put Back.

Empty the Trash

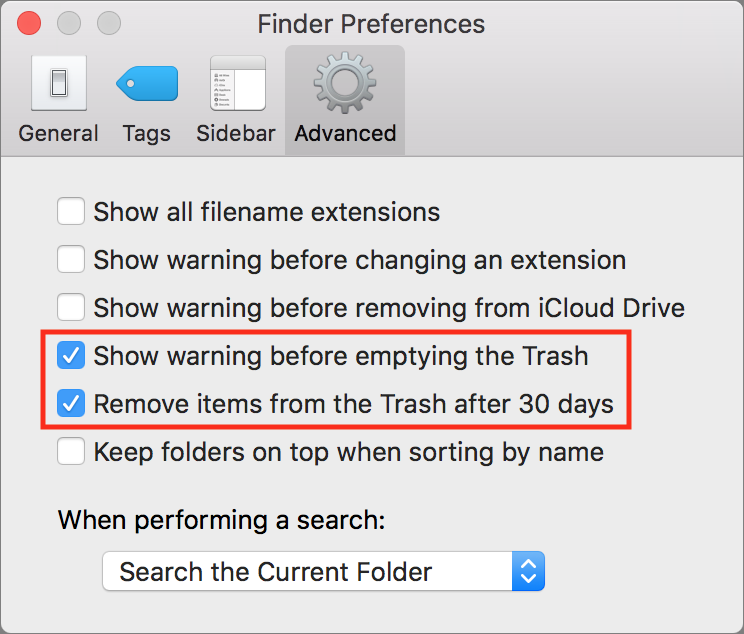
The main reason to empty the Trash is if you need to reclaim the disk space its contents occupy. You can do that at any time, as we’ll explain momentarily, but in macOS 10.12 Sierra and later, you can have the Mac automatically remove items from the Trash after they’ve been in there for 30 days. Just choose Finder > Preferences > Advanced, and select the “Remove items from the Trash after 30 days” checkbox.

To empty the Trash manually, choose Finder > Empty Trash. If “Show warning before emptying the Trash” is selected in the window shown above, you’ll be prompted to confirm the deletion. If you don’t like the prompt, deselect that checkbox. Other shortcuts include:

  • Click and hold the Trash icon on the Dock, and choose Empty Trash.
  • Press Command-Shift-Delete.
  • To avoid the warning even when it’s enabled, press Command-Shift-Option-Delete.

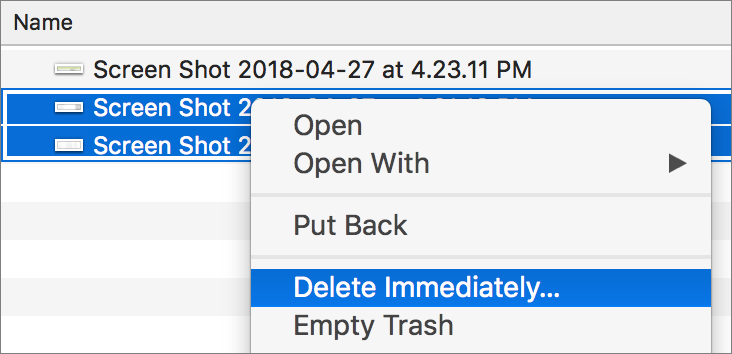
Emptying the Trash doesn’t have to be an all or nothing action. Imagine that you’ve just trashed a few huge files and want to recover their disk space without tossing every other file in the Trash. Just select them, Control- or right-click one, and choose Delete Immediately. You can also press Command-Option-Delete.

Files in your Mac’s Trash smell better than the inside of a typical garbage can, but that doesn’t mean you want to spend a lot of time fussing with them. With these tips, you can trash files, recover from mistakes, and clear disk space quickly and confidently.

Who Should Buy the New iMac Pro?

Apple’s new iMac Pro has started shipping, and it’s an astonishing machine. Put simply, it’s the most powerful Mac ever, a title it will likely retain until Apple releases a new version of the Mac Pro, promised for sometime in 2018. But for now, what’s special about the iMac Pro, and should you buy one?

The main thing to know about the space gray iMac Pro is that it’s aimed at high-end professionals, and as a result, it gets pricey fast. The base configuration starts at $4999, and if you max out all its options, you’ll spend over $13,000. That’s a lot of money, but you get a lot of bang for your buck.

The power starts with the processor, an 8-core Intel Xeon W. If that’s not enough performance for you, there are also 10-core, 14-core, and 18-core options. Apple didn’t skimp on RAM either—32 GB comes standard, and you can bump it to either 64 GB or 128 GB. The default storage is a 1 TB solid-state drive, but you can increase that to 2 TB or 4 TB. You can’t upgrade the iMac Pro in any way yourself, but you can take it to an Apple Store or Apple Authorized Service Provider to have more RAM installed after the fact.

The screen is a stunning 27-inch Retina 5K 5120-by-2880 P3 display, and the iMac Pro drives all those pixels with a Radeon Pro Vega 56 graphics card with 8 GB of memory, though you can get even more graphics processing power from an optional Radeon Pro Vega 64 card with 16 GB.

Most of the iMac Pro’s other specs are similar to the existing 27-inch iMac with Retina display—a 1080p FaceTime camera, 802.11ac Wi-Fi, Bluetooth 4.2, an SDXC card slot, four USB 3 ports, and a headphone jack—but it also boasts four Thunderbolt 3 ports for driving external displays and large storage arrays, along with 10 Gb Ethernet for lightning-fast network access.

It comes with a space gray Magic Keyboard with Numeric Keypad and a space gray Magic Mouse 2. You can switch to a space gray Magic Trackpad for $50 or buy both input devices for $149, which you might want to do because the space gray peripherals aren’t sold separately.

Many of the iMac Pro’s options come with eye-watering price tags—$2400 for the 18-core processor and another $2400 for 128 GB of RAM—but those stratospheric costs make the purchasing decision fairly easy. If you’re in a line of work where increased performance translates directly to increased productivity, you’ll want an iMac Pro as soon as you can get one. It’s ideal for video editors who need to work with 8K video, engineers using complex modeling software, and developers suffering through long compile times. Put simply, if time is money for you, you’ll want an iMac Pro.

And if you’re a professional whose needs aren’t nearly so rarefied, you can rest easy knowing that the regular 27-inch iMac can give you more than enough performance for a lot less money.

Learn How You Can Adjust Web Site Behavior with Safari’s Site-Specific Settings

Although macOS 10.13 High Sierra was light on new features, it did bring one welcome addition to Safari—site-specific settings. Imagine that you regularly visit a blog that you prefer to read using Safari’s Reader view. Rather than invoke it each time you visit, you can now set Safari to use Reader automatically on that site. Similarly, if there’s a site whose text is too small, Safari can remember your page zoom setting for that site. Neat, eh?

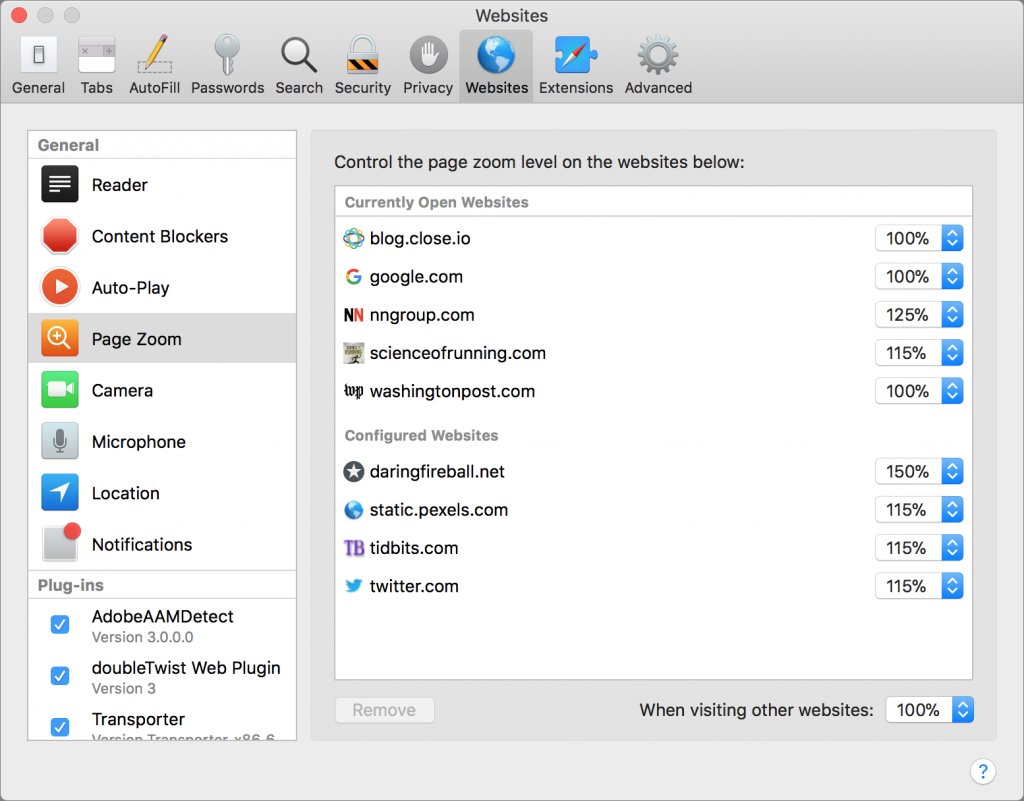
Here’s how to make the most of Safari’s site-specific settings. First, load a site whose settings you’d like to customize. Then, choose Safari > Preferences and click Websites in the toolbar. You see a list of general settings in the sidebar at the left, followed by any plug-ins you’ve installed. For each setting or plug-in, you can set what happens when you visit the site you just loaded—or, if you have a bunch of sites open in different tabs, you can customize the behavior for any open site. Here are your options.

Reader

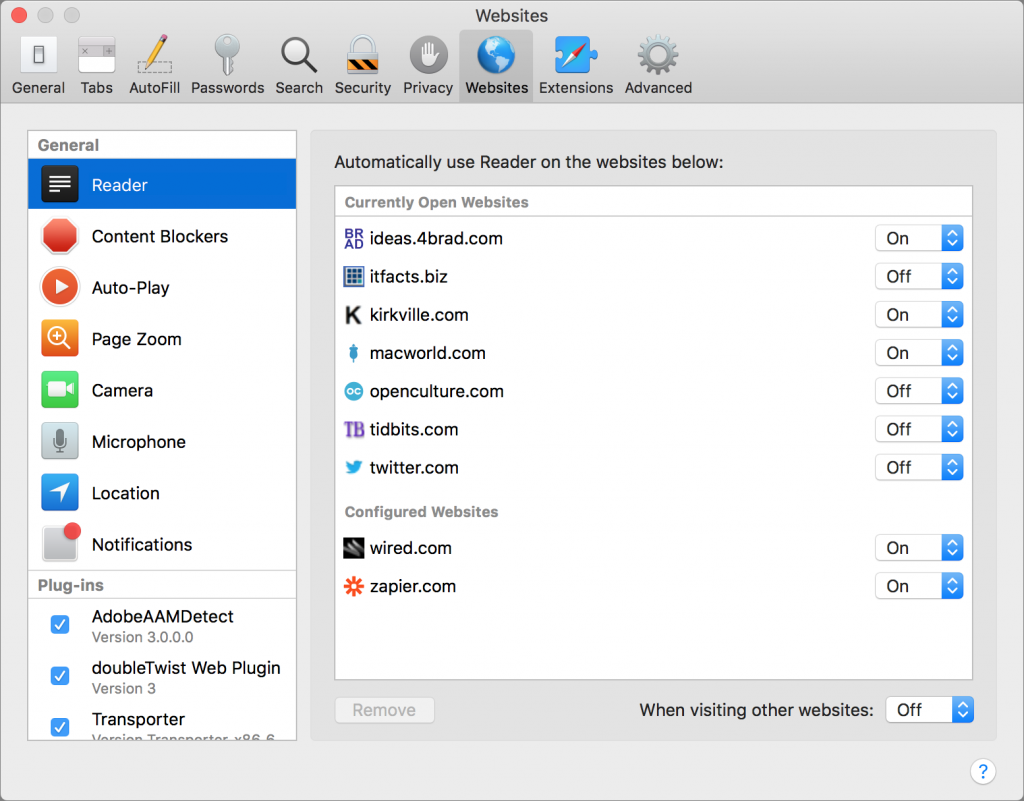
Reader view displays an article as a single page that’s formatted for easy reading, without ads, navigation, or other distractions. It’s such a significant change that it’s off by default—you enable it by clicking the Reader button to the left of the URL in the address bar. To turn it on for all of a site’s articles, in Safari’s Websites preferences, select Reader and choose On from the pop-up menu next to the site name.

Content Blockers

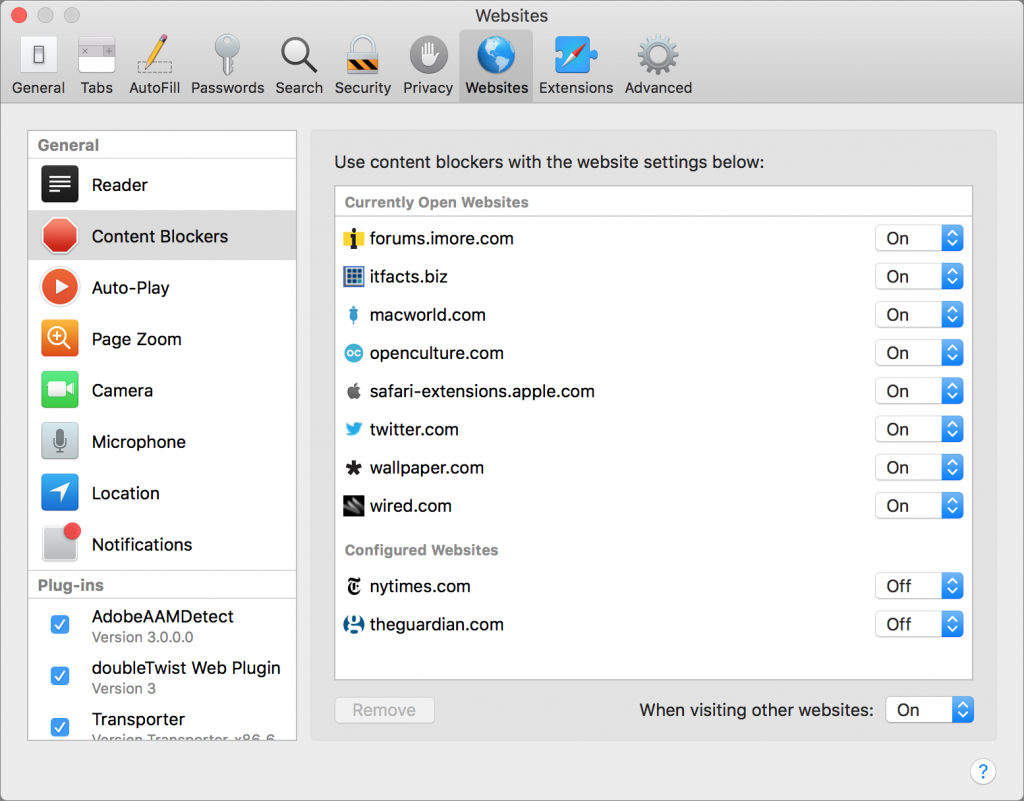
Another way of seeing fewer Web ads is to install a Safari content blocker. Choose Safari > Safari Extensions to open Safari’s Extension Gallery, and then scroll down slightly to find the page’s Search field, where you can search for blocker. There are lots—look for one like Adguard AdBlocker that supports Safari’s content blocking API. Once you’ve installed one, select Content Blockers in the Websites preferences. By default, Safari blocks ads on all sites, so choose Off from the pop-up menus for sites whose ad content you want to see.

Auto-Play

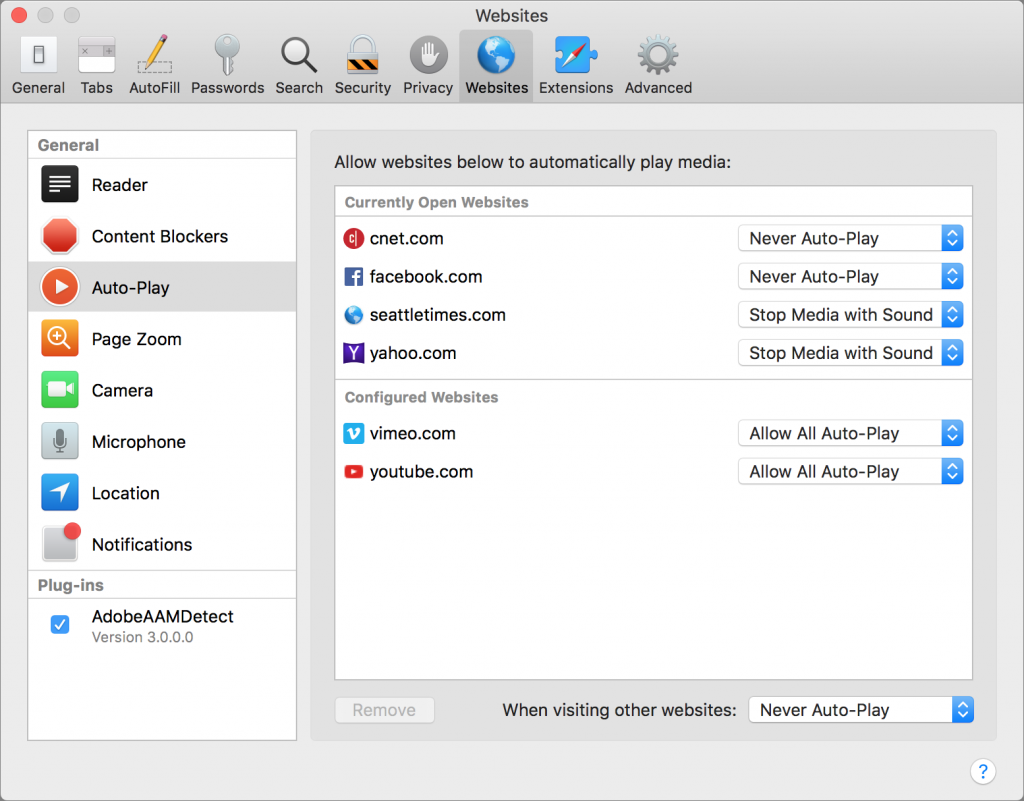
Little is more annoying than sites that play a video when a page loads, distracting you from the text you want to read. Even worse are those sites—Macworld, we’re looking at you—that auto-play videos that aren’t even related to the page. Safari squelches auto-playing videos by default, but for sites like YouTube, you might want to allow videos to play. You can also choose to stop only videos that have sound.

Page Zoom

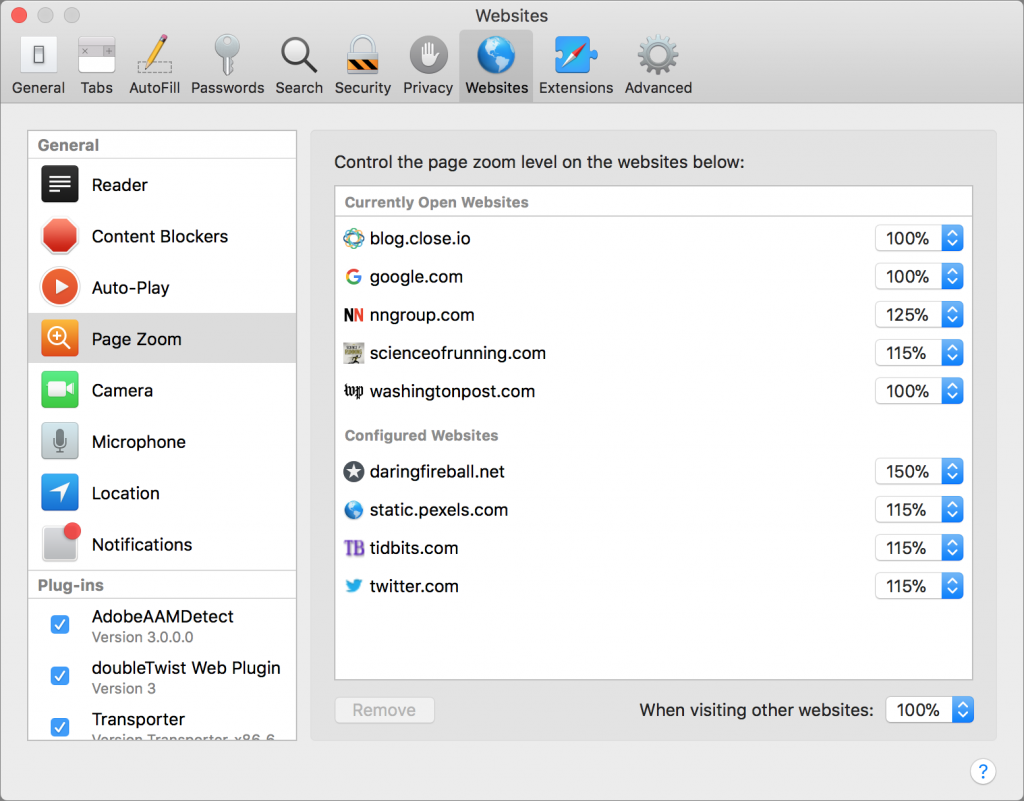
It’s easy to hit Command-Plus to zoom in on a page, increasing the text and graphics proportionally, but who wants to do that every time you visit a page sporting barely readable words? With the Page Zoom setting, Safari will use your preferred zoom every time you visit a particular site. In fact, you don’t have to do anything other than set a zoom level with Command-Plus when you’re viewing a site because Safari remembers it automatically, as you can see in the Configured Websites section for Page Zoom. To tweak it manually, choose a zoom level from the site’s pop-up menu.

Camera & Microphone

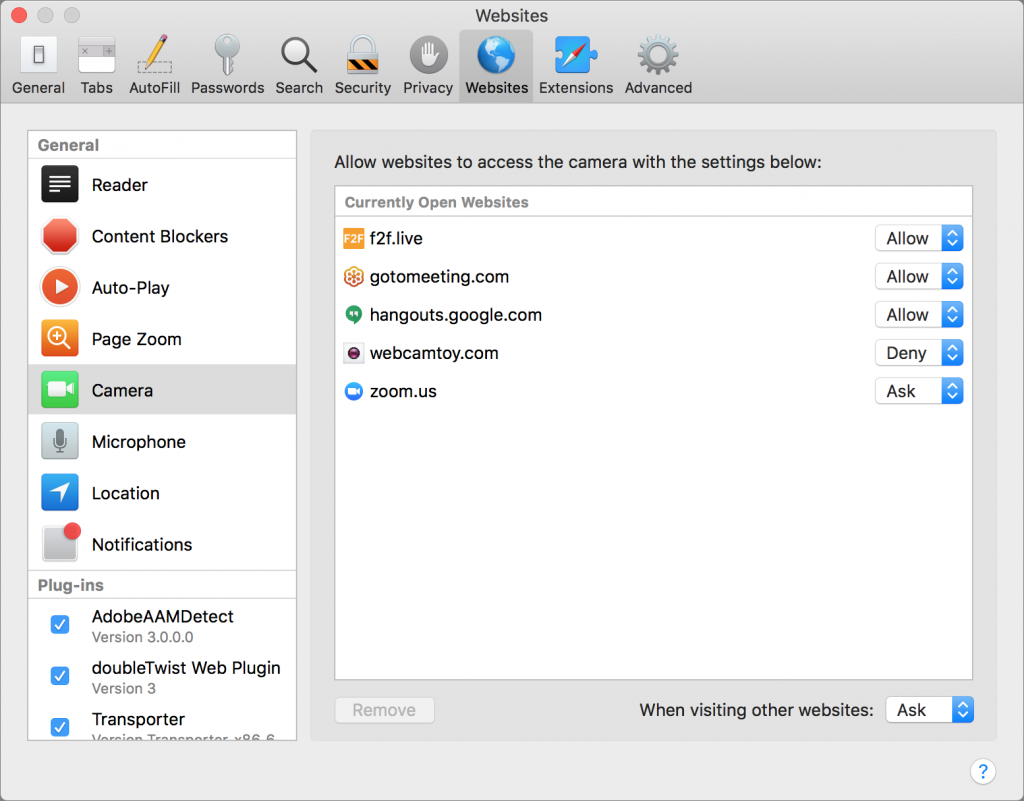
Apart from Web conferencing services, you’re unlikely to run across many sites that want to access your Mac’s camera and microphone. That’s why the Camera and Microphone settings default to asking you whenever a site wants permission to record you. If you find it irritating to be asked constantly by a site you use often, choose Allow from the pop-up menu for that site. And if a site asks repeatedly but you never want to allow it, choose Deny to stop the prompts.

Location

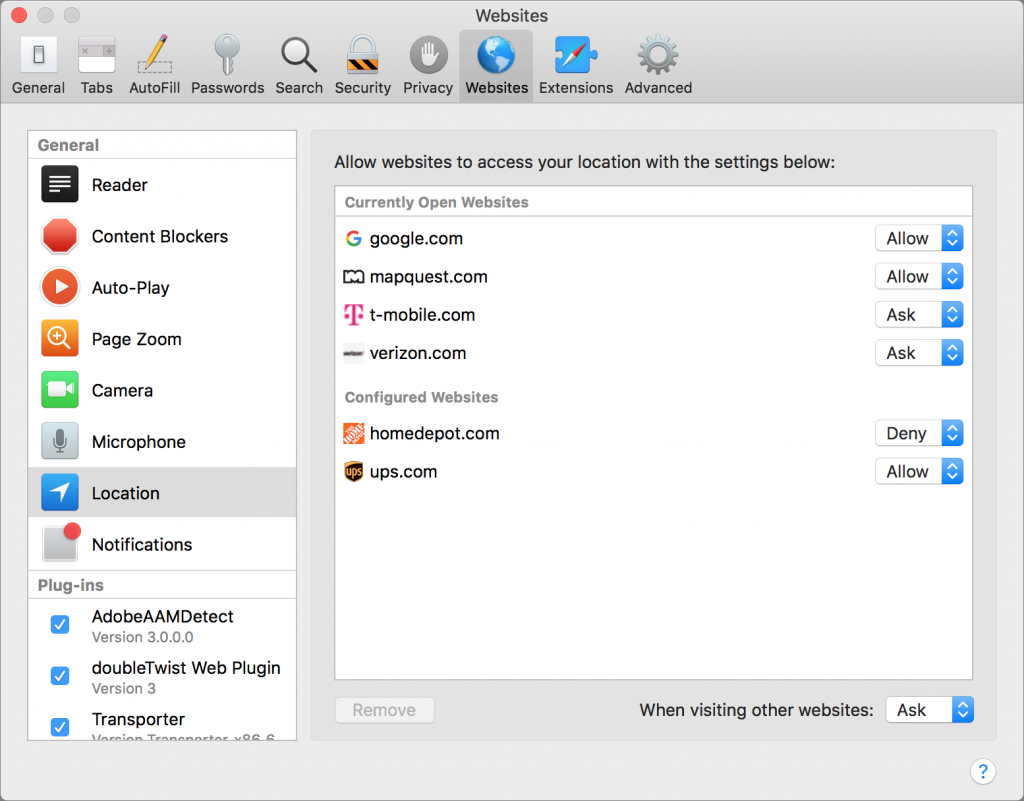
Most Web sites that ask for your location want to determine how close you are to particular stores. If that’s information you’re interested in sharing, let them see where you are, by all means. And if you’re using a mapping service that wants your location, it’s entirely reasonable to set its pop-up menu to Allow. But if a site keeps asking and it feels creepy, set it to Deny.

Notifications

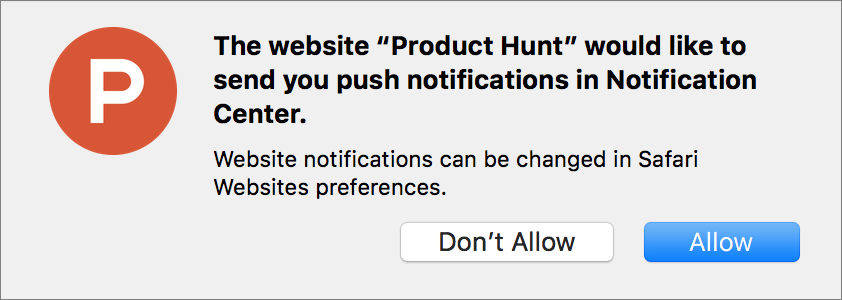
Are there sites whose new posts you’d like to know about right away? If they support Web notifications and you give them permission, they can post push notifications that appear on-screen and in Notification Center, just your other notifications.

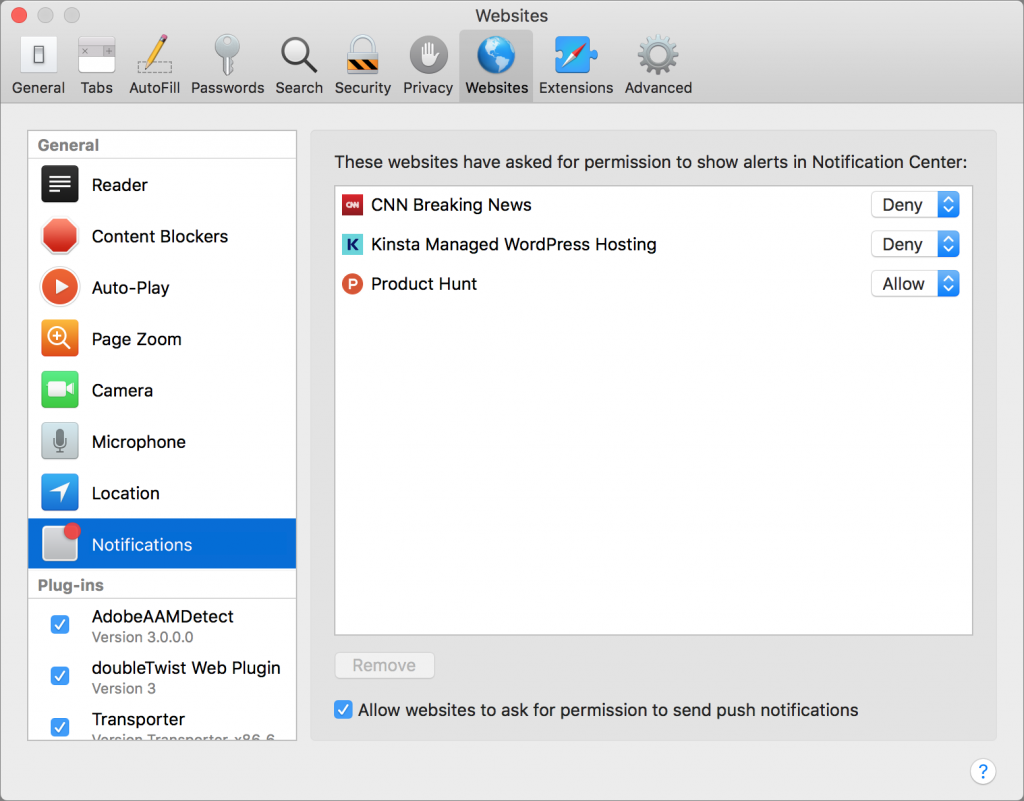
The Notifications preferences look different from the others because they show only sites that have asked for permission in the past. Safari remembers your choice, and if the site gets annoying later, you can always take back permission by changing the Allow pop-up menu to Deny. And if you never want to be prompted for push notifications—they can be distracting—uncheck the “Allow websites to ask for permission to send push notifications” checkbox at the bottom of the pane.

Plug-ins

It’s impossible to know what plug-ins you’ve installed, but Safari is configured to make sites ask for permission to use a plug-in each time you visit. That’s the safest setting, but for any given site and plug-in, you can use the pop-up menu to give the site access (choose On) or not (choose Off). And if you can’t even remember what a plug-in does, you can deselect its checkbox to disable it.

That’s it! Some of Safari’s site-specific settings work without any interaction from you, such as your page zoom and notification preferences. Others require a tiny bit of configuration, but that’s a small price to pay for the Web working more the way you want.