Sneak Preview of What’s Coming from Apple This Fall
At Apple’s Worldwide Developer Conference keynote on June 4th, the company unveiled the first developer versions of all four of its operating systems: macOS 10.14 Mojave, iOS 12, watchOS 5, and tvOS 12. They won’t be available until this fall, likely in September or October, but here is a glimpse of what you can expect.
macOS 10.14 Mojave Adds Dark Mode, Enhances the Finder, and Gains Four iOS Apps
With the update to macOS, which Apple is calling “Mojave” after the southern California desert, the company is beefing up the Finder, adding visual enhancements, and bringing some familiar iOS apps to the Mac. Apple is dropping support for some older Macs, so you’ll need a Mac introduced since 2012 to run Mojave.
Productivity mavens with messy Desktops will appreciate a new Finder feature, which, when turned on, automatically gathers all the files on the Desktop into “stacks,” sorting them by file type, date, tag, or other criteria. Click a stack to expand it, much like a Dock stack today.
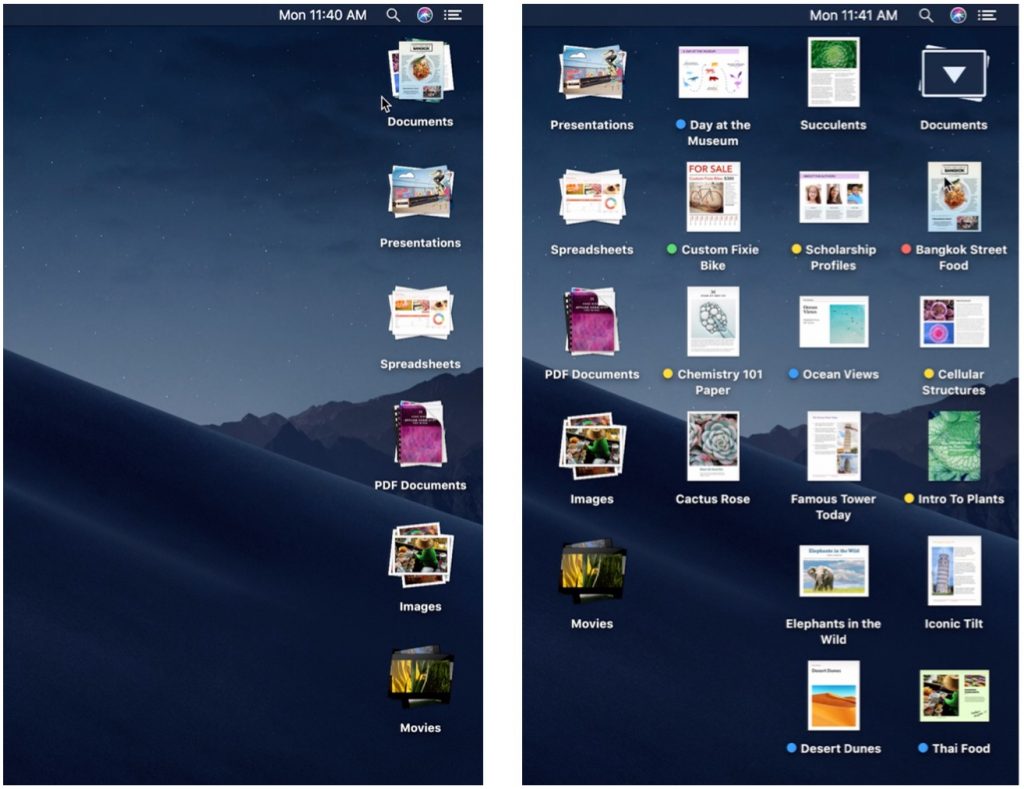
Apple has replaced Cover Flow view, which combined a large preview area and a file list, with the new Gallery view. Aimed at helping you browse in a folder of images, Gallery view displays a large preview of the selected file above a row of thumbnails for other items in the folder. A right-hand sidebar in Gallery view shows more information about the current file and lets you edit or mark up the file with Quick Actions (which you can create with Automator) without opening the file in an app. Press Space bar to preview a file with Quick Look, and you can apply appropriate Quick Actions to the file as well, all from the Finder.
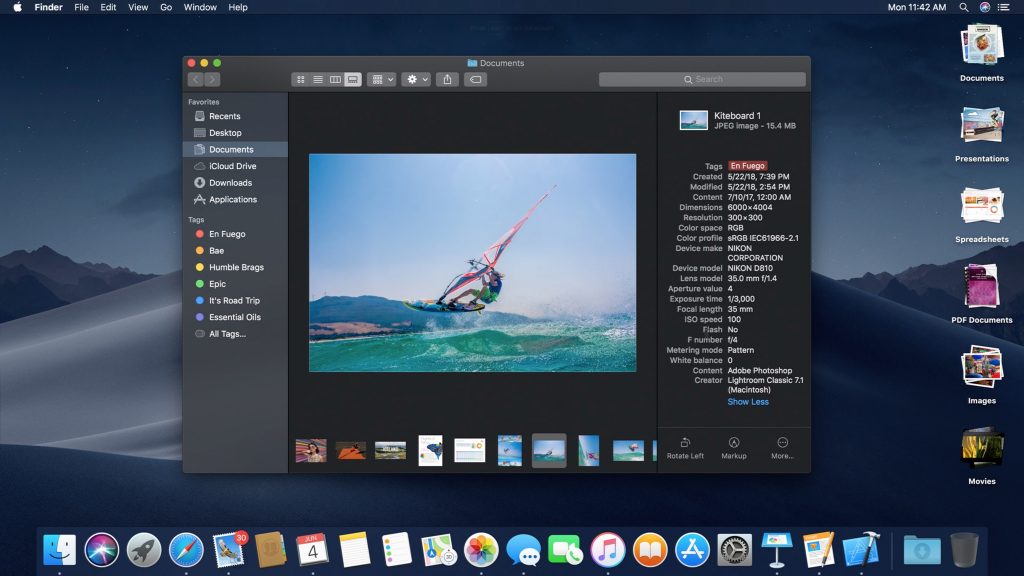
If you find the white backgrounds in the Mac’s windows too bright, you’ll like Mojave’s new Dark Mode (shown above), which intelligently reverses things to display white text in a largely black interface. Additional eye candy comes from Dynamic Desktops, which change the appearance of new Apple-provided Desktop backgrounds based on the time of day.
For those who take a lot of screenshots, Apple has given the Mac’s long-standing screenshot capabilities a visible interface that simplifies taking still screenshots or recording a movie of your actions. Plus, you can preview, edit, share, or delete a screenshot or movie immediately after creating it.

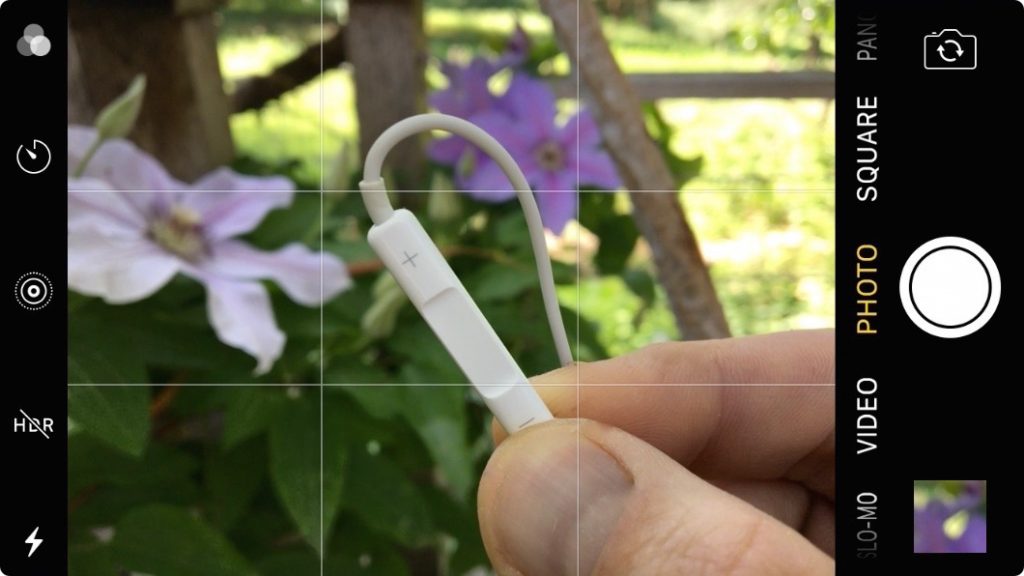
A new feature called Continuity Camera lets you use your iPhone’s camera in Mac apps, either taking a photo directly into a Mac app or scanning a document as a PDF.
Lastly, although Apple was emphatic that it won’t be replacing macOS with iOS, or merging the two, the company is working to make it easier for developers to create apps that work on both platforms. Independent developers won’t be able to do that until 2019, but Apple is testing the waters by bringing four familiar apps from iOS to the Mac: News, Stocks, Voice Memos, and Home. They look and work very much like their iPad counterparts, but rely on the mouse or trackpad, and use normal Mac interface elements like resizable windows.

iOS 12 Improves Performance, Provides Time Management Tools, and More
In the WWDC keynote, Apple emphasized that one of its main goals for iOS 12 is to improve performance, especially for older devices. Unlike Mojave, iOS 12 will support all the same devices as iOS 11, so those with an iPhone 5s or original iPad Air may benefit the most from this effort.
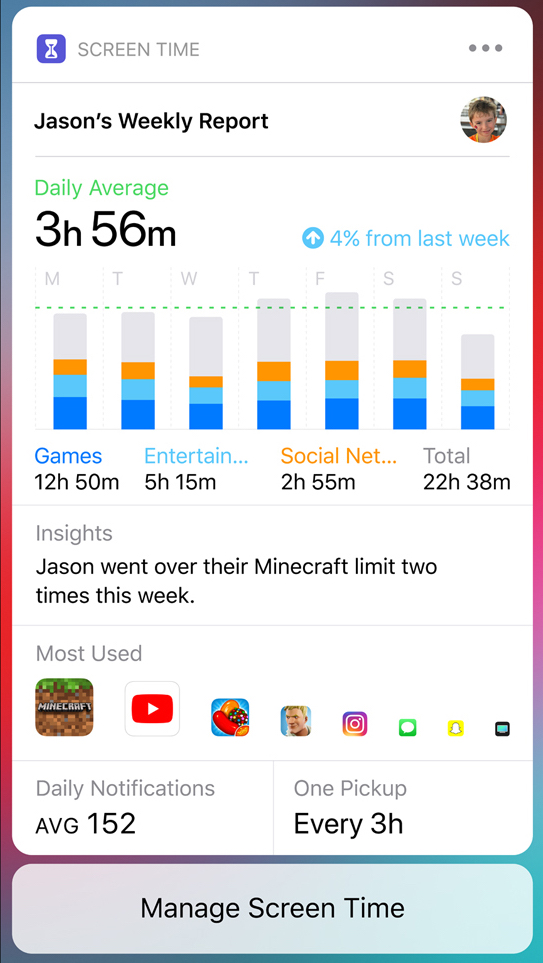 To address increasing concerns about how much we—and our kids—are using smartphones, Apple has made some important changes. Perhaps most important is the new Screen Time feature, which shows how often you use your iOS devices and how much time you spend in different apps. It also lets you set daily time limits for specific apps, so you can make sure you don’t spend too much time in Facebook, for instance. Even better, you can set such limits for your children’s devices via Family Sharing.
Do Not Disturb has become a more appealing feature, because you don’t need to worry about accidentally leaving it on for too long—it can now be set to turn off automatically after some time or when you leave a location, such as at the end of a class or when you leave your doctor’s office. (This feature also comes to the Apple Watch with watchOS 5.) Also new is Do Not Disturb During Bedtime, which ensures you won’t see enticing notifications on the Lock screen if you check the time on your iPhone in the middle of the night.
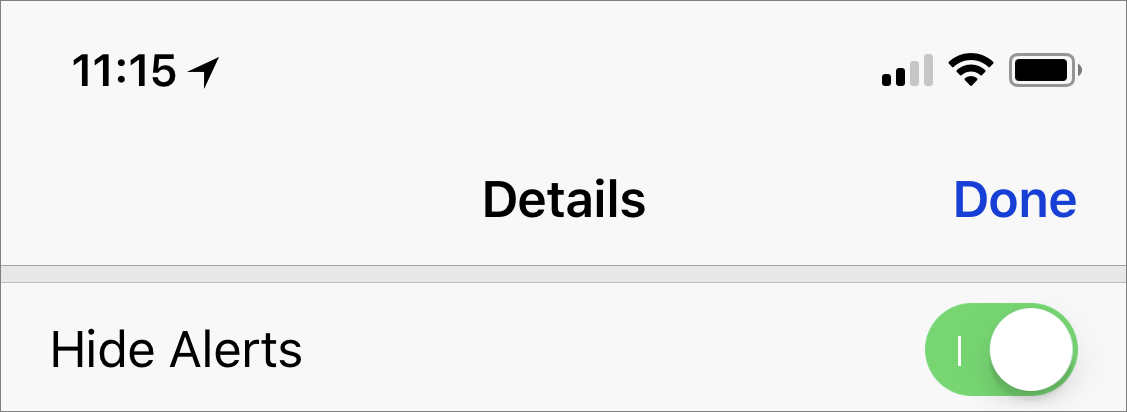
Getting too many notifications? Notification grouping gathers all the notifications from each app together on the Lock screen so it doesn’t fill up, but you can see them all at once when you’re ready. Plus, a new feature called Instant Tuning helps you reduce the number of notifications you see, right from the Lock screen.

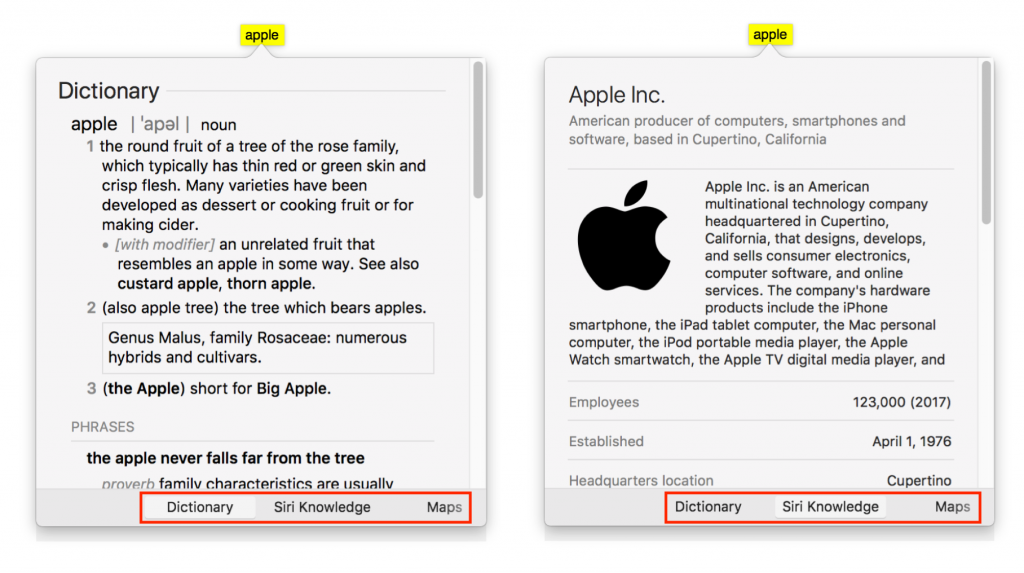
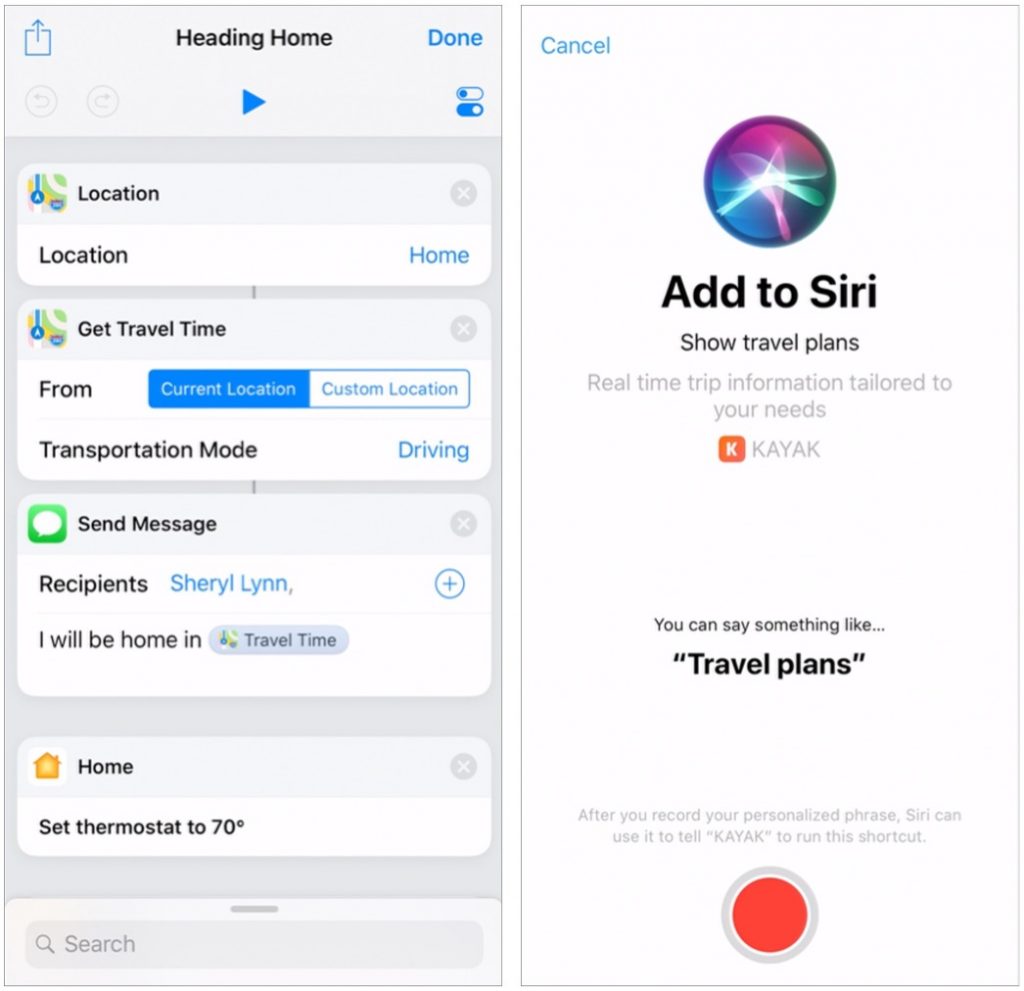
If you’ve always wanted to automate repetitive actions in iOS, you’ll love the new Siri Shortcuts feature. You can use it to string together actions in different apps—send a message to your spouse that you’re leaving work, show the traffic conditions on your commute home, and start playing a podcast app—and then invoke them all via Siri with a custom phrase.
Other interesting changes in iOS 12 include these:
- Apple has renovated the interfaces of several bundled apps, including iBooks (now called Apple Books), News, Stocks, and Voice Memos (which can now sync recordings with the Mac).
- FaceTime is no longer limited to one-on-one conversations and can now include up to 32 people in a single FaceTime conversation. The Mac version of FaceTime gains this capability too.
- Photos boasts improved searching, can unearth photos from your library in a new For You tab, and prompts you to share photos with friends who it recognizes in your photos.
- Apple is working with colleges and universities to add Wallet support for contactless student ID cards so students can use an iPhone (or Apple Watch) for unlocking doors, paying for meals, and more.
- CarPlay allows apps from non-Apple developers to take over the car’s screen so that you can use alternative mapping apps like Google Maps and Waze in a CarPlay-enabled car.
watchOS 5 Improves Workouts, and Adds Walkie-Talkie and Podcasts Apps
Apple has realized that the Apple Watch is popular primarily for fitness and communication, so the company focused on those areas for watchOS 5. Alas, watchOS 5 isn’t available on the original Apple Watch.
On the fitness side, the Apple Watch can now start many workout types automatically when it detects that you’re exercising, and end a workout automatically when it sees that you’ve stopped. It even provides retroactive credit for what you did before the workout was detected. Apple has added new Yoga and Hiking workouts, each with their own metrics, and the running and walking workouts now measure cadence (steps per minute).
For those running outside, the Workout app can also display the rolling mile pace—the pace for the last mile—and can sound an alarm if you’re going slower or faster than a specified pace. And for those who do better with social motivation, watchOS 5 provides 7-day activity competitions.
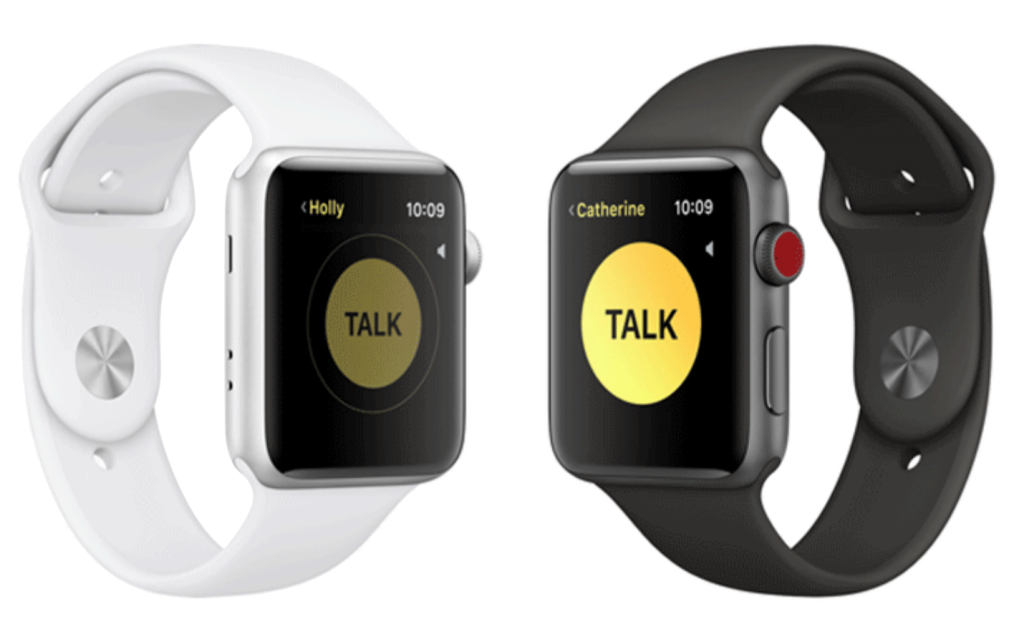
In terms of communication, watchOS 5’s marquee feature is the new Walkie-Talkie app. Once you and a friend have set it up, you can tap a big yellow button to talk to your friend—and they can reply—just as though you were using old-school walkie-talkies. It works over both Wi-Fi and cellular.
Apple is bringing the Podcasts app to watchOS 5, so you’ll be able to listen to podcasts from your wrist, assuming you have AirPods or a Bluetooth headset. Plus, watchOS 5 makes it possible for other audio apps to store audio on the watch, so it should get easier to listen to audiobooks and the like even when you don’t have your iPhone with you.
Other welcome changes in watchOS 5 include:
- The Siri watch face has new options, including sports scores, heart-rate readings after workouts, and commuting times from Maps. Independent apps will also be able to contribute bits of data to appear in the Siri face.
- Notifications can be interactive, so you could tap on your wrist to check in for a flight, confirm a restaurant reservation, or extend parking time. As with iOS 12, multiple notifications from the same app will be grouped.
- Web links in Messages or email can be previewed on the Apple Watch.
- When you raise your wrist to talk to Siri, you no longer have to say “Hey, Siri.
tvOS 12 Gains Dolby Atmos Support, Zero Sign-on, and a New Aerial Screensaver
Although the Apple TV often receives less attention than Apple’s other platforms, it still gains new capabilities with tvOS 12. Most notable among these is support—on the Apple TV 4K only—for Dolby Atmos audio, which makes audio sound more realistic by going beyond the simple right and left channels to provide 3D sound. You’ll need an Atmos-capable soundbar too, along with Atmos-compliant video content, but Apple will automatically upgrade anything you’ve bought from the iTunes Store to the Atmos version once it’s out.

Two other new features work on both the Apple TV 4K and the fourth-generation Apple TV but require support from both apps and TV providers: Zero Sign-on and Cloud DVR. Zero Sign-on figures out your Internet provider, and if it’s the same as your TV service, automatically detects apps that need authentication and logs you in to them. It will work only with Charter Spectrum at launch, but Apple is negotiating with more providers. Similarly, the new Cloud DVR feature lets you watch TV you’ve recorded via the Apple TV, if your TV provider supports it. In the U.S., that again means Charter Spectrum to start.
Apple put some work into the Apple TV’s gorgeous aerial screensaver, introducing a new view from space using imagery taken by astronauts on the International Space Station. Also, you can tap the Siri Remote touchpad while a screensaver is showing to see where it was taken.

Finally, in conjunction with iOS 12, tvOS can autofill passwords saved on your iOS devices so you don’t have to type them on the awkward onscreen keyboard. And if iOS 12 detects an Apple TV, it automatically adds an Apple TV Remote button to Control Center on your iPhone or iPad. (You can do that now, but you have to add the button manually in Settings > Control Center > Customize Controls.)
Getting Ready for These OS Releases
Apple usually makes new versions of its operating systems available in September or October, in conjunction with new iPhones. That doesn’t mean you should upgrade immediately, and we always recommend that you hold off on upgrades until Apple had had a chance to address the inevitable bugs that come with the initial release of any major upgrade. So sit tight, and we’ll tell you more when the time is right.
That said, if these features sound enticing and you have a pre-2012 Mac, an iPhone 5 or earlier, an iPad that predates the iPad Air, or an original Apple Watch, some new hardware may be in your future.