How to Back Up an iPhone or iPad with Your Mac Running Catalina
One of the most significant changes in macOS 10.15 Catalina was the breakup of the long-standing iTunes app into separate Music, Podcasts, and TV apps. But what about backing up iOS devices, which you also used to do in iTunes? In Catalina, Apple moved this function into the Finder. So if you’ve upgraded to Catalina or bought a new Mac that comes with Catalina, here’s how you can continue to back up your iPhone, iPad, or iPod touch in the Finder.
One note first. If you haven’t been using iTunes to back up, manage, and sync media to your device from your Mac all along, we don’t recommend that you start now. Although Apple continues to make these capabilities available for those who need or prefer them, the company focuses most of its efforts on cloud-based services like iCloud Backup, Apple Music, and iCloud Photos. Plus, many of Apple’s apps, like Books, Calendar, Contacts, Podcasts, and TV, can sync their data among all your Apple devices through iCloud. We’re focusing on backup here—for more details about manually syncing media to your iOS device, check out Take Control of macOS Media Apps, by Kirk McElhearn.
Initial Connections
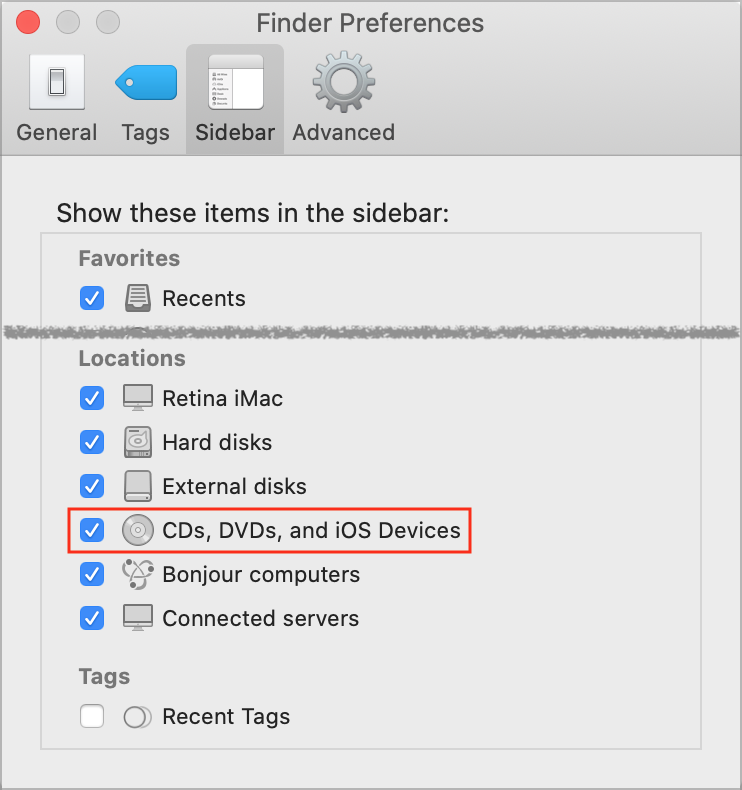
As when you were using iTunes, you’ll need to connect your iOS device to the Mac with a USB cable, either a USB-to-Lightning cable for most devices or a USB-C cable for recent iPad Pro models. When you plug your device into your Mac, it should appear in a Finder window’s sidebar. However, it may not show unless you open Finder > Preferences > Sidebar and select CDs, DVDs, and iOS Devices. (And if it still doesn’t appear, restart your Mac.)
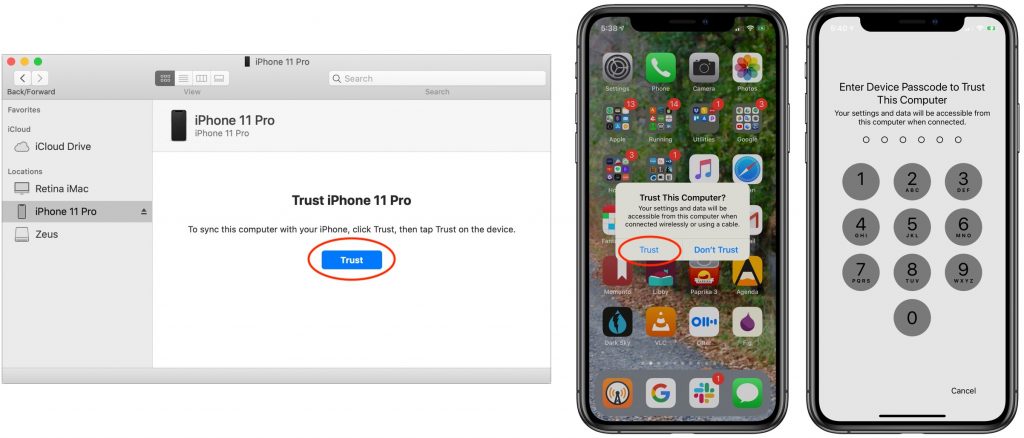
The first time you connect an iOS device to your Mac, you’ll need to establish a trust link between the two devices. That requires that you select the iOS device in a Finder window’s sidebar, click a Trust button that appears, click Trust again on the device itself, and then enter the device’s passcode. This is all very sensible since it prevents someone from stealing your iPhone and connecting to their Mac to read its contents.
Back Up Your Device
Once you’ve jumped through the necessary security hoops, select your device in a Finder window sidebar to view the General screen, which has an interface that’s eerily reminiscent of iTunes. Here’s where you’ll find backup controls, along with a button that lets you update your device’s version of iOS and (not shown) a variety of other general options. Again, we’re focusing on backup here.
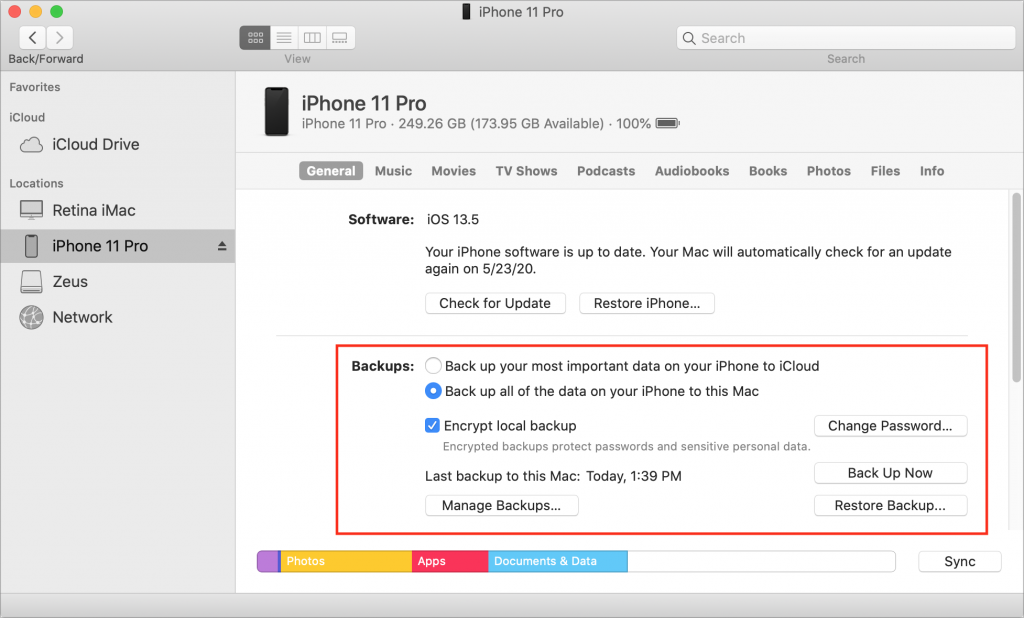
You have two choices: storing the backups on iCloud or keeping them on your Mac. Apple has more information comparing the two, but here are the basics:
- iCloud backups: Assuming you have enough (or are willing to buy more) storage space in iCloud, select “Back up your most important data on your iPhone to iCloud.” Backing up to iCloud is the best option because it automatically happens once per day whenever the device is connected to power, locked, and on Wi-Fi—for us, that usually means during an overnight charge. Plus, if your Mac has a relatively small SSD, you may not have space to store the backups for a large iOS device. iCloud backups are highly secure and reliable, but there are those who don’t want to pay for sufficient iCloud space or don’t want their data in iCloud.
- Local backups: If you prefer, select “Back up all of the data on your iPhone to this Mac.” Be sure to select “Encrypt local backup.” Otherwise, the backup won’t include saved passwords, Wi-Fi settings, browsing history, Health data, and your call history. And anyone breaking into your Mac could access everything else in your iPhone backup! When you select “Encrypt local backup,” you’ll be asked for a password—make sure it’s one you won’t forget.

If you’re going with iCloud backups, you’re done—backups will happen automatically. For local backups, however, click Back Up Now to initiate a backup. Backups can take quite some time—a circular progress indicator replaces the eject button next to the device’s name in the sidebar. That’s a hint that you shouldn’t unplug the device while it’s backing up.
In fact, you don’t have to choose between iCloud and local backups. Nothing prevents you from leaving the default set to iCloud (this mirrors the setting on the device itself in Settings > Your Name > iCloud > iCloud Backup) but occasionally connecting your device to your Mac and clicking Back Up Now to make a secondary local backup, just in case. That would be a sensible thing to do before switching devices or intentionally erasing the device for some reason.
Since iOS device backups can be quite large—up to hundreds of gigabytes—you may need to recover space used by backups for devices you no longer have. Plus, if you switch to iCloud backups at some point, there’s little point in devoting many gigabytes of storage to obsolete backups.
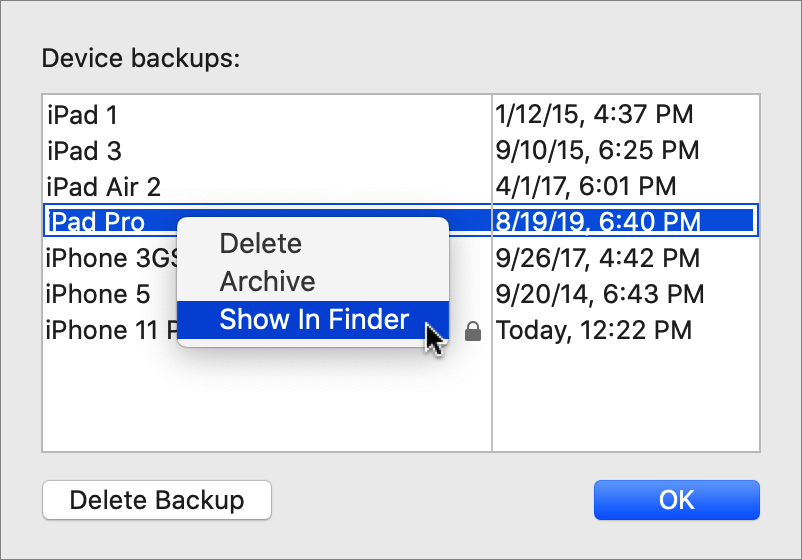
Click Manage Backups to see a list of backups. To delete one, select it and click Delete Backup. You can also Control-click any backup to delete it, archive it (which prevents it from being overwritten by future backups), or show it in the Finder. That last option is useful for determining the size of the folder containing the backup—select it in the Finder and choose File > Get Info.
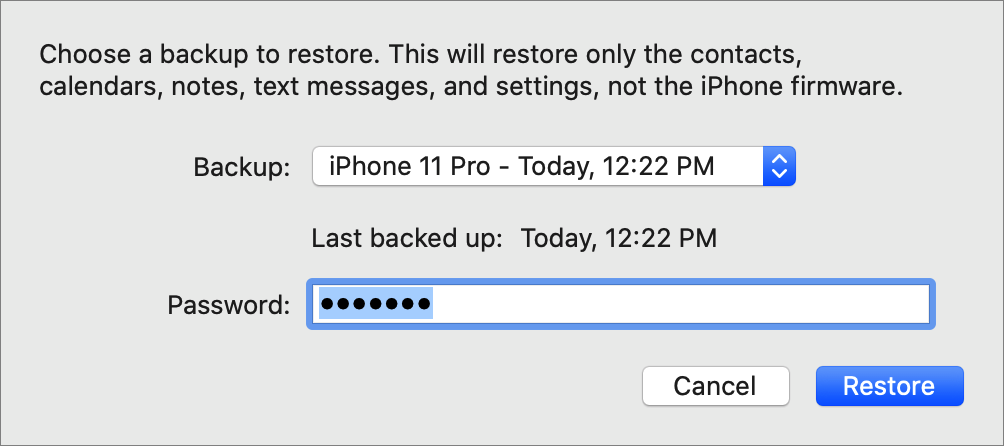
Finally, backups are useful only if you can restore from them in case of problems. To do that from the Finder in Catalina, connect your iOS device and click Restore Backup. You can choose which backup to restore, if necessary, and enter the password you set for an encrypted backup. Restoring will likely take quite some time, depending on how much data needs to be transferred.
We’ll leave you with one last thought. An eject button appears next to your iOS device in the Finder window’s sidebar. You can click it to disconnect the device or, if there’s no other progress indicator there, just unplug the device.
(Featured image components by Apple)