Archive Email to Avoid Mail Quotas, Improve Performance, and Reduce Clutter
Email is a major part of all our lives, both personally and professionally, and as such, it can add up. Before you know it, you have years of email stored away—potentially tens or even hundreds of thousands of messages. Most of the time, that’s fine. Email doesn’t take up any physical space and not even that much digital space in the scheme of things.
However, there are situations where you might want to archive email, by which we mean download it from the server and store it for posterity on your Mac, possibly outside your email app. Some of those reasons include:
- Insufficient server space: Institutional email accounts sometimes have inflexible mail quotas, and although you can pay for more storage on many large email providers, you might prefer instead to clear out old mail that you don’t refer to anymore.
- Reduce clutter: Even if you have sufficient server space, archiving mail—particularly mail from ancient completed projects—might reduce the mental load of having it in your email app.
- Poor email client performance: Although good email apps should be able to handle hundreds of thousands of messages, it’s possible that reducing the amount of email in your account would help if you’re experiencing slowdowns.
- Switching email providers: If you choose to stop using a particular email account, you might want to download all the mail in it first.
- Leaving a job or graduating from school: If you have a work or school email account that will be shut down after you leave, you might want to archive all that email beforehand.
- Preserving a former employee’s business communications: From the opposite perspective, if an employee of yours leaves, you might want to archive their work email account so you have an easily searched record of what they said to clients or suppliers.
- Local backup: Although most email providers and businesses back up their servers (and probably better than most users), it’s not inconceivable that you could lose mail stored remotely. Archiving email locally—perhaps on an annual basis—ensures the long-term preservation of your email communications.
So how should you archive your email? There are two general approaches:
- Store email in a local mailbox: The most straightforward approach is to store email in a local mailbox on your Mac using your existing email app. It’s free and keeps your mail together, but it makes switching to another email app more complicated, and it’s fussy to move local mailboxes to other Macs. Plus, it may require some effort to keep an archive up to date.
- Archive email in a dedicated app: You’ll have to pay for an archiving app, but these apps work with multiple email apps, may provide more powerful searching capabilities, and often integrate email with other archived data. It’s also easier to move archived data between Macs or even keep it available on a server for access on multiple machines.
Store Email in a Local Mailbox
For simple archiving, it’s easy to create local copies of messages or mailboxes you want to preserve locally. The main thing to keep in mind here is the difference between moving and copying.
- Move: When you move a message from the server to a local mailbox, you’re deleting it from the server. Move messages when you want to clear space on the server.
- Copy: When you copy a message, the original message stays on the server, and a copy appears in the local mailbox. Copy messages if you want a local backup of important messages or mailboxes but also want to keep them available online.
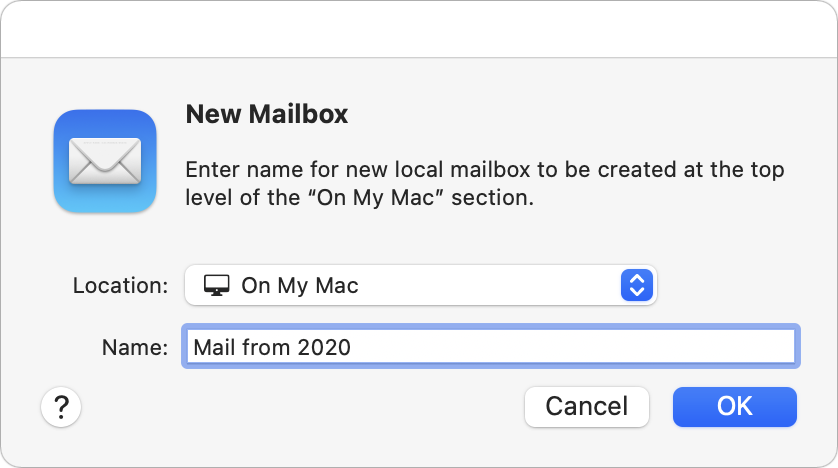
How you do this varies slightly by app, but let’s look at Apple’s Mail—other apps will be similar. The first step is to create a local mailbox. Choose Mailbox > New Mailbox and then choose On My Mac from the Location pop-up menu when naming it.
Then, to move or copy mail:
- Move messages locally: Select messages and, from the Message > Move To menu, choose the desired On My Mac mailbox. You can also Control-click a selection to access the Move To menu or drag the messages from a server-based mailbox to a mailbox under On My Mac.
- Copy messages locally: Select messages and, from the Message > Copy To menu, choose the desired On My Mac mailbox. Alternatively, Control-click a selection to access the Copy To menu, or Option-drag the messages to an On My Mac mailbox. Also note that you can copy an entire mailbox by dragging it from an online account in Mail’s sidebar to the On My Mac section of the sidebar.
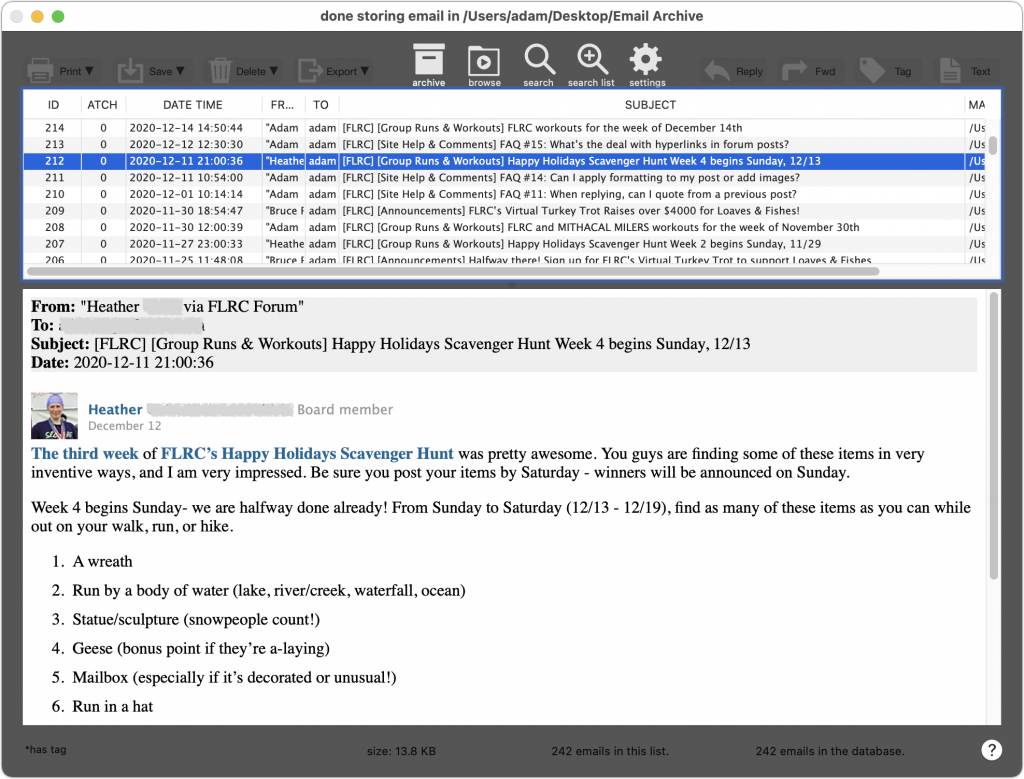
You can also select a mailbox and choose Mailbox > Export Mailbox to save all the data to a local file in .mbox format suitable for importing into other email and archiving apps.
Archive Email in a Dedicated App
When it comes to archiving email in an app dedicated to that purpose, the details vary, so let’s focus on giving you some choices for the leading Mac archiving apps. Once you know what you want, you can more easily pick among them:
- DEVONthink Pro ($199): The most powerful (and expensive) of these apps is undoubtedly DEVONthink Pro. It can import directly from Apple’s Mail and Microsoft Outlook and supports importing .mbox files exported from other email apps. Its integration with Mail and Outlook lets you continually archive new messages without worrying about duplicates. DEVONthink is a general-purpose information management app that also lets you import, organize, and search for files of any kind, scan documents with optical character recognition, and much more. The $499 DEVONthink Server lets multiple people access the shared data over the Web.
- EagleFiler ($49.99): Another general-purpose archiving app, EagleFiler supports direct imports from Mail and Outlook, and it can also import .mbox files exported from numerous other email apps. With Mail, EagleFiler can skip previously imported messages and includes an option to remove duplicate messages from mailboxes. It makes it easy to search archived email and lets you reply (using your standard email app) to archived messages. Beyond email, you can import, organize, search, and view any kind of file, and everything is stored in its original format in a standard Finder folder.
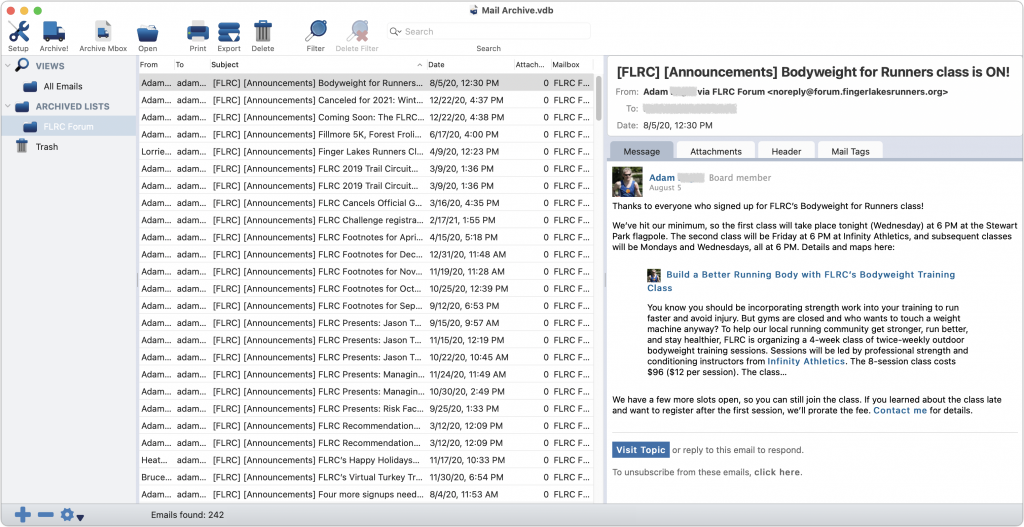
- Mail Archiver X ($49.95): Mail Archiver X focuses on email, supporting major email clients like Mail, Outlook, Postbox, and Thunderbird along with .mbox files, and it can even archive email directly from your IMAP or Gmail account. You can set up Mail Archiver X to archive email on a schedule, automatically skipping previously archived messages. It lets you store messages in its internal database format, FileMaker (if you have a license), or PDF.
- MailSteward ($24.95/$49.95/$99.95): All the basics are here—support for Mail and Postbox plus .mbox files, scheduling of imports, importing into a relational database, automatic skipping of duplicates (and later identification of them if necessary). The three editions of MailSteward let you pick how much power you need. The Lite edition may be all most people need, but the standard edition adds automatic scheduling, saved searches, and database exporting and merging. The Pro version is necessary only for very large archives over 250,000 messages—it trades MailSteward’s SQLite database for MySQL.
We realize there’s a lot to think about here, but no one solution fits all. If you’d like advice on which app would be best for your particular needs and help setting it up, don’t hesitate to contact us.
(Featured image by Gerhard G. from Pixabay)

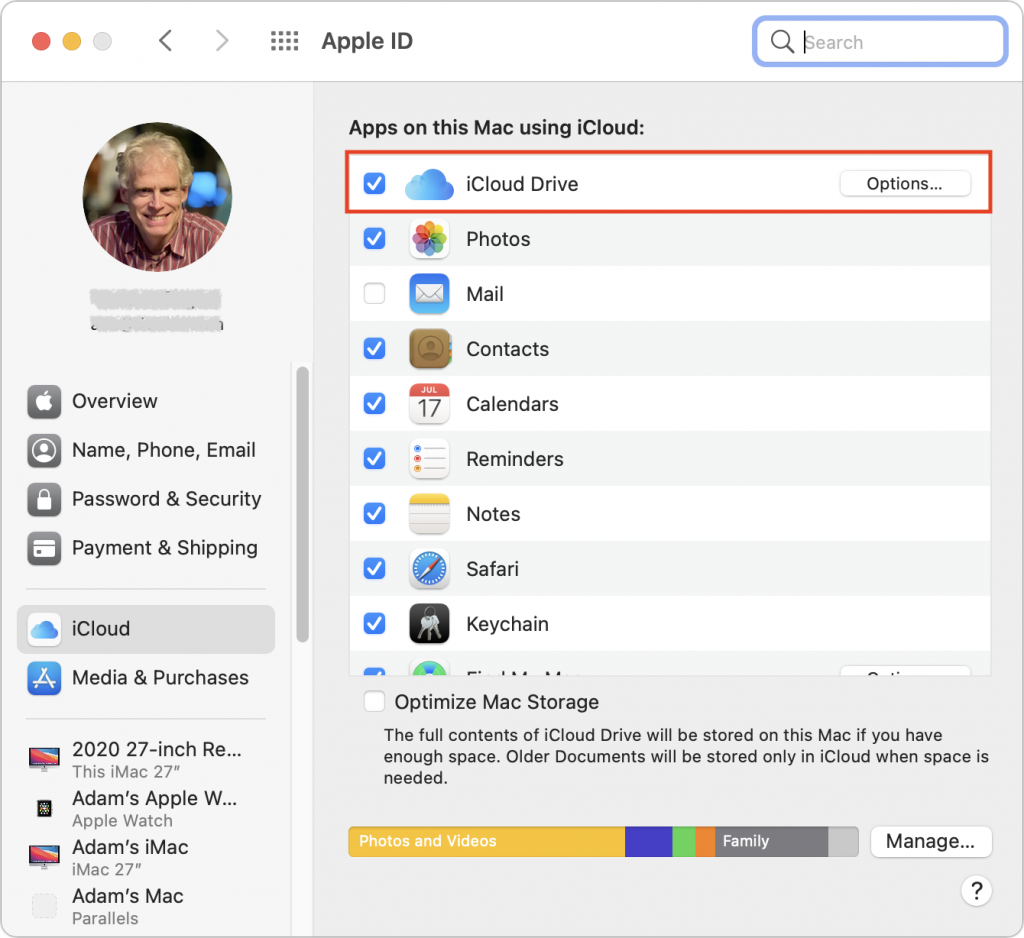
 On the Mac, iCloud Drive creates a special folder to hold all the data mirrored to iCloud. You can access it by choosing Go > iCloud Drive in the Finder. It’s usually available in the sidebar of Finder windows too. If not, open Finder > Preferences > Sidebar and select iCloud Drive.