If Your Internet Connection Is Slow, Research These Three Numbers
As pandemic-related restrictions ebb and flow, many people continue to work from home at least some of the time. A key requirement for successful remote work is a fast, solid Internet connection. Unfortunately, it’s all too common for Internet connections to degrade over time as cables endure a variety of insults ranging from water seeping into connectors to squirrels gnawing through insulation. You might be surprised at how variable such problems can be—we once saw an Internet connection that dropped out infrequently; it turned out that squirrels had damaged just one pair of wires in the cable, and the Internet provider’s system hopped between pairs depending on other neighborhood traffic.
How do you know if something in your Internet connection needs fixing? If the entire connection goes offline periodically, even if it comes back on its own, that’s a hint. Videoconferencing apps and streaming video services can also provide useful warnings—if the picture often pixelates or pauses, or if the audio falls out of sync with the video, that’s another indication that something may be wrong. Finally, if you use a VPN, Internet connectivity issues can cause all sorts of weird problems.
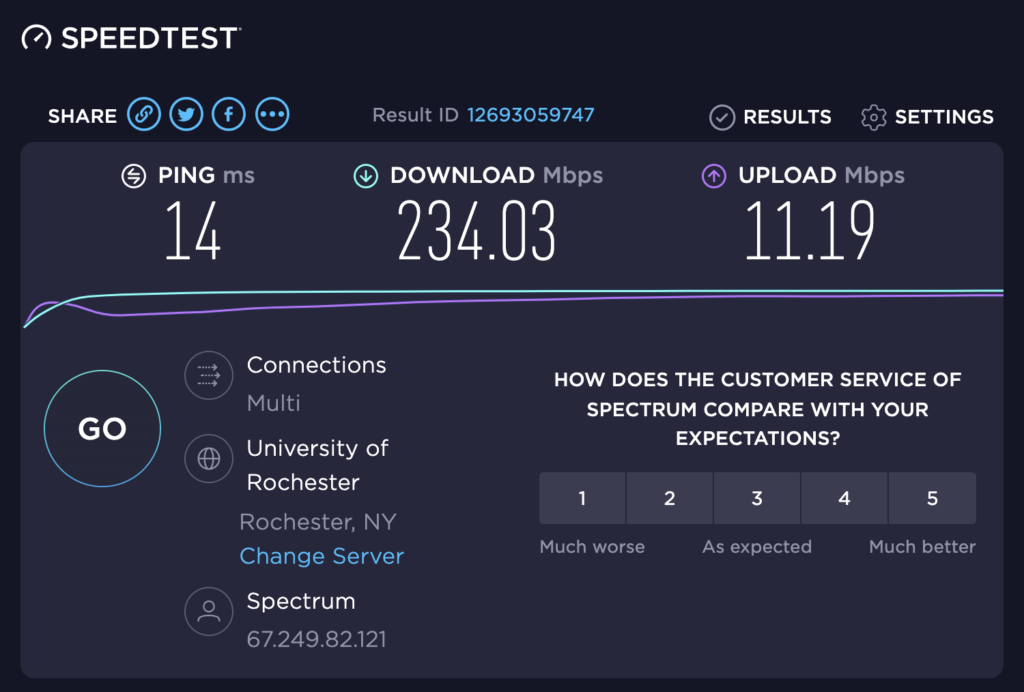
When you notice such problems, you can perform a simple test that may shed some light on the situation. First, make sure to stop any audio or video streaming or large downloads. Then go to speedtest.net and click the Go button. Speedtest will run some tests to come up with three numbers:
- Download: Your download performance, generally measured in megabits per second (Mbps), is the most important and determines how quickly your computer can receive data from the Internet for downloads and streaming video.
- Upload: Conversely, your upload performance, also measured in megabits per second, determines how fast you can send data to the Internet. It’s almost always much lower than download performance, but sufficient upload bandwidth is essential for your audio and video to be clear and smooth in a videoconference.
- Latency: This number, which Speedtest calls “ping,” measures the amount of time in milliseconds to send a single packet to the destination server and receive it back again. The lower the latency, the more responsive communications will be, which is all-important for online gaming. Very long latencies can also cause problems for VPNs.
(You can also use other similar services, such as Netflix’s fast.com or Google’s built-in tester. Apple even built a networkQuality tool into macOS 12 Monterey—run it at the command line in Terminal—though it has an unusual Apple Network Responsiveness test that replaces the latency test.)
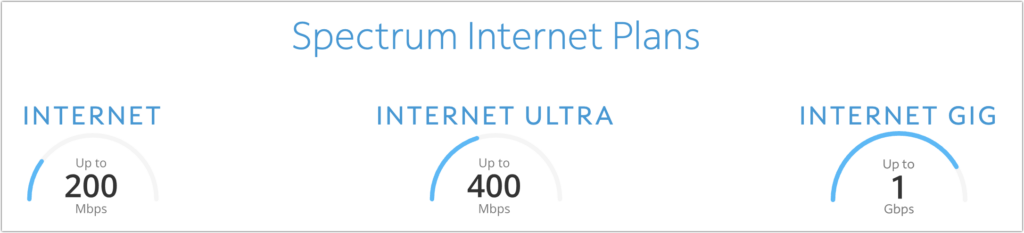
What should these numbers be? When you signed up for a plan with your Internet service provider (ISP), you should have been quoted download and upload numbers, such as 200 Mbps down and 10 Mbps up. If you don’t know what those numbers should be, ask your ISP. It’s not uncommon for download and upload speeds to vary somewhat from what you were promised, but they should generally be close.
Latency is trickier, and ISPs won’t promise anything specific. The lower the latency number, the better. Speedtest suggests that times under 59 milliseconds are good for gaming, times between 60 and 129 milliseconds are acceptable, a range of 130–199 milliseconds is problematic, and 200-plus milliseconds won’t be usable. There’s no way to know what latency numbers might cause other problems, but we’d pay attention to anything over 100 milliseconds.
Let’s assume your numbers aren’t what they should be—or at least what you’d like them to be. Don’t complain to your ISP right away. Instead, try these steps:
- Run the test a few more times, preferably at different times of the day. (If you create an account with Speedtest, it will track your tests so you can see how they change.) You may discover that performance is slow only during peak usage hours.
- Run more tests using different Speedtest servers or even different testing services. You’re testing the performance between you and a particular server, and it’s possible that server is having problems that others won’t share.
- If you have other devices, run tests from those as well. Don’t assume you’ll get identical results because different devices may have varying capabilities. If you notice differences between devices that use Wi-Fi and those connected via Ethernet, that might point to your Wi-Fi router as a bottleneck. That’s not common with modern Wi-Fi routers, but if you’re still relying on an old AirPort Express, it could be slowing you down.
- Restart your devices, and if that doesn’t make a difference, restart or power cycle your router and modem as well.
If your performance problems persist through all those troubleshooting tests, the problem is likely in the physical connection, and only your ISP can address that. When you call, be sure to share the testing numbers and any commonalities—times of day, for instance—that you observed. With luck, they’ll be able to confirm your issues and dispatch a technician to evaluate the physical connection for problems.
(Featured image by iStock.com/gorodenkoff)