Need to Share Files Securely? Try Password-Protected ZIP Archives
Imagine you’re staring at a file or folder—perhaps confidential employee information that you need to send to your accountant. If attaching it to an email message makes you think, “That doesn’t seem like a good idea,” award yourself a gold star!
Sending sensitive files via email is a bad idea, partly because the email could be intercepted in transit (possible but highly unlikely), but more because the files then live in both your and your recipient’s email accounts in an unprotected form. If an attacker were to gain access to either of your email accounts, they might scan for patterns like credit card numbers, ID numbers, phone numbers, and postal addresses and find them even in attachments.
There are ways of encrypting email messages so they can be read only by the recipient and never exist in an unencrypted form other than while being created or read, but they’re difficult to set up and fussy to use. For most people, most of the time, encrypted email is overkill.
For a more straightforward solution to exchanging information securely via email, use password-protected and encrypted ZIP archives. They’re easy to create on the Mac, either using a simple command in Terminal or with a third-party utility. And better yet, any Mac user can expand them using the built-in Archive Utility simply by double-clicking and entering the necessary password.
Create Encrypted ZIP Archive Using Terminal
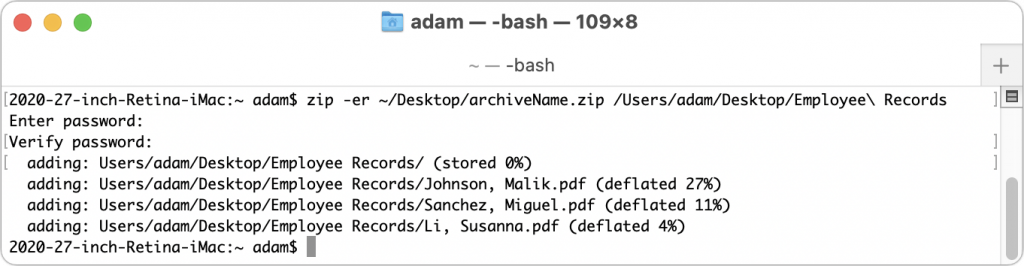
Although many Mac users are intimidated by using the Unix command line in Terminal, making an encrypted ZIP archive is easy enough for anyone. All it takes is typing a single command, dragging a file or folder to Terminal, and entering a password twice. Follow these steps, which make an encrypted ZIP archive on your Desktop:
- In your Applications folder, open the Utilities folder and double-click Terminal to launch it.
- Type (or copy and paste) this command, replacing “archiveName” with whatever you want to name the ZIP file and making sure to type a space after the last letter—the “p” in “zip”. (The tilde ~ character is Shift-backtick, and it’s the key to the left of the numeral 1 key.)
zip -er ~/Desktop/archiveName.zip
- Drag the file or folder you want to protect into the Terminal window to complete the command.
- Press Return, and when prompted, enter the desired password twice—the second time is for confirmation.
Create Encrypted ZIP Archive Using Archiver
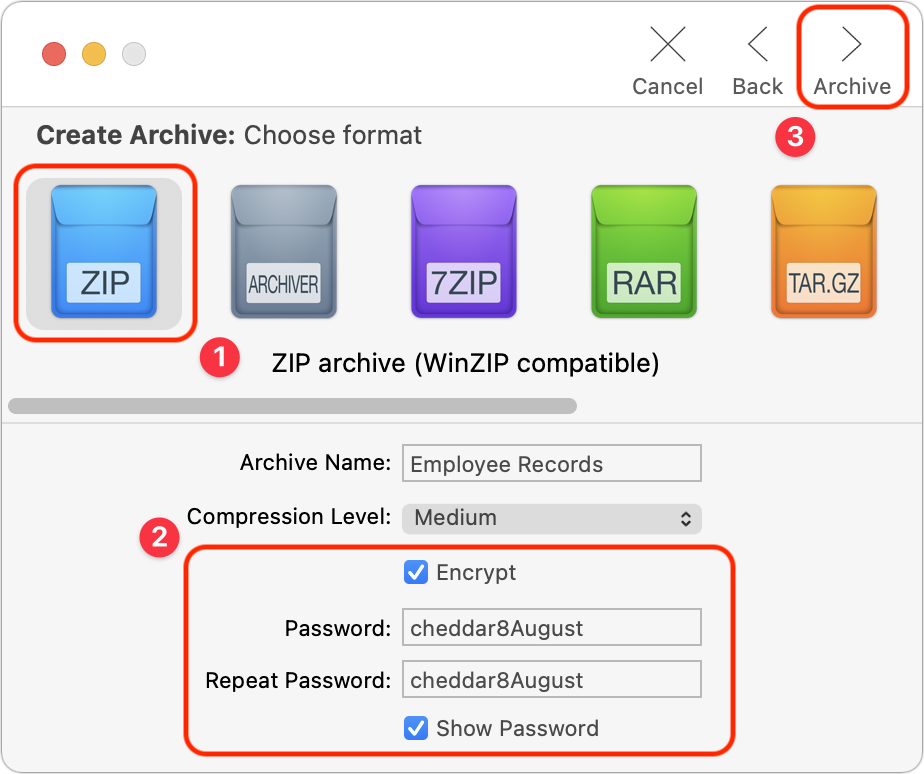
If you have trouble with the command-line method or plan to create encrypted ZIP archives regularly, it’s worth using a Mac app that simplifies the process even more. There are various apps, but a particularly straightforward one for those running macOS 11 Big Sur is Archiver ($19.99, with a free trial). Download it and then follow these steps to create an encrypted ZIP archive:
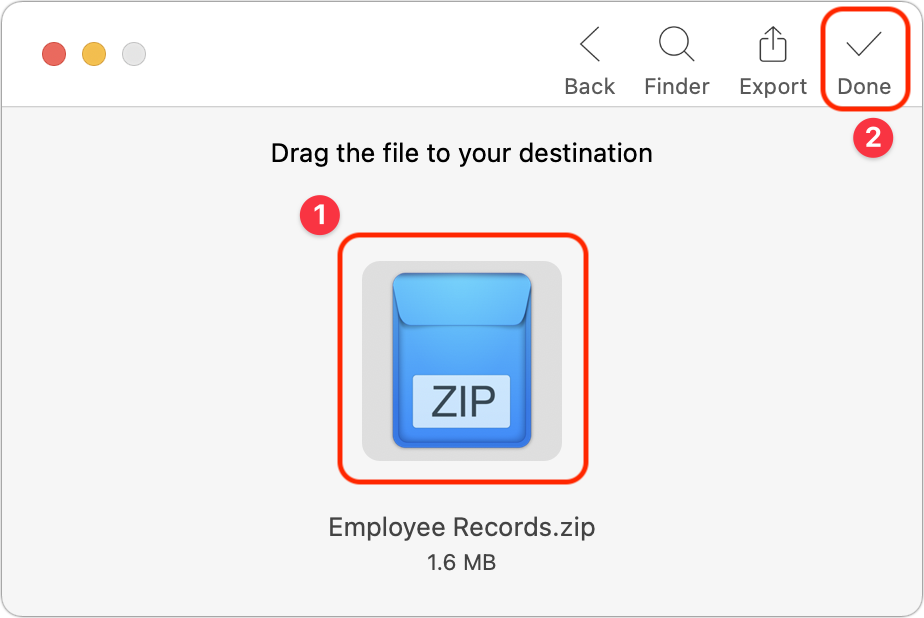
- Launch Archiver.
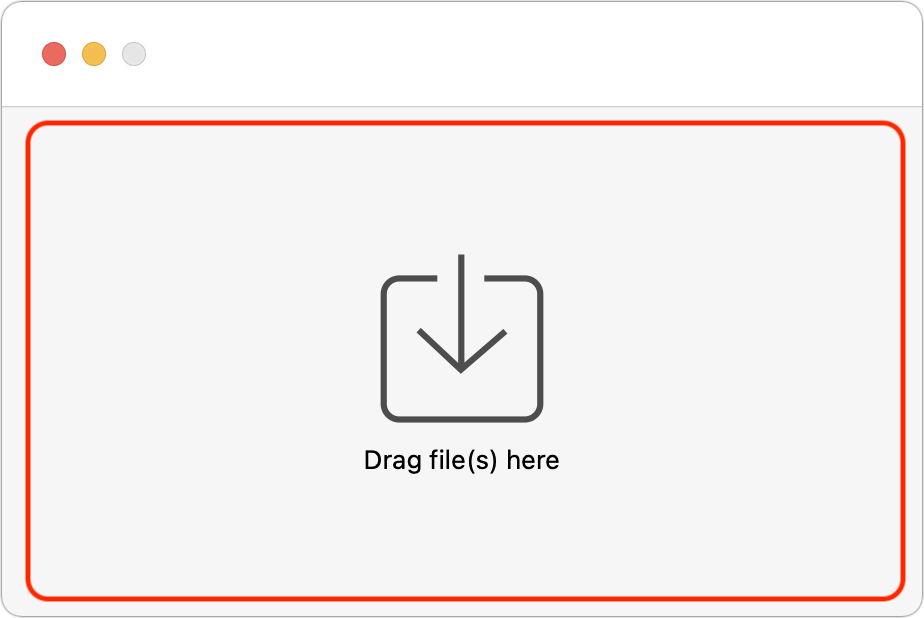
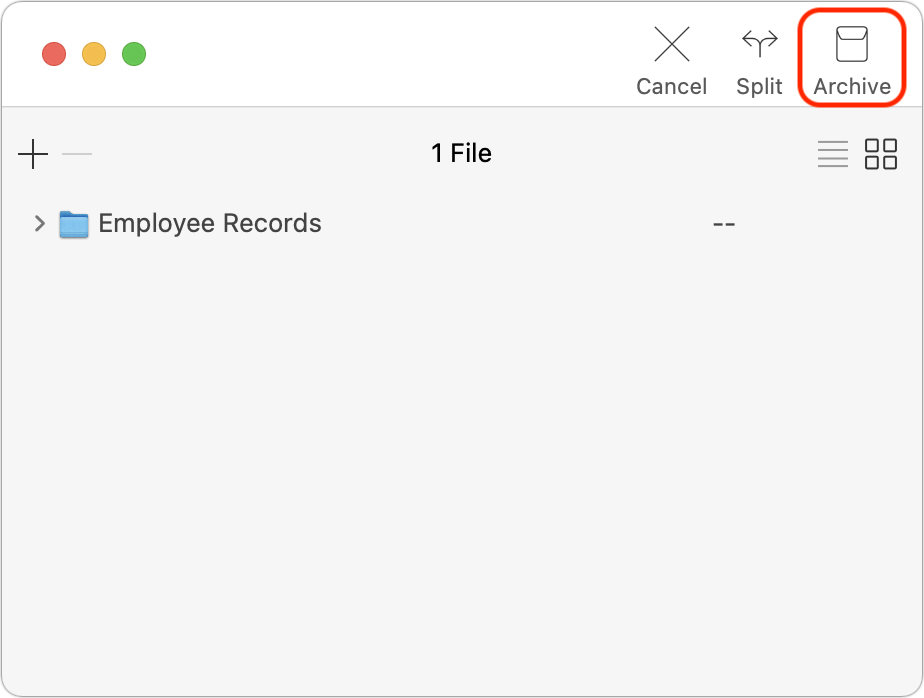
- Drag a file or folder to the Archiver window and click the Archive button in the toolbar.
- Select the archive format (use ZIP), click the Encrypt checkbox, enter the password twice, and click the Archive button in the toolbar.
- Drag the ZIP archive to the Desktop or another folder and click the Done button.
Decrypting a ZIP Archive
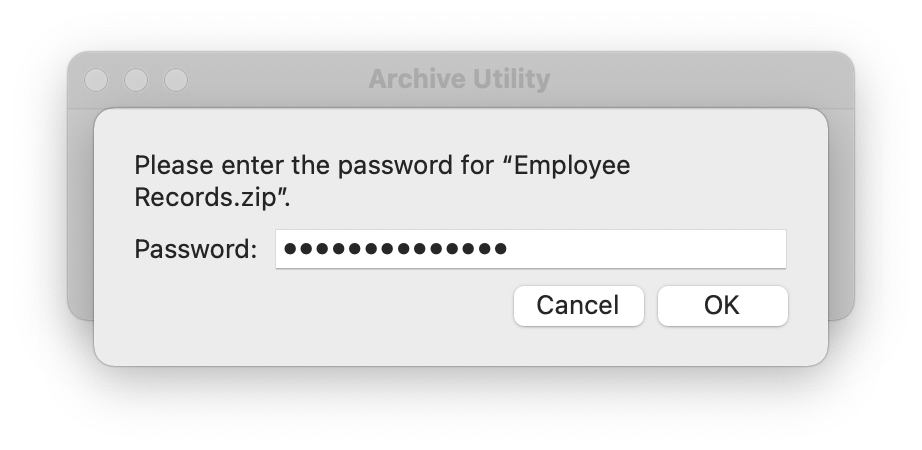
As noted earlier, decrypting a password-protected ZIP archive on the Mac is as simple as double-clicking it and entering the password when prompted.
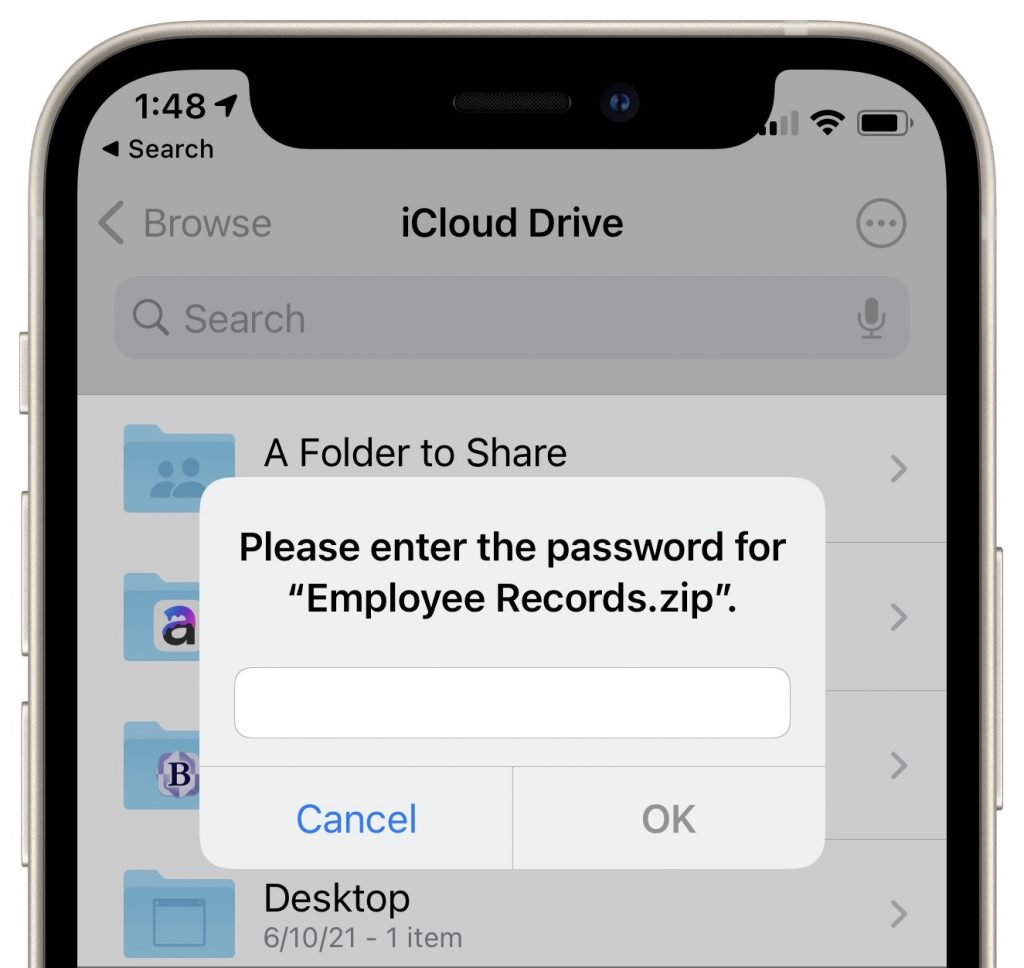
What about iOS or iPadOS? Never fear, since the Files app can also decrypt ZIP archives; just tap the archive to open it and enter the password when prompted.
A Word about Passwords
It’s important to think briefly about how you’re going to communicate the password to your recipient. Don’t send it in email or else anyone who compromises either your email account or your recipient’s account could decrypt the ZIP archive.
Instead, use what’s called an “out of band” communication channel. In other words, if you’re going to send the ZIP archive via email, communicate the password in a phone call or text message. That would keep the password safe if either of your email accounts were compromised.
If you’re sending password-protected ZIP archives to a particular person regularly (and the files don’t contain state or corporate secrets), you could agree on a system for generating passwords so you don’t have to communicate each one individually. For instance, you could combine a random word and the current month, so the password would be “cheddar9September” one month and “cheddar10October” the next.
As you can see, you can use this technique with so little extra effort that it’s worth ensuring a higher level of security whenever you need to share confidential information.
(Featured image by iStock.com/brijith vijayan)