What You Need to Know about Face ID on the iPhone X
Apple’s new iPhone X does away with the Home button, which has been a fixture since the original iPhone and has long served as the Touch ID sensor. To replace Touch ID, Apple developed a new facial recognition technology called Face ID. With Face ID, the iPhone X scans your face to authenticate you instead of using your fingerprint. It is truly amazing technology, but we’ve been getting questions that we’d like to answer here. If you have others, get in touch!
How does Face ID work?
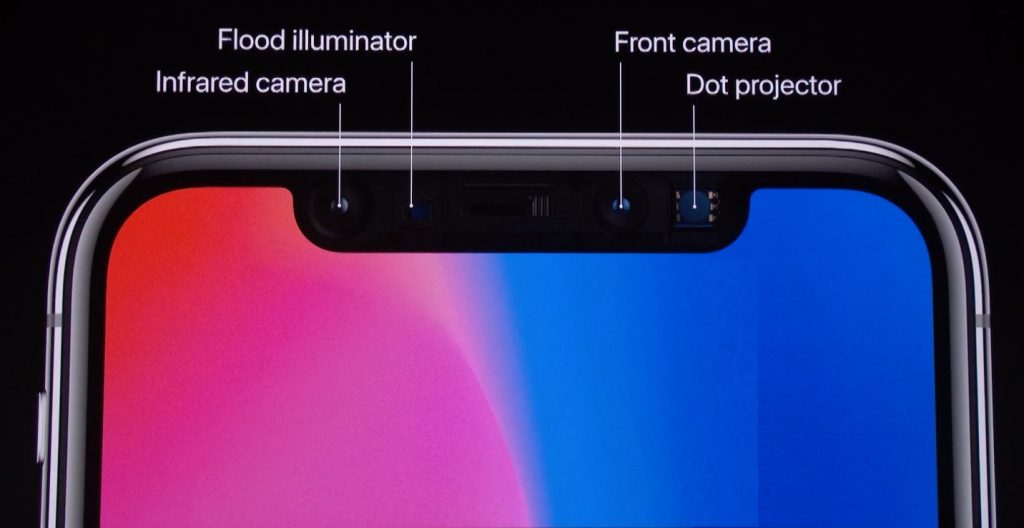
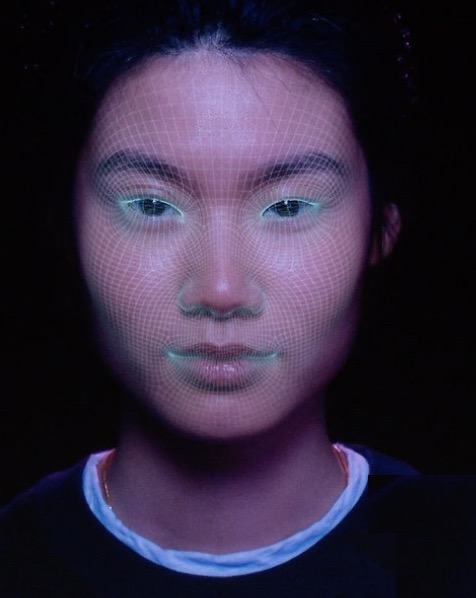
Magic. Well, close. As science fiction author Arthur C. Clarke said, “Any sufficiently advanced technology is indistinguishable from magic.” Face ID is cutting-edge technology that uses Apple’s TrueDepth camera system to project over 30,000 invisible dots onto your face. Then it illuminates your face with infrared light and takes an infrared image. Finally, it translates that image into facial recognition data that’s encrypted and stored within the iPhone’s Secure Enclave (the data never leaves your iPhone).
Face ID updates its mathematical representation of your face over time to keep up with how your appearance changes.
 How secure is Face ID?
Extremely. Apple claims that Touch ID’s false positive rate—the number of people who would have to try logging in to your iPhone before someone would succeed randomly—is 1 in 50,000. In contrast, Apple says that Face ID’s false positive rate is 1 in 1,000,000. It can’t be fooled by a picture or a simple mask, although a high-enough quality 3D reproduction of your face might get past it, just as a sufficiently good cast of your fingerprint could fool Touch ID.
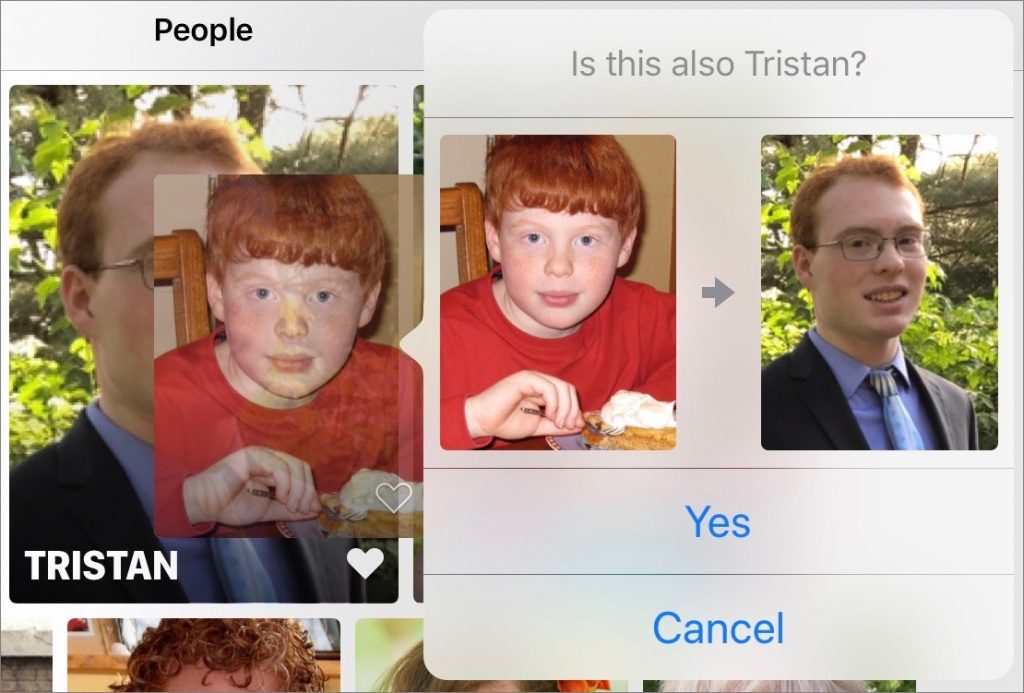
However, Face ID has trouble distinguishing between identical twins and siblings who have nearly identical features. So if you have an evil twin, stick to a Touch ID-based iPhone or your passcode! The probability of an incorrect match is also higher with children under 13, since their facial features haven’t become sufficiently distinct yet.
By default, Face ID works only when you look at the iPhone X—it can’t be unlocked by your face when you’re sleeping.
How fast is Face ID?
Not quite as fast as Touch ID in current iPhones, but fast enough that you likely won’t notice. When you pick up your iPhone X so you can look at it, Face ID will, in most cases, have already recognized you.
This quick recognition is possible in part because the iPhone X can start scanning early, thanks to iOS’s Raise to Wake feature and a new Tap to Wake feature that automatically wakes the iPhone X when you touch the screen.
What if Face ID doesn’t work?
First off, things like wearing a hat, scarf, or glasses won’t confuse Face ID, nor will growing or shaving a beard. Thanks to that infrared camera, it even works in complete darkness. However, Face ID does fail occasionally. One reason for a Face ID failure is holding the iPhone X too close to your face—this is easy to do accidently if you’re nearsighted and not wearing your glasses. (Some sunglasses prevent Face ID from seeing your eyes, but you can work around that problem by disabling Require Attention for Face ID in Settings > Face ID & Passcode.)
To make Face ID retry a facial scan, hold the iPhone X at a normal viewing distance, tilt it away from you, and then tilt it back to your normal viewing position. If that doesn’t work, or if you want to let someone else use your iPhone, enter the passcode. Entering the passcode is always an option.
Alas, unlike Touch ID, which let you enroll up to five fingers (so family members could unlock your iPhone without using the passcode), Face ID lets you have only a single face.
Can I use Face ID for anything besides unlocking?
Yes, Face ID completely replaces Touch ID, so you can use it to authenticate when you’re using Apple Pay, or the App Store or iTunes Store. Plus, apps that previously relied on Touch ID, such as the 1Password or LastPass password managers, will automatically use Face ID instead.
We hope Apple can make the hardware necessary for Face ID cheaply enough to bring it to other devices as well. Wouldn’t it be nice if you could walk up to your Mac and have it automatically unlock because it had recognized your face?