Audiovisual Tips for Better Videoconferencing
Whether for work or socializing, we’re all spending a lot more time in video calls these days. But—surprise!—it turns out that many of our group video calls could be more pleasant, less embarrassing, and overall better if we follow a few basic audiovisual tips.
Make Sure You Have Decent Lighting
Natural light is best, but room light is generally fine too, especially if it’s coming from the side. Overhead light isn’t quite as flattering, but whatever you do, avoid light that comes from underneath your face or you’ll look like an old-time movie villain. Also, avoid sitting in front of a window because the bright light behind you will make you look way too dark. Pull a shade or try to put your computer against the window so the light hits your face instead.
Arrange for a Decent Background
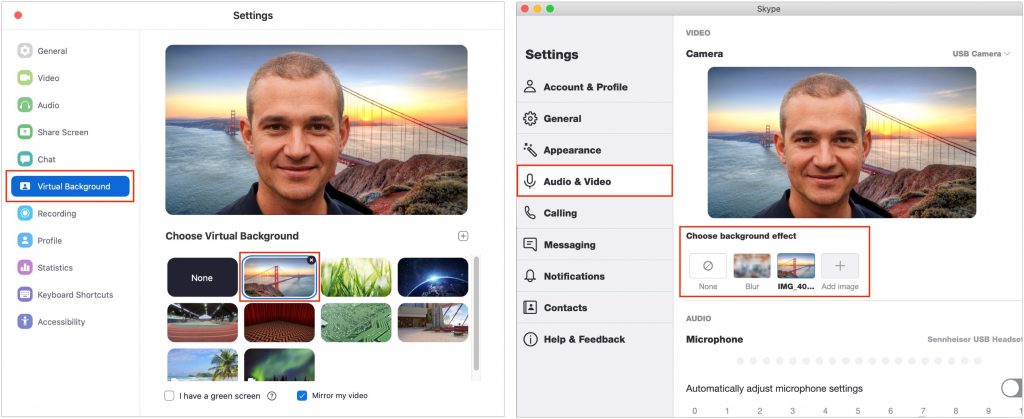
You may not have many choices for where your computer is located, and thus for what’s behind you when you’re on a video call. If you’re using Zoom or Skype, you can employ a virtual background (pick one that’s appropriate for the context, and for goodness sake, don’t use an animated background). Otherwise, make sure that what’s behind you is tidy and wouldn’t embarrass you if the people on the call were to visit in person. Or, take it up a level and put a pleasing arrangement of art or photos on the wall behind you. Even if they are too small to be seen well, they will break up a monotonous blank wall.
Wear Appropriate Clothing
Yes, it’s tempting to schlub around all day in pajamas or ratty old sweats. Resist the urge and wear the same type of clothes you’d put on if you were meeting with these people in person. That includes pants—if you get up in the middle of the call without thinking, you don’t want to advertise your taste in boxers. You don’t want your boss and colleagues to have a mental image of you as a total slob. For bonus points, avoid tops that are bright white, black, or have distracting patterns.
Think Like a Movie Director
Particularly if you need to use a phone, tablet, or laptop to participate in a video call, think about your camera angles. It’s best to have the camera at roughly the same height as your face, if possible, so if you can avoid it, don’t put your laptop in your lap or hold your phone at your waist. And if you’re using a phone, don’t walk around such that the changing background distracts everyone else.
And Like a Movie Star
It’s sometimes hard to remember that everyone can see you even though they’re not in the room, but you’ll come off as more alert, confident, and engaged if you sit up straight, get close enough to the camera so your face fills the screen, and smile. Seriously, you’re on Candid Camera, so act like it. You’ll almost always have a thumbnail that shows what you look like, so make sure you like what you see. Oh, and don’t touch your face repeatedly.
Look at the Camera, Not the Other Participants
This one is tough. The camera is usually at the top center of your screen, so if you look anywhere else, it seems like you’re avoiding eye contact. It can make you look shifty or inattentive. But it’s hard not to look at the other people or at your own video thumbnail. The best trick is to resize and position your video window so the person you’re most likely to look at is right under the camera.
Pay Attention and Don’t Multitask
Look, we get it—a lot of meetings are boring. But it’s both rude and distracting to the speakers if you are clearly doing something else or worse, leaving and coming back. Focus on the screen, and show that you’re paying attention by nodding your head, smiling, and all the other little things you’d do if the meeting were taking place in person. If you truly can’t stay engaged, turn off your audio and video so no one has to see and hear you. If you need an excuse for that, say that your Internet connection is being a little wonky, so you want to cut down on bandwidth usage.
Mute Your Mic When Not Talking
The more people on a call, the more important this tip is. All videoconferencing apps have a Mute button you can click so others in the call aren’t distracted by you coughing or sneezing, your children playing in the other room, or other extraneous noise. Just remember to unmute before you start talking. It’s hard to remember at first, but you’ll get good at it.
All this may seem like a lot to think about, but once you get your environment set up properly, you’ll be a bright spot in the video grid at your regular meetings. And then maybe you can forward this article to your family, friends, and colleagues so they can up their video game too.
(Featured image by Marcus Aurelius from Pexels)


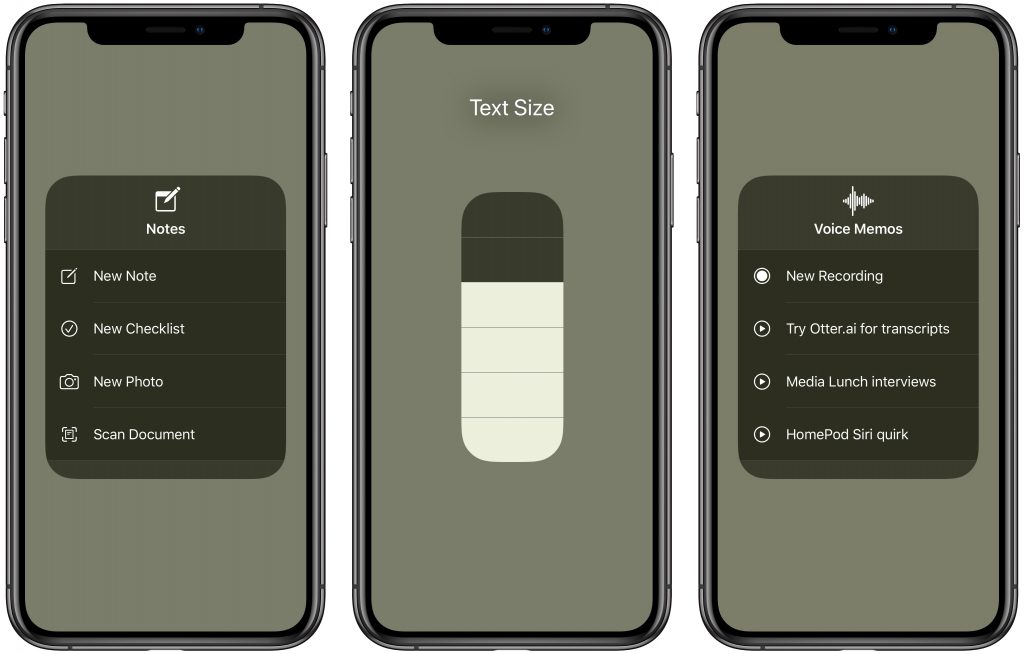
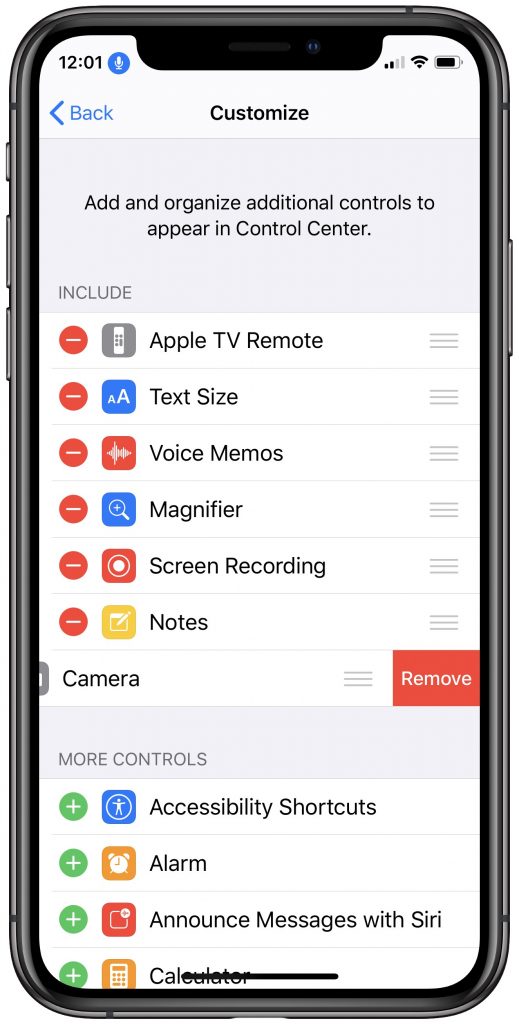 To change which buttons are available in Control Center, go to Settings > Control Center > Customize Controls. The Customize screen is split into two sections: Include lists controls that are showing in Control Center, and More Controls contains inactive controls you can add.