Web Ads: Making the Best of a Lose-Lose Scenario

Typically, we like to help you solve problems in these articles. But there’s one problem we all face that has no good solution: ads on Web pages. Let us explain the background, after which you can decide how you want to proceed.

Put simply, advertising is the economic engine of the Web. Google and Facebook make billions and billions of dollars every quarter, almost entirely on advertising. Publications ranging from the New York Times to your local newspaper rely on online ads for significant portions of their revenue. (Historically, newspapers made a lot of money on classified ads, a business taken over by Craigslist.) On the other side of the equation, large and small businesses alike depend on ads to get the word out about their products and services.

The downside? We have to put up with ads slowing down page loads, distracting us from what we’re reading, getting in the way of videos, and more. The ads have gotten so bad on food blogs that someone built the JustTheRecipe site to strip out the cruft and display only recipe ingredients and instructions. Worse, the ad companies try to track your every move so ads can follow you from site to site and attempt to sell you products based on where you’ve been.

Plus, most publishers and advertisers aren’t all that happy with ads. A typical click-through rate is about 0.1%, which means only about 1 in 1000 people who see an ad will click it, and the percentage who buy after that is far lower yet. Publishers need to attract as many eyeballs as possible to deliver those clicks, so they’re more likely to write controversial headlines and try to trick you into reading as many pages as possible. Plus, advertisers are constantly trying to make their ads stand out with in-your-face designs and annoying animations. (Please, no more “one weird trick” clickbait ads!) What’s an ordinary person to do?

Tech companies who aren’t beholden to advertising have responded to the infestation of Web ads by introducing blocking technologies. Apple has built privacy features into Safari to prevent advertising companies from tracking you. Brave Software has created Brave, a new Web browser that automatically blocks ads and trackers. And numerous ad-blocking extensions work with these and other Web browsers, including Firefox and Google Chrome. The best-known of these browser extensions are AdBlock, Adblock Plus, Ghostery, and the open-source uBlock Origin (the last two work only with Chrome and Firefox).

So should you use one of these approaches to blocking ads? On the plus side, you will see far fewer ads, Web pages will load faster, and you won’t be creeped out by ads that follow you around the Web like digital zombies.

However, if you block ads, you aren’t supporting the publications whose work you’re consuming, and some publications won’t let you read anything until you disable your ad blocker. Even worse, a non-trivial number of websites won’t work correctly when you have an ad blocker installed. That’s because sites often embed content onto their pages using the same techniques as ads. We recently saw an exercise equipment site whose pages of instructional videos were mostly empty and largely incomprehensible due to our ad blocker preventing the embedded videos from appearing. Disabling the ad blocker on that site allowed them to load, but it took us a few minutes to realize what was going on. In more subtle situations, you may never realize.

You can see why we say this is a lose-lose scenario. Either you allow ads to load and put up with cluttered Web pages and privacy-abusing ad trackers, or you block the ads, which hurts publications and can break Web pages.

At the moment, we come down on the side of blocking ads, supporting the publications you love through subscriptions, and realizing that you may need to disable your ad blocker if a Web page doesn’t seem to be working correctly or displaying the desired content. One easy way of testing sites with problems is simply to load them in a different Web browser that doesn’t have an ad blocker installed.

If you need help choosing or configuring an ad blocker, get in touch!

(Featured image by Jose Francisco Fernandez Saura from Pexels)

PostScript Type 1 Fonts Losing Support This Year—Here’s What to Do

For you graphic designers out there, Adobe has announced that it will be ending support for PostScript Type 1 fonts starting with Photoshop in 2021. All Adobe apps will stop allowing users to author content using Type 1 fonts beginning January 2023.

This announcement shouldn’t come as a surprise. Adobe introduced Type 1 fonts at the dawn of the Macintosh age back in 1984, started collaborating with Microsoft on the more versatile OpenType fonts in 1996, and stopped developing Type 1 fonts in 1999. Although some operating systems still support Type 1 fonts, Web browsers and mobile operating systems don’t. Worse, Type 1 fonts don’t support Unicode, limiting their ability to support extended language character sets.

However, Mac users whose careers stretch back to the 1990s and earlier likely still have Type 1 fonts kicking around—who would toss a Type 1 font that worked perfectly well? Now’s the time to think about dealing with those ancient fonts.

First, however, it’s worth a quick trip to Font Book (or whatever font utility you use) to determine which of your fonts are Type 1 fonts. You can do this easily in Font Book by creating a smart collection that selects fonts by kind:

  1. Launch Font Book from your Applications folder.
  2. Choose File > New Smart Collection to open the Smart Collection dialog.
  3. Give the collection a name, like “PostScript Type 1.”
  4. Choose All from the first pop-up menu.
  5. From the criteria pop-up menu, choose Kind and complete the search by choosing “is” from the second menu and PostScript from the third menu.
  6. Click OK to save your smart collection.

Once you have a sense of which of your fonts will be impacted by this change, you have three options. You can just delete them and move on, replace them with modern OpenType fonts, or convert them to OpenType.

Delete Type 1 Fonts

Although it would seem like Font Book should let you delete fonts directly, when you Control-click a font, the Remove command may be dimmed out. If that’s the case, choose Show in Finder instead.

That opens a new Finder window with the font files selected. In all likelihood, there will be other font support files in there as well, so make sure you don’t need to keep anything before tossing it all in the trash.

If you’re more cautious, don’t trash those files immediately. Instead, temporarily sequester them in a special folder. This is just in case any old documents or older software on your Mac is using those font files. As you go about your weekly and monthly tasks, if you encounter a problem with a missing font, you may wish to reinstall that font until you can find a different solution.

Replace Type 1 Fonts

For a Type 1 font published by Adobe Type, the company says you can contact its partner Fontspring to receive a discount when upgrading the font to an OpenType version. For other Type 1 fonts, including those sold by Adobe, Adobe recommends contacting the font foundry to see if there’s a discounted upgrade path.

That may be easier said than done, given how old many of these are likely to be. However, you can start by looking at the font metadata to see who created the font or holds its trademark. Select a font in Font Book and click the i button in the toolbar. The Trademark metadata is a good place to look, and some fonts may have Manufacturer, Designer, or Copyright metadata that might provide contact information.

Convert Type 1 Fonts to OpenType

Finally, what should you do if you rely on specific Type 1 fonts and no OpenType versions are available? It might be possible to convert your fonts from Type 1 to OpenType. Although we haven’t tried it, Mike Rankin at CreativePro recommends TransType, which costs $97. It’s not cheap, but it may be your only alternative.

It’s impressive that PostScript Type 1 fonts have retained support for nearly 40 years—those who bought in early got an amazing run for their money. But it’s not unreasonable for Adobe and other tech companies to move on to OpenType, which is still going strong after 25 years, with its most recent update so far in November 2020.

(Featured image by Mr Cup / Fabien Barral on Unsplash)

Manage Your Apple Purchases and Subscriptions on the Mac and iPhone

Last quarter, Apple’s Services segment generated a whopping $15.8 billion in revenue, 14% of the company’s total—sales of apps, media, and subscriptions are a big deal to Apple. And if you’re like us, you’re probably now paying Apple for services like Apple Music, extra storage for iCloud Photos, various app purchases and subscriptions, and perhaps the new Apple Fitness+.

It’s a lot to keep track of, but particularly with subscriptions, it’s essential to stay on top of the charges and make sure you’re paying only for services you’re still using. Happily, Apple enables you to do that on both the Mac and the iPhone/iPad.

Review Your Purchase History

On a Mac running macOS 11 Big Sur or 10.15 Catalina, you can see your purchase history in the Music app. If you’re running an earlier version of macOS, you’ll use iTunes instead. In either app, choose Account > View My Account. Scroll down to Purchase History and click See All at the right.

In Purchase History, you’ll see every one of your purchases from Apple, whether it’s an app from the App Store, a book from Apple Books, or a subscription like Apple TV+ (even when it’s free). You can click the More link to the right of any purchase for a few additional details (in the screenshot below, these are showing for iCloud) or click the blue Order ID link for even more details. Also hidden inside the Order ID information for any item you paid for is a Resend link that sends you another email copy of the invoice for that purchase.

On an iPhone or iPad, navigate to Settings > Your Name > Media & Purchases > View Account > Purchase History (you’ll need to scroll down for the last one). The Purchase History screen shows the same information as on the Mac, and you can tap the Total Billed line under each item for the equivalent of the Order ID details, complete with a button for resending the email invoice.

Apart from merely displaying your purchases, the Purchase History screen can raise two other questions:

  • Why isn’t an item I purchased showing up? The main reason why this happens is if the purchase was made with a different Apple ID. If you have two or more Apple IDs, that could explain it, or if you’re participating in Family Sharing, a family member might have made the purchase. In either case, you must sign in with the appropriate Apple ID to see the purchase.
  • What are these purchases that I don’t recognize? The most likely explanation is that someone in your Family Sharing group made a purchase without telling you. You can turn on Ask to Buy if you have children in your family. If you’ve shared your Apple ID and password with someone else (never do that!) who has bought items without your knowledge, we recommend changing your Apple ID password immediately. If you still can’t figure it out, contact Apple Support.

Manage Subscriptions

For the most part, app, book, and other purchases aren’t that expensive, but subscription fees can add up quickly. We recommend checking your subscriptions periodically to make sure they’re all still relevant and canceling any that aren’t. Here’s how.

On the Mac, you can manage your subscriptions in the Music app in Big Sur or Catalina, though Apple recommends the App Store app. In the App Store app, click your name or picture in the lower-left corner and then click View Information at the upper right. In the window that appears, scroll down to Manage and click the Manage link to the right of Subscriptions.

Next, you’re shown a list of all your active and expired subscriptions.

To see more details about a subscription, click Edit to the right of the subscription’s listing. You can now change your billing period using the radio buttons and cancel the subscription by clicking Cancel Subscription.

On an iPhone or iPad, it’s a little more straightforward. Tap Settings > Your Name > Subscriptions to see a list of all your subscriptions. Tap one of them to change the billing frequency or cancel it.

Although it’s easier to manage subscriptions on a Mac, iPhone, or iPad, you can also cancel subscriptions from the Apple Watch or Apple TV. Here’s what to do:

  • On the Apple Watch, open the App Store app, scroll to Account and tap it, tap Subscriptions, tap the desired subscription, and tap Cancel Subscription.
  • On the Apple TV, you can see subscriptions only for installed tvOS apps, and thus only for the Apple TV HD and Apple TV 4K. (For the third-generation Apple TV, use a Mac, iPhone, or iPad to manage subscriptions.) Open Settings, select Users & Accounts, select your account, select Subscriptions, choose the desired subscription, and select Cancel Subscription.

Finally, what if you don’t see the subscription you want to cancel? There are a few possibilities:

We hope this article has shed some light on purchases and subscriptions you make through various Apple online stores.

(Featured image by Tim Gouw on Unsplash)

Keep iPhone 12 and MagSafe Accessories Away from Pacemakers

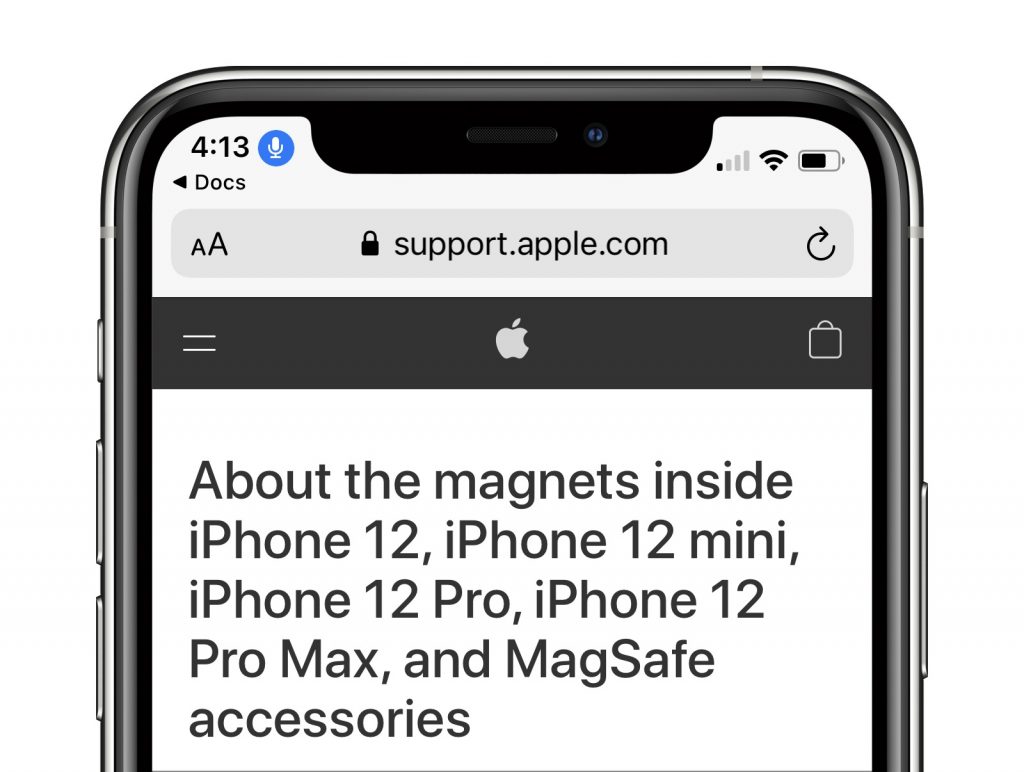
Remember when we had to keep magnets away from floppy disks to avoid scrambling them? Modern storage is no longer vulnerable, but magnets and electromagnetic fields from consumer electronics can interfere with medical devices, like implanted pacemakers and defibrillators. Although iPhone 12 models contain more magnets than prior models, Apple says they’re not expected to pose a greater risk of magnetic interference. However, after a study found that one pacemaker could be deactivated by holding an iPhone 12 near it, Apple issued a support document recommending that you keep your iPhone 12 and MagSafe accessories more than 6 inches (15 cm) away from your medical device or more than 12 inches (30 cm) away while wirelessly charging. Better safe than sorry—if you have a pacemaker, don’t put your iPhone or any other consumer electronics in a breast pocket.

(Featured image by Ulrike Leone from Pixabay)

Reclaim Local Storage Space by Removing iCloud Drive Downloads

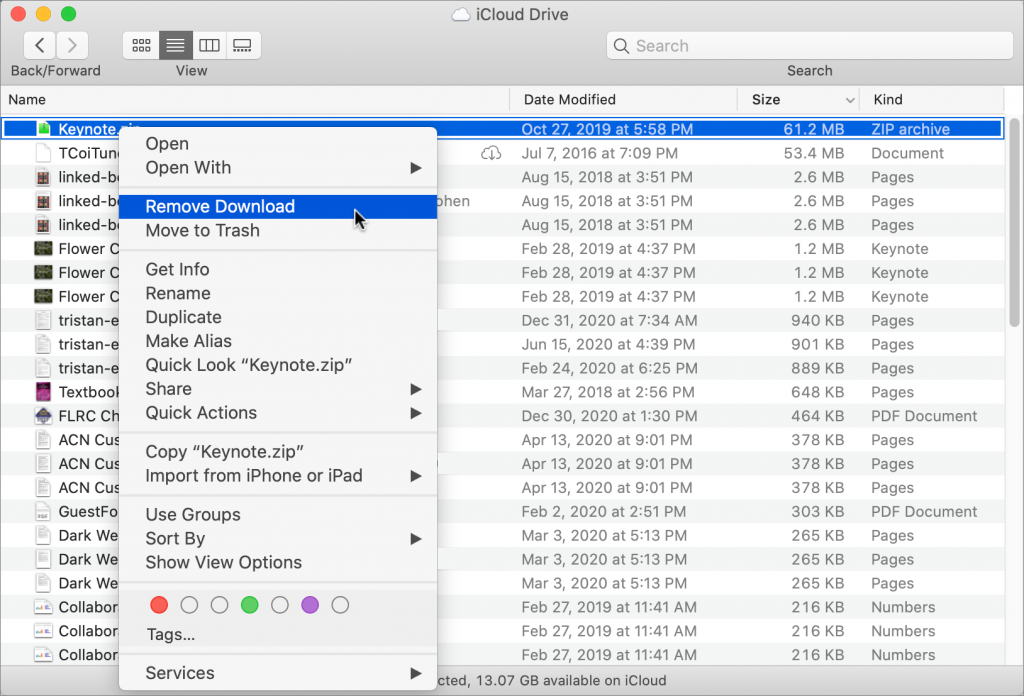
With iCloud Drive, Apple provides an Optimize Mac Storage checkbox that, when checked, stores the full contents of iCloud Drive on the Mac only if there’s enough space. However, you may wish to recover local storage space without selecting that option—luckily, that’s easy to do. Open iCloud Drive in the Finder, Control-click a file, and choose Remove Download. The file remains in iCloud Drive, and if you need it locally, you can click the cloud icon next to its name to download it. If you’re not sure which files in the iCloud Drive window occupy the most space, choose View > As List, and then click the Size column so the largest files sort to the top (click again if they’re sorting to the bottom).

(Featured image based on originals by Denny Müller on Unsplash and Mahir Uysal on Unsplash)