After years of user requests, Apple has finally beefed up Messages with a few welcome features—options to mark conversations as unread for later reference, edit messages after they’ve been sent, and undo sending entirely. Plus, when you delete junk texts in Messages, you can now report them to Apple and your carrier, and you can find inadvertently deleted conversations in Recently Deleted. Finally, there’s a Tapback improvement for SMS messages to Android users.
Before we begin, beware that editing messages and Undo Send work the way you expect only if your recipient is also using iMessage (blue bubble friends) with iOS 16 (or iPadOS 16 or macOS 13 Ventura, once those come out later in 2022). Instead of an edited message, a device running any other operating system will display a second message with the edited text. An unsent message can’t be called back from a recipient not running iOS 16—it will remain in the conversation with no indication that you tried to unsend it.
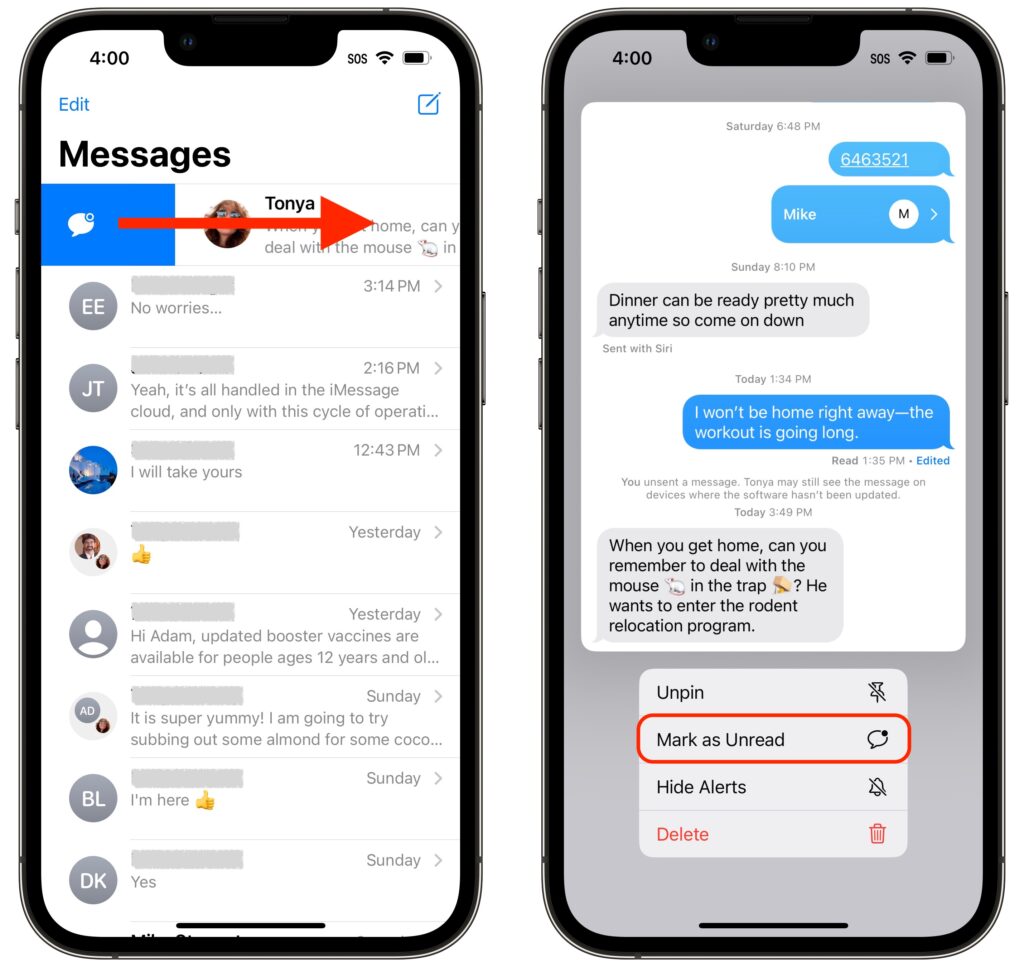
Mark as Unread
There are two types of people in the world: those who use red icon badges as reminders and those who ignore them entirely. The same applies to the blue dots that appear next to conversations in Messages to indicate unread posts. If an icon badge or blue dot is your nudge to do something, you’ll like Messages’ new capability to mark messages as unread. That way, if you receive a message while you’re busy, you can pretend that you haven’t read it so the red icon badge and blue dot remind you to deal with the message later.
Note that Mark as Unread works at the conversation level, not the message level. To mark a conversation as unread after looking at it, return to the message list and swipe all the way right on the conversation. For a pinned conversation, press and hold the conversation and tap Mark as Unread.
Edit Messages
We’ve all been the victims of auto-correct or dictation errors that render a message embarrassing, confusing, or inexplicable. With Messages in iOS 16, you can fix such errors within 15 minutes after sending, and if necessary, you can do it up to five times.
To edit a message during that 15-minute window, press and hold the message, then tap Edit. Your message opens for editing. Make your changes and then tap the blue checkmark; if you change your mind, tap the gray X.
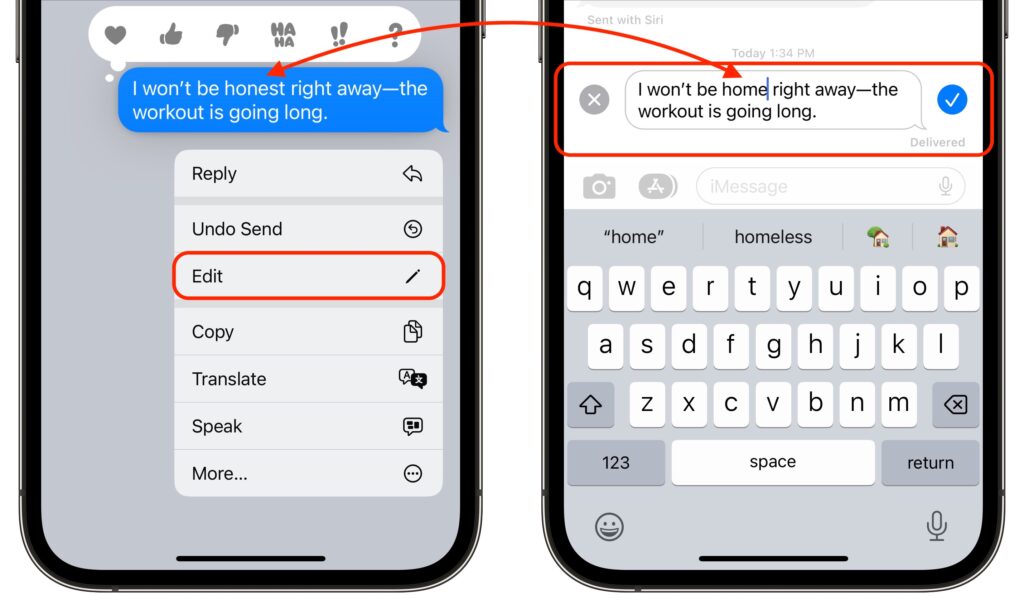
It’s important to note, however, that the recipient could have seen the message before you edited it, and even if they didn’t, such messages are marked with Edited in the conversation. If they tap Edited, they can see previous versions of the message. In other words, you can fix mistakes, but you can’t pretend they never happened.

Undo Send
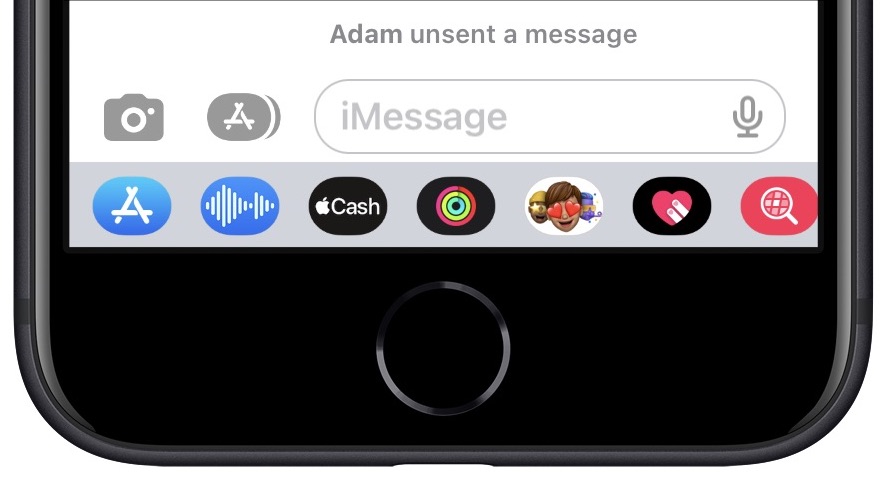
Have you ever sent something in Messages that you wanted to call back? We’ve certainly sent the right message to the wrong person and inadvertently sent gibberish with errant taps on the keyboard. With iOS 16, if you realize you’ve made such a mistake within 2 minutes, you can undo sending, which deletes the message from the recipient’s iPhone, replacing it with a message saying that you unsent it. However, if the recipient isn’t using an iPhone or has any Apple device logged into iMessage that’s not running iOS 16, iPadOS 16, or macOS 13 Ventura, the message will not be deleted on that device, with no indication that you tried to recall it.
To unsend a message within that 2-minute window, press and hold the message, then tap Undo Send. It disappears instantly, and you see a warning about it working only with compatible devices.
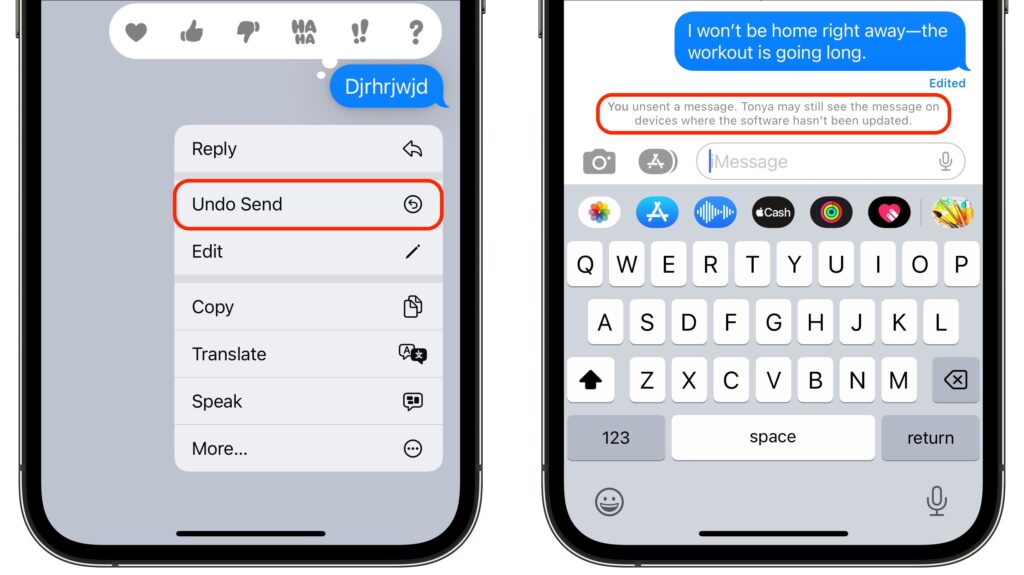
Meanwhile, even if the recipient is running iOS 16, they still could have read the message before you unsent it, and if they didn’t see it, they would still see a message saying that you unsent it. In short, you still need to think before you send!
Report Junk
There’s no way to know how effective reporting junk messages is in preventing future spam from that person or phone number, but it feels good. (We like to imagine an Apple satellite’s space laser vaporizing the offender’s phone.) If you get a junk text, either via iMessage (blue bubble) or SMS/MMS (green bubble), swipe all the way left on it. Then tap Delete in the prompt that appears, and Report Junk in the next one.

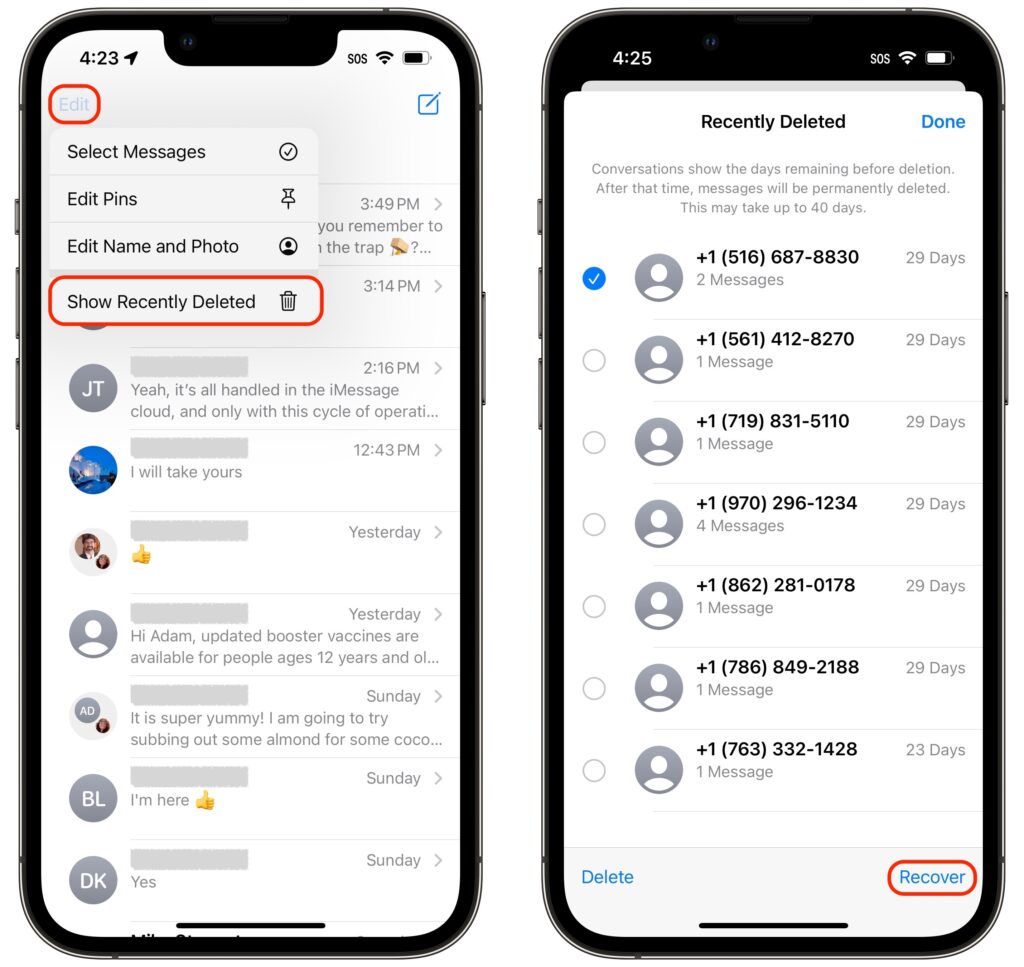
Recently Deleted
What if you inadvertently delete the wrong conversation or message? You can now access those for up to 30 days in Recently Deleted. Tap Edit in the upper-left corner, tap Show Recently Deleted, select the messages to restore, and tap Recover in the lower-right corner.
SMS Tapbacks on Android
Finally, Apple has tweaked Messages so you can use the Tapback feature (press and hold a message, and then tap one of the response icons above it) to send a corresponding emoji to messages sent by Android users with SMS. This small change helps to provide a consistent experience for both iPhone and Android users.

Although it’s too bad that message editing and Undo Send work only with other iOS 16 users, there’s no avoiding the need for support at both the system level (which eliminates SMS messages sent to non-iPhone users) and the app level (which eliminates older versions of Messages). Nevertheless, they and the other new Messages features are useful now and will become all the more so as more iPhone, iPad, and Mac users upgrade.
(Featured image by iStock.com/ViewApart)