Trash Files Instantly from the Keyboard

Every Mac user knows that you drag files or folders you want to delete to the Trash icon in the Dock. And you probably even know that you can select multiple items by Shift-clicking (for a sequential range of items in a list view) or Command-clicking (for an arbitrary set of items) and then drag them to the Trash. But you’ll save yourself mousing time if you learn the quick shortcut that trashes selected files and folders: Command-Delete.

The Fastest Way to Invoke Apple Pay

When it’s an option at a cash register, Apple Pay is faster, easier, and safer than using a credit card. But accessing it from the Wallet app is way too slow! Here’s the trick to pull up Apple Pay quickly. In Settings > Wallet & Apple Pay, under “Allow Access When Locked,” enable Double-Click Home Button. Then, when you want to pay in a checkout line, double-click the Home button from the Lock screen of your iPhone to bring up Wallet instantly. If you have trouble with your thumb unlocking the iPhone instead, use another finger that isn’t registered with Touch ID, and then use your thumb to authenticate once Apple Pay comes up.

The Quick Trick for Magnifying Your Mac’s Screen

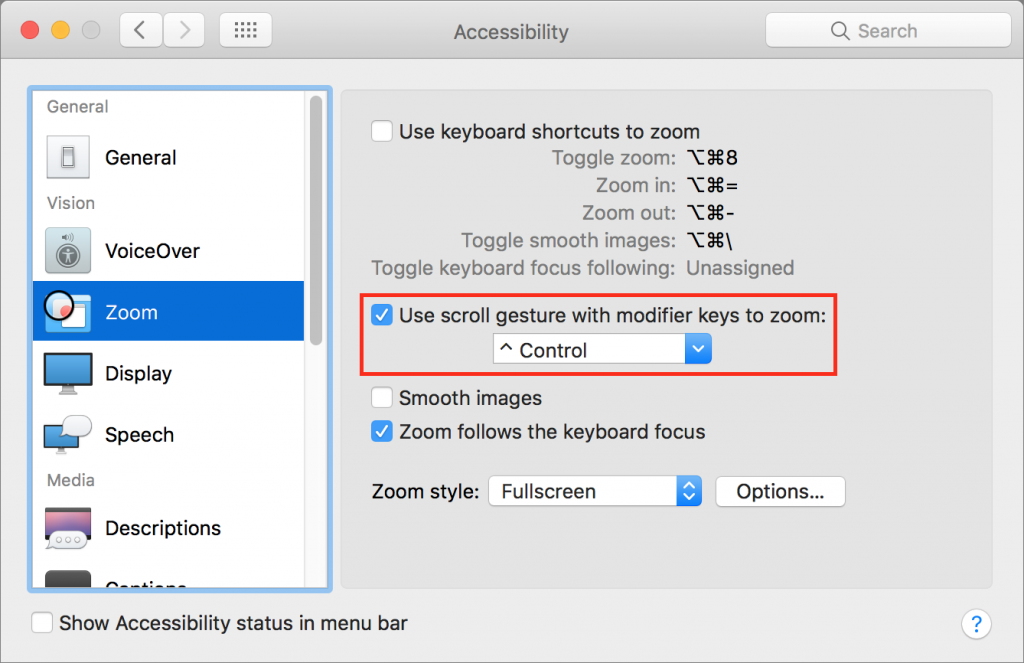
No matter how good your eyes are, at some point there will be something on your Mac’s screen that’s just too small to see well. With just a minute of setup, you can take advantage of a macOS feature that lets you zoom the screen right where the pointer is. Open System Preferences > Accessibility > Zoom, and select “Use scroll gesture with modifier keys to zoom.” Choose which modifier key you’d like from the pop-up menu—we like Control. From then on, when you want to zoom in, hold down the Control key and use the gesture you use to scroll, whether it’s a two-fingered swipe up on the trackpad or an old-style mouse’s scroll wheel. The screen will zoom where the pointer is—the more you scroll, the higher the zoom level. To zoom back out, hold Control and scroll down.

Don’t Get Burned by Bad Cables… Literally!

It can be hard to ante up for a quality Lightning or USB-C cable when just a little searching reveals cables that cost only a couple of bucks each. “Surely,” you might think, “the cheap cables might not be as good, but so what if they wear out sooner?”

Points for frugality, but this is one place you don’t want to skimp too far. With some types of cables, the worst that could happen is that the cable would stop working. But with any cable that carries power, like Lightning cables for iOS devices, a short could cause sparks, smoke, and even a fire. This isn’t a crazy concern: there have been numerous reports over the years of fires started by charging smartphones, both iPhones and models from other manufacturers. Apple even has a page that helps you identify counterfeit or uncertified Lightning cables.

If you have a MacBook or MacBook Pro with USB-C ports, fire hasn’t been an issue, but bad cables have been. In 2015 and 2016, Benson Leung, an engineer at Google, made it his mission to identify out-of-spec USB-C cables after a bad USB-C cable fried his Chromebook Pixel laptop. To summarize his findings, stick with cables sold by name-brand manufacturers.

With Lightning cables, the same advice applies—buy cables only from well-known manufacturers like the ones mentioned above. You’ll pay a little more, but the cables will not only likely last longer, they’ll be less likely to damage your iPhone or iPad, or burn down your house.

Of course, any cable, if sufficiently mistreated, can short out and cause problems. Follow this advice to protect your devices from cable-related issues:

  • When coiling your cables, avoid wrapping them tightly around something. A tight wrap can cause kinks that will degrade the wires inside.
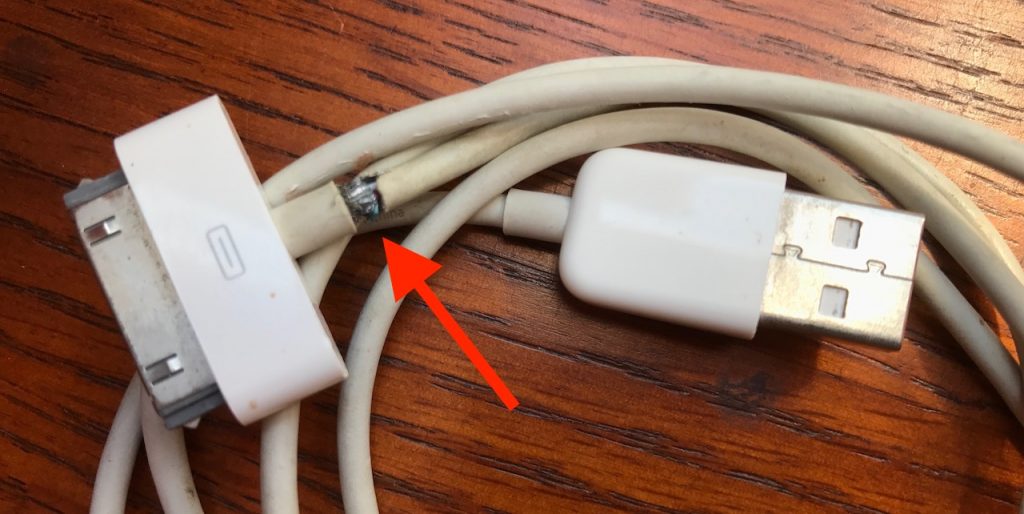
  • Don’t create sharp bends in the cable, especially near the connector. Sharp bends can eventually break the insulation and reveal the wires inside.
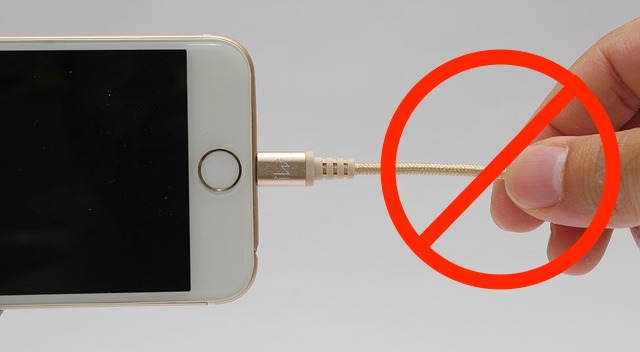
  • When unplugging your device, pull from the plug instead of the cord. That avoids stress near the connector.
     
  • Keep the Lightning connector’s pins clean and away from liquids; crud or a drop of water on the pins could cause a short circuit. USB-C cables are less susceptible to such problems because of their metal jackets, but still be careful.
  • If a cable’s insulation ever breaks such that you can see the wires inside, wrap it with electrical tape right away, and replace it as soon as you can.

Don’t freak out about cable safety—although there have been problems, hundreds of millions of people have never experienced any trouble at all. But it’s still worth buying quality cables and taking good care of them.

Three Ways to Backup Your Mac

“To go forward, you must back up.” Sure, it was an advertising tagline for backup software from the 1990s, but it’s still true. When it comes to losing data, the question is not “if,” but “when.” If you store valuable information—whether personal or professional—on your Mac, or if you rely on your Mac to earn a living, you must back up regularly or risk irretrievable data loss. But backups aren’t as simple as you might think.

Happily, Apple has provided the Time Machine backup software with the Mac since 2007. Give it an external drive and it will do a good job of creating “versioned” backups, which contain multiple copies of each file as it changes over time. With versioned backups, you can restore a lost or damaged file to its most recent state, or to any previous state. That’s essential if corruption crept in unnoticed such that you had been backing up a corrupt file for some time. Time Machine also enables you to restore an entire drive as of the latest backup, which you might need to do if you have to reformat or replace your drive.

Time Machine backups, useful as they are, can’t help you in two situations:

  • If your Mac’s main drive does go south, it will likely take several hours to reformat and restore, and quite a bit longer if you have to get a new drive installed first. To keep working with minimal interruption, you need a bootable duplicate, which is an exact clone of your drive.

  • Should you be so unlucky as to experience a burglary, fire, or flood that affects your Mac, it’s likely that your Time Machine drive—and your bootable duplicate—will suffer the same fate and thus be useless as a backup. To protect against that unhappy possibility, you need an offsite backup.

To make a bootable duplicate, you need an external drive that’s as large as your Mac’s internal drive, or at least a good bit bigger than the amount of data on your drive. If you have a really large drive, you could partition it in Disk Utility and use one partition for Time Machine and the other for a bootable duplicate.

You also need backup software that can create a bootable duplicate, and the leading contenders are Carbon Copy Cloner ($39.99) and SuperDuper! ($27.95). Both are easy to set up and can update your bootable duplicate reliably on a regular schedule—nightly is best.

When it comes to offsite backups, you have two basic choices:

  • Set up two or three backup drives with Time Machine, or with Time Machine and a bootable duplicate on separate partitions, and store one of them in another location, such as your office, a relative’s house, or a safe deposit box. (If you’re storing it where someone else could access it, make sure to encrypt the Time Machine backup and use FileVault to protect the bootable duplicate’s contents.) Then, on a regular basis, swap the drives such that you’re backing up to one, and keeping another off-site.
  • Use a cloud backup service, which you can back up to and restore from over the Internet. The two leading services with good Mac apps are Backblaze and CrashPlan. Plans for both start at about $5 per month or $50 per year for one computer. These apps back up constantly in the background, so you’re always protected. Their main downside is that they’re slow in both directions, but in the event of a complete disaster, getting your data back slowly is better than not getting it back at all.

So there you have it. Use Time Machine for continual protection of your data, a bootable duplicate so you can get back to work quickly if your drive dies, and an offsite backup to protect against catastrophe. You can read a lot more about the topic in Backing Up Your Mac: A Joe On Tech Guide, or just contact us for help setting up a rock-solid backup system.