Merge Recognized Faces in Photos in Both iOS and macOS

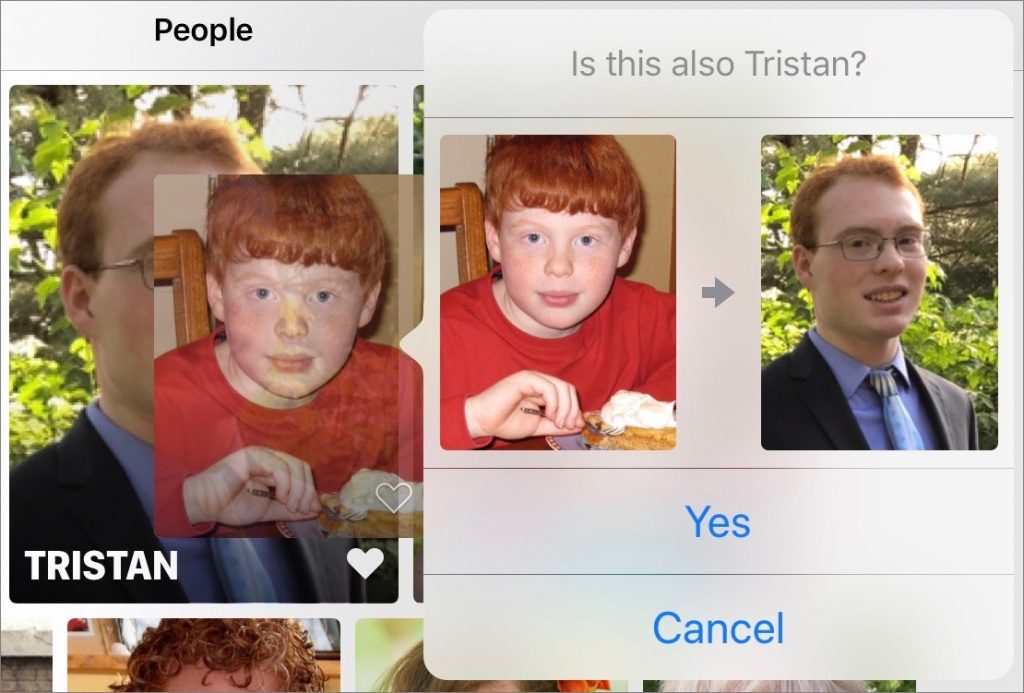
An extremely welcome under-the-hood change in iOS 11 and macOS 10.13 High Sierra is that Photos facial recognition syncs across iCloud Photo Library. Previously, people you identified on one of your devices remained unidentified on others. But what if Photos now identifies the same person twice, such that they have two separate entries in the People album? Just drag one entry on top of the other, in either the Mac or iOS version of Photos, and agree that they’re the same person when Photos asks.

Teach Siri How to Pronounce Names Properly

Siri is supposed to be a competent voice assistant, but sometimes Siri can’t even pronounce your own name correctly! Luckily, it’s easy to fix Siri’s pronunciation for any name. Just say to Siri, “Learn how to pronounce Jill Kresock.” (Siri defaults to “krehsock” rather than the correct “kreesock” in this case.) Siri first asks you to say the person’s first name and then presents a list of options for the best pronunciation. Tap the play button next to each option to hear it, and tap Select for the one you like best. If none are good, tap Tell Siri Again and say the name again, perhaps changing your enunciation slightly. Once you’ve set up the first name, Siri will ask you to say the person’s last name, after which you can pick the best pronunciation for the last name.

Here’s How to Hide All Windows on Your Mac So You Can Work on the Desktop

If your Mac is anything like ours, you end up with lots of apps open, each with one or more windows that obscure the Desktop. For those people who like to save in-progress documents to the Desktop and keep current project folders there, all those windows get in the way. macOS has a solution. Open System Preferences > Mission Control, and in the Keyboard and Mouse Shortcuts section, from the Show Desktop pop-up menu, choose a keyboard shortcut. Try the right-hand modifier keys—we’re fond of Right Option—because they’re easy to press and aren’t likely to be used for other purposes. Then, whenever you want to see and work with the icons on your Desktop, hit that key, and do what you want. If you like, you can press that key again to bring the windows back.

Use iOS 11’s Do Not Disturb While Driving Feature

Distracted driving may not make headlines, but it’s a huge problem. In the United States in 2015, the National Highway Traffic Safety Administration says that 391,000 people were injured and 3477 killed in accidents caused by distracted driving.

Many things can distract drivers, but the most concerning—and the most avoidable—is texting. Given that the iPhone has a 30–40% share of the market, it might have been involved in as many as 100,000 injuries and 1000 deaths in just 2015. Not good.

Apple has stepped up to the plate by introducing the Do Not Disturb While Driving (DNDWD) feature in iOS 11. You’ll be prompted to enable DNDWD when it first detects that you’re driving in a car after you install iOS 11. In normal use, it activates automatically when you’re driving, blocking notifications and preventing you from using apps until you stop the car. Here are answers to the most common questions we get about DNDWD.
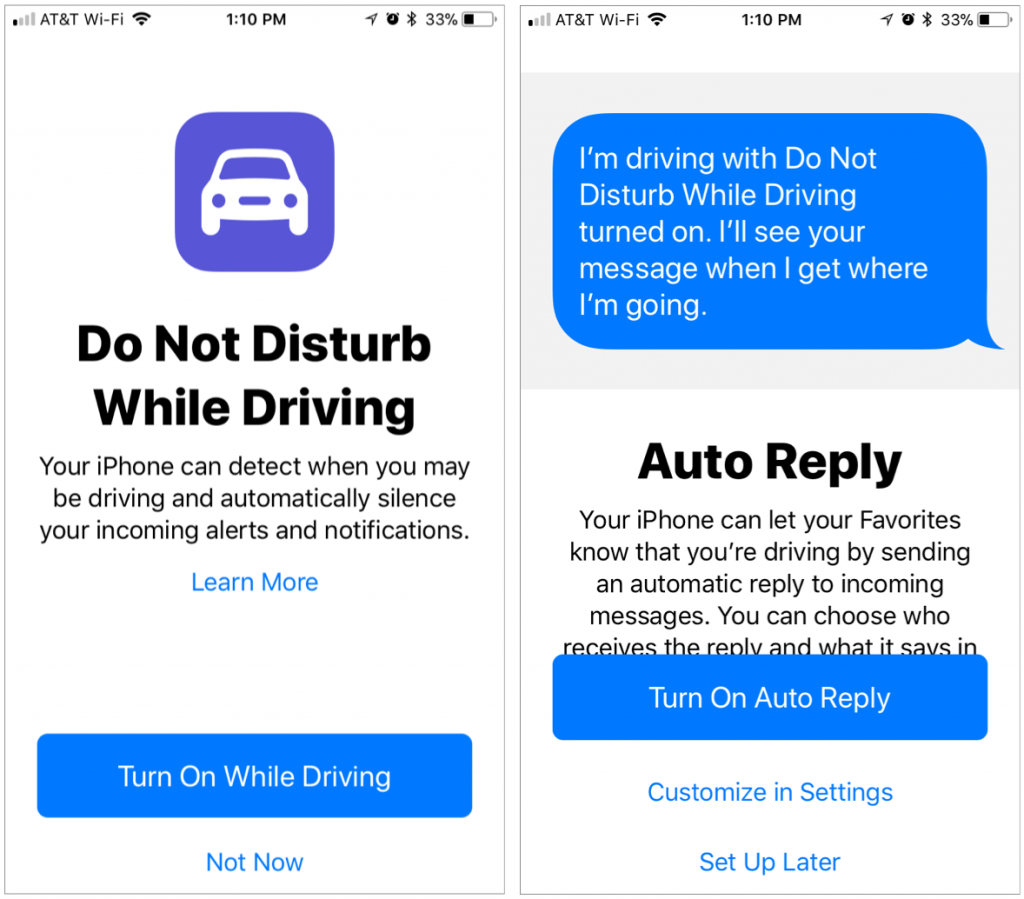
How does the iPhone know that I’m driving?

The most reliable way is that your iPhone has connected to a car via Bluetooth. Obviously, that requires the car to support Bluetooth, and that you pair your iPhone with it. If there’s no Bluetooth connection, the iPhone uses its accelerometer and signals from nearby Wi-Fi networks to figure out that you’re driving.
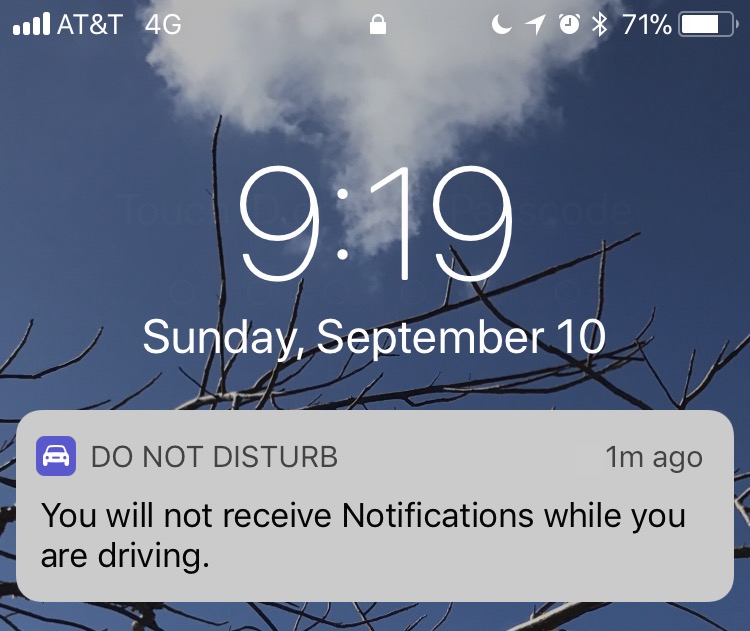
In Settings > Do Not Disturb > Activate, you can choose from Automatically, When Connected to Car Bluetooth, or Manually. Stick with one of the first two options unless the iPhone regularly fails to detect that you’re driving, at which point you can add the Do Not Disturb While Driving button to Control Center, and activate DNDWD with it.

Will any notifications break through the DNDWD cone of silence?

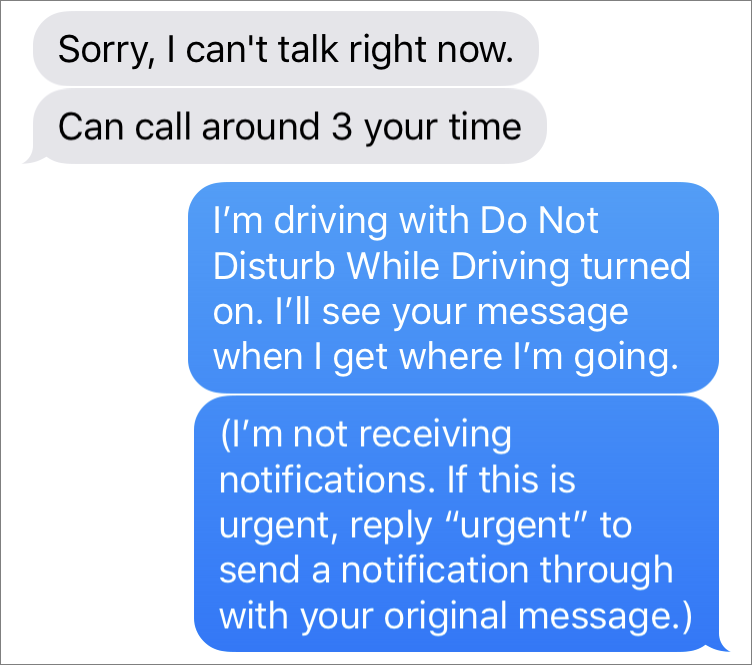
Yes. As with standard Do Not Disturb, timers, alarms, and emergency alerts will still work. Plus, you can opt to receive urgent text messages. To enable this feature, go to Settings > Do Not Disturb > Auto-Reply To and choose a group (Recents, Favorites, or All Contacts). Those people will get an auto-reply—which you can personalize—when they text you, and if they reply to that auto-reply with the word “urgent,” the message will be delivered.
What about phone calls?

If your car has a Bluetooth hands-free system, phone calls will come in as they always have, and you can answer them via your steering wheel controls and carry on the conversation using the car’s built-in mic and speakers.

However, if you don’t have car Bluetooth or another hands-free accessory, DNDWD will block calls just as they would be by standard Do Not Disturb. That means you can allow calls from specific groups in Settings > Do Not Disturb > Allow Calls From and let anyone through if they call twice within 3 minutes.

Can I still use Maps to navigate?

Yes! Maps works on the Lock screen just as it always has, though it’s best started before you begin driving. If you keep your iPhone in a car mount so you can use it for navigating, DNDWD won’t get in the way.

Will Siri still work while in DNDWD?

Indeed it will, both via Hey Siri and by holding the Home button. But don’t do that—Hey Siri is safer than taking your hand off the wheel to press the Home button.

Siri won’t do some things for you while you’re driving, like open apps. Plus, Siri tries to respond to you so that you won’t have to look at the iPhone, reading all responses instead of displaying them on the screen.

How do I turn off DNDWD if I’m a passenger?

If DNDWD is on and you try to use your iPhone, an I’m Not Driving button appears. Tap it, and you can use your iPhone normally for the rest of the trip. If you’re always a passenger, go to Settings > Do Not Disturb > Activate, and select Manually. Then, if you do want to turn DNDWD on, you can use its Control Center button.

So hey, if you didn’t turn on Do Not Disturb While Driving when you first set up iOS 11, do us and everyone else on the road a favor and turn it on now. The life you save could be your own.
What Is a Fusion Drive, and Why Should You Care?

There are two basic types of storage devices available today: hard disk drives and solid-state drives. For the lowest cost per gigabyte, you can’t go wrong with a hard drive, and they come in truly massive sizes—up to a whopping 10 terabytes. However, they’re relatively slow.

For speed, you want a solid-state drive, also known as an SSD. Because SSDs rely on flash storage, a type of non-volatile memory whose chips retain data without power, they’re lightning fast. But chips are more expensive than hard disk platters and read/write heads, so the $250–$300 that will get you an 8 TB hard drive is enough for only a 1 TB SSD.

In 2012, Apple came up with a compromise: the Fusion Drive. As its name suggests, a Fusion Drive melds a hard disk drive with flash storage to provide the best of both worlds. The user sees just a single volume, but behind the scenes, macOS automatically and dynamically moves frequently used files—notably those used by the operating system—to the flash storage portion of the Fusion Drive for faster access while keeping infrequently used files on the hard drive.

In essence, the Fusion Drive provides much of the speed of an SSD along with the capacity of a hard drive. What’s not to like?

There are some caveats. Good as a Fusion Drive is, it will never be as fast as a pure SSD, and you’ll probably notice that most when working with older files. Try editing some photos from last year in Photos and you’ll likely be working entirely on the slow hard drive.

Also, Apple provides the Fusion Drive as an option only for the iMac and Mac mini; there’s no room it in a modern MacBook. But not all Fusion Drives are created equal. They come in 1 TB, 2 TB, and 3 TB sizes, although not all iMac and Mac mini models can accept the larger Fusion Drives.\

Originally, all Fusion Drives had 128 GB of speedy flash storage alongside the hard drive, but in 2015, Apple reduced the amount of flash storage in the iMac’s 1 TB Fusion Drive to a paltry 24 GB (the Mac mini’s 1 TB Fusion Drive still has 128 GB). The company subsequently increased it to 32 GB, but if you’re buying a new iMac and want better performance from a Fusion Drive, go for either 2 TB or 3 TB, both of which have 128 GB of flash storage.

One final note. As of this writing, macOS 10.13 High Sierra will not convert a Fusion Drive to Apple’s new APFS file system. We anticipate that will change at some point in the next year, and APFS might make Fusion Drives even a bit faster.

All that said, if you want the best performance and can afford the cost, get an SSD. If you need more space than an SSD can provide, consider using the SSD internally and adding an external hard drive connected via USB 3 or Thunderbolt 3. Barring that, a Fusion Drive—particularly one with 128 GB of flash storage—remains a good compromise. Honestly, we can’t currently recommend a hard disk drive as the primary storage for a Mac unless low cost is paramount. Hard drive performance just isn’t good enough.