Delete or Position iOS Apps from Search

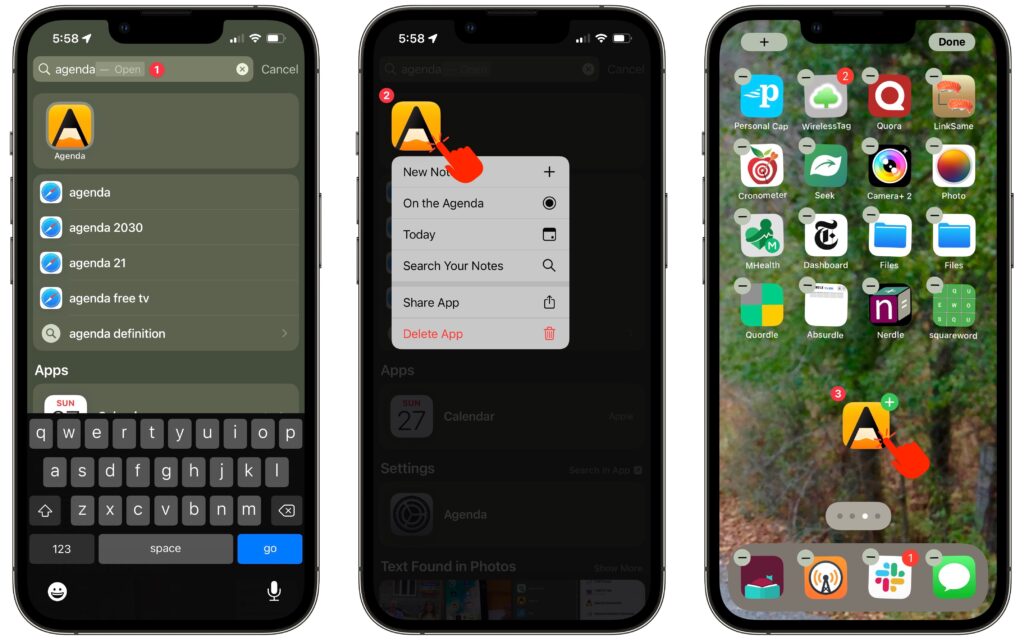
In iOS 15 and iPadOS 15, Apple added a feature that would have been even more welcome before the advent of the App Library: the capability to manage apps from Search. But it’s still handy as a way to delete or position an app you can’t find on a Home screen page. Swipe down from the middle of the Home screen to enter Search, after which you can work with any app you see in Siri Suggestions or find with a search ➊. Touch and hold an app to display its contextual menu ➋, including a Delete App option. Or touch and hold it and start dragging to move it to a Home screen page ➌. Bonus: you can even drag an app out multiple times to put it on multiple Home screen pages or in multiple folders!

(Featured image by iStock.com/B4LLS)

Use Reduce Transparency for a Consistently Colored macOS Interface

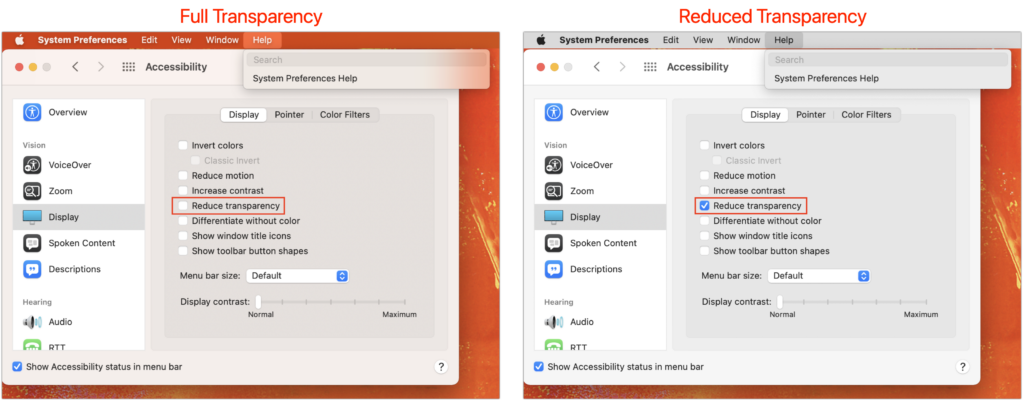
For years now, Apple has made transparency a part of the macOS interface, which has the effect of blending the menu bar into the background and making menus and some windows take on the background hue, as you can see on the left side of the illustration below. For many people, transparency blurs the interface, making it harder to differentiate interface elements from the wallpaper. It also causes problems for screenshots meant for publication because the images end up with unrepresentative color levels. To prevent that from happening, open System Preferences > Accessibility > Display and select Reduce Transparency. It can be a significant difference, as you can see on the right side of the illustration below.

(Featured image by Adam Engst)

Apple Works to Improve Safety in the Wake of AirTag Stalking Reports

Over the past few months, there has been a spate of media reports about how people may have been tracked without their knowledge using AirTags, Apple’s elegant location trackers. Like many mainstream media forays into the tech world, the reports are often short on detail and sometimes unclear on the reality of how the AirTags work. Nor is it clear that there have been many successful cases of AirTag abuse, but the mere fact that people are trying to use AirTags to stalk others is concerning.

Apple put significant effort into preventing such abuses, revolving around three features:

  • Safety alerts: If you have an iPhone or iPad running iOS 14.5 or later and an unknown AirTag is traveling with you, your device will alert you to that fact. Although safety alerts aren’t available for those using Android smartphones, Android users can download Apple’s Tracker Detect app to scan manually.
  • Safety sounds: After an AirTag has been separated from its owner for several days, it will make a sound the next time it moves.
  • NFC identification: If you find an AirTag, you can hold it up to an iPhone or other NFC-capable smartphone to load a website that reveals the AirTag’s serial number and the last four digits of the owner’s phone number. The police can use this information to learn the owner’s identity from Apple.

Sadly, those precautions haven’t been sufficient either to dissuade all would-be stalkers or to educate potential stalking victims (and let’s be real—dissuading stalkers is also a matter of educating people that it’s unethical, likely dangerous, and often illegal to abuse an AirTag in this way). Apple has responded in two ways, one general, the other specific to AirTags.

Personal Safety User Guide

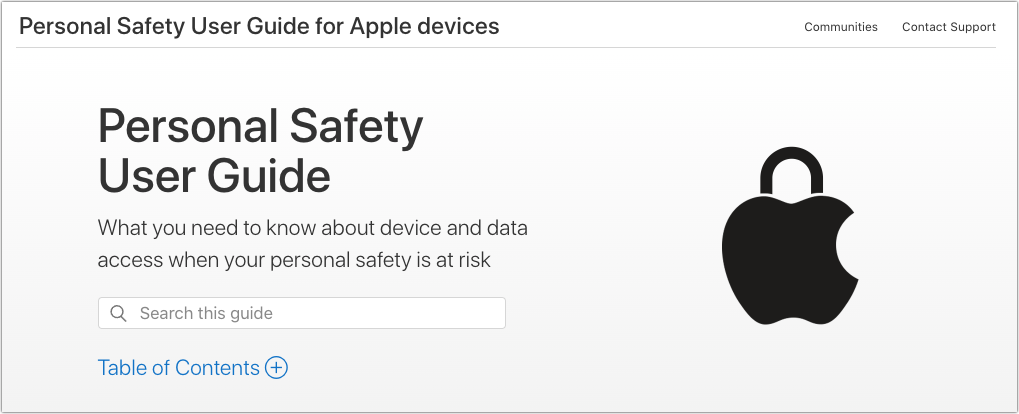
Apple documents its products and services quite well, but the company tends to generate many focused pages without much high-level organization. It’s all too easy to flail around within Apple’s support documentation looking for help if you don’t know what search terms are likely to work. In an effort to mitigate that problem for issues surrounding personal safety, Apple has created the Personal Safety User Guide website, also available as a downloadable 56-page PDF.

The Personal Safety User Guide brings together numerous Apple support articles in two main sections:

  • Review and take action: The first section helps you review how your devices and apps are set up, with a focus on settings that could expose you to harm. It helps you manage sharing settings, look at location sharing, control your Home accessories, and more. You’ll also learn how to block unknown sign-in attempts, document suspicious activity, delete suspicious content, and avoid fraudulent requests to share information, among much else. The main criticism here is that the section on AirTag safety doesn’t explain or link to all the features Apple provides.
  • Safety and privacy tools: The second section is a bit more generic, providing support documentation that encourages you to take advantage of the features Apple has provided to protect your safety and privacy. Among other topics, it discusses passcodes, setting up Face ID and Touch ID, using two-factor authentication, seeing which apps are accessing your data, blocking unwanted calls and messages, and using Emergency SOS.

The Personal Safety Guide ends with three checklists, each of which walks you through a series of steps. These are extremely useful because almost no one would necessarily know or remember all the places to check. The checklists help you:

  • See who has access to your device or accounts
  • Stop sharing with someone
  • Control how someone else can see your location

The Personal Safety User Guide website is best when you want an answer to a specific question, but it doesn’t lend itself to reading front to back. For that, we recommend downloading the PDF, which you can read at whatever depth you desire. But do at least scan the entire thing to get a sense of what it contains should you need that information later.

Apple AirTag Announcement

Shortly after releasing the Personal Safety Guide, Apple also posted a short but detailed statement on its website. In it, the company makes it clear that it is actively working with law enforcement on all cases involving AirTag abuse. Apple also says that it has updated its unwanted tracking documentation to explain AirTag safety features more clearly to users and to include resources for those who feel their safety is at risk.

Apple also outlined important advancements that will be coming to the AirTag and Find My network systems via software updates later this year:

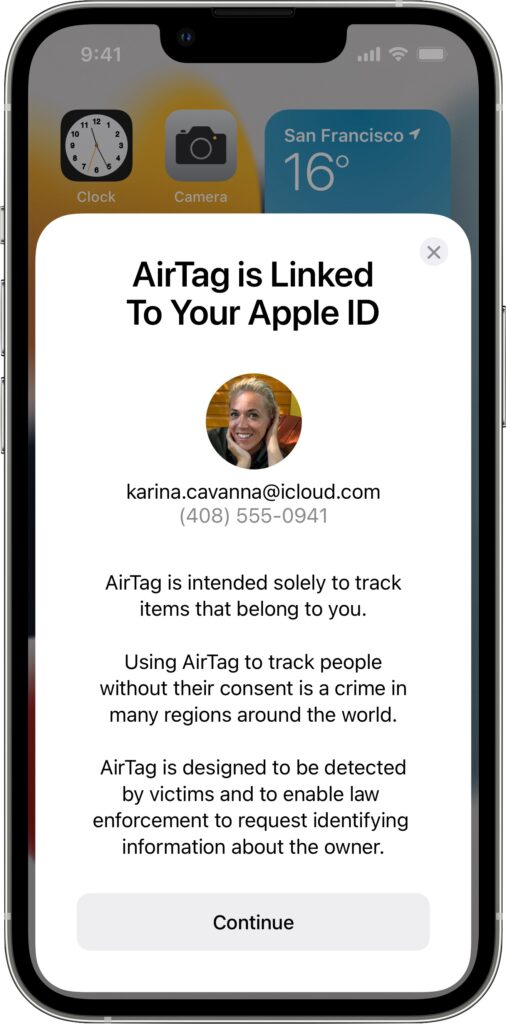
  • New privacy warnings during AirTag setup: To ensure that everyone understands the utility of AirTags and the implications of abuse, people setting up an AirTag for the first time will see a message that clearly states that AirTags are meant to track their own belongings, that tracking people without their consent is a crime in many places, that AirTags are designed to alert victims to their presence, and that law enforcement can request identifying information about the owner of an AirTag.
  • Better alerts for AirPods: Instead of an “Unknown Accessory Detected” alert when your iPhone detects Find My network-compatible AirPods traveling with you, the alert will specify that AirPods are involved, not an AirTag. (There are third-party Find My network accessories that will still generate this alert, such as the Chipolo ONE Spot.)
  • Refined unwanted tracking logic: Apple will be updating its unwanted tracking alert system to notify users sooner that an unknown AirTag or Find My network accessory is traveling with them.
  • Precision Finding for unknown AirTags: Those with an iPhone 11, iPhone 12, or iPhone 13 will be able to take advantage of Find My’s Precision Finding feature to home in on the location of an unknown AirTag. Previously, this capability was limited to your own AirTags.
  • Display alerts with unknown AirTag sound: When an unknown AirTag emits a sound to alert anyone nearby to its presence, and it’s detected moving with your iPhone or iPad, an alert will also appear to help you play the sound again or use Precision Finding, if available. This should help when an unknown AirTag is in a place that blocks sound or if its speaker has been disabled.
  • More obvious AirTag alert sound: Apple will be adjusting the tone sequences to make an unknown AirTag’s alert sound easier to hear and find.

Overall, these changes are welcome, and it’s a testament to the care Apple took when designing the AirTag and Find My network systems that it can make such enhancements through software updates—no hardware changes are necessary. It’s also good to see Apple taking the problem—however small it might actually be—seriously and working to reduce it even further.

(Featured image by Apple)

Please Dispose of Old Electronics Responsibly—Not in the Trash or Standard Recycling!

We all have old electronics squirreled away in our drawers and closets. It’s hard to admit that a computer, phone, or peripheral that cost hundreds or even thousands of dollars years ago has little or no value. That’s doubly true if it doesn’t work anymore. Once you’ve decided to get rid of that PowerBook 520 from the 1990s or your first digital camera from 2004, resist the urge to toss it in the trash.

In some places, it’s illegal to throw out electronics because they tend to contain heavy metals like mercury, lead, and lithium, plus other hazardous materials that can pollute the air if incinerated or contaminate the ecosystem if buried in landfills. Even if dumping e-waste is not actively illegal in your area, it’s a terrible thing to do. So what can you do instead?

No matter what you choose, make sure to delete all your data to the extent possible. If the device in question works, it’s best to erase or reformat its storage. Apple makes that relatively easy, especially on iOS devices; look in Settings > General for a reset option that contains Erase All Content and Settings. For dead computers whose drives contain data, you can remove the drive and ensure your data can’t be accessed by whacking it with a hammer or drilling through the case. That can be a good stress reliever too, but be sure to wear safety goggles.

Sell

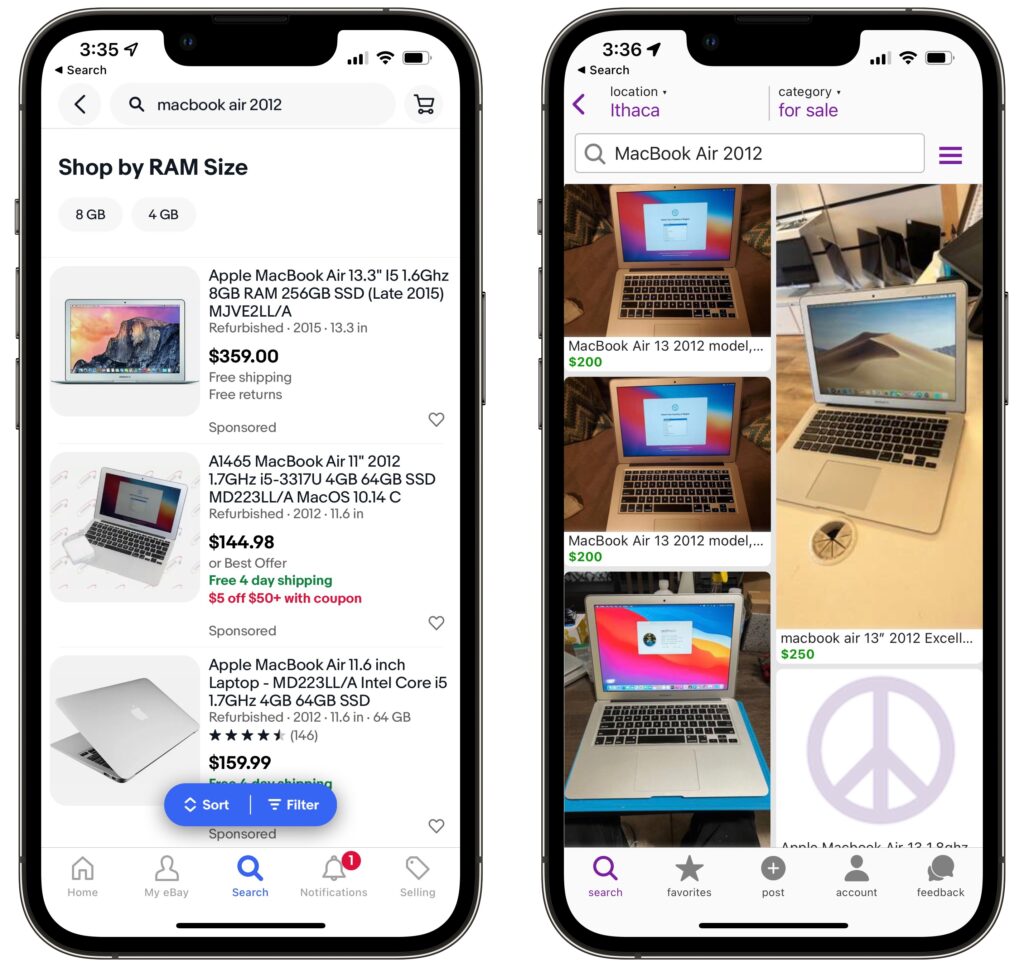
If the old device is fully functional or sufficiently rare, you may be able to sell it on eBay or through Craigslist. To determine if that is likely to be worthwhile, search for similar used devices on those sites. If others are selling their old stuff, you probably can too. Keep in mind that you’re not likely to make much, and be sure to take shipping costs and fuss into account.

Donate

Given the low value of even fully functional hardware, a more socially beneficial option is often to take advantage of local programs that accept donations of working computers and other electronics, clean and refurbish them as necessary, and then donate them to schools, libraries, community centers, and other worthy institutions. If the program to which you’re donating is a registered nonprofit, you may even be able to deduct the value of the gear from your taxes.

If your area lacks such programs, check out Computers with Causes, which accepts donations of computers, tablets, and gadgets. It then refurbishes them and moves them on to groups like youth centers, K–12 schools, libraries, historical societies, wildlife conservation organizations, and more. Also look into World Computer Exchange, which provides donated computers and electronics to youth in developing nations.

Recycle

All too often, the only realistic option for disposing of old electronics is recycling. That doesn’t mean just tossing that old iPhone 3GS in the bin with your #2 plastics. It’s extremely important that e-waste be recycled separately from standard recyclables like cardboard, paper, cans, and plastic tubs. That’s because lithium batteries from improperly recycled electronics are causing dangerous fires at recycling centers.

Municipal waste programs are often set up to recycle e-waste properly, and they may be the easiest option in your area. For alternatives, look to the large chain stores Best Buy and Staples, both of which accept electronics for recycling, generally for free. Apple stores also accept electronics for recycling, or you can request a prepaid shipping label that lets you ship e-waste to Apple. Alternatively, try searching the Earth911 database for other recycling options near you. The Consumer Technology Association also provides a locator for electronics recycling; it may have slightly different listings.

Regardless of where you take your e-waste, be sure to read the requirements first. Not all sites take all types of electronics—a cell phone is much easier to handle than a broken large-screen TV. Also, you may need to remove any batteries first and recycle them separately so they can be handled with additional care to prevent fires.

Thanks for doing your part to keep old electronics from causing harm!

(Featured image by iStock.com/ThamKC)

How to Use Change Tracking Effectively When Collaborating on Documents

Long gone are the days of printing a document, marking it up with a red pencil, and sending it back to the author to input the changes. In the modern world, we use comments and change tracking to collaborate in word processors like Microsoft Word, Google Docs, Apple’s Pages, and Nisus Writer Pro. The specifics vary a little by app, but in essence, once you turn on change tracking, every change you make becomes visible to others working on the document, and they can accept or reject the change. Changes and comments can also host brief discussion threads.
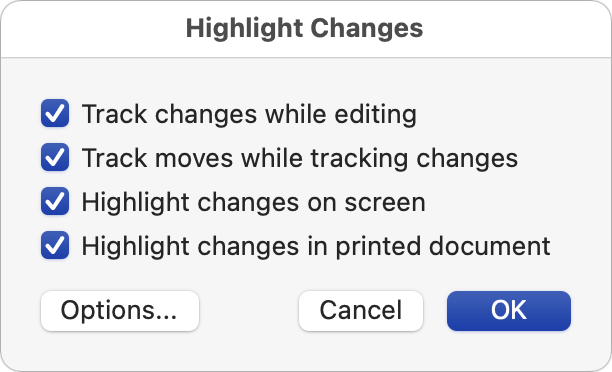
In this article, we’re going to recommend general ways of working with change tracking and comments, rather than exploring the particular interfaces in different apps. This advice should work well for all apps that support change tracking and comments.

Establish a Working Approach

There are two typical scenarios when working with others on a document. Either you’re collaborating with colleagues to create the best possible final document, or you’re negotiating over every change, as might be the case when constructing a legal agreement where people have conflicting goals and agendas. We’ll focus on the former since everything gets tense when multiple people have to sign off on every change. If you end up in an editing scenario that’s essentially an arms-length negotiation, you’ll probably make fewer changes and examine each one closely.

Assign Roles

Talk with your fellow collaborators to clarify who will be doing what. Depending on your workflow, a document will have people in two or three roles:

  • Author: The author drafts the document without change tracking enabled. Subsequently, the author accepts changes made by the editor and contributors.
  • Editor: The editor enhances the author’s text with change tracking enabled and accepts the author’s subsequent changes. (An editor isn’t necessary as long as everyone else doesn’t mind the author accepting their own changes later.)
  • Contributor: Everyone else is a contributor, and they only make changes in change tracking mode. They neither accept nor reject changes.

These roles make it clear who can and should do what. Otherwise, you end up in a situation where people are hesitant to accept changes or where someone accepts changes before the author has seen them.

Even with these roles, the order in which the document gets reviewed can matter if you want certain contributors to see what’s changed, even if they don’t accept the changes. Generally speaking, people take turns with documents, with communication via email or some other channel to let others know when they can dive in.

Some documents may need only one editing pass, whereas others will require several. You’ll know you’re done when all changes have been accepted and comments have been resolved.

Decide Which Changes to Show

When you enable change tracking, every change will be tracked. That can be counterproductive if the number of changes becomes overwhelming—to either people or the software. You may wish to make certain changes without change tracking enabled or accept them before the next person’s turn. For instance:

  • Formatting changes: If you’re changing styles or putting text into lists to make a draft more presentable or professional, those changes can quickly clutter the document and are usually not controversial.
  • Consistency changes: For ensuring consistent usage, such as one space after a period, a search-and-replace with change tracking disabled lets the next person avoid dealing with hundreds of small changes. You can leave a comment at the top of the document noting what you did.
  • Minor proofreading changes: Everyone makes typos. You may wish to keep typo fixes visible to show how much your editing has improved the document, or you can accept them right away to save the next person time.
  • Too many changes to parse: At times, you may edit a paragraph so heavily that it has been almost entirely rewritten. As with proofreading changes, you might want to keep those changes visible to indicate how much you’ve done, or you might want to accept them all and leave a comment saying, “Read this paragraph carefully—too many changes to show with change tracking.”

Accept (Don’t Reject) Changes

When it comes time to review changes, apps let you either accept or reject changes. We usually recommend accepting changes even if you disagree with them. That’s not to say you have to stick with a proposed change that you dislike, but the person who made it did so for a reason, and it’s up to you to figure out what that reason is and recast the text to accommodate it, preferably with an explanatory comment. That way, they’ll see your change on their next pass and can decide if you addressed their concern.

Occasionally, someone might negatively change some carefully worded text because they didn’t realize why it was worded that way. Rather than rejecting such a change, leave it and start a discussion. In all likelihood, they’ll withdraw the change on the next pass, or you can reject it once they see where you’re coming from.

When accepting changes, you can employ several techniques:

  • Few changes: If there aren’t that many changes, it’s easy to accept them one at a time. As you do this, watch for mistakes that creep in—missing or double spaces, verb tense and number mismatches, and so on. These can be easy to introduce and difficult to see while editing.
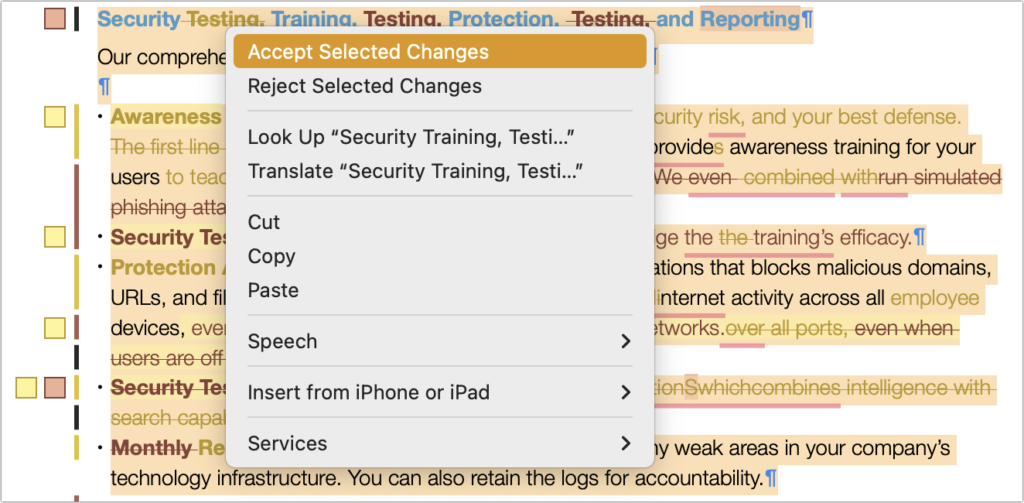
  • Many changes: When the entire document seems to have changed color because there are so many changes, it’s easier in most apps (other than Google Docs) to select a paragraph at a time, accept all changes in the selection, and then read it closely to make sure the changes are both helpful and don’t introduce additional mistakes. A keyboard shortcut to an Accept Selected Changes command can make this process faster.
We don’t recommend using the Accept All feature to accept all the changes in the document unless it’s quite short and you plan to read the entire thing carefully again.

Dealing with Comments

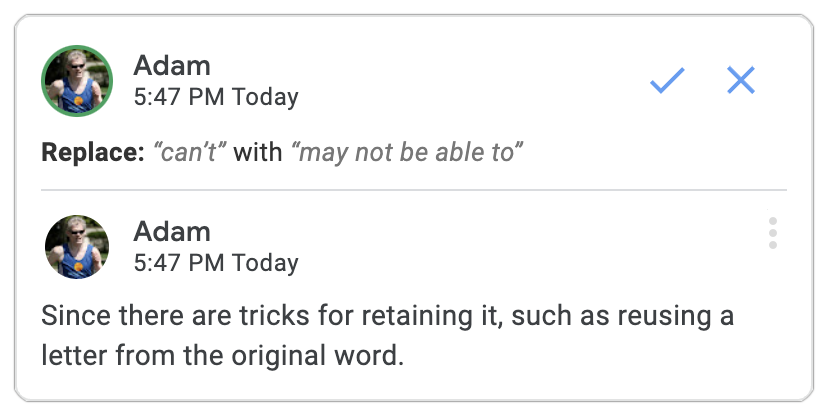
Finally, some comments about comments. In most apps, you can add a comment to a change and start a threaded discussion about the change. That’s extremely helpful if you want to explain why you made the change. However, that approach works poorly if the next person wants to accept your change and continue chatting in the comment, since accepting the change will close the comment thread. As such, we recommend restricting change-specific comments to non-controversial situations where you’re merely informing the next person about why you made ​the change.

When you need to ask a question or raise a topic for discussion, do that in a standalone comment instead, so the discussion doesn’t disappear with the accepted change. Even in this situation, however, you have to be careful. If you select a particular word and start a discussion asking if it’s the right word to use, the next person may not be able to change that word without deleting the comment thread. One solution is to select a few words before the text on which you’re commenting, or just the period ending the sentence, so changes can be made while retaining the comment. Another approach is to select more text—the entire sentence or paragraph that contains the text in question—for the comment. That’s more effective, but too many such comments will overwhelm the document with large colored comment blocks.

Who should resolve comment threads? Although some comments are purely informational and can be resolved by the person to whom they’re addressed, it’s usually best if the person who started the comment thread resolves it. Let’s say the editor leaves a comment that asks a question. The author responds, so the editor needs to see that response. If it doesn’t fully answer the initial question, the editor can ask for more information, and the author can provide it. The editor can then resolve the comment to indicate that the final comment from the author closed the topic.

One last point. Comment threads within a document are useful but limited. If a topic needs significant discussion, break it out to email, Slack, or even a meeting rather than going back and forth within a single comment at length.

We hope this advice makes your collaborative editing faster, easier, and more companionable—remember, the goal should always be to improve the document. However, there’s room for tweaking within these general guidelines to create the ideal workflow for your group.

(Featured image by iStock.com/FrankieMea)