Tips for Working with Mac Display Resolutions

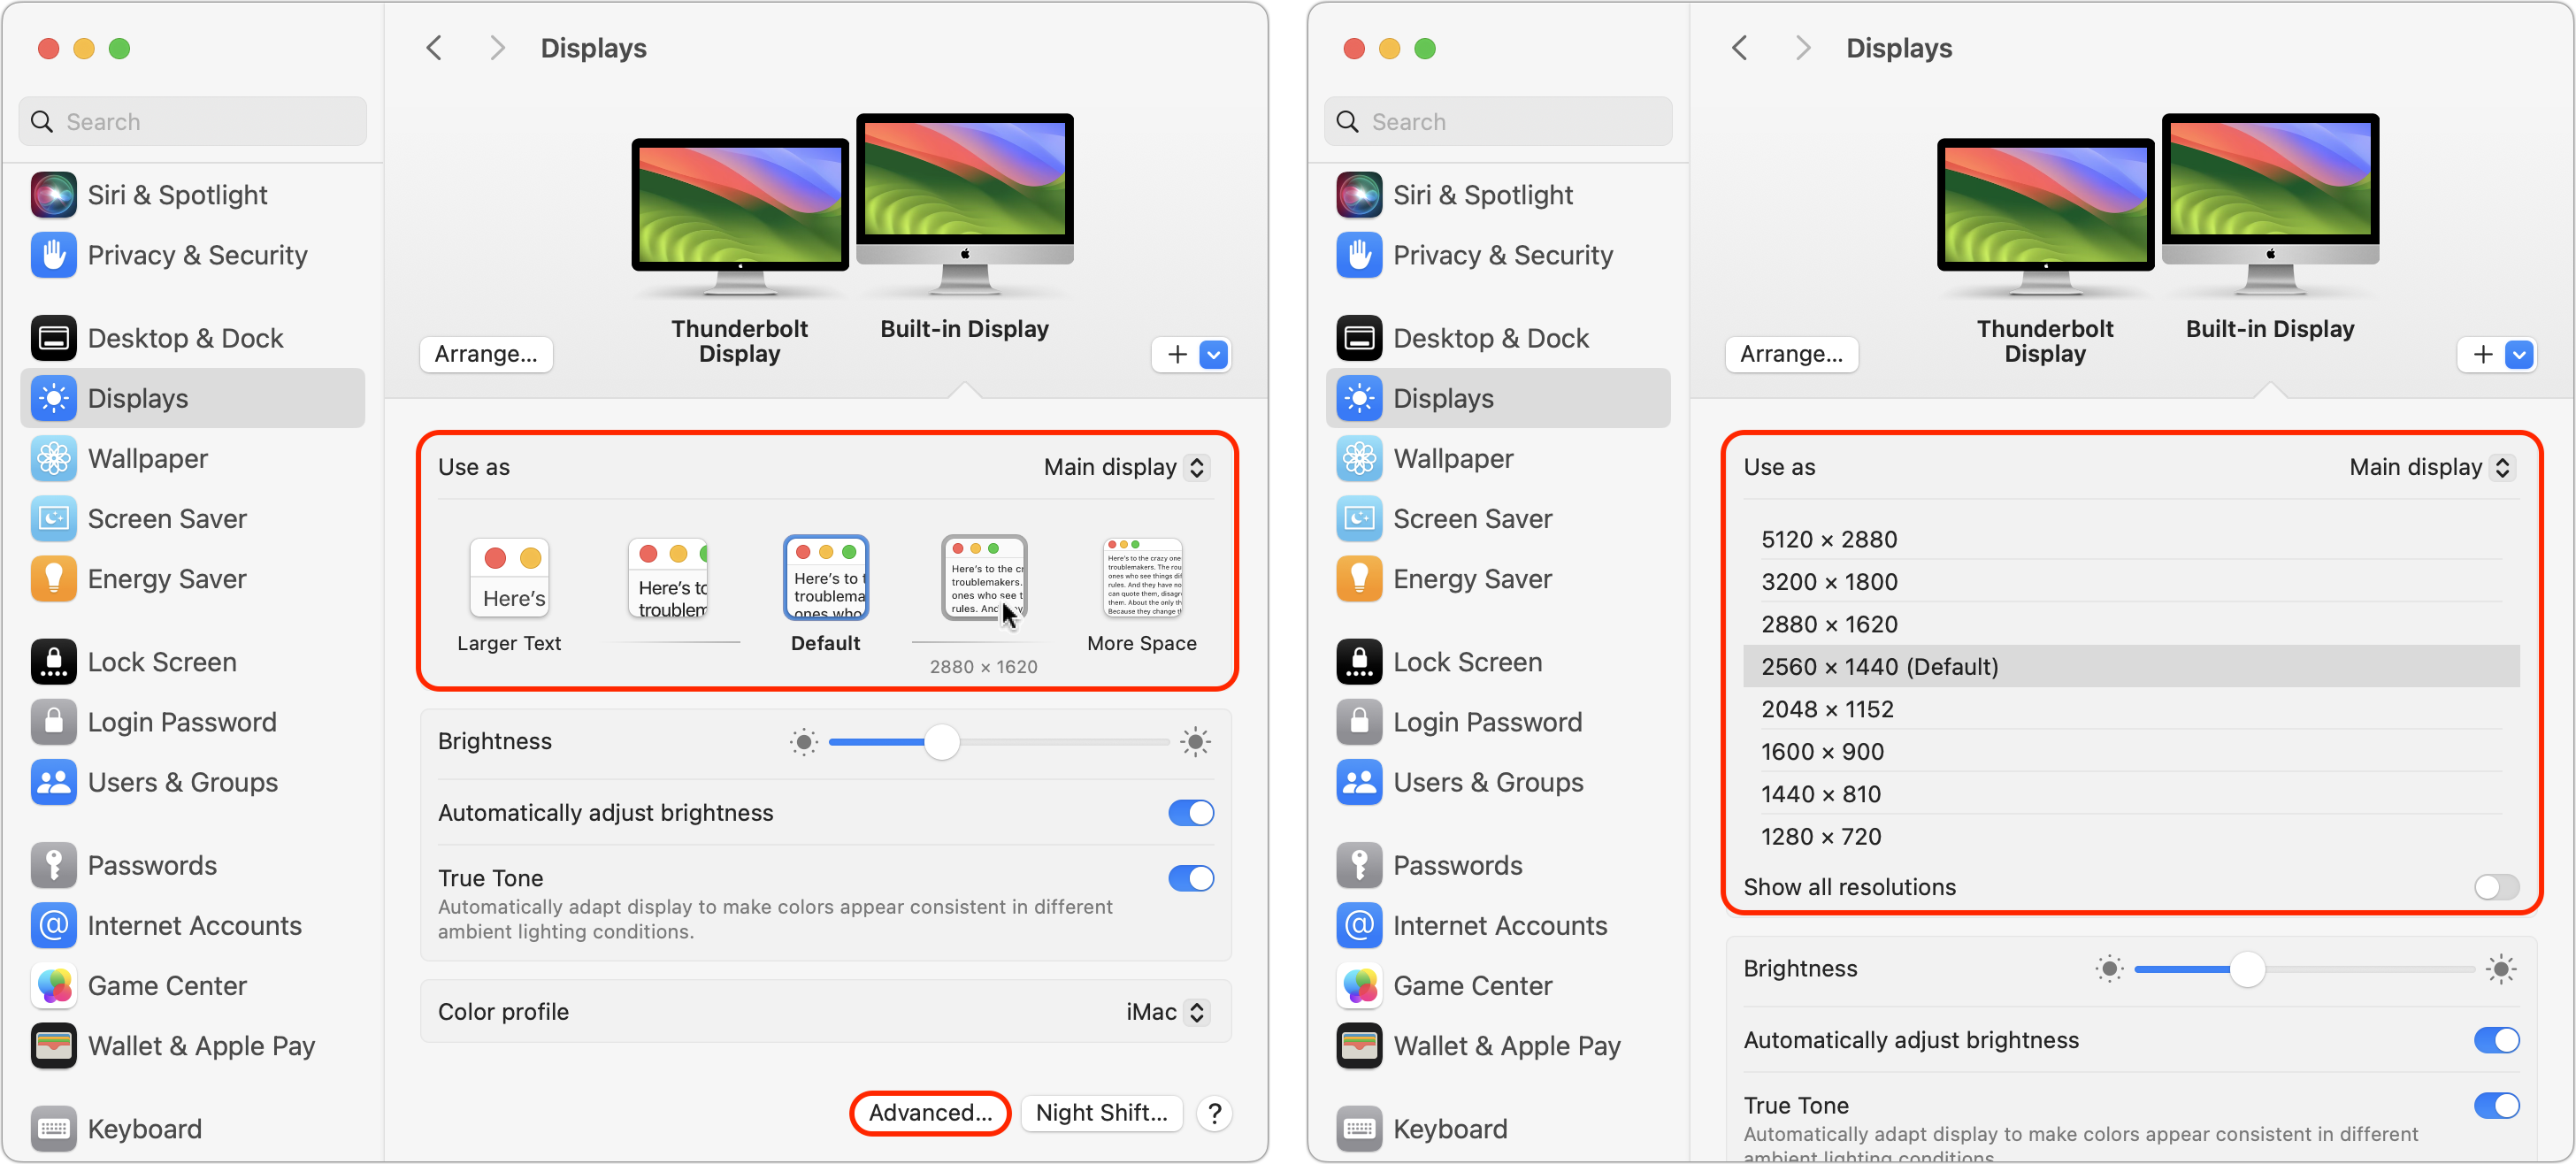
You can change the resolution of your Mac’s screen—how many pixels appear—to make text and graphics larger and easier to see or smaller to fit more content onscreen. In System Settings > Displays, Apple shows thumbnails for five likely possibilities. Hover the pointer over a thumbnail to see its numeric resolution underneath. If you prefer the traditional list of numeric resolutions, Option-click a thumbnail—another Option-click in the list brings back the thumbnails. Although the Show All Resolutions switch reveals more options, most will be fuzzy. If you always want to see resolutions as a list, click Advanced at the bottom and turn on Show Resolutions as a List. Finally, look closely for a tiny Easter egg: the text in the thumbnails is the script from Apple’s classic Think Different ad spot.

(Featured image by Adam Engst)

Looking for Apple Manuals? Check the New Documentation Site

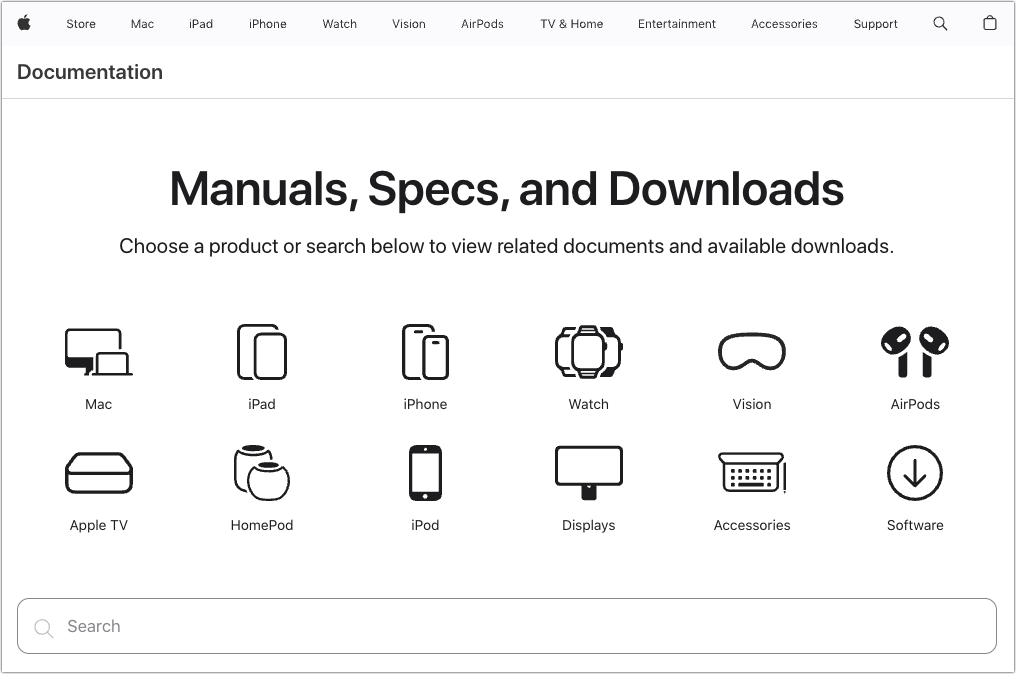
Apple publishes a multitude of manuals and tons of technical documentation for its products on its support site, but until recently, it could be challenging to find something specific because the search engine on Apple’s site is poor. For a better path into Apple’s online support materials, check out the company’s new Documentation site, which brings together manuals, specs, and some downloads for nearly all its products. The operating system User Guides are particularly helpful, and they even provide a Version pop-up menu that lets you make sure you’re getting information for the version you’re using.

(Featured image by iStock.com/Ildo Frazao)

How to Sync Your Text Messages across All Your Apple Devices

Although many of us think of Messages as an iPhone app, Apple’s platform integration lets you read and reply to conversations in Messages on other Apple devices, including the Mac and iPad. All your devices must have the correct settings to make this work reliably. We regularly hear from users who don’t see all their messages on all their devices. If that’s you, check these settings:

  • Same Apple ID: Your devices all know they’re yours when they’re logged in to the same Apple ID. That’s not a problem for most people, but couples who share an Apple ID, for instance, can run into trouble here. To verify this, open Settings > Your Name in iOS and iPadOS, or System Settings > Your Name in macOS. The email address under your picture at the top of each of those screens should match. If it doesn’t, scroll to the bottom, tap or click Sign Out, and sign in again with the correct Apple ID.
  • Two-factor authentication: As with so many Apple services now, your Apple ID must be set up for two-factor authentication, which causes certain logins to be queried a second time on another device. Most people have two-factor authentication set up by now, but if not, turn it on using Apple’s instructions.
  • iCloud Keychain: Your devices must have iCloud Keychain turned on to share your Messages account information. It’s probably already on, but you can enable it if not. Turn it on for an iPhone or iPad in Settings > Your Name > iCloud > Passwords and Keychain > Sync this iPhone. On a Mac, the switch is in System Settings > Your Name > iCloud > Passwords & Keychain > Sync this Mac.
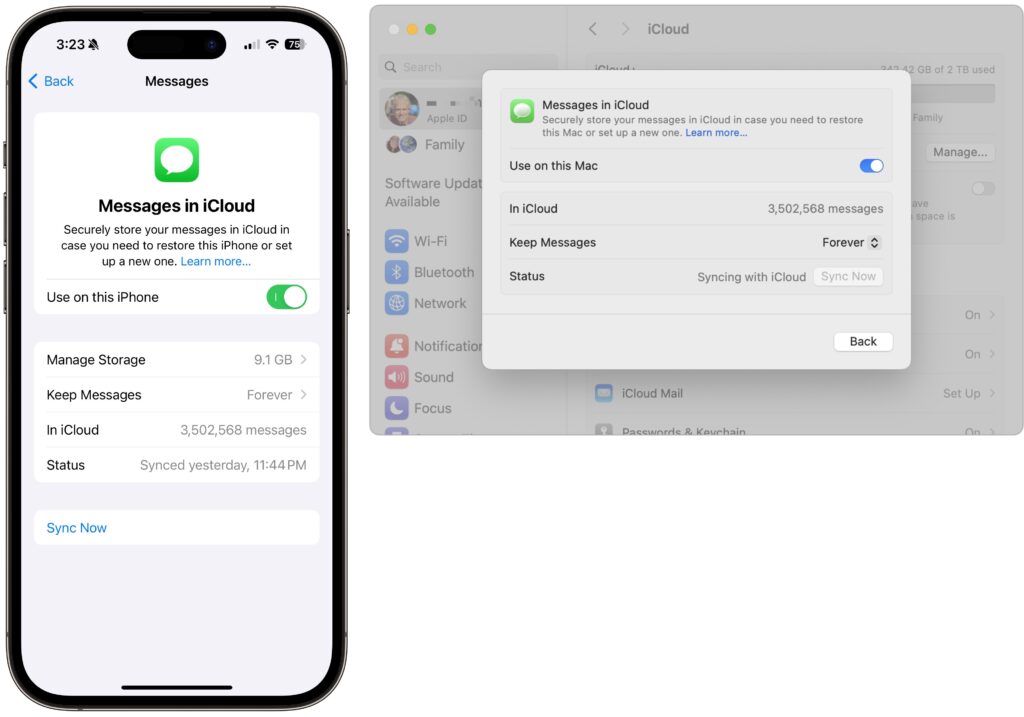
  • Messages in iCloud: This is the key setting—the previous three are just foundational requirements. Enable it for an iPhone or iPad in Settings > Your Name > iCloud > Show All > Messages in iCloud > Use on this iPhone. On the Mac, look in System Settings > Your Name > iCloud > Show More Apps > Messages in iCloud > Use on this Mac.
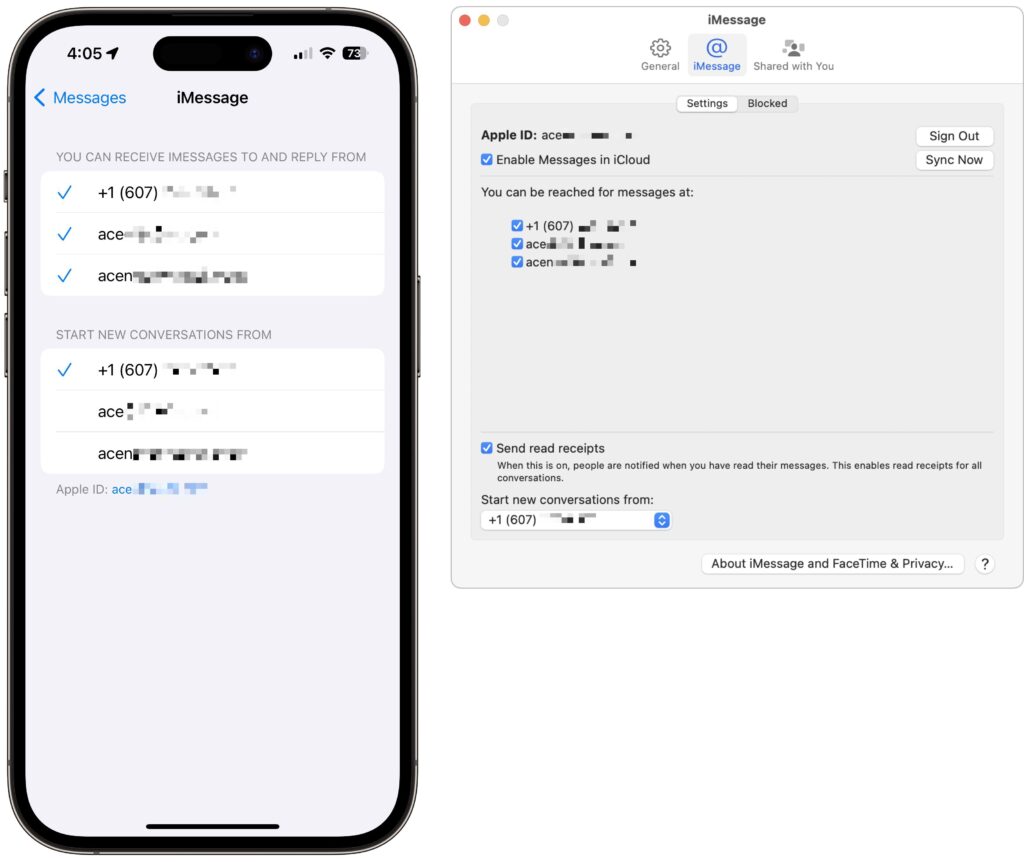
  • iMessage account: You’ve checked that you’re using the same Apple ID everywhere, but there’s a similar setting that’s also important. On your iPhone or iPad, go to Settings > Messages > Send & Receive and make sure you’re signed into iMessage with the same Apple ID—look at the bottom of the screen. Also, ensure you’re set to send and receive from your phone number and appropriate email addresses. It’s safest to send and receive from all the possibilities and start new messages from your phone number. On the Mac, verify that you have the same settings in Messages > Settings > iCloud.
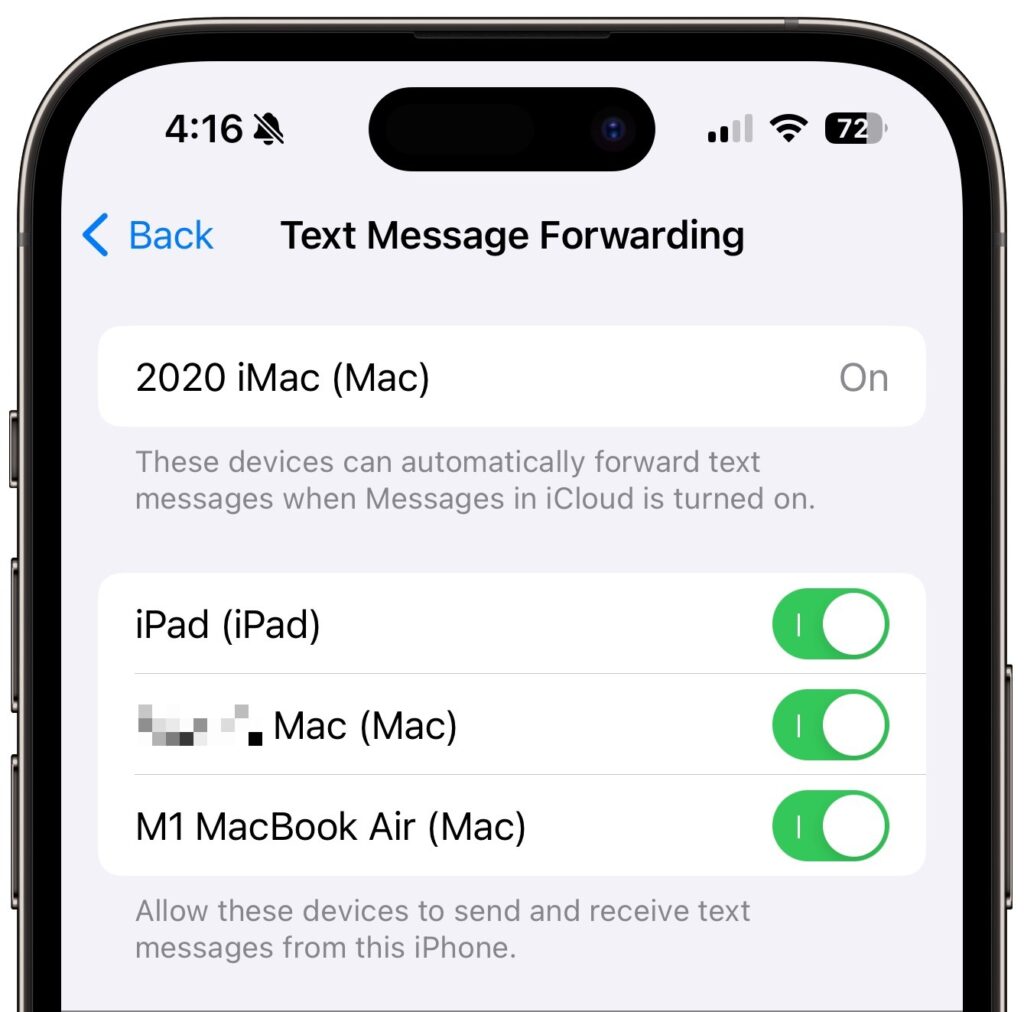
  • Text Message Forwarding: Turning on Messages in iCloud should keep message history synced across all your devices, including green bubble SMS/MMS text messages. However, it’s worth verifying that SMS/MMS messages are being sent to all your devices. On your iPhone, in Settings > Messages > Text Message Forwarding, select all the devices you want to receive text messages.

Although all the above settings may seem like a lot, most should already be set up correctly. We listed them all because when people have trouble with their messages syncing across all their devices, one or more of these are usually set wrong.

Even with everything configured correctly, there can be hiccups—nothing’s perfect. If messages fail to sync consistently, try these troubleshooting steps:

  • Use the Sync Now button in the Messages in iCloud settings on any device that hasn’t caught up. That likely won’t help instantly, but syncing should eventually catch up.
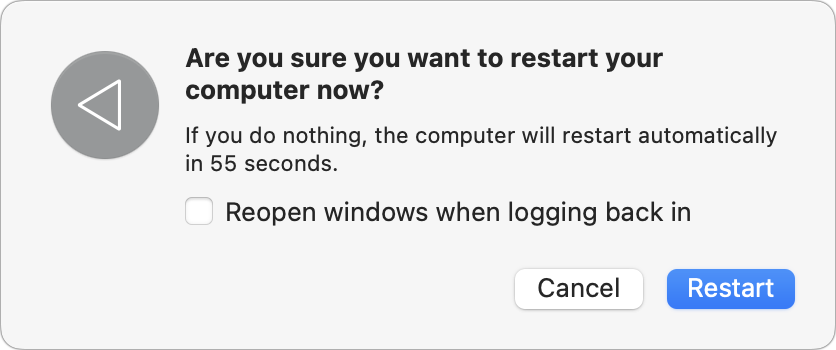
  • Restart the device—it’s always worth trying. On an iPhone or iPad, choose Settings > General > Shut Down (at the bottom), slide to power off, and then press and hold the side (iPhone) or top (iPad) button to turn the device back on. On a Mac, just choose Restart from the Apple menu.

When Messages in iCloud is working properly, though, you can carry on text message conversations using any of your devices at any time. It’s especially nice to switch to the Mac for easier typing when you’re in an involved conversation.

(Featured image by iStock.com/anyaberkut)

Six Reasons Why You Should Restart Your Mac Periodically

Long ago, before macOS was as stable as it is today, Mac users restarted their Macs regularly. Back then, Macs couldn’t sleep, either, so it was common for users to shut down at the end of the day and start up the next morning, effectively restarting daily.

With modern Macs using the barest trickle of power in sleep and both apps and macOS almost never crashing, many Mac users have gone to the opposite extreme, letting their Macs run for months between restarts. However, such an approach brings with it new problems, and as with so many things, there’s a happy medium.

Why are we banging this particular drum? As an off-the-cuff estimate, about a quarter of the problems reported to us can be solved by a restart. Really! Just click the Apple menu and choose Restart. As long as you save your work first or when prompted, nothing bad will happen.

Here are our top six reasons you should restart periodically:

  • Improved security: Restarting itself doesn’t generally improve security (although it could theoretically clear malicious code running in memory). However, installing macOS updates requires a restart, and we strongly recommend installing security-focused updates shortly after they’re released. If you resist installing updates because of the need to restart, you’re increasing your risk significantly.
  • Resolve problems: Modern Macs may be more stable than ever, but things can still get funky. If apps are crashing, peripherals aren’t connecting, you’re seeing visual glitches, or anything else seems wrong, the first troubleshooting step is a restart.
  • Better performance: We all have a feel for how long different tasks on our Macs take. If icons for launching apps bounce longer than usual, windows draw slowly, or you see the spinning pinwheel repeatedly, restart. Performance problems are often caused by a poorly coded app or out-of-control process causing your Mac to run out of physical memory and switch to slower virtual memory. Restarting clears such issues.
  • Recover drive space: Another memory-related bonus of restarting is that it can free up drive space. When macOS starts to rely on virtual memory, it creates swap files that can consume gigabytes of space. Restart, and all that space is returned, at least until your app usage requires it again.
  • Get updates: Most apps notify you of updates at launch, and some automatically download their updates but install them only when you quit. Either way, a restart results in all your apps quitting and relaunching, which ensures they either install or at least notify you of important updates.
  • Start fresh: Even if having 20 or more apps open isn’t affecting your Mac’s performance, a clean slate can help you focus on your work better. A simple restart quits everything and lets you start over with just those apps set to launch at login. For a completely fresh start, make sure to deselect “Reopen windows when logging back in” in the restart dialog. Of course, if you have a lot of documents open and need to return to them, leave that checkbox selected to pick up exactly where you left off.

There’s no set schedule on which you should restart, but if you use a Mac at work and like routines, it wouldn’t be problematic to restart on Friday evening as you wind down to leave for the weekend. That way, you’d return to a clean slate on Monday morning. It’s also totally fine to restart whenever it might be helpful.

Just don’t fear the restart—modern Macs, especially those with Apple silicon, restart quickly, and the benefits far outweigh the few minutes of downtime.

(Featured image based on an original by iStock.com/Armastas)

Take Advantage of the Reference Library in Your Mac

You may be used to Mac apps using red underlines to mark misspelled words, but did you know that macOS has also long included a fully featured Dictionary app? It provides quick access to definitions and synonyms in the New Oxford American Dictionary and the Oxford American Writer’s Thesaurus, along with definitions of Apple-specific words like AirDrop and Apple ProRes RAW. But that’s far from all it can do.

Getting on the Same Page

First, some basics. Open the Dictionary app from your Applications folder and type a word or phrase into the Search field. As you type, Dictionary starts looking up words that match what you’ve typed—you don’t even have to press Return. It’s a great way to look up a word when you aren’t quite sure of the complete spelling. If more than one word matches what you’ve typed, click the desired word in the sidebar.
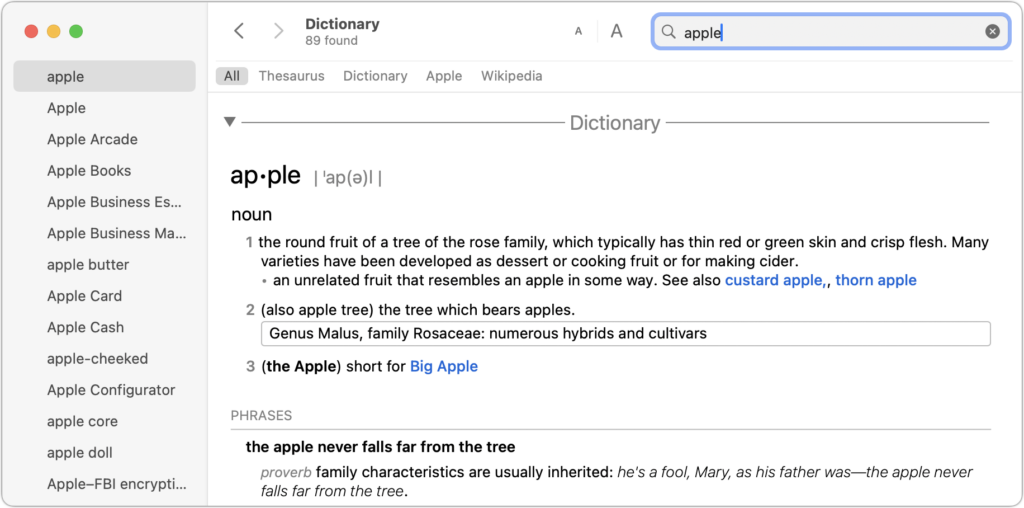
Notice the gray buttons below the toolbar, which represent the references Dictionary will consult for every search, including Wikipedia if your Mac has an Internet connection. In short, Dictionary gives you instant access to a dictionary, a thesaurus, and an encyclopedia containing over 6.8 million articles in English. Click a reference to limit your search to that source, or click All to scan all of them.

If you want to look up words in another language and get an English definition, Dictionary even provides translation dictionaries alongside a long list of other reference works. Choose Dictionary > Settings and select the ones you’d like to use. Then, drag the selected entries into the order you want them to appear below the toolbar.
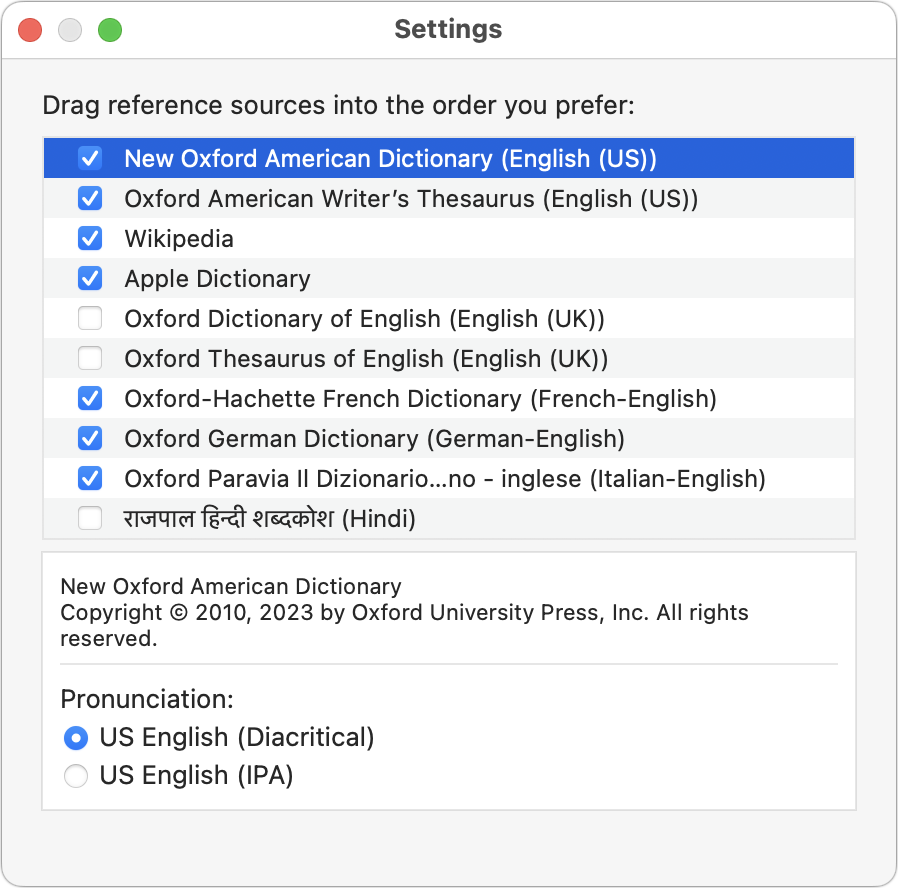
Once you’re in a definition, note that you can copy formatted text for use in other apps—always helpful when wading into grammar and usage arguments on the Internet. More generally, you can click nearly any word in Dictionary’s main pane to look it up instantly. If dictionaries had been this much fun in school, we’d all have larger vocabularies! Use the Back and Forward arrow buttons to navigate among your recently looked-up words.

Alternative Lookup Methods

As helpful as the Dictionary app is, you probably don’t want to leave it open all the time. Happily, Apple has provided several shortcuts for looking up words:

  • Spotlight: Press Command-Space to invoke Spotlight, and enter your search term. If you get too many unhelpful results from Spotlight, deselect unnecessary categories from System Settings > Siri & Spotlight.
  • Lookup: Even better, hover over a word or phrase with the pointer and press Command-Control-D—you can also Control-click the word and choose Look Up “word.” If the app supports it, macOS displays a popover with the definition. If you use a trackpad, you can also do a three-finger tap on the selected word—make sure the “Look up & data detectors” checkbox is selected in System Settings > Trackpad > Point & Click.

Now that you know how to take full advantage of the reference works Apple has built into macOS, it’s time to get in touch with your inner logophile—look it up.

(Featured image by iStock.com/Chinnapong)