Badges? We Don’t Need No Stinkin’ Red Badges (On Our iPhone Apps)

Quick quiz: what does a red number badge on the Phone icon on your iPhone mean? You’d be right if you said that it indicates the number of missed calls or voicemail messages. The Mail and Messages apps also use a red badge to display the number of unread messages; Settings uses one to indicate that software updates are available; and Reminders shows a badge for the number of tasks due today. Third-party apps also use red badges to indicate that some number of somethings await you inside. You’ll also see a red badge on any folder that contains apps that are themselves showing badges—the folder’s badge sums the total of the badges inside.

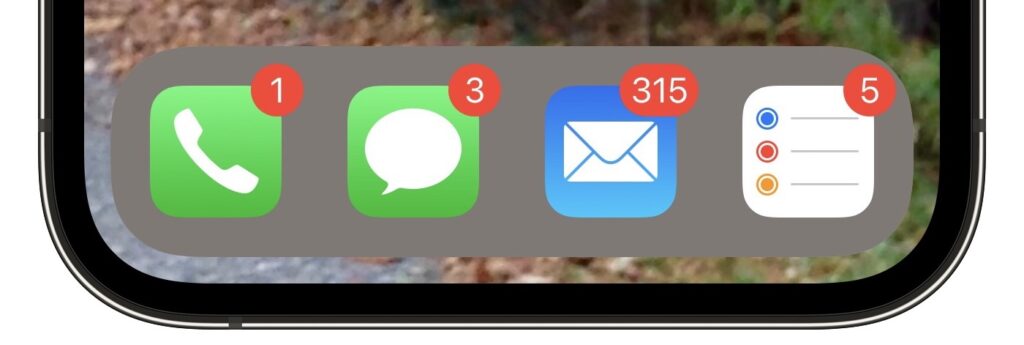
We’re willing to bet that some of you stay on top of your badges at all times, checking the missed calls, reading the messages, and completing the to-dos. Others don’t find the badges helpful and either ignore them or find them somewhat annoying. Who needs to know they have 315 unread email messages?

Here then is our advice on how to ensure that the red badges either provide useful information or get out of your way.

Clear Badges Organically

Being told that you have 17 voicemail messages that you haven’t listened to or 32 unread texts in Messages isn’t helpful—at best, you have to remember that you had only 16 voicemail messages yesterday. There’s no option for dealing with them all at once, but it’s worth taking a few minutes while standing in line or otherwise killing time to clear the badges manually.

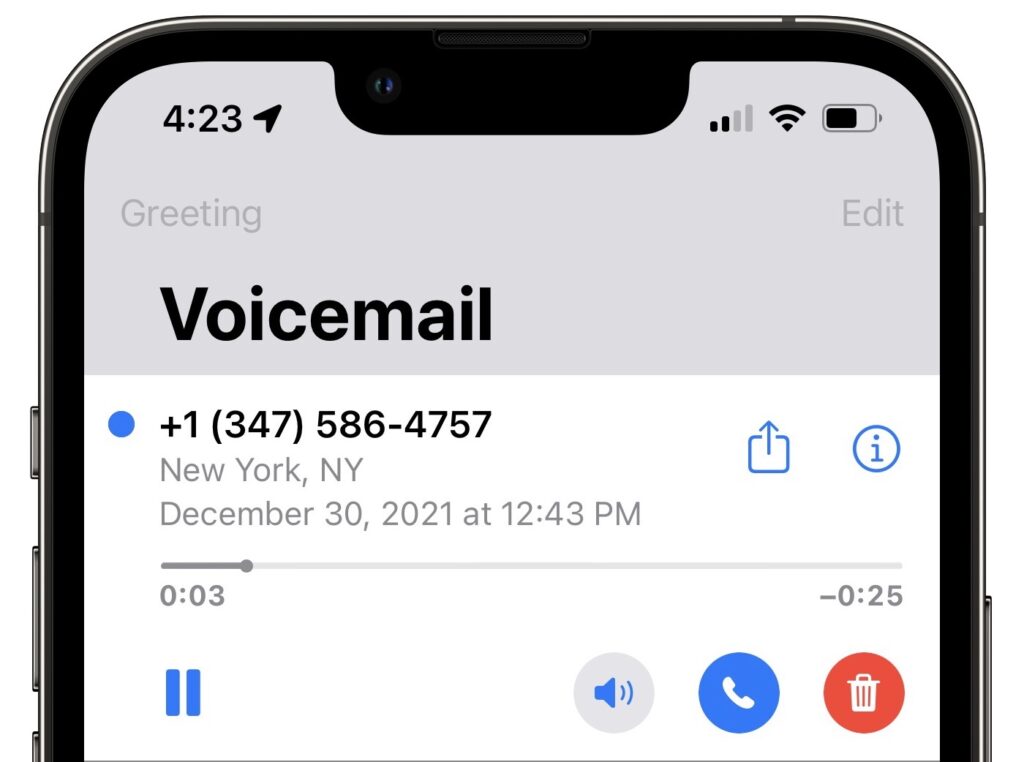
Precisely how you do this depends on the app. In the Phone app, all you have to do to clear the missed calls in the badge is tap Recents at the bottom—that’s enough to mark them as viewed. For voicemails, however, you’ll either have to listen to at least some of the message or delete it by swiping all the way to the left. (Remember that you can drag the playback slider to fast-forward if you want to mark it as listened without actually doing so.)

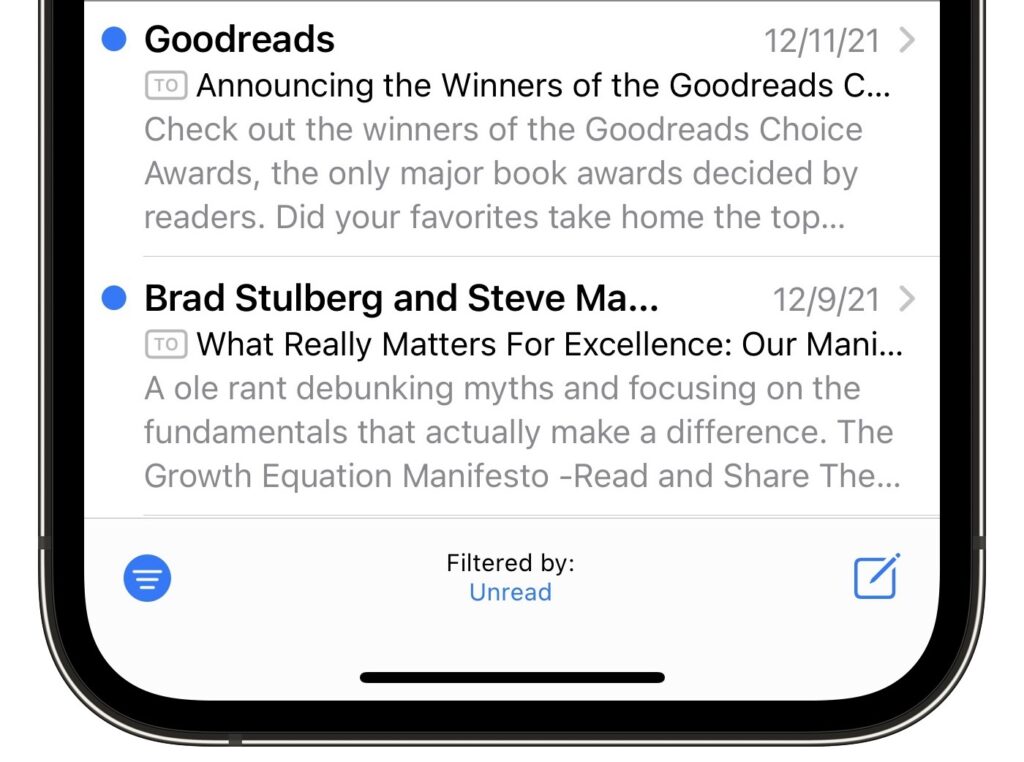
In Messages and Mail, the trick is to read or delete each message. That mostly means just loading it quickly and then moving on, although you can also swipe left to delete unread conversations or email threads. In Messages, you’ll have to scroll through all your conversations, looking for those that have a blue unread dot next to them. In Mail, you can tap the Filter button at the bottom to show only unread messages (tap Filtered By and select Unread if it’s set some other way).

Regardless, the goal is to mark everything as dealt with so the badge goes away, not for the sake of making it go away, but so when it returns with the next unread message or new voicemail, it’s giving you actionable information.

Disable Unnecessary Badges

However, some badge numbers are never useful. Unless you receive very little email, being told you have more than a handful of unread emails will likely just cause stress, not encourage you to deal with those messages. That’s especially true if a session in Mail merely knocks the number down to a still-high value. (“Oh good, now I only have 289 unread messages.”) Or you may just dislike the badges in general—that’s fine too.

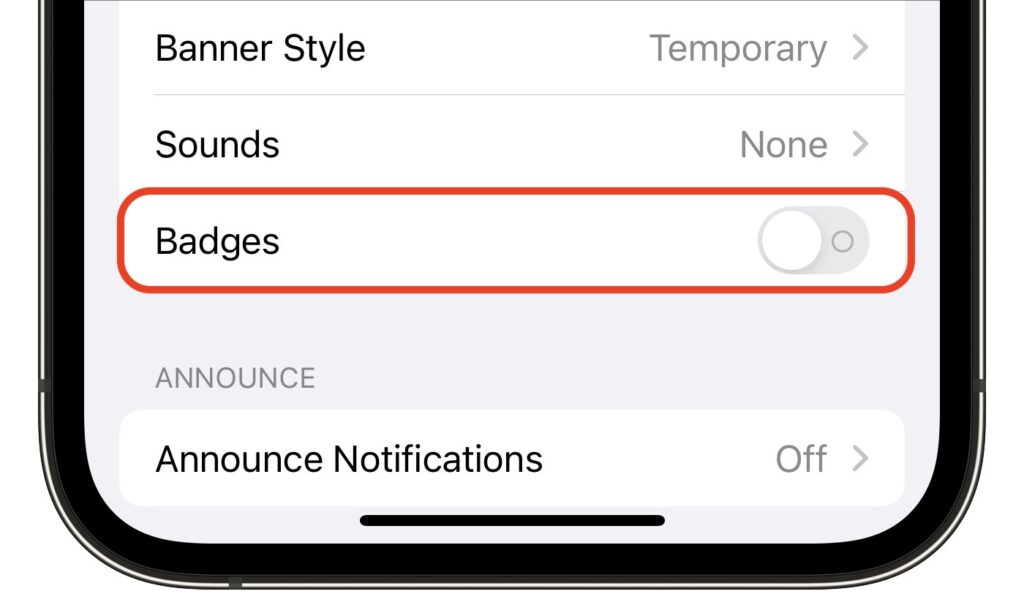
Luckily, you can turn the badges off entirely. Go to Settings > Notifications > AppName and disable Badges. You’ll never see that red badge of nagging again.

Clear Stuck Badges

Sometimes an app will end up with a red badge even when you’re certain that you’ve done whatever is necessary to clear it. Here are a few things to try:

  • Update the app: Go to the App Store app, tap your avatar in the upper-right corner, and tap Update All if it appears (pull down to make the App Store check for new updates). It’s generally worth going to Settings > App Store and enabling App Updates so they come in automatically.
  • Force-quit the app: There’s no reason to force-quit apps unless they’re misbehaving, but a stuck badge counts as bad behavior. Swipe up from the very bottom of the screen and pause to enter the app switcher—or on Touch ID-equipped devices, double-press the Home button—and then swipe up on the card for the app in question to force-quit it.
  • Restart the iPhone: If all else fails, restart the iPhone. First, press and hold the side button and either volume button (iPhone X, 11, 12, and 13), the side button (iPhone 6, 7, 8, and second-generation iPhone SE ), or the top button (first-generation iPhone SE, iPhone 5, and earlier). Wait until the power off slider appears, drag it, wait 30 seconds, and then press either the side button or the top button to turn the iPhone back on.
  • Disable that app’s badges: If nothing else works to clear a stuck badge, you can always resort to the steps above to disable badges for that app.

Making sure that app badges are either useful or hidden won’t change your life, but given how often we look at our iPhones, even little tweaks like this can lift your mood.

(Featured image by Adam Engst)

Perturbed by the Price of Adobe Creative Cloud? Consider the Affinity Suite

Few would disagree that the most popular image editing software in the world is Adobe Photoshop, the top illustration app is Adobe Illustrator, and the preeminent page layout package is Adobe InDesign. Many design and publishing professionals spend their lives in one or more of these apps.

There’s one problem: cost. Adobe provides access to them only via Creative Cloud subscriptions, where each app costs $21 per month, making it hard to pass up the $53-per-month All Apps bundle that includes all three plus Premiere Pro, Acrobat Pro, and more. That All Apps bundle works out to an eye-watering $636 per year.

For many people, that $636 annual expense is just the cost of doing business. They need the full power of Adobe’s tools, and they need to collaborate with others using native Photoshop, Illustrator, and InDesign files. If you fall into that camp, no worries, and you can stop reading right now.

However, if you’re subscribing to Adobe Creative Cloud merely because you need a capable image editor, illustration app, or page layout package, and you aren’t otherwise deep in the Adobe ecosystem, consider the Affinity suite from Serif: Affinity Photo, Affinity Designer, and Affinity Publisher, each of which costs $55. Once. That’s right, you can buy all three for $165, or just about the same as 3 months of Creative Cloud. Updates are free. Versions for Microsoft Windows are available for $55 too, and Affinity Photo and Affinity Designer also come as $10 iPad apps.

The obvious question is if you could replace Photoshop, Illustrator, and InDesign with Affinity Photo, Affinity Designer, and Affinity Publisher. We can’t answer that for sure—the Adobe apps have so many features that it’s impossible to know which are most important to you and if the Affinity apps’ features are comparable. Some may not match up—we’ve been told that master pages in Affinity Publisher are a bit funkier than master pages in InDesign, for instance. Others may even be better—some people we know find exporting Web graphics from Affinity Designer easier than exporting from Illustrator. And some may not exist at all—it doesn’t seem that Affinity Publisher (the newest addition to the suite) has a Track Changes feature like InDesign.

For instance, just as you can embed Photoshop and Illustrator files in an InDesign layout and then use the Edit Original command to edit them in the other app, you can embed Affinity Photo and Affinity Designer files in Affinity Publisher. Serif’s StudioLink technology provides direct access to the primary tools from Affinity Photo and Affinity Designer right within an Affinity Publisher document. It’s neat.

Overall, the feature sets are similar. Those who would consider switching from Creative Cloud can probably figure out how to accomplish their necessary tasks using the Affinity apps. That’s not to say that they’re clones of Adobe’s apps. In many cases, you might need to learn a new technique for accomplishing some task. Along with full documentation, Serif provides hundreds of tutorial videos and runs an active user forum where people ask questions, make suggestions, and share tutorials. Simple Web searches also often turn up blog posts with useful techniques from Affinity users.

What about moving files back and forth? Affinity Photo can open Photoshop’s proprietary PSD files, although it’s not guaranteed to import everything perfectly. Affinity Designer can open Illustrator documents as long as they were saved with the Create Compatible PDF File option selected. Similarly, it can open Illustrator-created PDF files that many designers send to clients as proofs. And Affinity Designer can open InDesign files that have been saved in IDML (InDesign Markup Language) format. Plus, you can often just copy and paste text and objects between the apps. If you decide to switch, you might want to continue your Creative Cloud subscription while ensuring that your key Adobe files are saved such that the Affinity apps can open them.

On the export side, the Affinity apps can export in many formats, but they’re more for final exports when it’s time to print or publish. You probably wouldn’t want to use the Affinity apps to collaborate on files with those using the Adobe apps. That said, Affinity Photo can export PSD files for use in Photoshop, and Affinity Designer and Affinity Publisher are probably best served by exporting PDF files that Illustrator and InDesign can open. Just don’t expect everything to move between the apps flawlessly.

In the end, the decision is yours—we’re merely suggesting the Affinity suite as a cost-saving option if you don’t need everything Creative Cloud provides. Visit the Affinity site, watch Serif’s marketing and tutorial videos, and poke around in the extensive online help. Free trial versions of all the apps are available, and there’s a 14-day money-back guarantee. In the best of all worlds, you’ll save hundreds of dollars per year and find that you like the Affinity apps more than Adobe’s.

(Featured image by Serif)

How to Stop Forgetting Your Apple Gear with “Notify When Left Behind”

Apple’s Find My technology is a lifesaver when it works, enabling you to locate and potentially retrieve lost or stolen devices. It’s not perfect, even with the addition of the Find My Network, which drafts other nearby Apple devices to relay the location of a lost device, but it’s a heck of a lot better than nothing. Part of the problem is that you have to notice that a device is missing before you can bring Find My into play to see where it might be.

No longer, thanks to the brilliant new Notify When Left Behind feature of iOS 15. Why wait until you notice that your AirPods aren’t in your bag when the Find My app can notify you shortly after you leave their immediate vicinity? Even if that means talking your way back onto an airplane to retrieve your AirPods from the seatback pocket, that’s better than discovering your loss an hour or two later.

Notify When Left Behind doesn’t support all Apple devices—you know that you’re leaving your 27-inch iMac behind whenever you leave home, and HomePods tend to stay put. But it does work with the iPhone, iPad, AirPods, AirTag, and Mac laptops. Somewhat surprisingly left out is the Apple Watch, perhaps because Apple assumes it would always be either charging or on your wrist.

To set up Notify When Left Behind for your devices, follow these steps:

  1. In the Find My app, tap Devices at the bottom of the screen to show all your devices.
  2. Tap the name of the device for which you want to enable Notify When Left Behind.
  3. Scroll up to reveal the Notifications section, and tap Notify When Left Behind.
  4. Enable the Notify When Left Behind switch, then tap Done.
  5. Repeat for each desired device, switching to the Items screen to include AirTags.

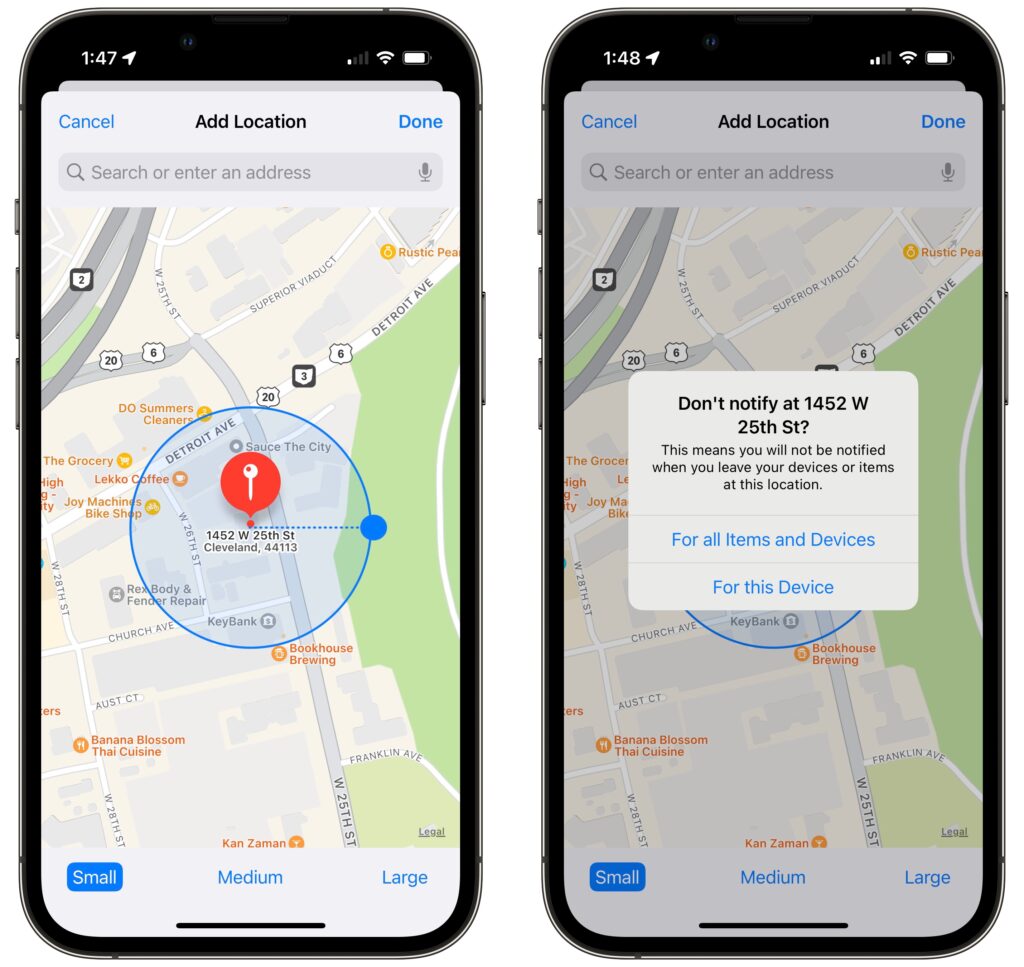
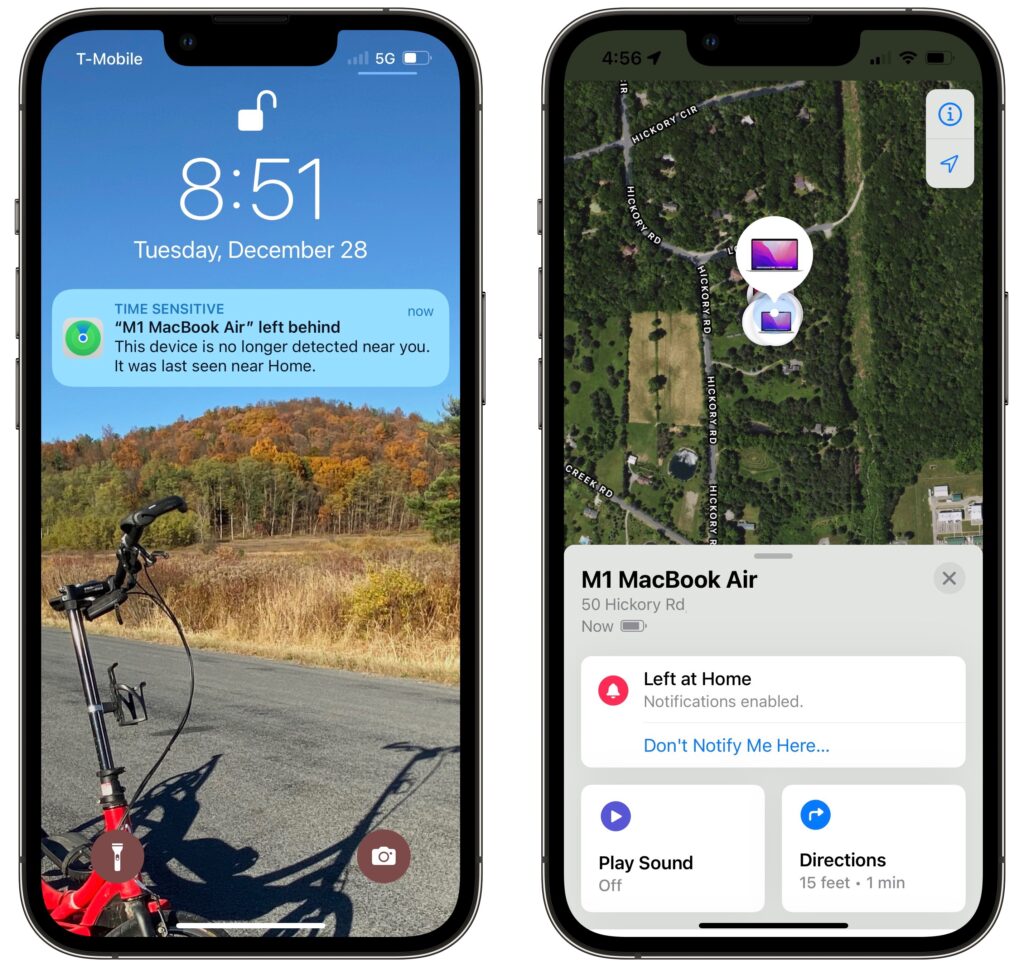
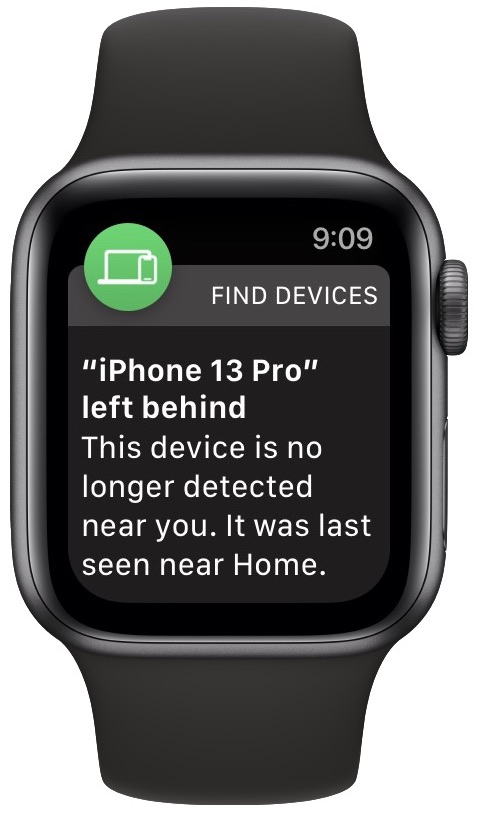
“Wait a second,” you’re thinking. “How can your iPhone tell you that you’ve left it behind if it’s not with you?” Apple is one step ahead of you. The key is your Apple Watch—if you leave your iPhone on your desk at work when going home for the day, your Apple Watch will alert you 5 or 10 minutes later. It may be annoying to go back for it, but it’s better than not realizing until you get home.

Your next thought is probably, “Won’t it be annoying if my iPhone tells me that I’ve left various devices behind even when I meant to leave them there?” Apple has an answer to that as well. As you can see in the Notify When Left Behind screen above, there’s a Notify Me, Except At section to which you can add places that it’s acceptable to leave your devices. Find My even suggests your Home location; just tap the + button to add it. If you tap New Location, you can scroll the map to any location, press and hold to drop a pin, and then choose a small (300 feet), medium (800 feet), or large (1400 feet) radius to ignore. When you add a custom location, Find My asks if it should apply to just the current device or to all your devices and items.

When you actually leave a device behind, you’ll get a notification on your iPhone. Tap it to see where you left the item, which may be all the reminder you need. If you tap Continue to open the Find My app, you can tap Directions to be directed to where the device is or tap Don’t Notify Me Here if the location is a place where you don’t mind leaving your devices.

That’s all there is to Notify When Left Behind. It’s the perfect example of a feature that works quietly in the background to help you avoid problems.

(Featured image by iStock.com/Farknot_Architect)