We regularly hear from people who think they need Adobe Acrobat DC to manipulate PDFs. Don’t misunderstand: Adobe Acrobat is the gold standard, but it’s complicated and expensive—$14.99 per month or as part of Creative Cloud for $52.99 per month. In contrast, Apple’s Preview is easy and free with macOS. Here are six tasks that people may think require Acrobat but can easily be accomplished in Preview.
Remove and Rearrange or Export Pages
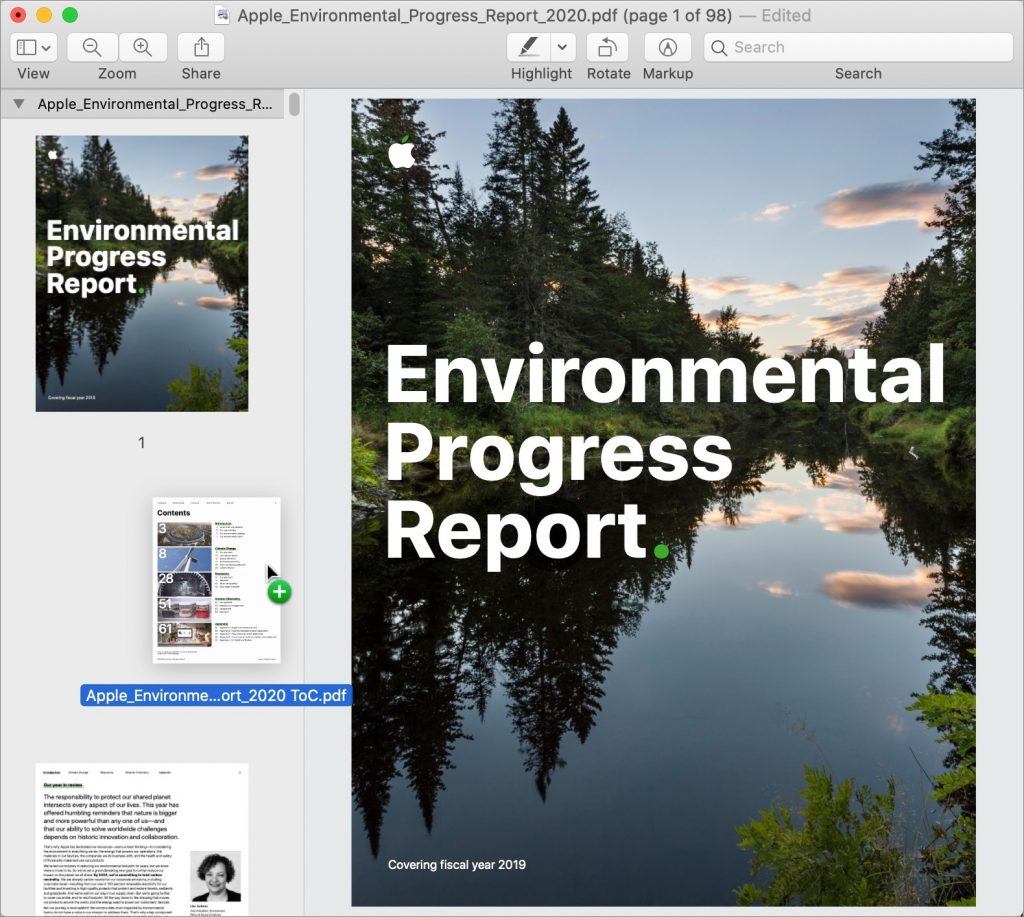
Have a PDF with unnecessary pages? You can delete them in Preview. First, make sure page thumbnails are showing in the sidebar by choosing View > Thumbnails. Then select the pages you want to remove and press Delete. Choose File > Save when you’re done—you’ll need to do that after all the rest of these tasks too.
Rearranging pages also happens in the sidebar—just drag the thumbnails as needed. If you drag a thumbnail to the Finder, Preview exports the page as its own PDF file.
Merge and Add Pages
What about putting pages from one PDF into another? Preview has your back there too. Open both PDFs, make sure their sidebars are showing page thumbnails, and then drag one or more thumbnails from one sidebar to the other, dropping them between the desired pages in the destination.
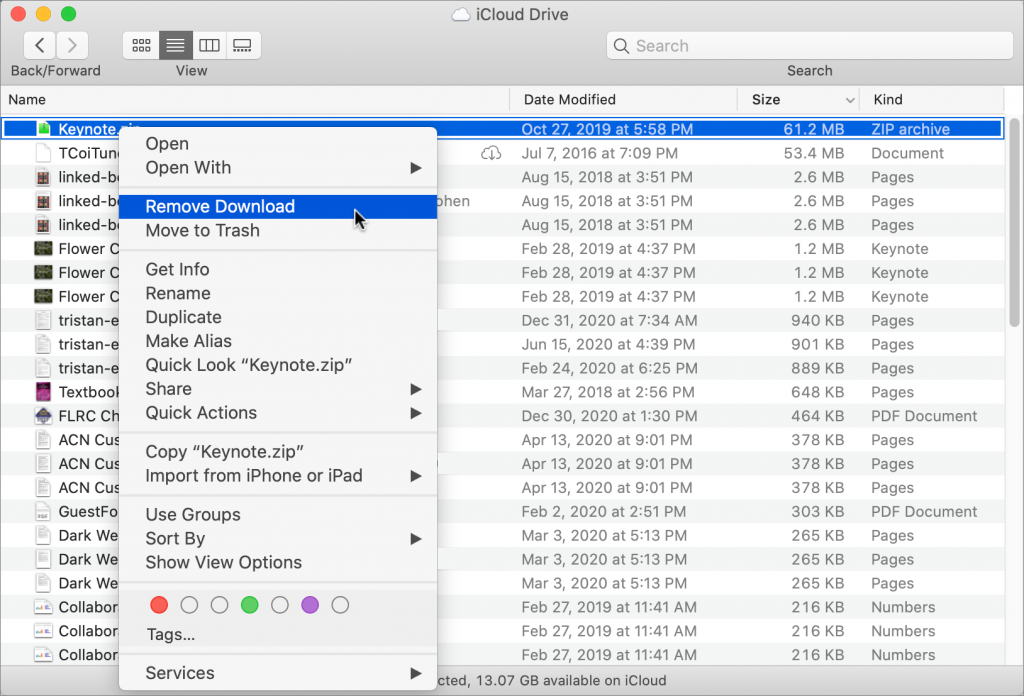
You can also drag a PDF from the Finder into the sidebar to add all its pages. Or, to take a photo or scan a document and insert it into the document, Control-click in the sidebar and choose Import from iPhone or iPad.
Annotate Text
Let’s say someone asks for edits or comments on a PDF. Although you can’t change the text with Preview, you can mark up the document.
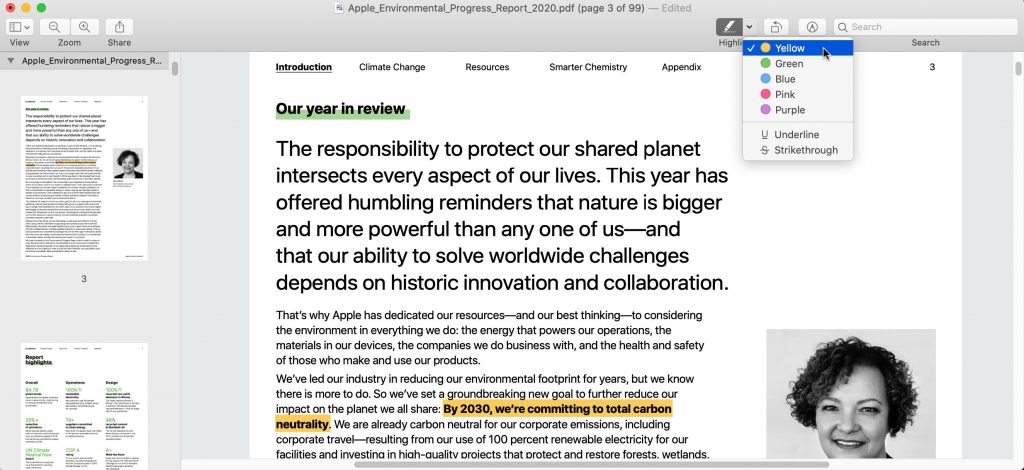
- Highlight text: They may give you flashbacks to high school, but Preview provides a handful of colored highlighters, along with underline and strikethrough styles. Choose one from the Highlight menu in the toolbar and then select the desired text.
- Add highlight notes: To ensure that your highlights make sense to others, add notes to them. Control-click the highlighted text and choose Add Note. Then enter your note in the colored box that appears. It shrinks when you click away from it and expands when you click it again.

- Add general notes: You can also place faux sticky notes anywhere on a PDF page. Reveal the Markup toolbar by clicking the Markup button, and then click the Note button. Dag the closed note box to position it on the page. See all your notes in the sidebar by choosing View > Highlights and Notes.

- Add shapes and text boxes: The Markup toolbar also contains controls for creating various shapes (including lines with arrows) and text boxes. At times, the best way to show what you mean is to put a box, line, or text directly on the page. Click a shape to add it—text you type while it’s selected sticks with the shape, like the speech balloon below and the arrows above.
If you do need to edit the text of a PDF, that’s a job for Adobe Acrobat or another PDF tool like Smile’s PDFpen.
Redact Text
Sometimes, when you’re sharing a PDF, you want to redact sensitive information so it can’t be read. macOS 11 Big Sur’s version of Preview can permanently obscure and delete selected text from the document. Choose Tools > Redact and select the text you want to hide.
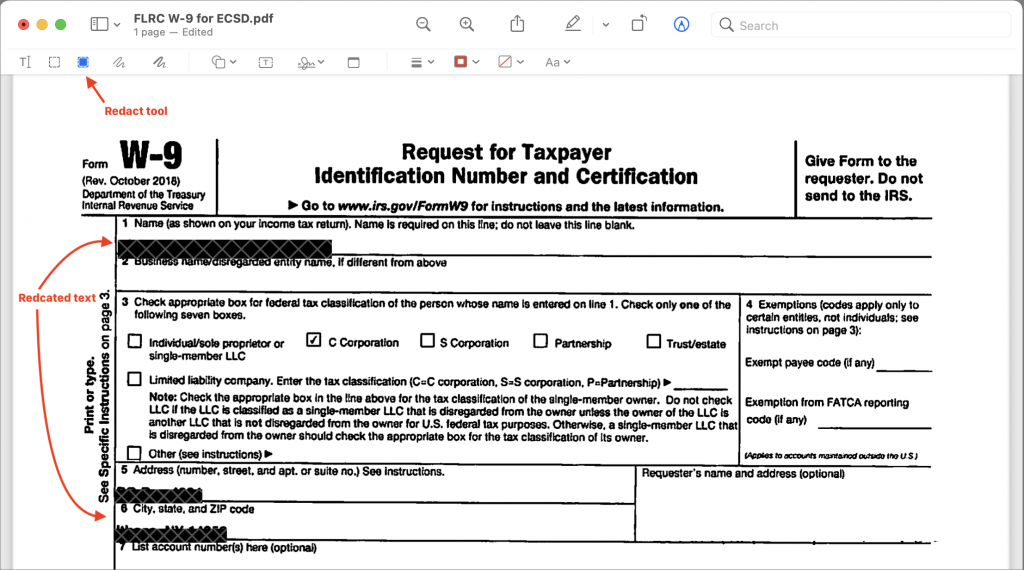
In earlier versions of macOS, you can simulate redaction by covering text with a colored rectangle. Unfortunately, recipients could delete your rectangle or copy the text underneath it. Don’t depend on this workaround to protect confidential information. For true redaction in older versions of macOS, use Acrobat or PDFpen.
Fill PDF Forms
Although Preview cannot create fillable PDF forms (again, turn to Acrobat or Smile’s PDFpenPro), it works fine for entering information into such forms. If you have to fill out an IRS form for your employer, for instance, Preview should work fine. Just click in a field and type, or click a checkbox to select it.
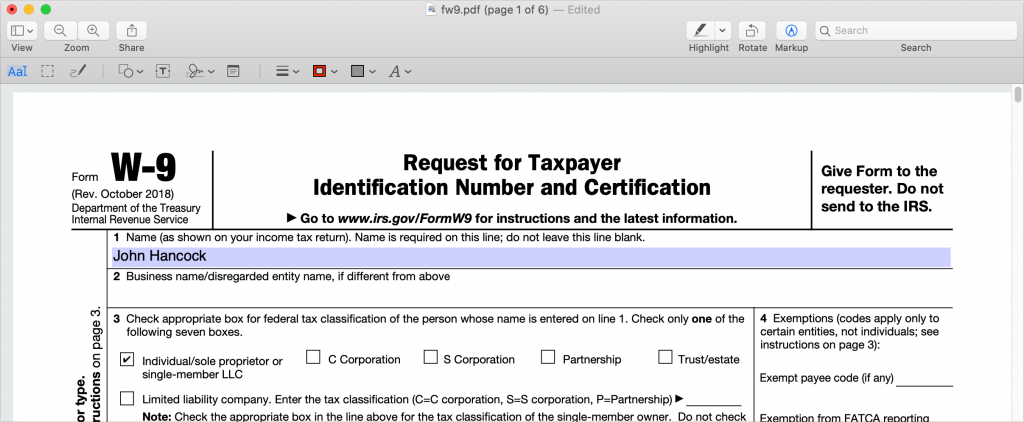
One warning. We’ve heard occasional reports that Windows users reading PDFs with forms filled out in Preview sometimes don’t see the entered text. When returning an important form, it’s always best to ask the recipient to confirm that it worked. If it doesn’t, fall back on the free Adobe Acrobat Reader DC.
Sign Documents
Now that so much paperwork has gone digital, we often need to sign PDFs. The most important documents will probably use a service like SignEasy that’s designed for collecting legally binding, secure signatures. But for something like a simple permit application, you can add your signature in Preview by clicking the Signature button in the Markup toolbar and choosing it.
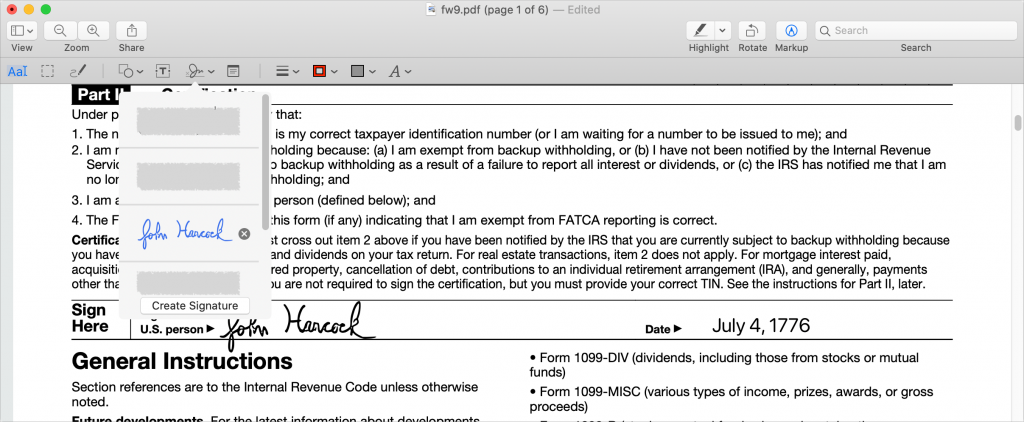
Inserting (and resizing) an already created signature is easy, as is the one-time process of making one. Click the Signature button, and then click Create Signature. If your Mac has a trackpad, write on it with your finger or a rubber-tipped iPad stylus. Or use a marker to write your signature on paper and take a picture of it with the camera. In macOS 10.15 Catalina and later, you can also create a signature on an iPhone or iPad. Once created, the signature sticks around in Preview and even syncs to your other Macs through iCloud.
Note that Preview’s signature is just a graphic that could be copied, so it’s no more protected than a handwritten signature that could be scanned or photocopied.
Useful as all these features are, they’re just the tip of the iceberg when it comes to what Preview can do, particularly with graphics. For a complete look at Preview’s features, check out the 178-page ebook Take Control of Preview.
(Featured image by Cytonn Photography from Pexels)