8 Ways Apple Improved the Camera App in iOS 14

It’s difficult for most of us to imagine that a camera—something that still feels like it’s a standalone object—could be improved significantly with a software update. But now that cameras are part of our phones, code is king. With iOS 14, the camera in your iPhone becomes all the more capable. You’d be excused for not discovering the new features, though, so here’s a rundown.

Apple ProRAW

For professional and committed amateur photographers using an iPhone 12 Pro or Pro Max, perhaps the most important new feature of iOS 14 is the Apple ProRAW image format. Standard RAW images provide raw information from the camera sensor, which can be tweaked in editing to achieve results that the camera’s standard processing can’t. Alas, RAW images can’t take advantage of the iPhone’s computational photography capabilities, such as stitching together many images to produce a single image with good exposure even in low light conditions.

The Apple ProRAW format gives you the best of both worlds: the iPhone’s computational photography plus the added flexibility of working with raw data to adjust exposure, color, and white balance. It’s far too complex to get into here, so if you’re interested, check out these articles by photographers Ben Sandofsky, Austin Mann, Nick Heer, and Om Malik, all of which feature copious visual examples.

Faster Performance

We’ve all missed shots because we couldn’t get the Camera app open in time. That may still happen, but Apple is doing its best to help. The company says that the Camera app now opens faster and the time to the first shot is 25% faster. When taking a series of Portrait shots, the time between shots is 15% faster. Overall, Apple says, the Camera app is 90% faster, taking up to 4 frames per second.

Prioritize Faster Shooting

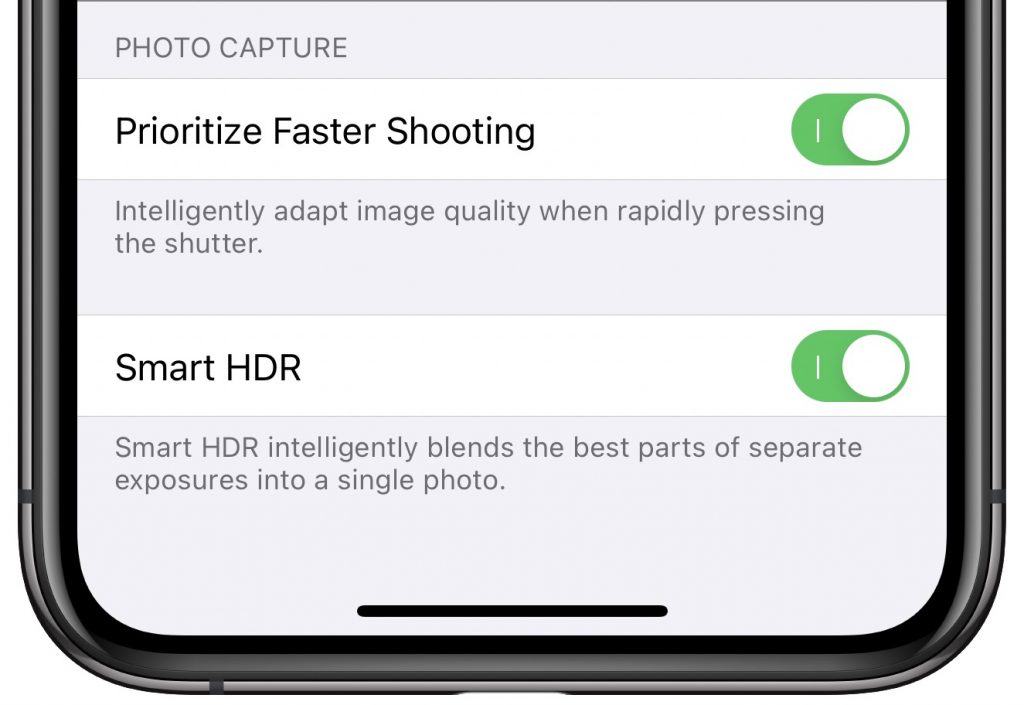
Want still more shooting speed? If you take a lot of action shots, iOS 14 offers a new Prioritize Faster Shooting option that reduces the amount of processing (probably reducing image quality slightly) when you press the shutter button rapidly. Turn that on in Settings > Camera.
Use Volume Buttons for Burst Photos or QuickTake

Burst mode is the best way to make sure you get the photo when shooting fast-moving subjects. Historically, you invoked burst mode by pressing and holding the shutter button. Unfortunately, in iOS 13 on the iPhone 11 models, Apple assigned that action to the QuickTake feature, which automatically starts taking a 1080p video regardless of the current mode. Burst mode required pressing the shutter button and dragging to the left, which is tricky to perform correctly under pressure.

Happily, iOS 14 gives us additional options. When in the Camera app, press and hold the physical Volume Up button to invoke burst mode—let up to stop taking photos. Pressing and holding the Volume Down button invokes QuickTake and records video as long as you press the button.

QuickTake Comes to iPhone XR, XS, and XS Max

QuickTake was initially available only on the iPhone 11, 11 Pro, and 11 Pro Max from 2019. When Apple released the second-generation iPhone SE in 2020, it too featured QuickTake. With iOS 14, the QuickTake feature also comes to 2018’s iPhone XR, XS, and XS Max. So if you have one of those models, try pressing and holding the shutter button to take a video, or use the Volume Down button.

Change Video Mode in the Camera App

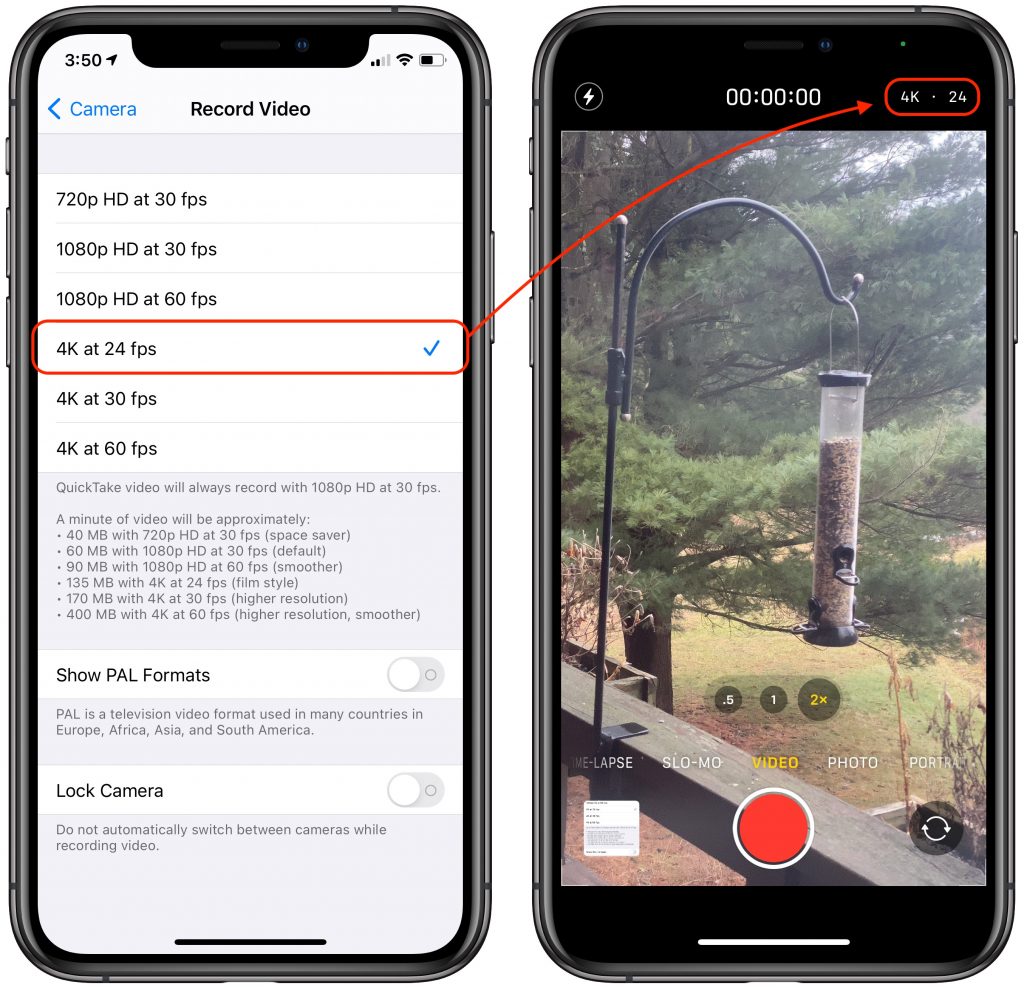
Most people will probably want to set the resolution and frames-per-second for videos once and then forget it. That’s what you do in Settings > Camera > Record Video and Record Slo-mo. But if you do want to change the settings, getting back to that screen quickly is difficult. In iOS 14, Apple added a pair of tiny indicators to the upper-right corner of the Camera app when you’re in Video or Slo-mo. They tell you what resolution and frames-per-second you’re using, and tapping either one cycles you through the other options.
Preserve Exposure Adjustment

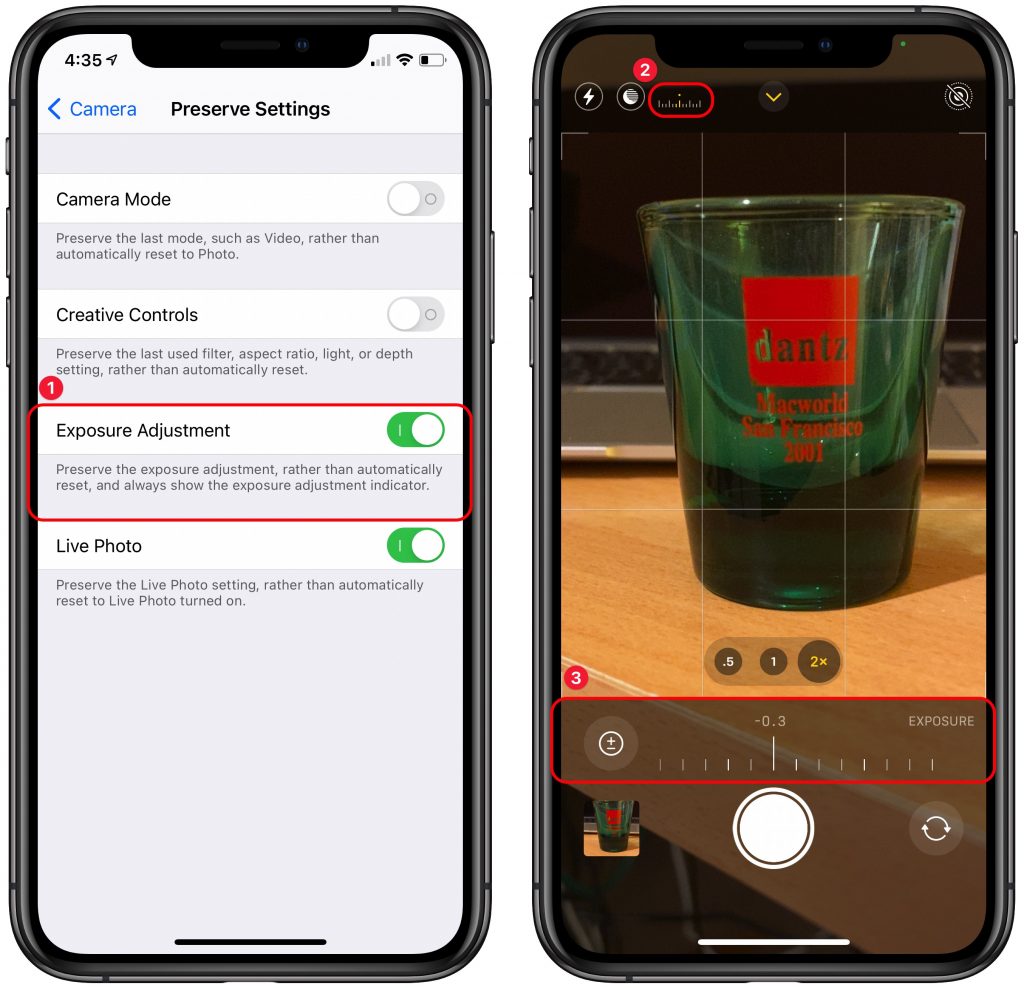
Sometimes, when you’re taking photos in challenging lighting conditions, you want to override the automatic exposure settings and keep those settings across multiple shots. In Settings > Camera > Preserve Settings, you can now enable Exposure Adjustment ➊, which maintains your settings across shots and shows the exposure adjustment indicator ➋ near the upper left at all times. Tap that indicator to display the exposure adjustment slider ➌ below.
Mirror Front Camera

By default, when you’re taking a selfie with the iPhone’s front-facing camera, the preview shows you what you’d see in a mirror, but the eventual photo instead displays what someone looking at you would see. This is most noticeable when there’s text in the shot. Some people want the photo to look exactly like the mirrored version without having to edit the photo and flip it. iOS 14 now makes that possible with a Mirror Front Camera switch in Settings > Camera. It affects only the photo you take, not the preview, so you won’t see any change while composing the shot. In the examples below, the left-hand image shows the Camera app’s default behavior, and the right-hand image shows what you get if you enable Mirror Front Camera.

If any of these new features sound compelling, take a few minutes to see if you can work them into your regular shooting.

(Featured image based on an original by Element5 Digital from Pexels)

M1-Based Macs Have New Startup Modes: Here’s What You Need to Know

For many years, Macs have relied on sets of keys held at startup to enable specific modes. Most notably, pressing Option displays the Startup Manager and lets you pick a boot drive, Command-R starts up from macOS Recovery, Command-Option-P-R resets the NVRAM, Shift starts up in Safe mode, D opens Apple Diagnostics to check the hardware, and T starts up in Target Disk Mode. Needless to say, obscure key combinations aren’t the friendliest way to help someone who may already be stressed out about their Mac not working, so Apple improved things for the new M1-based Macs.

The most important part is that you no longer have to press a key combination during startup. Instead, press and hold the power button until the screen shows “Loading startup options…” and displays the Startup Manager.

Unfortunately, Apple is still a little fast and loose with terms, so we’ve tried to list all of the ones you might see.

Startup Manager / Startup Disk

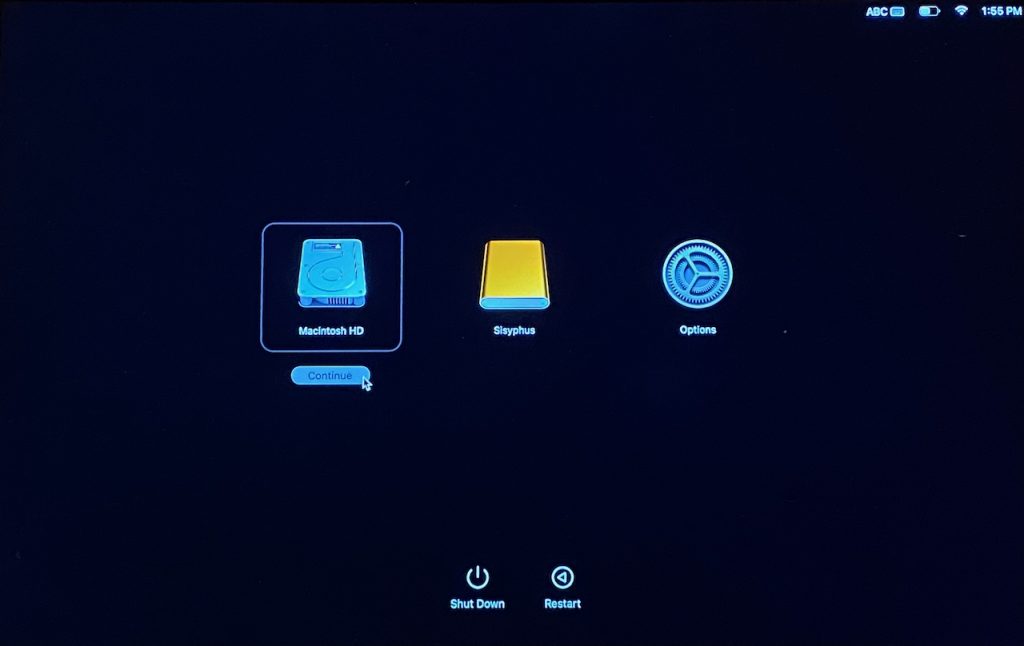
If you have multiple boot drives and wish to switch among them, you’ll want to use Startup Manager. Immediately after you see “Loading startup options…,” the Mac displays the new Startup Manager, which shows icons for all the bootable drives, along with buttons for Options, Shut Down, and Restart. To boot from a particular drive, select it and click Continue under it.

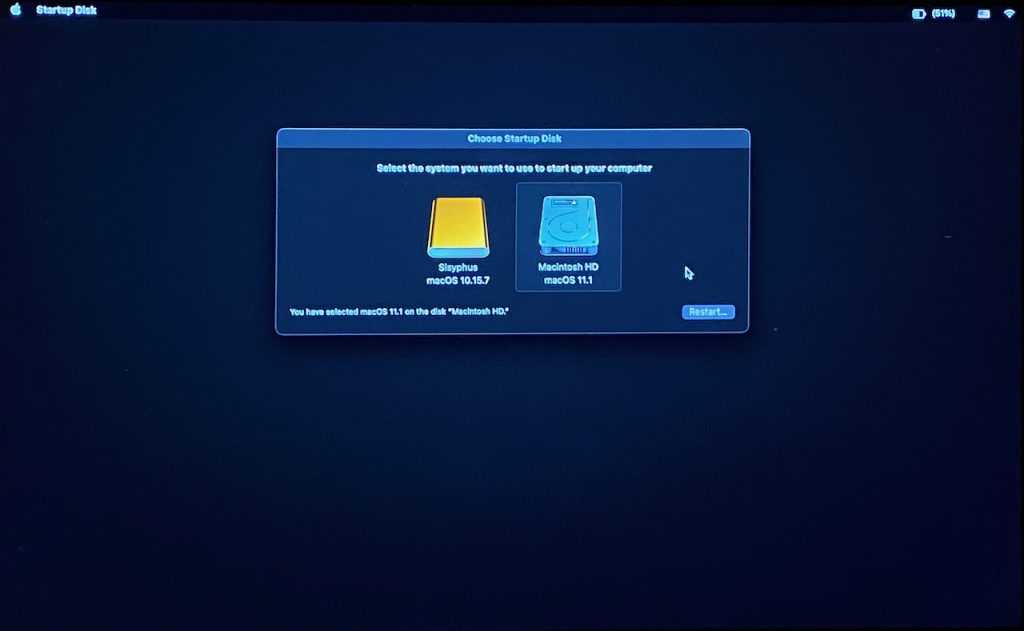
If you work your way into macOS Recovery but then want to back out in order to select a startup drive, look in the Apple menu for a Startup Disk command, which provides similar functionality with a slightly different look.

Startup Manager (but not Startup Disk) also lets you start up in Safe mode and set a drive as the default to use for booting. First, select a drive. Then, for Safe mode, press the Shift key and click the Continue in Safe Mode button below it. To set a selected drive as the default, press the Control or Option key and click the Always Use button underneath it.

Note that M1-based Macs can’t boot from just any external drive. We’re all still learning about the new platform, but it seems that you need a Thunderbolt 3 SSD that has been freshly formatted with APFS and set up with a new installation of macOS 11.1 Big Sur. See Howard Oakley’s writeup for details.

macOS Recovery / Recovery

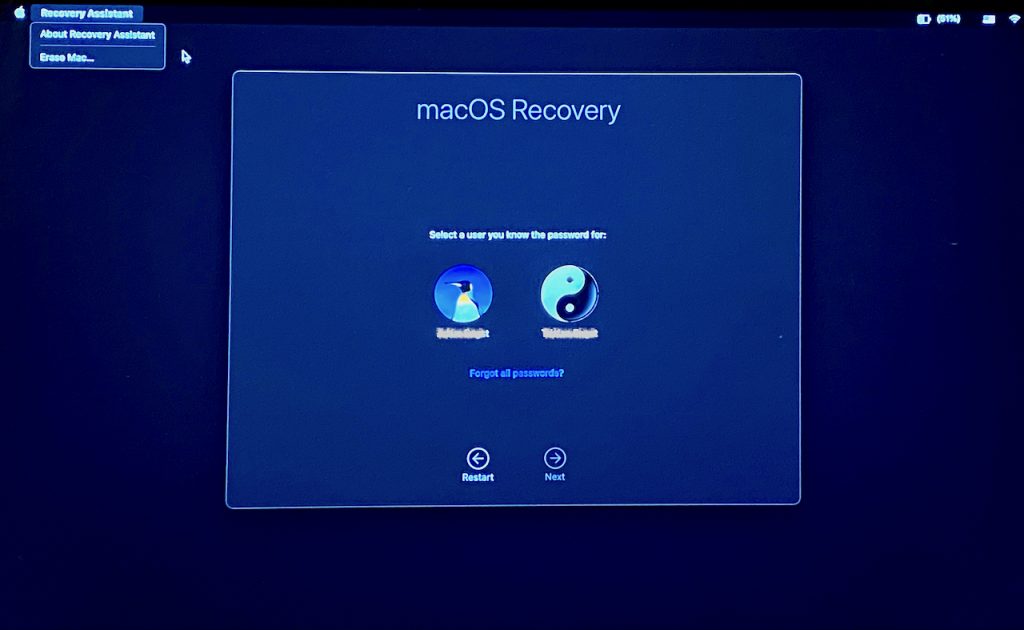
When you need to reinstall macOS or restore from a Time Machine backup, head to macOS Recovery. From the Startup Manager screen, select Options and click Continue underneath it. After you choose a language, an initial macOS Recovery screen appears. Note that you have access to the Apple menu, which lets you choose Startup Disk, Restart, or Shut Down, and to the Recovery Assistant menu, which includes a potentially useful Erase Mac command.

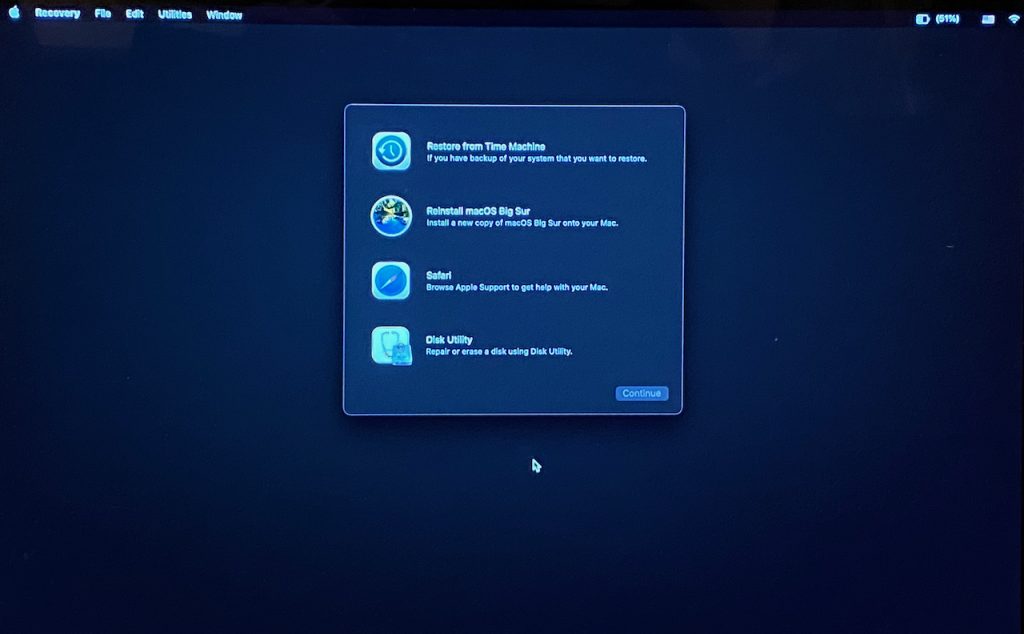
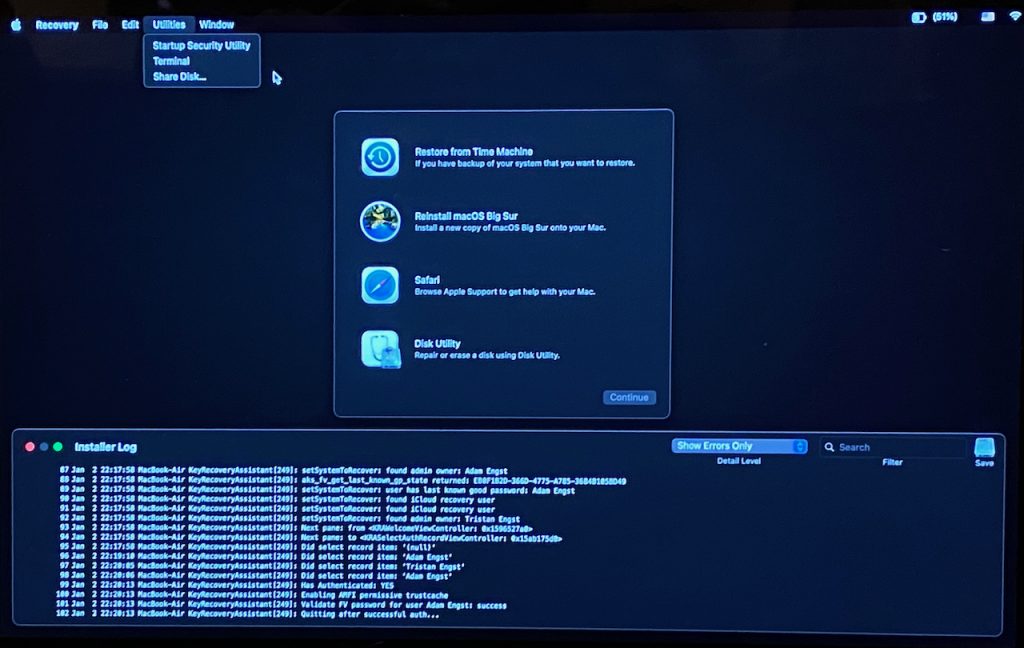
macOS Recovery presents you with a list of users. Select one for which you know the login password, click Next, and enter the password when prompted. Now, in the Recovery app, you can restore from Time Machine, reinstall Big Sur, launch Safari to browse the Web and get online help from Apple, and open Disk Utility to manage drives.

The Recovery app has a full set of menus, and notice Utilities in particular. It lets you launch the Startup Security Utility, to reduce the macOS security level, or Terminal, if you want to run command-line tools before startup. (The old macOS single-user mode accessible by holding down S at startup has disappeared.) To return to the Recovery app from any other app, quit the current app. Finally, note that the Recovery app’s Window menu has an option for Recovery Log. As is often the case with logs, it may be inscrutable to all but high-level support experts.

Oddly, once you’re in macOS Recovery, there’s no way to return to the Startup Manager.

Target Disk Mode / Share Disk

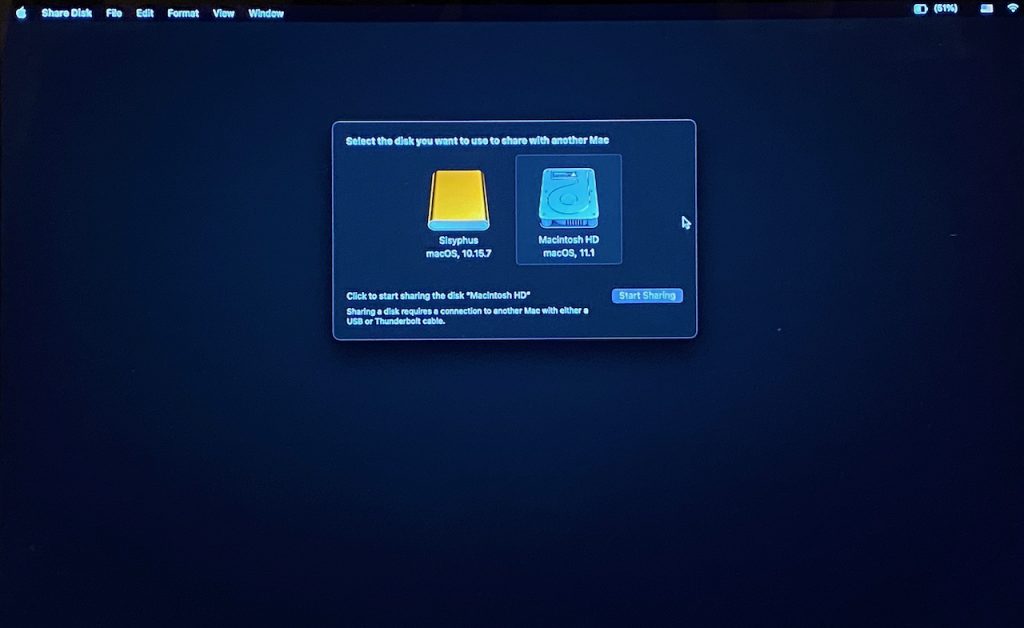
If you ever want to access one Mac’s drives from another, you can connect the two Macs via a USB or Thunderbolt cable and use Target Disk Mode. On M1-based Macs, you initiate Target Disk Mode using a command in the Recovery app’s Utilities menu: Share Disk.

Choose Utilities > Share Disk to start sharing one of the M1-based Mac’s drives via Target Disk Mode. Select the drive and click Start Sharing. When you’re done using it, click Stop Sharing before disconnecting the cable.

Apple Diagnostics / Diagnostics Loader

If you’re worried that your M1-based Mac is suffering from a hardware failure, running Apple Diagnostics may shed some light on the problem. Oddly, getting to Apple Diagnostics still requires a hidden keystroke.

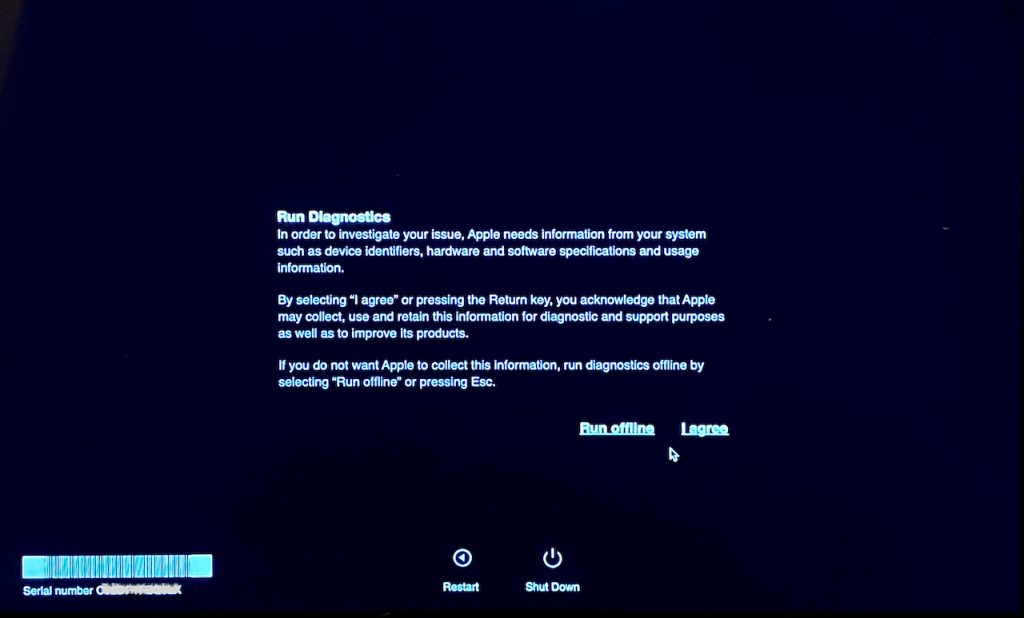
Once you’re in the Startup Manager screen, press and hold Command-D to reboot the Mac into the Diagnostics Loader app. You can choose to run the diagnostics offline or to share the information with Apple.

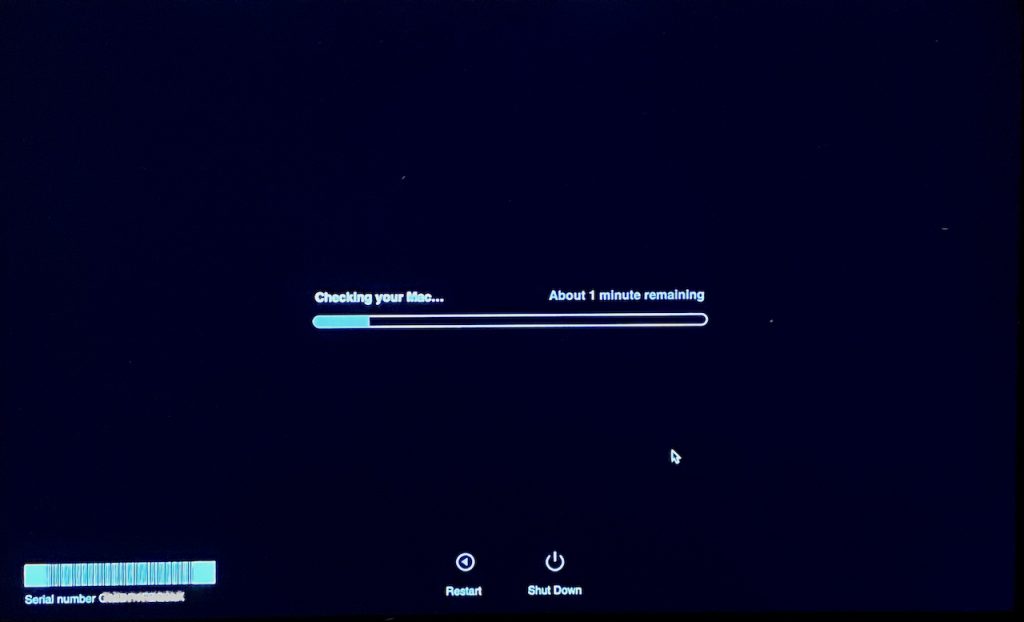
After you pick one, the diagnostics run right away and report back when they’re done. If you have an M1-based MacBook Air or MacBook Pro, make sure to plug it in first, or you’ll get an error telling you that the power adapter couldn’t be found.

The troubleshooting approaches that no longer seem to be available in any way are to reset the NVRAM (Non-Volatile RAM) or the SMC (System Management Controller). Apparently, the NVRAM tests itself at startup and resets automatically if necessary. M1-based Macs reportedly don’t have an SMC in the same way as Intel-based Macs, so there’s no option to reset it.

(Featured image by Apple)

New Features You May Have Missed in the iOS 14.1, 14.2, and 14.3 Updates

We’ve published overviews of the major features in iOS 14 and iPadOS 14, along with detailed looks at our favorite features. But Apple keeps releasing updates with new features, and we wanted to take a moment to catch you up on what Apple has added in versions 14.1, 14.2, and 14.3. (If you’re running iOS 14 or iPadOS 14, you should update to the latest version, which is 14.3 as of this writing. There’s no benefit to staying at an interim version.)

Here’s what you may have missed.

Apple Fitness+

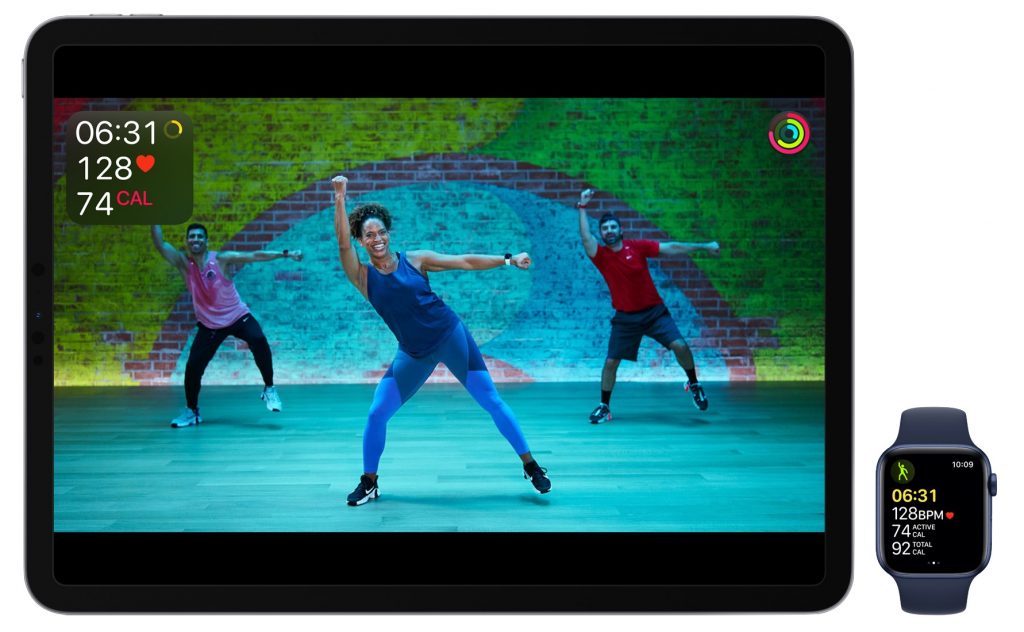
The highest-profile change in Apple’s recent updates is support for Apple Fitness+. It provides studio-style streamed video workouts that you can participate in using an iPhone, iPad, or Apple TV. The linchpin of the system is the Apple Watch, which tracks your fitness metrics and progress and stores them in the Fitness app (previously called Activity).

Apple Fitness+, which can be shared by up to six family members through Family Sharing, costs $9.99 per month or $79.99 per year. All current owners of an Apple Watch Series 3 or later get a free month to try it out, and if you buy a new Apple Watch, Apple will give you 3 months for free.

If you have an Apple Watch and more exercise figured in your New Year’s resolutions, give Apple Fitness+ a try and see if you find it fun and worthwhile.

Intercom

Tired of yelling to get the attention of other members of your household? If you have two more HomePod speakers, you can use the new Intercom feature to send and receive messages through the HomePods. You can also send and receive messages through an iPhone, iPad, iPod touch, or Apple Watch, or in your car with CarPlay.

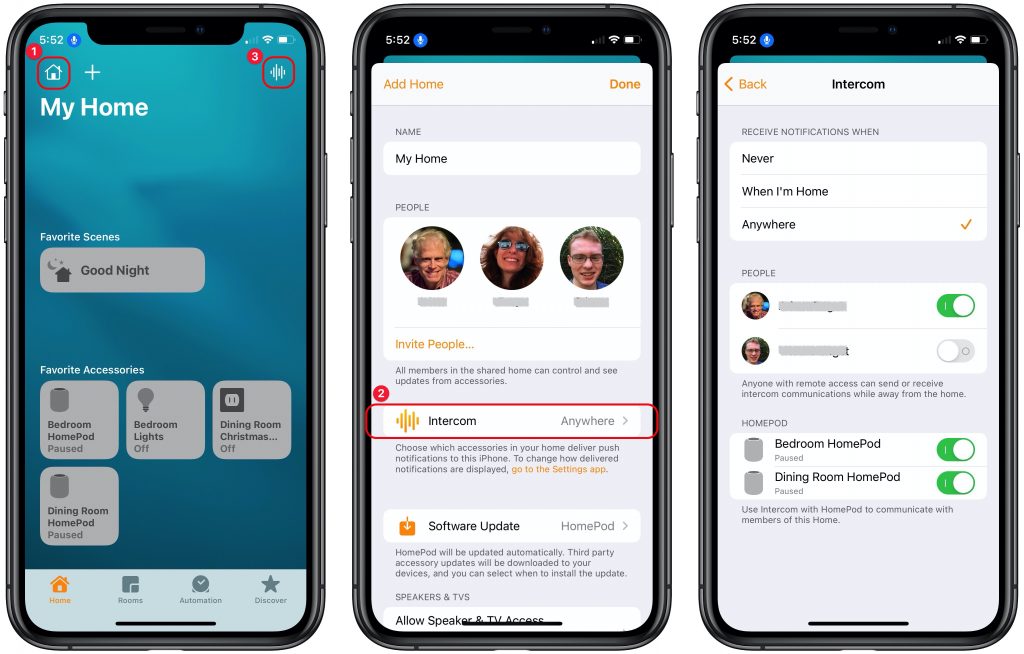
To enable Intercom, open the Home app, tap the house icon at the upper left ➊, and tap Home Settings. In the Settings screen, tap Intercom ➋ and set when you want to receive notifications, who should be allowed to send and receive them when away from home, and which HomePods to use.

Once you’ve enabled Intercom, you can most easily invoke it with Siri on any of your devices using trigger words like “intercom,” “tell,” “announce,” or “ask.” You can also send messages solely to a HomePod in a specific room or zone by specifying its name in the message. For example:

“Hey Siri, announce ‘It’s time to leave now!’”
“Hey Siri, ask upstairs ‘Did anyone feed the fish?’”

You can also access Intercom from within the Home app. Tap the waveform button in the upper-right corner of the screen (➌ above), record your message, and tap the Done button to send it.

When you hear an Intercom message, you can reply. If the message went to the entire Home, your reply will as well. However, if the message was sent to your specific room, your response will go only to the device that sent the message. And you can always direct a reply to a particular speaker. For example:

“Hey Siri, reply ‘I’m almost ready to go, honest!’”
“Hey Siri, reply downstairs ‘Yes, I fed Goldie.’”

Loud Headphone Alerts

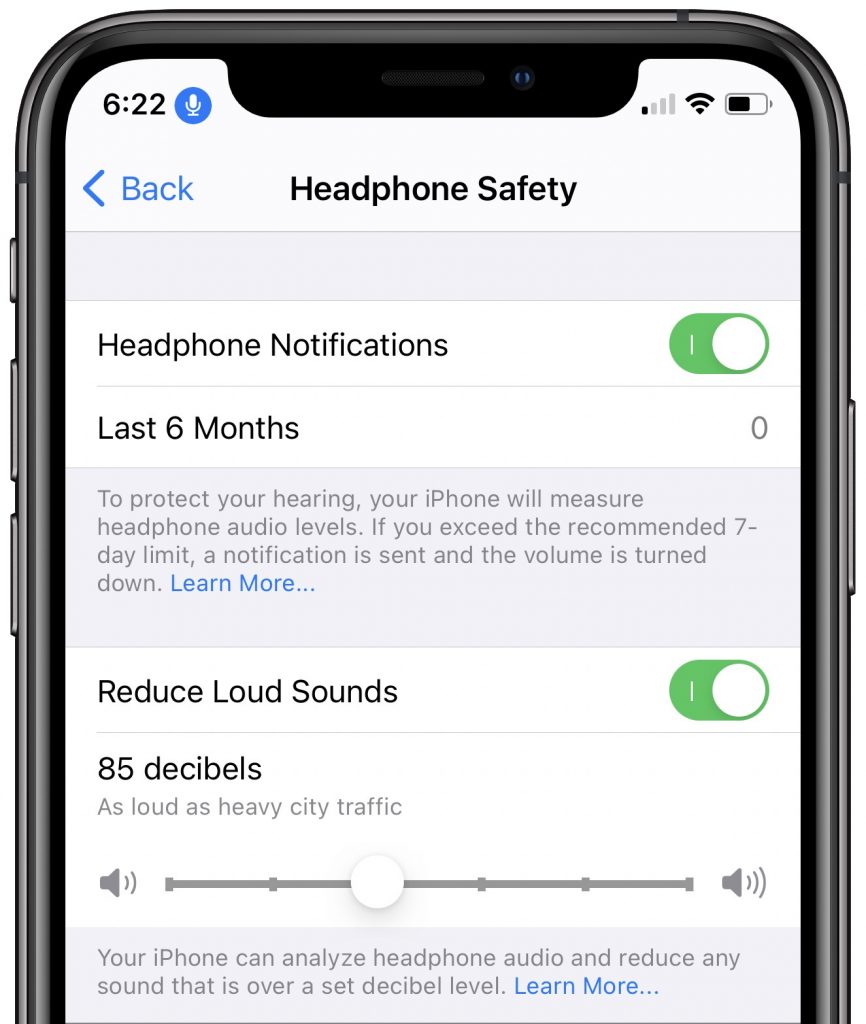
If you’re worried about damaging your hearing with too-loud headphone volumes (and you should be), go to Settings > Sounds & Haptics > Headphone Safety. There you can enable a notification that will tell you if you exceed the recommended limit for noise exposure (volume and time) as set by the World Health Organization.

That’s nice from a retrospective point of view, but more useful are the controls below, which let your iPhone actively protect your hearing by reducing the volume of sounds over a certain decibel level.

Optimized AirPods Pro Charging

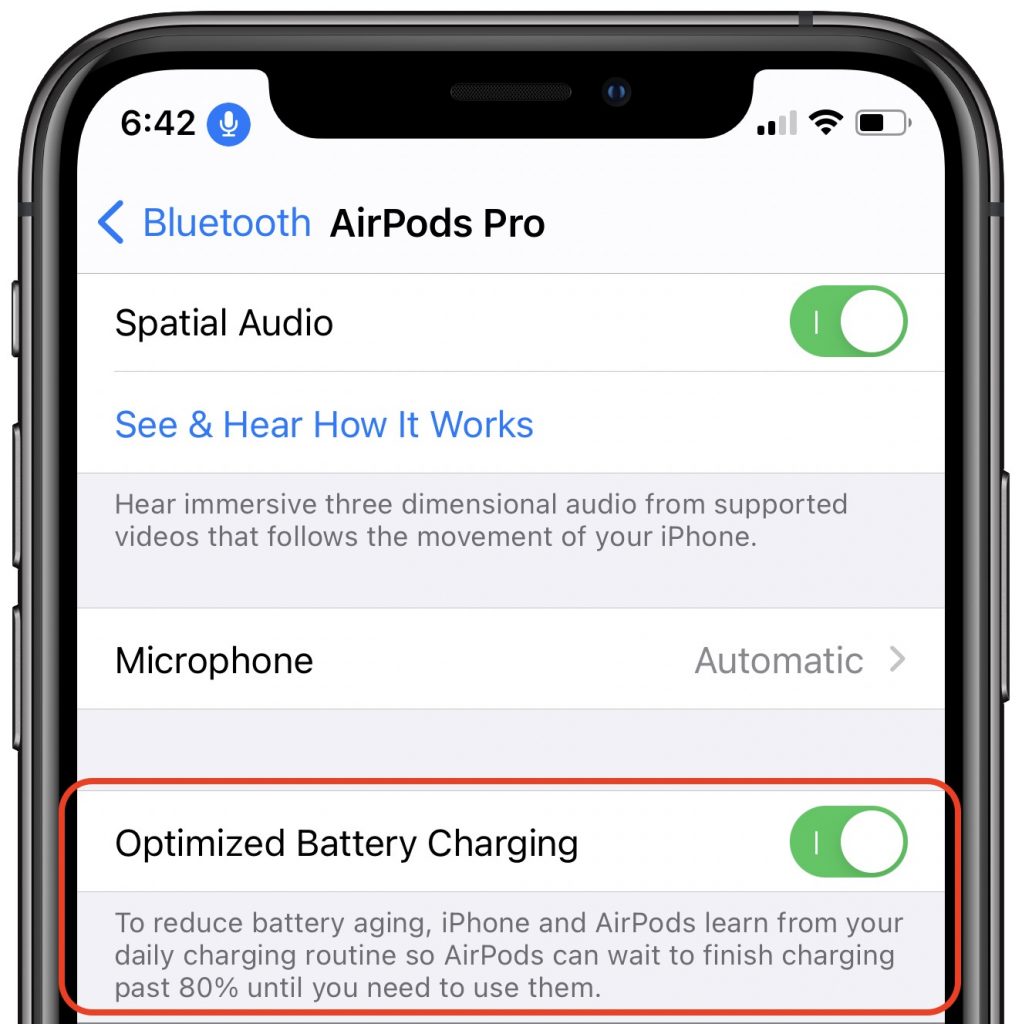
Apple says that it has now tweaked AirPods Pro charging to increase the lifespan of the battery. It does this by delaying charging past 80% to reduce the amount of time the batteries stay fully charged. Apple previously did this with the iPhone and Apple Watch. Given that there’s no way to replace the battery in the AirPods Pro, anything that extends their useful life is welcome. Sadly, this feature isn’t available for the standard AirPods. If you find that the feature regularly prevents your AirPods Pro from having a full charge, you can turn it off in Settings > Bluetooth (make sure the AirPods Pro case is open or they’re in your ears). Tap the i button next to your AirPods Pro and turn off Optimized Battery Charging.

Launch Shortcuts on the Home Screen Directly

In iOS 14, the Shortcuts app lets users assign custom icons to shortcuts, which has led some to become obsessed with customizing their Home screens with shortcuts that launch their favorite apps. Dedicated designers have created all sorts of Home screen looks, ranging from the minimalist to the wacky. The only problem was that these shortcuts first launched the Shortcuts app and then switched to the desired destination app. As of iOS 14.3, shortcuts now launch directly from the Home screen without passing through the Shortcuts app.

Use Ecosia as Safari’s Default Search Engine

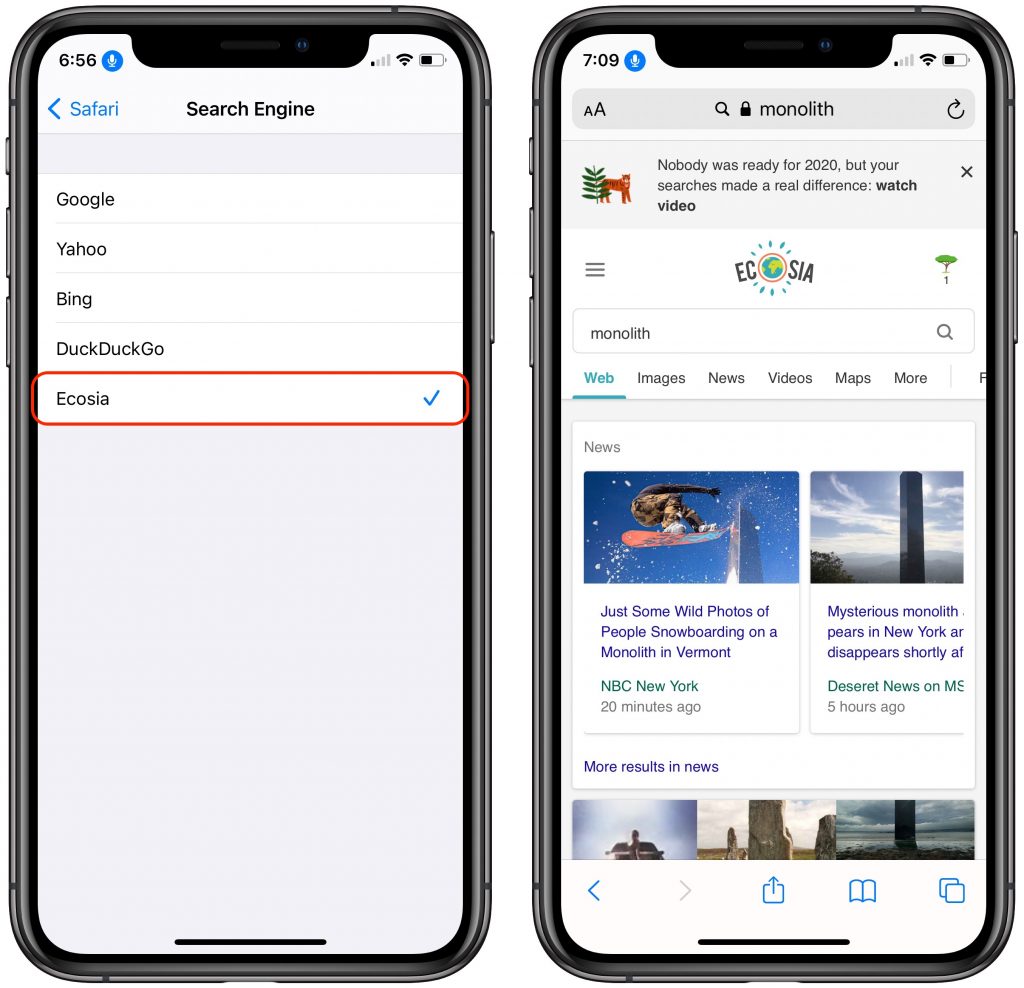
Want to move away from Google as your default search engine? iOS has long provided other options, including Yahoo, Microsoft’s Bing, and the privacy-focused DuckDuckGo. Apple has now added Ecosia, which is privacy-friendly and donates 80% or more of its profits to non-profit organizations that focus on reforestation. It’s a small way you can help fight climate change. It’s worth keeping in mind that Yahoo is a rebadged version of Bing, DuckDuckGo relies heavily on Bing, and Ecosia delivers results from Bing, enhanced by its own algorithms. In other words, when it comes to the quality of the search results, your choices are really between Google and Bing.

New Privacy Labels in the App Store

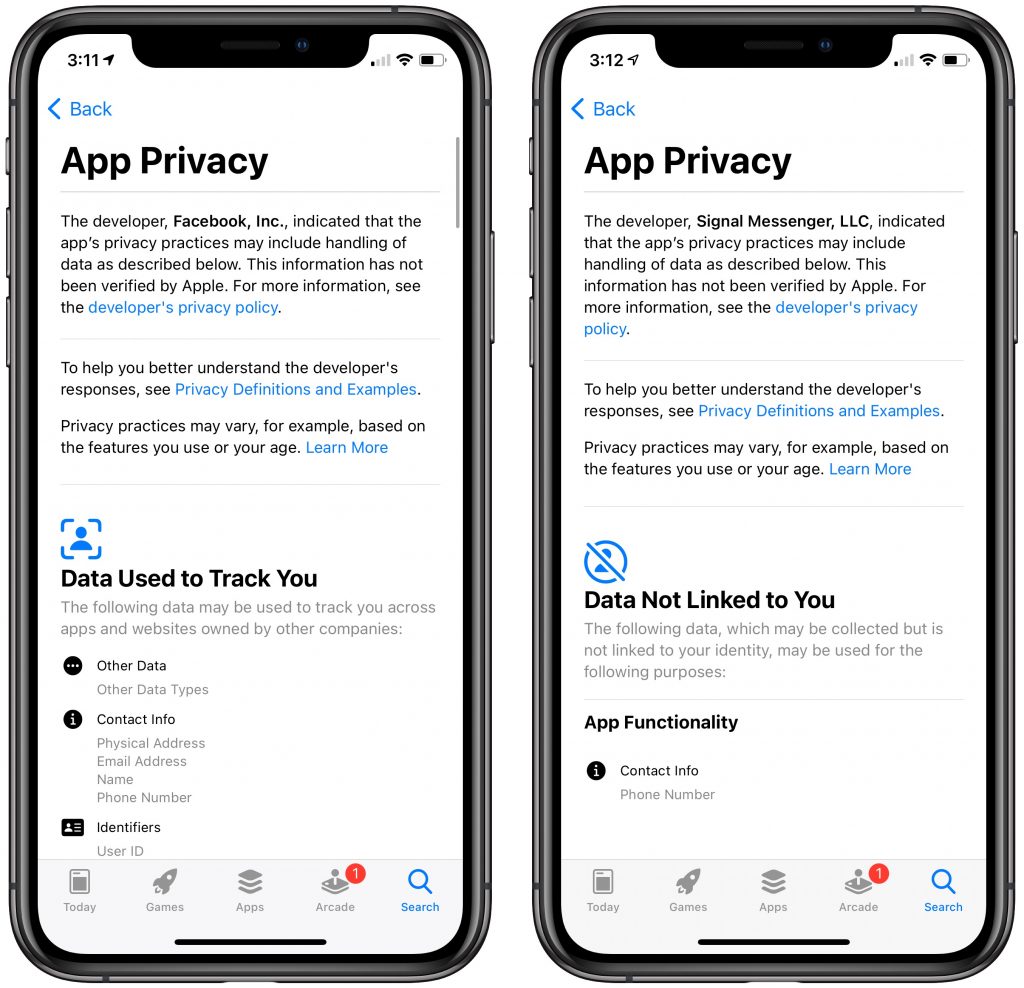
In Apple’s latest salvo against privacy-abusing apps and services, the company now requires all developers to provide information in App Store listings about what data collected by the app is linked to you personally and what data will be used to track your online movements. Apple doesn’t verify the information, and there’s no way to know if the developer is being truthful. Nonetheless, it’s good to see Apple pushing developers to be more transparent about their privacy practices. In the screenshot below, compare the ten screens of App Privacy details for what Facebook hoovers up with what is collected by the privacy-focused messaging app Signal: just your phone number, which is necessary for others to contact you.

App Clip Codes

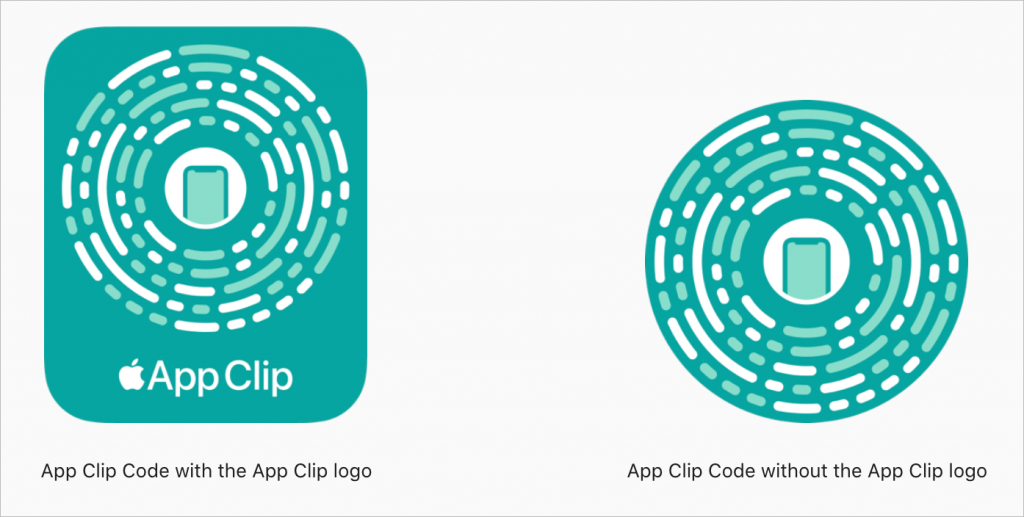
In non-pandemic times, the new App Clips feature of iOS 14 might have gotten more attention. App Clips are lightweight versions of an app that let people perform quick tasks—ordering a latte, renting a scooter—without downloading and configuring the full app. Apple encourages developers using App Clips to advertise their presence with App Clip Codes, which look a little like QR codes but are dedicated to launching App Clips. Now that iOS 14.3 has added support for App Clip Codes, if you notice one while you’re out and about, try scanning it with your camera to see what App Clip pops up.

iOS 14’s updates have added plenty of smaller features as well, such as over 100 new emojis, an Apple TV+ tab in the Apple TV app, additional data options in the Health app’s Cycle Tracking feature, air quality data and recommendations in more countries, and detection of people in Magnifier (which is helpful for users who are blind or who have low vision).

So if you have kept your iPhone or iPad up to date but haven’t noticed these new features, give them a try!

(Featured image based on an original Web page by Apple)

5 New Year’s Resolutions That Will Improve Your Digital Security

Happy New Year! For many of us, the start of a new year is an opportunity to reflect on fresh habits we’d like to adopt. Although we certainly support any resolutions you may have made to get enough sleep, eat healthy, and exercise, could we suggest a few more that will improve your digital security?

Keep Your Devices Updated

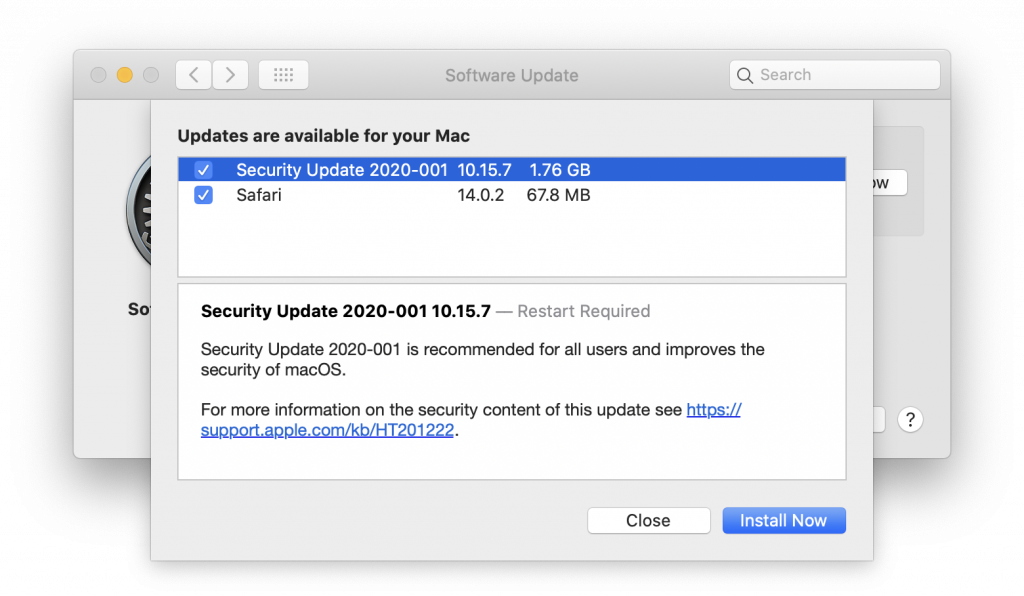
One of the most important things you can do to protect your security is to install new operating system updates and security updates soon after Apple releases them. Although the details seldom make the news because they’re both highly specific and highly technical, you can get a sense of how important security updates are by the fact that a typical update addresses 20–40 vulnerabilities that Apple or outside researchers have identified.

It’s usually a good idea to wait a week or so after an update appears before installing it, on the off chance that it has undesirable side effects. Although such problems are uncommon, when they do happen, Apple pulls the update quickly, fixes it, and releases it again, usually within a few days.

Use a Password Manager

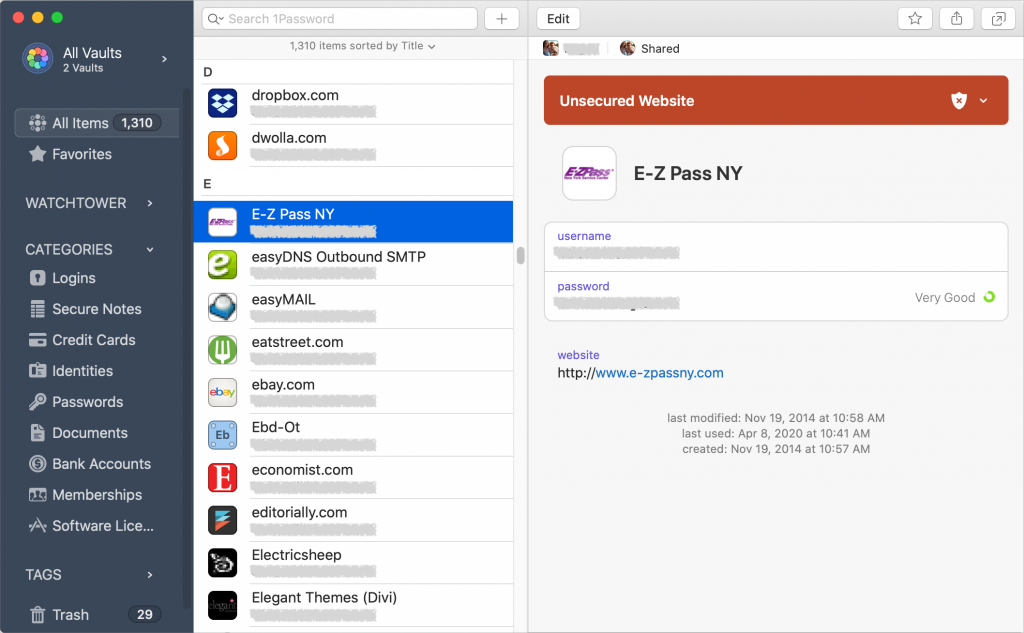
We’ve been banging this drum for years. If you’re still typing passwords in by hand, or copying and pasting from a list you keep in a file, please switch to a password manager like 1Password or LastPass. Even Apple’s built-in iCloud Keychain is better than nothing. A password manager has five huge benefits:

  • It generates strong passwords for you. Password1234 can be hacked in seconds.
  • It stores your passwords securely. An Excel file on your Desktop is a recipe for disaster.
  • It enters passwords for you. Wouldn’t that be easier than typing them in manually?
  • It audits existing accounts. How many of your accounts use the same password?
  • It lets you access passwords on all your devices. Finally, easy login on your iPhone!

A bonus benefit for families is password sharing. It allows, for example, a married couple to share essential passwords or for parents and teens to share certain passwords.

In short, using a password manager is more secure, faster, easier, and just all-around better. If you need help getting started, get in touch.

Beware of Phishing Email

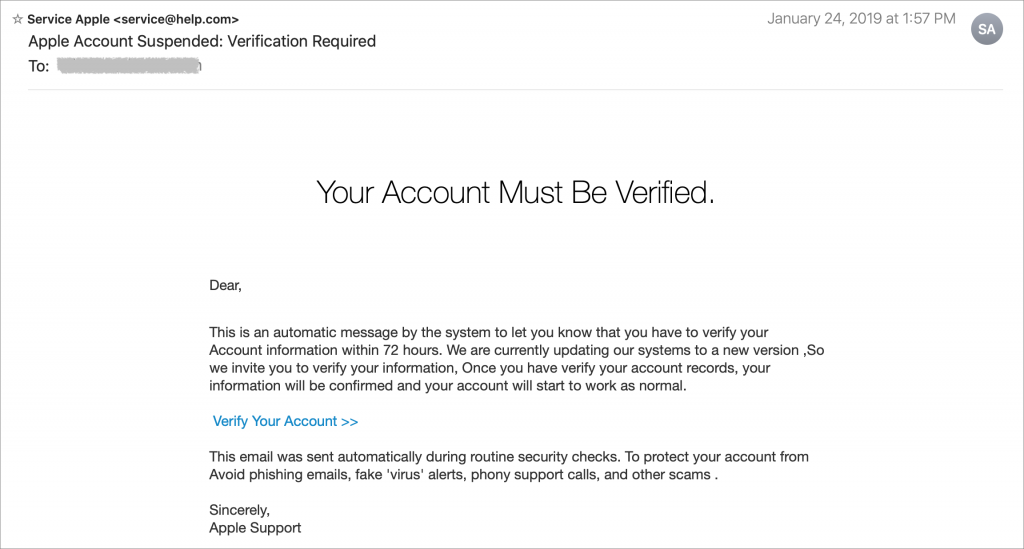
Individuals and businesses alike frequently suffer from security lapses caused by phishing, forged email that fools someone into revealing login credentials, credit card numbers, or other sensitive information. Although spam filters can catch many phishing attempts, it’s up to you to be on your guard at all times. Here’s what to watch for:

  • Any email that tries to get you to reveal information, follow a link, or sign a document
  • Messages from people you don’t know, asking you to take an unusual action
  • Direct email from a large company for whom you’re an anonymous customer
  • Forged email from a trusted source asking for sensitive information
  • All messages that contain numerous spelling and grammar mistakes

When in doubt, don’t follow the link or reply to the email. Instead, contact the sender in some other way to see if the message is legit.

Avoid Sketchy Websites

We won’t belabor this one, but suffice it to say that you’re much more likely to pick up malware from sites on the fringes of the Web or that cater to the vices of society. To the extent that you can avoid sites that provide pirated software, “adult” content, gambling opportunities, or sales of illicit substances, the safer you’ll be. That’s not to say that reputable sites haven’t been hacked and used to distribute malware too, but it’s far less common.

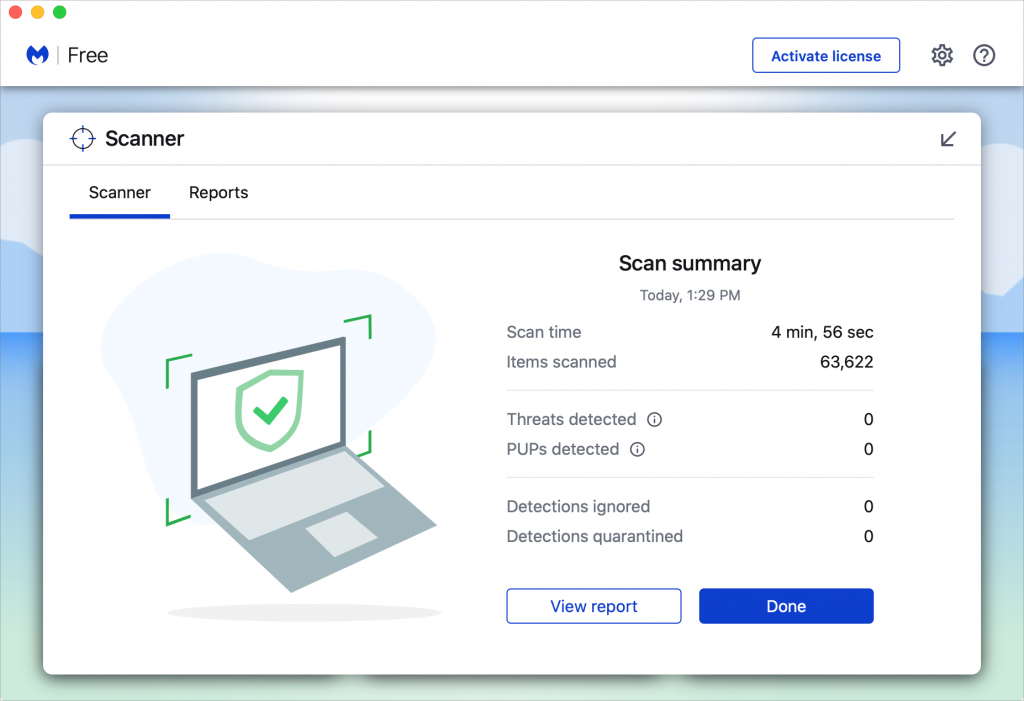
If you are concerned after spending time in the darker corners of the Web, download a free copy of Malwarebytes or DetectX Swift and scan for malware manually.

Never Respond to Unsolicited Calls or Texts

Although phishing happens mostly via email, scammers have also taken to using phone calls and texts. Thanks to weaknesses in the telephone system, such calls and texts can appear to come from well-known companies, including Apple and Amazon. Even worse, with so much online ordering happening, fake text messages pretending to help you track packages are becoming more common.

For phone calls from companies, unless you’re expecting a call back from a support ticket you opened, don’t answer. Let the call go to voicemail, and if you feel it’s important to respond, look up the company’s phone number elsewhere, and talk with someone at that number rather than one provided by the voicemail.

For texts, avoid following links unless you recognize the sender and it makes sense that you’d be receiving such a link. (For instance, Apple can text delivery details related to your orders.) Regardless, never enter login information at a site you’ve reached by following a link because there’s no way to know if it’s real. Instead, if you want to learn more, navigate manually to the company’s site by entering its URL yourself, then log in.

Let’s raise a glass to staying safe online in 2021!

(Featured image based on originals from Tim Mossholder and Jude Beck on Unsplash)

Apple Provides Sensible Device and Data Access Safety Advice

Our iPhones are the keys to our digital lives, holding our most private photos, conversations, and financial data, among much else. That’s why Apple goes to such lengths to help us protect our privacy and security. But we all have people with whom we share some level of access, whether that means shared photo albums, shared locations, or even shared passcodes. Unfortunately, trusted relationships sometimes disintegrate, occasionally in ugly ways that could endanger your safety. If that happens, you want to make sure to disable whatever sharing you had with such a person. You can always turn to us for help, of course, but Apple has now published “Device and Data Access when Personal Safety Is At Risk,” a clear, sensible PDF guide that explains the many ways of sharing data using Apple devices and services, along with details on how to see with whom you’re sharing—and how to stop that sharing. Even if you aren’t worried about your safety in this regard, it’s worth reading the guide and revisiting your settings to make sure you’re sharing only with intended people.

(Featured image by samer daboul from Pexels)