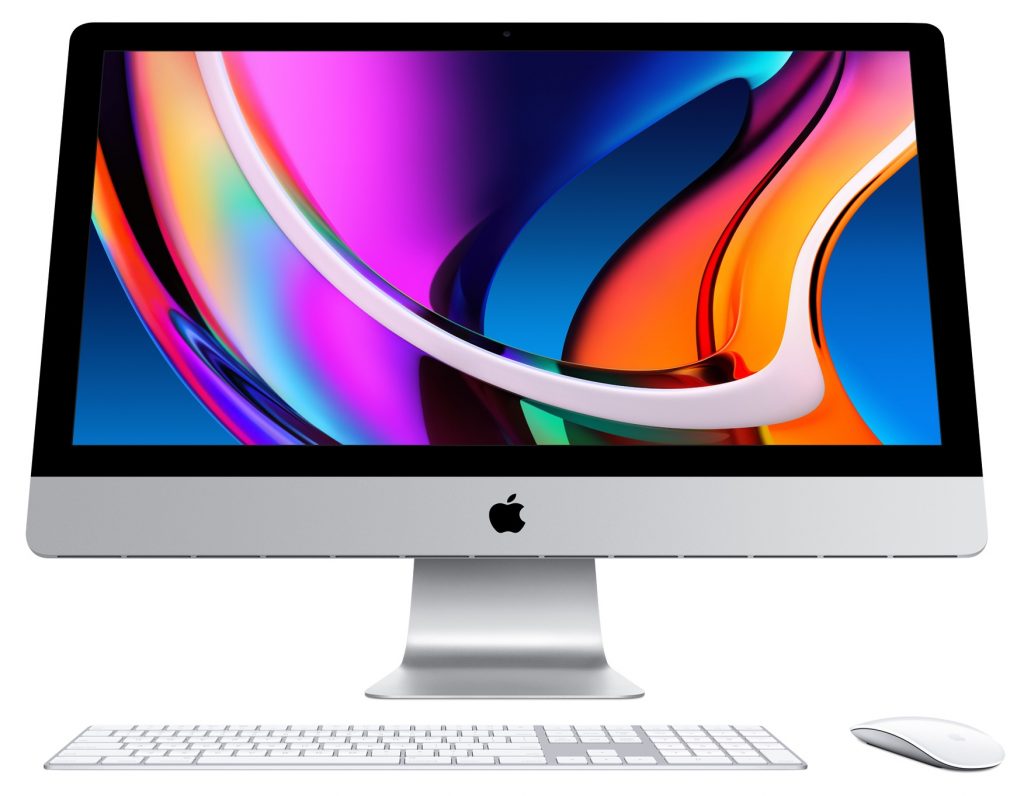
Apple Significantly Enhances the 27-inch iMac

Apple’s workhorse desktop Mac, the 27-inch iMac with Retina 5K display, hasn’t seen an update since March 2019—nearly a year and a half ago. Happily, the company has finally released a new version of the popular iMac, outfitting it with 10th-generation Intel processors, increasing its RAM and storage capacities, and improving its audio and video capabilities. Prices haven’t changed, with the low-end model starting at $1799, the mid-range model at $1999, and the high-end configuration at $2299.

Separately, although Apple didn’t update either the 21.5-inch iMac or the iMac Pro, it tweaked both of their configurations. The company finally stopped selling the small, inexpensive 21.5-inch iMac with a performance-robbing hard drive. It now comes with SSDs standard across the line, with a 1 TB Fusion Drive as an alternative. For the iMac Pro, Apple dropped the 8-core Intel Xeon W processor configuration, making the base model a 10-core processor configuration.

There are no industrial design changes this time around, unsurprisingly, but the rest of the enhancements will be extremely welcome to anyone who has been holding out for a new iMac.

Faster Processors

For those who are concerned about performance but don’t want to spend thousands more on an iMac Pro or Mac Pro, Apple increased the 27-inch iMac’s specs in noteworthy ways. You have choices of four of the latest 10th-generation Intel Core processors: a 3.1 GHz 6-core i5, a 3.3 GHz 6-core i5, a 3.8 GHz 8-core i7, and a 3.6 GHz 10-core i9. Performance and cost both rise through that list.

Higher Performance Graphics Chips

Apple also moved to the next-generation AMD Radeon Pro graphics chips, with the Radeon Pro 5300 with 4 GB of memory in the low-end and mid-range models. The high-end model starts with a Radeon Pro 5500 XT with 8 GB of memory, and you can upgrade to a Radeon Pro 5700 with 8 GB for $300 or a Radeon Pro 5700 XT with 16 GB for $500. The more expensive options would be useful for graphics-intensive workflows, complex video editing, or developing 3D content.

Higher RAM Ceiling

All configurations of the 27-inch iMac start with 8 GB, but you can expand that to 16 GB ($200), 32 GB ($600), 64 GB ($1000) or, for the first time in the iMac line, 128 GB ($2600). Unlike on most other Macs, RAM is user-accessible through a panel on the back, so you’d be smart to buy RAM separately, where it will be far cheaper—perhaps as much as two-thirds less.

Increased SSD Storage

Storage is locked at 256 GB for the low-end model, whereas the mid-range model starts at 512 GB and lets you upgrade to 1 TB ($200) or 2 TB ($600). The high-end model also starts at 512 GB, offering the same 1 TB and 2 TB upgrades and adding 4 TB ($1200) and 8 TB ($2400) options. The Fusion Drive is no longer an option for the 27-inch iMac.

Stronger Security and Processing with the T2 Security Chip

New to the 27-inch iMac is Apple’s T2 security chip. Along with encrypting all data on the SSD and ensuring that macOS hasn’t been tampered with at boot, the T2 chip includes custom processors that provide computational improvements for both audio and video. On the downside, the T2 chip’s added security makes certain kinds of troubleshooting and hardware repair difficult or impossible, so it’s extra important to have reliable backups.

Improved Glare and Ambient Light Handling

For those who have problems with screen glare, the 27-inch iMac now offers a $500 option for “nano-texture glass,” which Apple says provides “better viewing under various lighting conditions, such as a bright room or indirect sunlight.” Previously, nano-texture glass was available only for Apple’s Pro Display XDR screen. The iMac’s Retina display also now supports True Tone, enabling it to adjust its color temperature automatically for ambient light conditions.

Better Video and Audio for Videoconferencing

Those who spend their days on video calls will appreciate the new 1080p FaceTime HD camera, a notable improvement on the previous 720p camera. Apple also says the 27-inch iMac now features higher-fidelity speakers and a studio-quality three-mic array for better audio output and input.

Faster Networking

Finally, if you need the ultimate networking performance, a $100 option gets you 10 Gigabit Ethernet.

Overall, if you need a powerful desktop Mac with a gorgeous display, you can’t go wrong with the new 27-inch iMac. It’s significantly cheaper than the iMac Pro and more powerful than both the Mac mini and the 21.5-inch iMac. Just remember that some of the options are available only if you start with the high-end configuration.

(Featured image by Apple)


How to Choose the Best Uninterruptible Power Supply for Your Needs

With so many people working from home, lots of attention has been dedicated to making sure everyone has a functional computer, a reasonably ergonomic workspace, and a decent videoconferencing setup. One thing that many have overlooked, however, is the need for a reliable uninterruptible power supply (UPS). Particularly for those using desktop Macs or external hard drives, a UPS is essential because it protects your work—and your devices—against surges, brownouts, and outright power failures. That’s especially helpful as we head into the summer thunderstorm and fall hurricane season.

What is a UPS?

Put simply, a UPS is a big battery into which you plug your Mac and other peripherals. It then plugs into a wall outlet and monitors the incoming power. If the normal power fails, or surges or falls below a certain threshold, the UPS notices and switches the power source to its internal battery. This happens so quickly that your Mac never even notices.

How does a UPS help?

For desktop Macs, a power failure means an immediate and ungraceful shutdown. You’ll lose all unsaved work and, depending on what was happening when the power went out, your drive might be corrupted. Smaller power surges and brownouts may not cause the Mac to shut down, but they put stress on electronic components that can cause a shorter overall lifespan.

When your gear is plugged into a UPS, you get some time to save your work and shut down gracefully, ensuring that you don’t lose data or flirt with drive corruption. And by having the UPS filter out power spikes and drops, your Mac and peripherals will last longer.

What sort of UPS should I look for?

There are three types of UPS: standby, line interactive, and double conversion. The names that different manufacturers use vary slightly, but here are the differences:

  • Standby UPS: This simple type of UPS, also called an offline UPS, monitors the incoming power, and if it rises or falls beyond predetermined levels, it switches to using battery power. That happens within 5–12 milliseconds, but the computer still sees some power fluctuations. The incoming power isn’t conditioned as long as it remains within the predetermined levels. A standby UPS is most appropriate in environments where the power is clean—you don’t notice lights flickering—and goes off infrequently.
  • Line Interactive UPS: This type of UPS goes a bit further, using automatic voltage regulation to correct abnormal voltages without switching to battery. In the event of an outage, it still switches to battery, but more quickly, within 2–4 milliseconds. If you lose power more often, are near industrial machinery, or notice occasional brownouts when it’s hot out, go for a line interactive UPS. They’re the most popular.
  • Double Conversion UPS: The most advanced form of UPS, a double conversion or online UPS, always runs connected devices from the battery, and the incoming power serves only to keep the battery charged. It has no transfer time in the event of an outage and provides the cleanest power. If you’re considering a backup generator or Tesla Powerwall to deal with frequent power outages or it’s clear that you have really dirty power, you should probably get a double conversion UPS.

As you would expect, standby models are the cheapest, and double conversion models are the most expensive.

How big of a UPS do I need?

You’ll need to do some research and math to determine the capacity of your ideal UPS. The first step is to find the size of the load you’re going to connect to it. To do that, look on the back of devices or in their technical specs for a rating in watts (W) or volt-amps (VA). Theoretically, the two are equivalent—watts equals volts multiplied by amps. In reality, you also have to take into account something called power factor along with runtime—how long you want the UPS to power your system before its battery dies.

Apple publishes power consumption numbers for most recent models of the Mac mini, iMac, iMac Pro, and Mac Pro. For the MacBook, MacBook Air, and MacBook Pro, look at tech specs to find the wattage rating of the charger, which will be between 30W and 96W. Then add in any peripherals you’re planning to plug into the UPS, such as an external hard drive, Wi-Fi router, and the like. You may need to read the tiny print on power adapters and multiply volts by amps to get the wattage rating.

For instance, for a system comprising a 27-inch iMac from 2019, a 27-inch Thunderbolt Display, and an external hard drive, you’d add up the following numbers:

That gives you a total of 402W maximum, although it’s likely to be lower in normal usage. Nonetheless, to convert watts to volt-amps and account for the power factor, we divide the maximum wattage rating by power factor—a safe power factor is 0.8. So 402W / 0.8 = 503VA. So at a bare minimum, you’d want a UPS rated for 500VA. For some wiggle room on adding devices, it’s worth increasing the capacity by 50–100%, bringing us up to 750VA to 1000VA.

Here’s where things get fuzzy. The next step is to take that number and plug it into a UPS selector. Major manufacturers like APC (shown below), CyberPower, and Tripp Lite provide tools along these lines.

They’ll probably recommend a UPS with a higher capacity than is necessary—they are trying to upsell you, and the calculations will be based on the maximum loads you entered. If your Mac is running flat out, you’re likely sitting there and can shut it down quickly, so a long runtime isn’t necessary. If you’re not at the Mac, it should be sleeping, leading to a much longer runtime. CyberPower provides a nice runtime calculator that lets you see how long different models will last based on the actual load.

Are there other UPS features to look for?

Although many UPS features are fairly standard, it’s worth making sure you’re getting the ones you want. They include:

  • Form factor: Some smaller UPS models look like oversized surge protectors; most larger ones are mini-towers. You’ll probably want it under your desk, so make sure it’s a form factor that works for you.
  • Power outlets: Most UPS devices have a mix of outlet types. Some are backed by the battery, whereas others merely protect against surges. You’ll want to plug most electronic gear into battery-backed outlets—make sure the UPS has enough, and in an orientation that works with wall-wart power adapters—but if you have a laser printer or a lamp that you need to plug in as well, those should go in the surge-protected outlets.
  • Display: Many UPS models have an LCD display and buttons that you can use to cycle through screens of available runtime, current load, incoming voltage, and more. We like such displays.
  • Alarm control: When the power goes out, it’s common for a UPS to activate an audible alarm to alert you of the problem. Those alarms are usually loud and piercing, so if you need to keep working briefly or leave a low-load device (like a Wi-Fi router) running during an outage, you’ll want the option of turning the alarm off.
  • Replaceable batteries: UPS batteries don’t last forever, and it usually makes sense to buy a model whose batteries you can replace after a few years when its effective runtime has dropped significantly. You can always test runtime by pulling the UPS plug from the wall. Make sure to save all your work first!
  • Software: Many UPS models can connect to your Mac via a USB cable and use either included software or the Mac’s built-in power management software to shut the Mac down gracefully if you’re not present. When the UPS is connected, look in System Preferences > Energy Saver > UPS > Shutdown Options.

Phew! There’s a lot to consider when purchasing a UPS, but feel free to ask us for help or our current manufacturer recommendations.

(Featured image by Adam Engst)

Your Time Machine Drive Just Filled Up. What Should You Do?

It’s inevitable—your Time Machine backup drive is going to fill up. Time Machine is smart about backing up only files that have changed, but after months or years of usage, the drive will run out of space. What happens then?

Before we explain, some background. On its first backup, Time Machine copies everything on your startup drive to the backup drive. After that, Time Machine keeps hourly backups for the past 24 hours, daily backups for the past month, and weekly backups for all previous months. If you modify the same file multiple times per day, every day, you’ll have numerous versions of it in your backup set so that you can go back to any particular version.

So the first thing that Time Machine does when your backup drive fills up is start deleting those older versions, beginning with the oldest ones. It warns you when this starts happening and tells you what your oldest remaining backup is. In general, this approach works well, since you probably don’t need all the older versions of changed files as long as Time Machine always retains the most recent version in the backup.

Eventually, however, even this technique runs into the wall of hard drives having only so much capacity. When that happens, backups will start failing, and this notification will appear after every backup attempt.

Click the Details button in that notification to open the Time Machine pane of System Preferences, and you’ll learn more.

You have four options at this point, but two of them may not be all that helpful.

Delete Old Backups

One possible solution—albeit likely a short term one—is to delete old backups. You might be tempted to look in the Backups.backupdb folder on your Time Machine drive and delete some of the dated folders inside. Don’t. You have no idea what you’ll be deleting, and you’ll likely corrupt the entire Time Machine backup, rendering it useless.

Instead, use a utility like GrandPerspective or OmniDiskSweeper to identify folders or files that are both large and unnecessary. Navigate to one of those items in the Finder, select it, and then choose Enter Time Machine from the Time Machine menu bar icon. Once in Time Machine, click the Action menu (the gear icon) in the toolbar and choose Delete All Backups of Item.

Alas, this approach may not have much of an effect, since it’s difficult to know how many backups Time Machine has stored.

Exclude Large Folders from the Backup

Another approach that Apple mentions is excluding items from the Time Machine backup. To do this, open System Preferences > Time Machine and click the Options button. Then drag the desired file or folder into the “Exclude these items from backups” list and click Save.

The only problem with this advice is that it’s helpful only before your backup drive fills up. Time Machine won’t reclaim space used by newly excluded items that already exist in your backup.

Start Over, Either on a New Drive or after Erasing Your Existing Backup Drive

One of the great features of Time Machine is that it stores previous versions of files, as we’ve discussed. But you probably know if you’re the sort of person who needs to go back to such previous versions, or if you just use Time Machine so you can restore all your data in the event of a drive failure. If the latter is true and you don’t much care about previous versions of files, a good solution is just to start over, either on a new drive or after erasing your current drive.

Obviously, erasing your current drive means that you won’t have any Time Machine backup at all until a new one completes, which is a risk. And, of course, if that drive filled up once, it will do so again, potentially fairly quickly unless you exclude some large folders. But, if you want to go down that path, open Disk Utility, select your Time Machine drive in the sidebar, and click Erase. Then go into the Time Machine preferences again, click Select Disk, and pick your newly erased drive. You may have to select it under Backup Disks and click Remove Disk first.

Getting a new, larger backup drive and starting over with it is easier and more sensible, though more expensive. Once you’ve connected the new drive, just open the Time Machine preferences, click Select Disk, and select the new drive.

Or, rather, in an ideal world that would be true. You need to make sure that the new backup drive is formatted properly for Time Machine. Choose About This Mac from the Apple menu, and then click System Report to open the System Information app. In its sidebar, click Storage, select the drive at the top, and make sure File System is Journaled HFS+ and Partition Map Type is GPT (GUID Partition Table).

If the drive isn’t formatted correctly for Time Machine, open Disk Utility, select the drive in the sidebar, click Erase, and choose Mac OS Extended (Journaled) from the Format pop-up menu and GUID Partition Map from the Scheme pop-up menu. Then click Erase to ready it for Time Machine use. (This will, of course, delete all the data on the drive, so make sure that’s OK first!)

Finally, make sure the permissions on the new drive are set correctly. Select the drive icon in the Finder, choose File > Get Info, click the triangle next to Sharing & Permissions, and make sure the “Ignore ownership on this volume” checkbox is unselected. You may need to click the lock icon and enter an administrator username and password.

Copy Your Existing Backup to a New, Larger Drive

What if you want to retain all those old backups? That’s entirely possible, though it will take a long time to copy. Follow these steps:

  1. Connect both the old and the new backup drive to your Mac via Thunderbolt, USB, or Firewire.
  2. Make sure the drive is formatted properly for Time Machine, and if it’s not, reformat it in Disk Utility as noted above. Also, verify that the permissions are set correctly, as above.
  3. Turn off Time Machine so it doesn’t try to back up while you’re copying its data. In the Time Machine preference pane, deselect Back Up Automatically, or click the Off/On switch, depending on what version of macOS you’re running.
  4. Drag the Backups.backupdb folder from the old drive to the new one to copy it. You may be prompted for your administrator name and password.
  5. When it finishes, a day or two later, follow the instructions above to select the new drive in the Time Machine preferences and make sure to turn Time Machine back on.

One final note. It may be tempting to use an alternative method of copying the Backups.backupdb folder, but resist the urge. Time Machine uses special drive structures to work its magic, and only the Finder is guaranteed to copy them correctly.

(Featured image based on an original by Denny Müller on Unsplash)