Don’t Succumb to iOS 13 Update Fatigue!

Does it seem like that red badge on the Settings app indicating that there’s a new iOS 13 or iPadOS 13 update pops up at least once per week? You’re not imagining things—Apple has been frantically squashing bugs in its mobile operating systems since their release in mid-September.

If you haven’t yet upgraded from iOS 12, there’s no harm in waiting until the new year to see if things have settled down. (Well, no harm as long as you don’t receive a pair of Apple’s snazzy new AirPods Pro as a holiday gift, since they work only with devices running at least iOS 13.2, iPadOS 13.2, watchOS 6.1, tvOS 13.2, and macOS Catalina 10.15.1.)

That said, given Apple’s generally reliable record with major iOS updates, many people have upgraded to iOS 13. You shouldn’t feel bad if you have done so, either. Despite Apple’s flurry of bug fix updates, the overall user experience with iOS 13 has been generally acceptable.

Even if you haven’t noticed problems with iOS 13, it is important that you keep installing all these smaller updates, because they fix problems that could be serious. More important yet, if you do have trouble with your iPhone or iPad, and you’re not running the latest version of iOS or iPadOS, updating is the first fix to try.

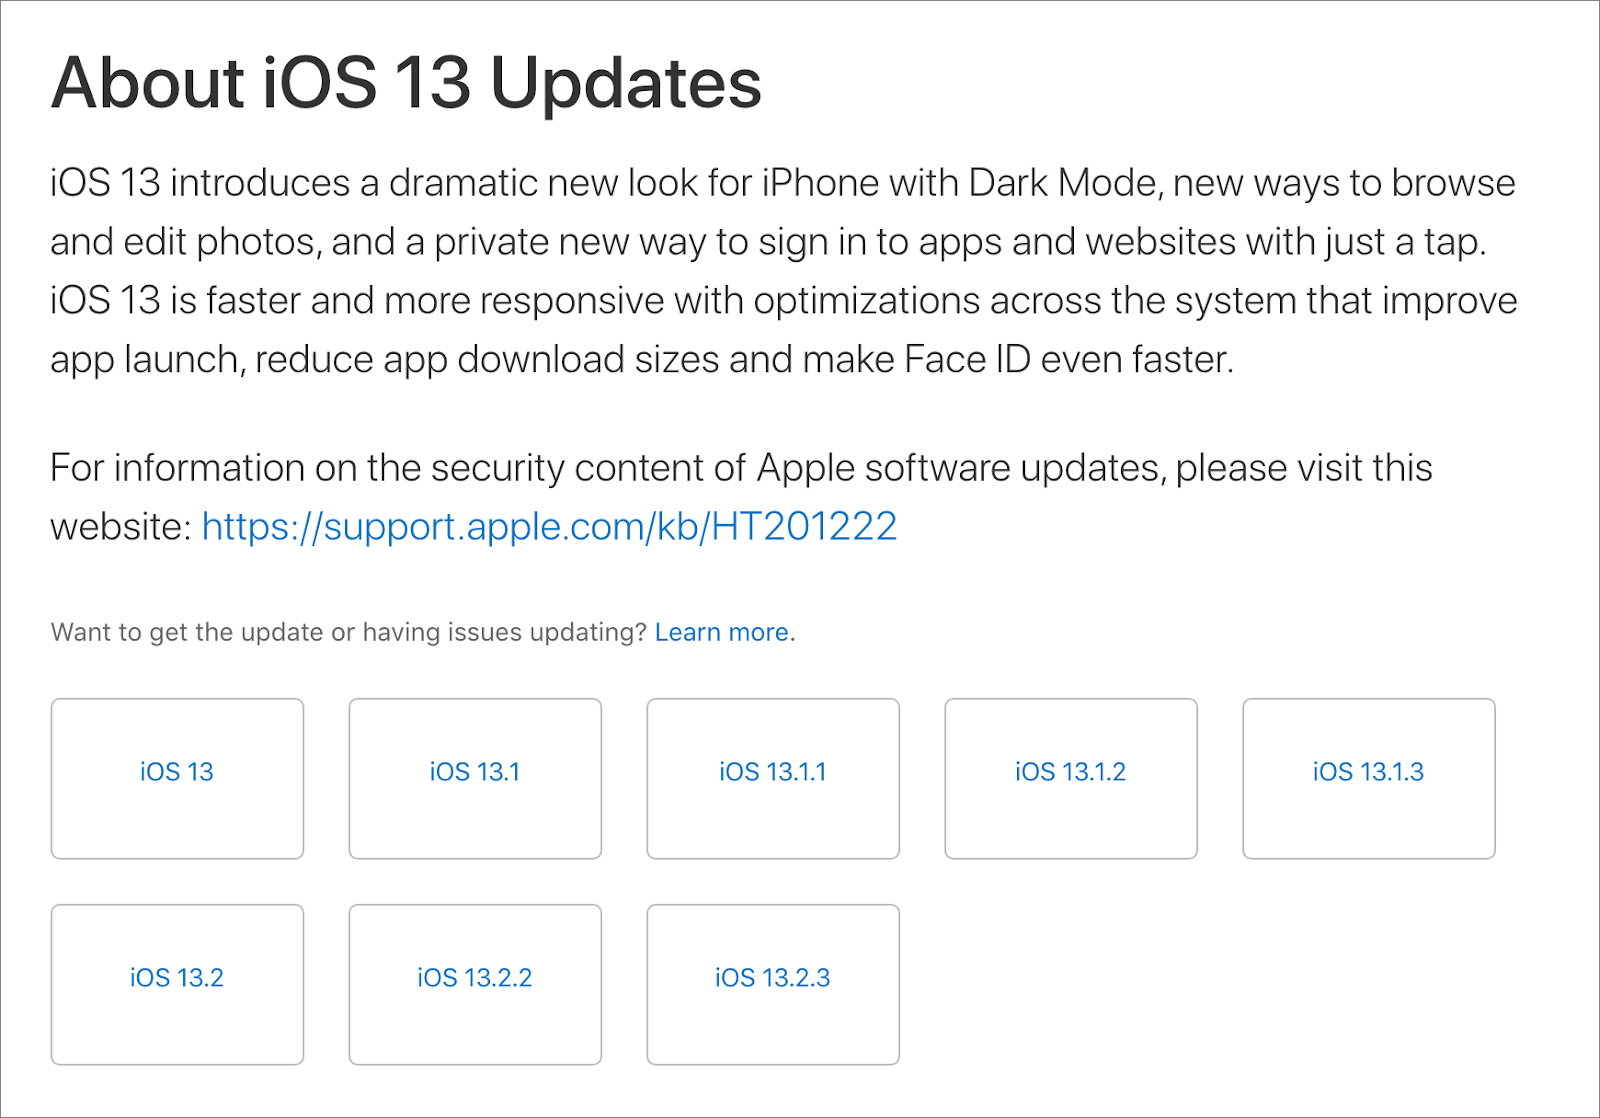
To hammer home why you should stay up-to-date with iOS releases, here’s a brief timeline of Apple’s fixes so far:

  • iOS 13.0 (September 19): This was the initial release of iOS 13 for the iPhone, with oodles of new features… and lots of bugs. Apple promised iOS 13.1 and the first release of iPadOS 13.1 for September 29th, with additional features and bug fixes.
  • iOS 13.1 (September 24): After iOS 13.0 received scathing reviews in early iPhone 11 reviews, Apple moved the release date of iOS 13.1 up by five days. It added more features and addressed numerous bugs with Mail, Messages, Reminders, Notes, Apple ID sign-in, the Lock screen, and more.
  • iOS 13.1.1 (September 27): This quick Friday release the same week as iOS 13.1 fixed bugs that could prevent an iPhone from restoring from backup, cause batteries to drain too quickly, reduce Siri recognition accuracy, bog down Reminders syncing, and allow third-party keyboard apps to access the Internet without your permission.
  • iOS 13.1.2 (September 30): The next Monday brought iOS 13.1.2, which ensured that the progress bar for iCloud backups would disappear after a successful backup, addressed bugs that caused the Camera app and flashlight to fail, and improved the reliability of Bluetooth connections in some vehicles.
  • iOS 13.1.3 (October 15): After a two-week breather, this update addressed bugs that could prevent incoming calls from ringing, block meeting invites from opening in Mail, cause incorrect data in Health after daylight saving time changes, prevent apps and voice memos recordings from downloading after restoring from iCloud Backup, stop an Apple Watch from pairing successfully, and cause Bluetooth connection problems with vehicles (again) and hearing aids.
  • iOS 13.2 (October 28): With this update, Apple delivered additional promised features, including support for the HomePod, Siri privacy options, HomeKit Secure Video, new emoji, Deep Fusion in the iPhone 11 Camera app, and AirPods Pro support. It also fixed a bug with password autofill in third-party apps, resolved an issue that prevented swipe to go home from working on the iPhone X and later, eliminated a problem that caused saved notes to disappear temporarily, and ensured that manual iCloud backups completed successfully.
  • iOS 13.2.1 (October 30): As it turned out, iOS 13.2 could brick HomePods during installation or after a reset. This HomePod-exclusive update fixed that bug.
  • iOS 13.2.2 (November 7): This update stomped a big bug that could cause apps to quit unexpectedly in the background, potentially causing data loss and draining the battery more quickly. It also addressed two bugs that could cause an iPhone to lose cellular service.
  • iOS 13.2.3 (November 18): This release resolved one bug that could cause searches in Mail, Files, and Notes to fail and another that prevented photos, links, and other attachments from displaying in the Messages detail view. It also addressed problems that could prevent apps from downloading content in the background and prevent Mail from fetching new messages and including and quoting original content when replying.

With luck, you never ran into any of these bugs—they weren’t universal. But the problems were real, and they inconvenienced plenty of people. Just like with vaccinations, staying current with your iOS updates is the best way to keep the bugs at bay.

(Featured image modified slightly from an original by energepic.com from Pexels)

Need to Move Lots of Data Between Macs? Try Target Disk Mode

We have an embarrassment of riches when it comes to the number of ways we can move data between Macs. You can send files via AirDrop, attach them to an email message, put them in a Messages conversation, turn on and connect via File Sharing, or use Dropbox or Google Drive as an intermediary, to name just a few of the more obvious approaches.

But what if you have a lot of data—say tens or even hundreds of gigabytes—to transfer from one Mac to another? The techniques listed above might work, but we wouldn’t bet on it. If you had an external hard drive with sufficient free space handy, you could copy all the data to it from one Mac and then copy the data back off to another Mac. To cut the copy time in half, though, try Target Disk Mode instead.

What Is Target Disk Mode?

Target Disk Mode is a special boot mode that enables nearly any Mac to behave like an external hard drive for another Mac. You can connect the Macs using Thunderbolt 3, USB-C (on the MacBook), Thunderbolt 2, or FireWire. It’s best to use the same port on both Macs if possible, but it’s usually fine to use adapters, such as Apple’s Thunderbolt 3 to Thunderbolt 2 adapter for connecting newer and older Thunderbolt-capable Macs.

Target Disk Mode is nearly universal, easy to set up, and one of the fastest methods of moving files between Macs. Let’s unpack that statement:

  • Nearly universal: Every Mac sold in the last decade supports Target Disk Mode, so you can be sure it will work with any modern Mac.
  • Easy setup: Because Apple has baked Target Disk Mode into the Mac firmware, the version of macOS is irrelevant. There’s no software to configure nor any permissions to worry about. Putting a Mac into Target Disk Mode merely requires holding down the T key during boot or clicking a button in the Startup Disk preference pane.
  • Speed: Because Target Disk Mode on modern Macs relies on a Thunderbolt connection, and you’re connecting one Mac directly to another, you’ll get the fastest transfer speeds in the fewest steps.

You can also use Target Disk Mode on an old Mac to set up a new Mac with Migration Assistant, repair its drive using Disk Utility, or possibly even boot another Mac with it. Booting one Mac from another in Target Disk Mode works best if the two Macs are of the same model and vintage and are running the same version of macOS, but it might work even if those facts aren’t true.

Step-by-Step Instructions

To use Target Disk Mode to copy data between Macs, follow these steps:

  1. On the source Mac, either:
    • Restart the Mac, and once it starts booting, hold down the T key until you see the Target Disk Mode screen with a bouncing Thunderbolt logo.
    • Open System Preferences > Startup Disk, click the lock button and enter your administrator credentials, click Target Disk Mode, and then click Restart.
  2. Connect the source Mac to the destination Mac with an appropriate cable. The source Mac’s drive appears on the destination Mac’s Desktop like an external hard drive. (If the source Mac is running macOS 10.15 Catalina, two drives will appear on the destination Mac’s Desktop: DriveName and DriveName – Data. The first is Catalina’s system volume; you’ll find all your files and folders on the Data volume.)
  3. Move or copy files as desired.
  4. When you’re done, press and hold the power button on the source Mac for a few seconds to shut it down.

If you have hundreds of gigabytes to transfer and either of your Macs is a notebook, it’s best to connect it to power to avoid draining the battery before the copy finishes.

Minor Gotchas

Two things can complicate putting a Mac into Target Disk Mode: FileVault and a firmware password. Both are easily worked around:

  • If the Mac is encrypted with FileVault, hold down the T key at startup like normal, but then enter the administrator password for that Mac to complete the switch to Target Disk Mode.
  • If the Mac has a firmware password, press the Option key while the Mac is starting up and enter the firmware password when prompted. Then press the T key to continue booting in Target Disk Mode.

Also, the Apple USB-C Charge Cable that comes with the power adapter for the MacBook, MacBook Air, and MacBook Pro models doesn’t support Target Disk Mode, so if that’s the cable you were planning to use, sorry, but you’ll need to buy a real Thunderbolt or USB-C cable.

Despite these small caveats, Target Disk Mode is one of the unsung innovations that has made Macs easier to use for decades, and it’s well worth keeping in mind whenever you need to move lots of data between machines.

(Featured image by Adam Engst)

In Case of Emergency, Create an iPhone Medical ID

Accidents, particularly those involving automobiles, are all too common, and while no one plans to be in one, you can prepare for the eventuality. If you end up in a state where you can’t speak with emergency responders or are too shaken up to share your details clearly, your iPhone can provide them with essential medical information. Emergency responders are trained to know how to access these details.

Apple makes this possible via the Medical ID feature of the Health app, which you can use to record medical data and emergency contact information (this is sometimes referred to as “ICE information,” where ICE stands for “In Case of Emergency”). Once you’ve entered all this information, emergency responders can use your iPhone to learn about your medication allergies and other conditions, plus contact your family. This data could also help a Good Samaritan return a lost iPhone. (Unfortunately, the Health app isn’t available on the iPad.)

To set up or edit your Medical ID, follow these steps (in iOS 13; they’re slightly different in earlier versions of iOS):

  1. Open the Health app and tap the Summary tab at the bottom.
  2. Tap your profile picture in the upper-right corner.
  3. Under Medical Details, tap Medical ID.
  4. Tap Edit in the upper-right corner.
  5. Make sure the Show When Locked switch is on.
  6. Enter all the relevant details about your medical conditions, medications, allergies, and so on.
  7. Specify one or more emergency contacts. These must be people in the Contacts app with phone numbers; if the right people aren’t there, add them first. You can’t select your own card in Contacts, so consider making one for a fake person called “If Lost, Please Call” and listing a different phone number at which you can be reached.
  8. Tap Done.


Hopefully, you’ll never have to use someone else’s Medical ID information, but you should know how to do so. You should also teach family, friends, and colleagues how to find and use this information. Should you come across a bicyclist who has had a bad crash or a similar situation, follow these steps:

  1. With a locked iPhone that uses Touch ID, press the Home button to display the Passcode screen. For iPhones with Face ID, press the side button and swipe up from the bottom.
  2. On the Passcode screen, tap Emergency in the bottom-left corner to move to the Emergency screen. If needed, call 911 from this screen by tapping Emergency Call.
  3. Again at the bottom left, tap Medical ID to display the Medical ID screen, complete with all the details that person entered into the Health app.
  4. From that screen, you can share the information with EMTs or other first responders so they’re aware of any serious conditions or allergies that would affect treatment. You can also call any emergency contacts listed by tapping their numbers.


Please, enter your medical and emergency contact details into the Health app right now, and spread the word to everyone you know. It could save your life, or help you save someone else’s!

(Featured image by F. Muhammad from Pixabay)

Apple Releases Redesigned Mac Pro and Pro Display XDR

We’re not going to beat around the bush. Apple’s new Mac Pro and Pro Display XDR redefine what “pro” means. If you aren’t certain that the fastest and most powerful Mac and an expertly calibrated 6K Retina display will enable you to make more money immediately, they’re probably not for you. You should also be ready to spend at least $12,000—and likely several thousand more—on the combination. For that money, though, you’ll get a system that puts every previous Mac setup to shame.

Mac Pro

The new Mac Pro, which Apple first teased in April 2017 and formally announced over two years later in June 2019, is the result of a complete reimagining of what a Mac for pro users should offer. In contrast with the previous cylindrical design, which favored form over function, Apple consulted with numerous pro users on the design and specs of the new Mac Pro tower.

Physically, the Mac Pro utilizes a stainless steel frame that provides mounting points for a wide array of components and configurations. An aluminum housing slips off to provide 360-degree access, with the processor, graphics, and expansion slots on one side, and storage and memory on the other. One size does not fit all pro users, so you’ll be able to customize the Mac Pro to your needs. Finally, optional wheels make it easy to move the Mac Pro around a set, stage, or studio.


For the ultimate in performance, the Mac Pro relies on an Intel Xeon W processor, and you can choose from 8, 12, 16,  24, or 28 cores. Base clock speeds vary with the number of cores, but all except the 8-core model support Turbo Boost to 4.4 GHz (the 8-core model only spikes to 4.0 GHz). Similarly, the 8-core model operates memory at 2666 MHz, whereas the remaining models run memory at 2933 MHz for increased performance. With the high-end 28-core configuration, Apple is promoting performance increases over the previous 12-core Mac Pro of 300% to 500% for activities like Photoshop filters, Xcode builds, Logic Pro plug-ins, and Autodesk Maya rendering.

Speaking of RAM, the base level is 32 GB, but there are 12 DIMM slots, so you can upgrade to 48 GB, 96 GB, 192 GB, 384 GB, 768 GB, or a whopping 1.5 TB. That final RAM ceiling is available only with the 24- and 28-core models.


These days, much of a workstation’s performance comes from its dedicated GPUs, which are essential for 3D animation, 8K video compositing, and building lifelike gaming environments, along with pure number crunching. Apple integrates GPUs via the new Mac Pro Expansion Module, or MPX Module, and the Mac Pro holds two MPX Modules. Those modules come with an AMD Radeon Pro 580X, Radeon Pro Vega II, or Radeon Pro Vega II Duo, the last of which combines two Vega II GPUs in a single module. For maximum compute power, configure two MPX Modules with Radeon Pro Vega II Duos for four GPUs. Those cards also offer a variety of DisplayPort, Thunderbolt 3, and HDMI 2.0 ports for connecting displays.

Of course, any Mac aimed at pros needs to be expandable, and the Mac Pro offers eight PCI Express expansion slots: four double-wide slots, three single-wide slots, and one half-length slot preconfigured with an Apple I/O card. Apple also offers the Afterburner PCI Express card, which accelerates ProRes and ProRes RAW codecs in Final Cut Pro X, QuickTime Player X, and supported third-party apps.

That Apple I/O card provides two USB 3 ports using the USB-A connector, two Thunderbolt 3 ports, and two 10-gigabit Ethernet ports. The top of the Mac Pro case (shown below) provides another two Thunderbolt 3 ports. Of course, 802.11ac Wi-Fi and Bluetooth 5.0 are built in.


In terms of storage, the Mac Pro starts with a 256 GB SSD for those whose data is all stored externally. However, you can also upgrade to 1, 2, or 4 TB SSDs, and Apple’s T2 security chip automatically encrypts all onboard storage.

All this computing power requires lots of electrical power, so Apple has outfitted the Mac Pro with a 1.4-kilowatt power supply. It will generate a lot of heat as well, so the design facilitates thermal cooling, with heat pipes directing hot air away from the CPU and dispersing it along aluminum fin stacks. Three impeller fans keep cool air moving across the CPU and GPUs, while a blower on the other side pulls air across the memory, storage, and power supply.

Pro Display XDR

If you’re a high-end software developer or audio pro, you may not care that much about your monitor. But if you spend your days working with video or graphics, you may want to consider Apple’s new Pro Display XDR to accompany your Mac Pro. It starts at $4999.

For starters, the Pro Display XDR is a 6K Retina display, which provides nearly 40% more screen real estate than a 5K display. It runs at 6016-by-3384 pixels at 218 pixels per inch. For those working with 4K video, that means you can see your video and have room for your tools, all on one screen.


It’s also likely the best-looking display you’ve ever used. It features 1000 nits of sustained brightness, and peaks at 1600 nits—most typical desktop monitors provide only 350 nits of brightness. That results in a 1,000,000:1 contrast ratio. It also provides a P3 wide color gamut and true 10-bit color, enabling it to produce more than 1 billion colors accurately.

The Pro Display XDR offers reference modes that enable you to match its output—color space, white point, gamma, and brightness—to the requirements for HDR, HD, SD video, and digital cinema, not to mention general photography, design, and print. You can even create custom reference modes.

Most displays suffer if you’re not looking straight at them, but with new polarizing technology, the Pro Display XDR boasts a wide viewing angle that provides up to 25 times better off-axis contrast than a typical LCD screen. Apple also engineered it for low reflectivity, and for the ultimate in matte screens, you can pay $1000 more for nano-texture glass that cuts reflections even further.

Not surprisingly, the Pro Display XDR is a hefty unit. It’s 23.8 inches (71.8 cm) wide, 16.2 inches (41.2 cm) high, and 1.1 (2.7 cm) inches deep, and it tips the scales at 16.5 pounds (7.5 kg). On the back, you’ll find one Thunderbolt 3 port and three USB-C ports.


What you won’t get with the Pro Display XDR out of the box is a stand. You can choose between Apple’s Pro Stand for $999 or the $199 VESA Mount Adapter, which lets you put the Pro Display XDR on an arm attached to a desk or wall. The beefy Pro Stand, which weighs in at 9.5 pounds (4.3 kg), offers a total height adjustment of 12 cm and can tilt from -5º to +25º. When using the Pro Stand, you can also rotate the Pro Display XDR from landscape to portrait to choose the orientation that you prefer.

Configure Carefully

As you can tell, the Mac Pro and Pro Display XDR provide a vast array of options, and at the prices Apple is charging, you want to make sure you’re getting the configuration that best fits your needs and budget. So before you order, get in touch with us to talk through what options you’re most likely to need.

(Images by Apple)