Use macOS’s Guest Account to Protect Your Privacy from Temporary Users

We’ve all had it happen. “Can I use your Mac for a minute to check my email?” The answer can be “Yes,” but to keep people from poking around on your Mac, have your visitor log in as Guest. To enable the Guest account, go to System Preferences > Users & Groups. If the lock at the bottom left is closed, click it and enter your admin credentials. Then click Guest User in the list, and select “Allow guests to log in to this computer.” To switch to the Guest account, go to the Apple menu and choose Log Out YourAccountName to access the login screen. Your guest can then click the Guest User icon, at which point they’ll have a clean account to work in. When they log out, the account—including any files they created or downloaded—will be deleted, thus protecting their privacy as well.

(Featured image by Apple)

Some May Like It Hot… But Your Technology Prefers to Stay Cool

When summer brings sunny days and rising temperatures, you may have ditched your business suit for shorts or skirts to stay comfortable, but your technological gear can’t do the same. And keeping your tech cool is about more than comfort—as temperatures rise, performance can suffer, charging may get slower or stop, various components might be disabled, and devices can become unreliable.

How Hot Is Too Hot?

You might be surprised by the recommended operating temperatures for Apple gear—whether you’re talking about an iPhone X or a MacBook Pro, the company recommends staying under 95° F (35° C).

Such temperatures happen regularly throughout the summer. Even in cooler climes, the temperature in a parked car in the sunshine can easily hit 130º F (54º C) in an hour and rise higher as time passes. And no, cracking the windows a couple of inches won’t make a significant difference. We hope you’re already thinking about that with regard to children and pets, but as you can see, tech gear should also be protected. Apple says its products shouldn’t even be stored—turned off—at temperatures over 113º F (45º C).

It’s not just cars you have to think about. Temperatures in homes and offices without air conditioning can also rise higher than electronics would prefer, and that’s especially true for computers that stay on most of the time and aren’t located in well-ventilated areas.

What’s the Danger?

First off, remember that all electronic devices produce their own heat on top of the ambient heat in the environment, so the temperature inside a device can be much, much hotter than outside. The CPU in an iMac can hit 212º F (100º C) under heavy loads.

Temperatures higher than what components are designed for can have the following effects:

  • Chips of all types can behave unpredictably as increased thermal noise (electrons vibrating more) causes a higher bit error rate. Because electrical resistance increases with heat, timing errors can also occur.
  • Lithium-ion batteries discharge well in high temperatures, but the increased rate of chemical reactions within the battery will result in a shorter overall lifespan.
  • As devices heat and cool, the uneven thermal expansion of different materials can cause microscopic cracks that can lead to a variety of failures over time.

Some heat-related problems are temporary, so when the device or component cools down, it will resume working correctly. But others, particularly drops in battery life—are irreversible and particularly worth avoiding.

When a Mac gets too hot, it will spin up its fans in an attempt to keep its internal components cool. If your Mac’s fans are ever running at full tilt, first quit apps you aren’t using, particularly those that might be CPU-intensive and thus creating a lot of heat. If that doesn’t make a difference, restart it to make sure the problem isn’t some rogue process. If the fans come back on at full speed quickly, shut it down and let it cool off for a bit. In the worst case, an overheated Mac will start acting unpredictably or crash.

iOS devices don’t have fans, so they employ other coping mechanisms. If your iPhone or iPad gets too hot, the device will alert you.

Apple says you might notice some of the following behaviors:

  • Charging, including wireless charging, slows or stops.
  • The display dims or goes black.
  • Cellular radios enter a low-power state. The signal might weaken during this time.
  • The camera flash is temporarily disabled.
  • Performance slows with graphics-intensive apps or features.

If you’re using Maps on an overheating iPhone for GPS navigation in the car, it may show a “Temperature: iPhone needs to cool down.” screen instead of the map. You’ll still get audible turn-by-turn directions, and the screen will wake up to guide you through turns,

How to Keep Your Tech Cool

For the most part, keeping Apple devices cool just requires common sense, since you’d do the same things for yourself.

  • As Apple’s specifications recommend, avoid using devices when the temperature is over 95º F (35º C). If you can’t avoid it entirely, keep usage to a minimum.
  • Don’t leave devices in cars parked in the sun for long periods of time. If it happens accidentally, let the device cool before using it.
  • Provide good ventilation so air can cool the device. Don’t block ventilation ports in the back of desktop Macs, and don’t use Mac laptops in bed, propped on a pillow, or under the covers. It can be worth vacuuming dust out of ventilation ports every so often.
  • Never put anything on the keyboard of an open Mac laptop.
  • Avoid stacking things on top of a Mac mini.
  • Monitor the temperature of server closets. If they get too hot, keep the door open, add a fan, or run the air conditioning.

Luckily, the temperatures that cause problems for Apple hardware aren’t terribly comfortable for people either, so if you’re way too hot, that’s a good sign your gear is as well.

(Featured image by Alfonso Escalante from Pexels)

Use Spotlight on the Mac to Convert Units, Track Flights, Find Movies, and More!

Most Mac users probably think of searching on the Mac in relation to finding files on their drives. That may be the most common use of Apple’s Spotlight search technology, but over the years, Apple has continually enhanced Spotlight’s capabilities, turning it into a veritable Swiss Army Knife that you can invoke with a quick press of Command-Space bar or a click on the magnifying glass at the right side of the menu bar.

Here are a few of our favorite uses for Spotlight that you may not have been aware of.

Launch Apps and Open System Preference Panes

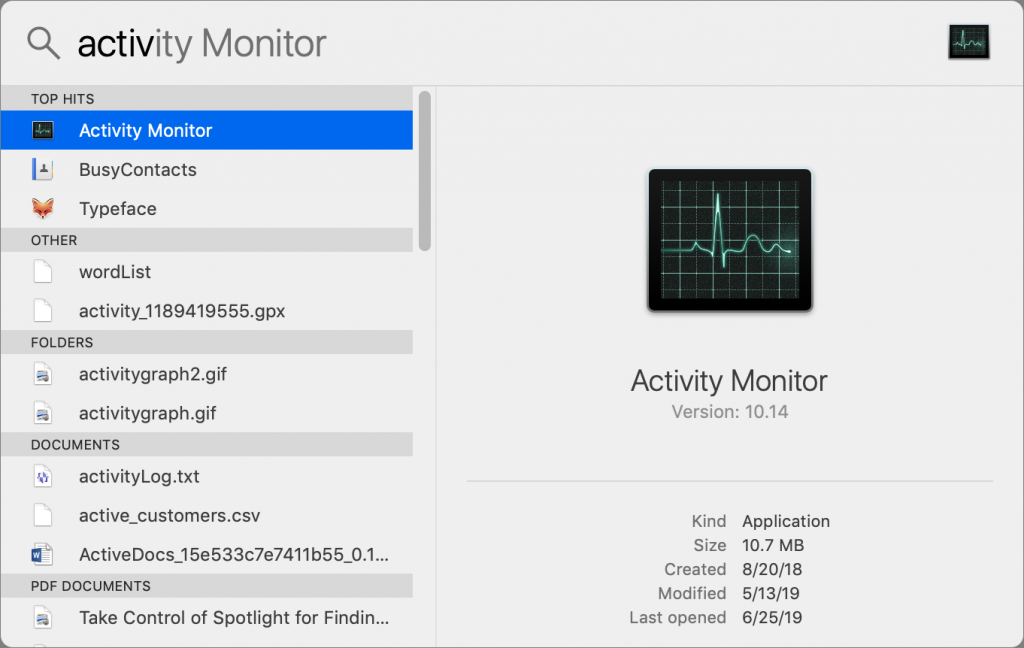
We recommend putting apps you use all the time in the Dock for quick access, but what about apps you need only occasionally? You can always root around in the Applications folder for them, but for quicker access, invoke Spotlight and type the first few characters of the app’s name (Spotlight will guess at what you want; if it’s wrong, keep typing). Then double-click the app in the results list or if it’s already selected, press Return. It’s a great way to bring up Activity Monitor to see what’s happening when your Mac feels slow. This trick also works wonders for opening panes in System Preferences.

For apps and preference panes whose names have multiple words, you can also try typing the first letter of each word, like ug to find and open the Users & Groups pane of System Preferences.

Convert Units and Currency

Need to figure out what 72º F is in Celsius? Or precisely how many quarts are in a 2-liter bottle? Spotlight can do all sorts of conversions for you. Just start typing your starting number, like 72, and then follow it with something that indicates your starting unit, such as “F” or “degrees.” Spotlight displays the conversion instantly, so you can tell if you’ve guessed wrong about the unit (K is degrees Kelvin, so you’d use km to figure out how many miles in a 24-kilometer race).

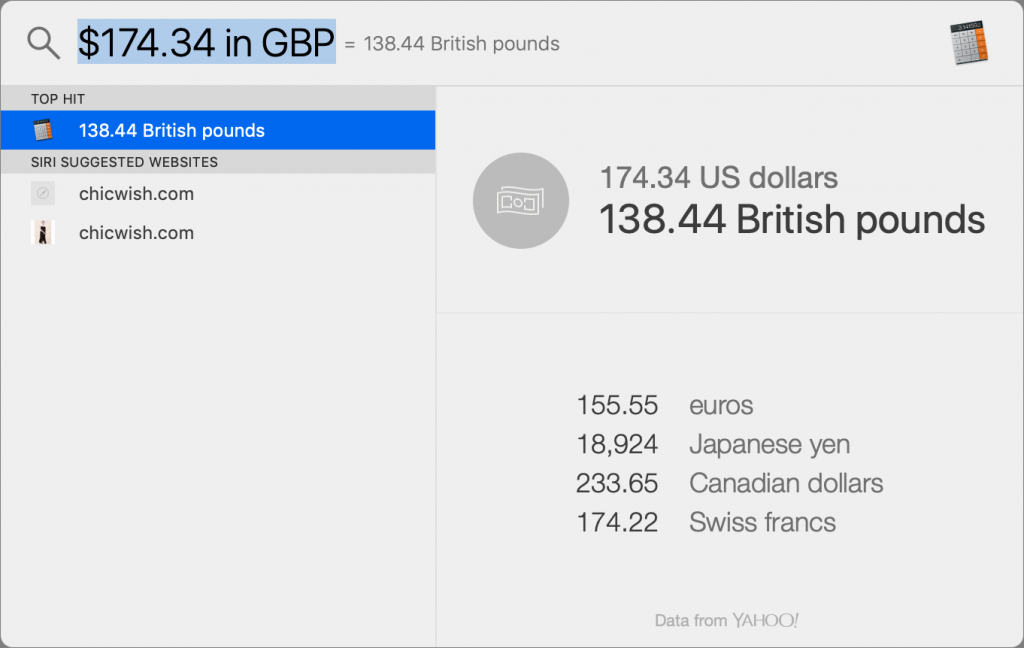
Particularly useful is Spotlight’s capability to do real-time currency conversions, since exchange rates fluctuate. It can’t do every currency on the planet, so you’re on your own if you need to check on Burundi francs, but you’ll find all the major currencies. The trick is knowing their abbreviations: the British pound is abbreviated GBP, the Canadian dollar is CAD, the Japanese yen is JPY, and so on. To convert from US dollars into another currency add the phrase “in GBP” or the like after the dollar amount.

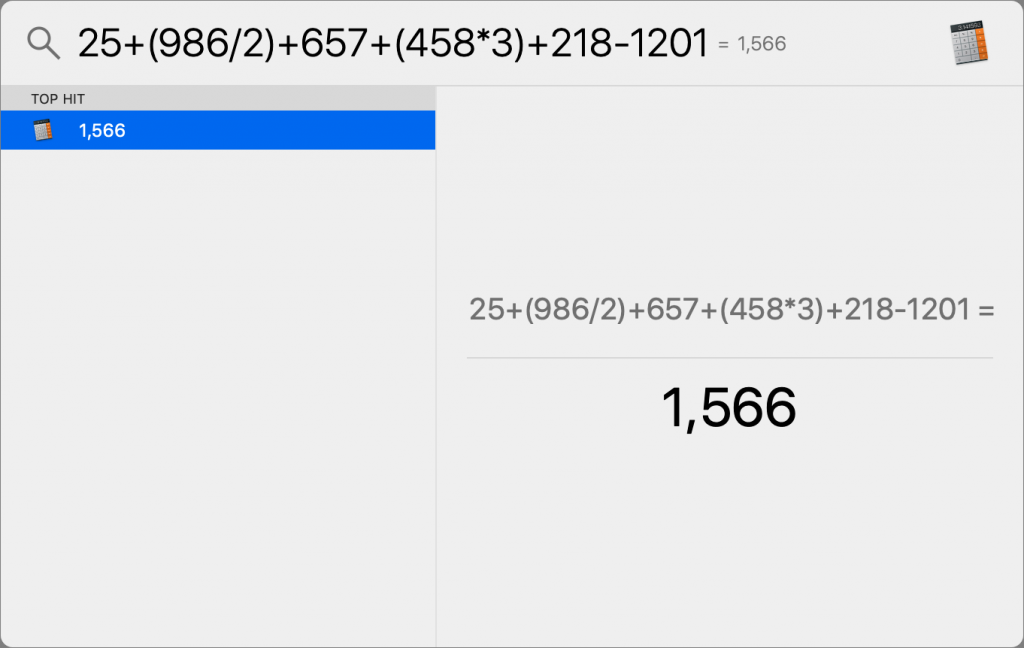
Perform Calculations

We’ve come a long way from thinking that calculator watches are the height of geek chic, but a calculator is still handy now and then. When you want to perform a simple calculation for which a spreadsheet would be overkill, you could use Spotlight to launch the Calculator app, but it’s faster to type your calculation into Spotlight itself. It even supports parentheses for specifying an order of operations. The screenshot is just for illustration; we mostly use this feature to add up a series of numbers.
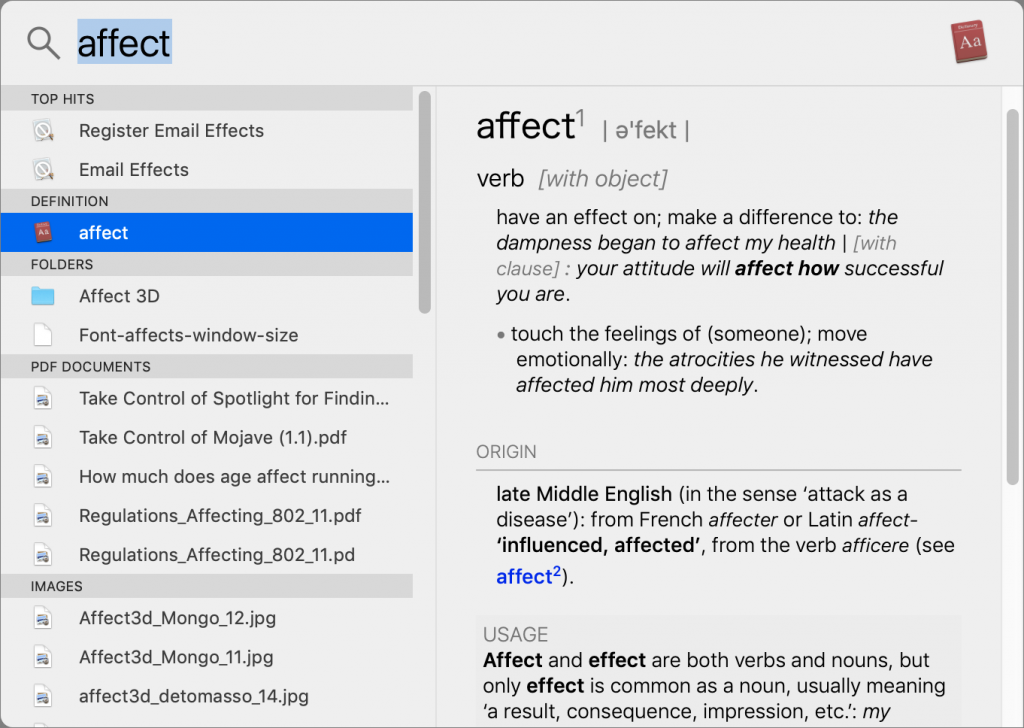
Look Up Words

Can’t remember the difference between “affect” and “effect”? macOS’s Dictionary app has all the help you need, but as with Calculator, Spotlight is a fast substitute. Type the word and click the entry under Definition to see the dictionary entry over on the side. If you want to look for synonyms in the thesaurus or explore other aspects of the word, press Return to open the word in the Dictionary app.

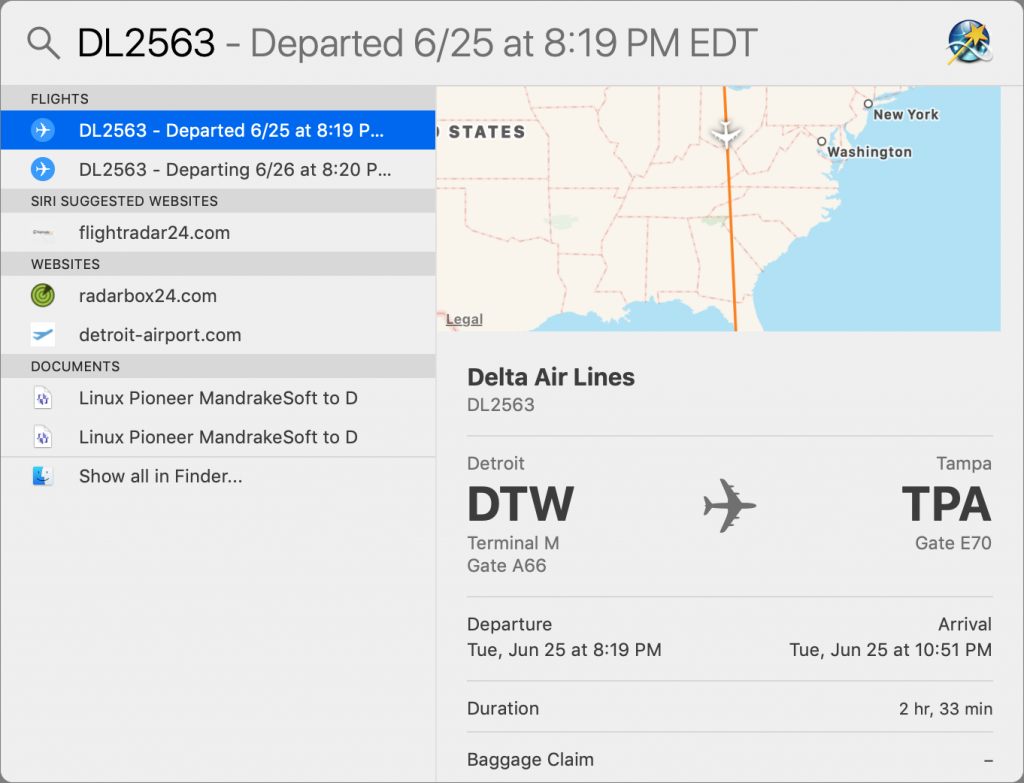
Track Airline Flights

Need to pick your relatives up at the airport? Rather than hoping that their flight will be on time, check to see if it is, with Spotlight. You can usually type the airline name and flight number, but it’s safest if you know the airline’s two-letter code, like DL for Delta, UA for United Airlines, and so on.

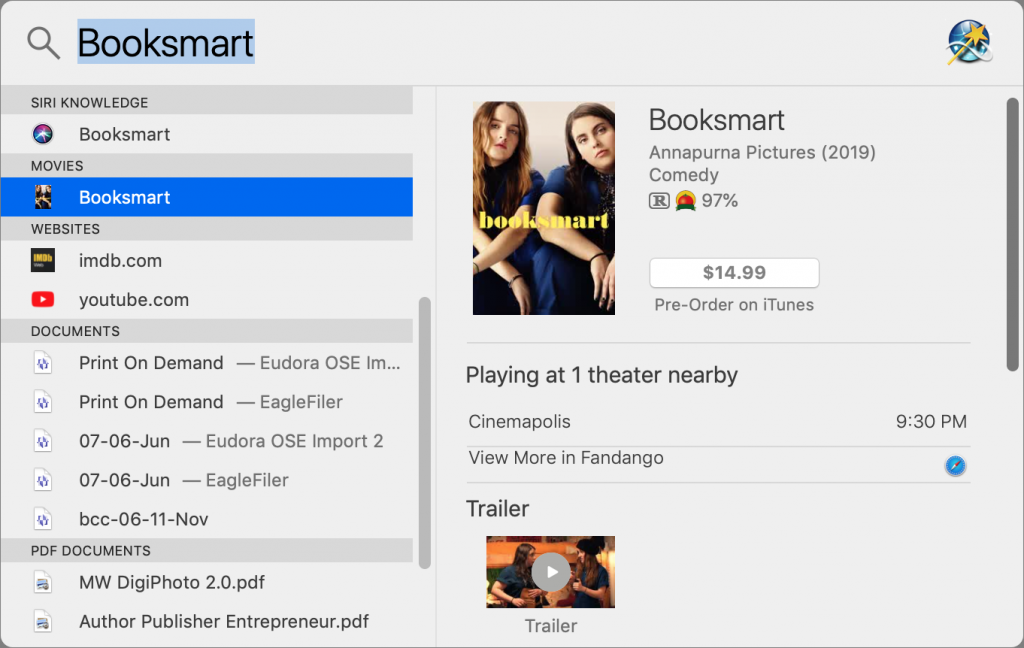
Find Movie Info and Show Times

Spotlight can even prove useful at the end of the day when you’re trying to figure out if a particular movie is playing at the local cineplex. Enter the title of a current movie and click its entry in the results under Movies to see all sorts of details, including its Rotten Tomatoes rating, when and where it’s playing, and if you can instead get it on iTunes.

Stocks, Sports Scores, and Weather

Wait, there’s more! Type a ticker symbol, like AAPL, into Spotlight to see the stock’s current price and activity for the day. Enter the name of a professional sports team to see the score of the team’s latest game (assuming they’re in season) and upcoming schedule. And type “weather” and a city name to check the climate conditions for that location and get an extended forecast.
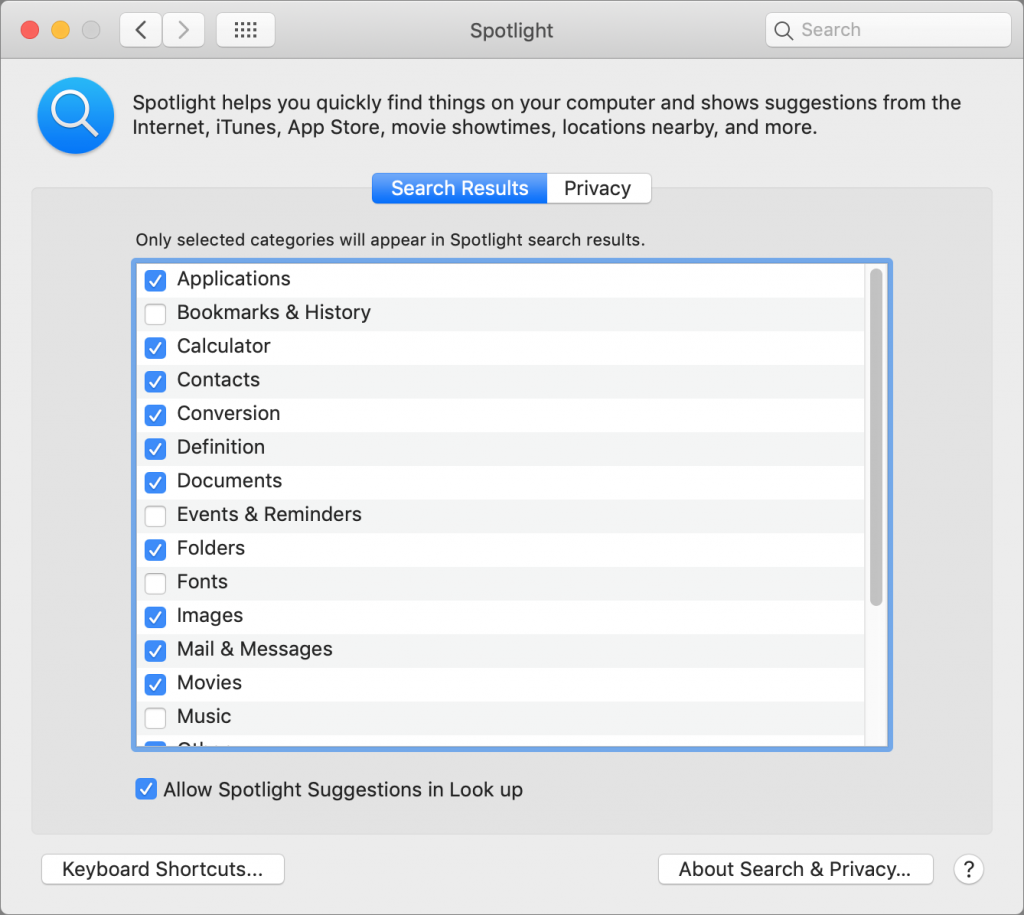
Customize Spotlight

You’ve probably noticed all sorts of other odd items in the results list. That’s because there’s no telling what old email messages or documents might also contain your search term. But you can trim the results somewhat by turning certain items off. To do this, open System Preferences > Spotlight and deselect any categories that aren’t helpful.

If you never knew or have forgotten how useful Spotlight can be, give it a try!

(Featured image by Nathan Anderson on Unsplash)

Did You Know You Can Make a Video of Anything on Your iPhone or iPad Screen?

You know how to use the Camera app on your iPhone or iPad to take a video, but did you know that you can also record a video of what happens on the screen of your device? That’s useful if you’re trying to explain the steps of some technical process to a friend or show a tech support rep what’s going wrong in an app or Web site. You could also use a screen recording to copy a video from Facebook, for instance, that you want to send to a social media–averse friend.

First, to get set up, go to Settings > Control Center > Customize Controls and tap the green + button next to Screen Recording to add it to the list of controls that appear in Control Center. Drag it in the list to rearrange where its round Record button will show up in Control Center. Here’s a screen recording showing those steps:

Making your first screen recording is simple. Follow these steps:

  1. Open Control Center. (Swipe up from the bottom edge of the screen, or, if you’re using an iPhone X or later, or an iPad running iOS 12, swipe down from the top-right corner of the screen.)
  2. Press deeply on the Screen Recording button to open a menu. If you want to record your voice via the microphone as well, tap the Microphone button to turn it on.
  3. Tap Start Recording, and then wait for the 3-second countdown.
  4. Perform the actions that you want to be recorded.
  5. To stop the recording, either enter Control Center again and tap the red Record button or tap the red status icon at the upper left of the screen and tap Stop. A notification appears, telling you that your screen recording was saved to Photos.

In fact, if you want to keep your options for the destination app and microphone at their current settings, making a screen recording is even easier:

  1. Open Control Center.
  2. Tap the Record button instead of pressing deeply.
  3. Perform your actions.
  4. Stop the recording via Control Center or the red status bar.

Told you it was simple. But we bet you have questions, so let’s provide some answers.

Where did my screen recording go?

As the notification informs you, screen recordings end up in the Photos app, just like any other photo or video. You’ll see them both in the Photos view and in Albums > Media Types > Videos.

What are Messenger and Skype doing in the screenshot earlier?

Instead of recording your screen to a video file, you can instead broadcast it to a Facebook Messenger or Skype chat. That might be useful for a quick show-and-tell while having a conversation.

Can I edit the screen recording?

Yes, although the Photos app limits you to trimming frames from the start and end of the video (which actually creates a new video with your selection rather than editing the original). For more significant editing, tap the ••• button in the Photos edit interface and send the video to iMovie.

Is there any way to show my taps and drags in the screen recording?

Yes, but it’s not easy. There’s a trick that relies on iOS’s Accessibility features, but it’s way too clumsy and leaves the Assistive Touch button on the screen the entire time. A better approach would be to use a dedicated app like ScreenFlow (which is what we used above) to insert circles where your fingers touch down, but that’s worthwhile only for videos where you need higher production values.

For the most part, though, the point of screen recordings is not to make the perfect movie—it’s to create and share a video of something that would otherwise be difficult or impossible to convey.

(Featured image by Lisa Fotios from Pexels)

Buy Quality Cables to Avoid Possible Device Damage or Even Fires

Apple’s prices for Lightning, USB-C, and Thunderbolt 3 cables often seem high—$19 for a USB-C to Lightning cable or $29 if you want a 2-meter version? Unfortunately, when it comes to cables, you often get what you pay for. Happily, other reputable hardware manufacturers like Anker and Belkin make quality cables and often charge less than Apple.

Stay away from the bargain basement prices from no-name Chinese manufacturers, and if you see a supposedly genuine Apple cable selling for a too-good-to-be-true price, consider the possibility that it’s counterfeit. Apple has even created a detailed page that explains how to identify counterfeit or uncertified Lightning accessories.

The problem with cheap cables is not just that they might break or wear out sooner, but that many modern cables carry power as well as data. When there’s sufficient juice flowing down those tiny wires, a short-circuit can fry hardware or in the worst cases, generate sparks, smoke, or even fire. Don’t misunderstand—fires aren’t likely, but over the years, there have been numerous headlines about fires caused by charging iPhones and Android smartphones. In fact, Target just recalled 90,000 Lightning to USB cables after 14 reports of the cables smoking, sparking, and igniting.

When it comes to damaging hardware, USB-C was a problem early on but is less so now, thanks to the efforts of Google engineer Benson Leung in 2015 and 2016. After a bad USB-C cable fried his Chromebook, he embarked on a one-man crusade to identify which USB-C cables were good and which were bad. He has moved on from that now, but in part due to his efforts, Amazon started prohibiting listings of USB-C cables and adapters that weren’t compliant with the USB-C specs. You might still run across bad cables that Amazon hasn’t yet identified, or dodgy cables sold through other retailers, but the danger is lower than it used to be, particularly with cables from name brands.

Lightning cables are incredibly common these days—you can buy them in gas stations and drugstores—and as with USB-C cables, you’ll do best if you stick with cables from brand name companies. You’ll pay more, but do you really trust electronics sold next to Twinkies and Slim Jims? It might be worth buying one in a pinch, but don’t rely on it.

Of course, even the best cables will fray and fail if you mistreat them. Follow this advice to ensure a long life for even heavily used cables:

  • Don’t create sharp bends in the cable, especially near the connector. Sharp bends can eventually break the insulation and reveal the wires inside.
  • When unplugging your device, pull from the plug instead of further down on the cord. That avoids stress near the connector.
  • When coiling your cables, avoid wrapping them tightly around something that’s not round. A tight wrap can cause kinks that will degrade the wires inside.
  • Don’t put heavy objects on cables, or sandwich them between a desk and the wall. Anything that compresses the cable can cause damage.
  • iPhones may be fairly water resistant these days, but try to keep both the Lighting port and the cable’s pins clean and away from liquids because crud or a droplet could cause a short circuit. USB-C cables are less susceptible to such problems because of their metal jackets, but it’s still worth being careful.
  • If a cable’s insulation ever breaks so you can see the wires inside, wrap it with electrical tape right away, and replace it as soon as you can.

In the end, the advice is pretty simple. Spend a little more on quality products from reputable manufacturers so you don’t have to worry about your $1000 iPhone XS being damaged by a $3 counterfeit Lightning cable.

(Featured image by Matthias Zomer from Pexels)