Considering a New iMac? Wait No Longer—Updates Are Here!

The iMac has long been the core of Apple’s desktop lineup, but it hasn’t received any updates since June 2017. Now, however, Apple has quietly updated the 21.5-inch iMac with Retina 4K display and the 27-inch iMac with 5K Retina display while keeping prices the same. The bargain-basement non-Retina 21.5-inch iMac remains for sale, but received no changes.

These updates are targeted at improving performance, so you won’t see any changes to the case, screen, or even networking capabilities. But if faster CPUs, GPUs, and memory are what you want, now’s a good time to buy.

The new 21.5-inch iMac boasts speedier 8th-generation Intel quad-core processors and an optional 6-core processor at the top of the line that deliver up to 60% faster performance than previous models. For even greater speed boosts—Apple claims up to 2.4 times faster performance—look to the 27-inch iMac, which now offers 9th-generation 6-core Intel Core i5 processors running at 3.0, 3.1, or 3.7 GHz. If that’s not enough, you can choose an 8-core 3.6 GHz Intel Core i9 processor for the best performance short of an iMac Pro.

Modern computers rely heavily on graphics processors for both silky smooth screen drawing and computationally intensive tasks. By default, both new iMac models have updated versions the previous Radeon Pro graphics chips, but anyone who needs more power can instead choose a blazingly fast Radeon Pro Vega. For the 21.5-inch model, Apple says the Radeon Pro Vega is up to 80% faster; for the 27-inch iMac, it’s up to 50% faster.

Note that both iMacs now use 2666 MHz RAM instead of the previous 2400 MHz RAM. It probably won’t make much of a performance difference, but it’s worth keeping the speed in mind if you’re buying RAM separately from the iMac.

For those ordering an iMac from the online Apple store, if the options you want are in the top-level configuration, start there rather than in the next configuration down. It’s possible to configure two Macs to have the same options for the same price but get a better Radeon Pro graphics processor if you start from the top-level configuration.

For storage, we generally recommend SSDs over Fusion Drives—add external storage if you need more space. Whatever you do, don’t buy an iMac with an internal hard drive because it will destroy the performance.

For those looking for the ultimate power in an iMac Pro, Apple also quietly added options for 256 GB of RAM (for a whopping $5200) and a Radeon Pro Vega 64X GPU ($700) while simultaneously dropping the prices on some other RAM and storage options.

Did You Know Families Can Share Mac and iOS Apps Purchased from the App Store?

Have you ever looked over your spouse’s shoulder and thought, “Hey, that’s a cool app.”? If you set up Family Sharing (in System Preferences > iCloud on the Mac, and in Settings > Your Name in iOS), you can download almost any app that someone else in your family has purchased on either the Mac App Store or the iOS App Store. How you find these shared apps depends on the platform. On a Mac running macOS 10.14 Mojave, open the App Store app, click your email address at the bottom of the sidebar, and then click the name next to “Purchased by” to see another family member’s purchases. In iOS 12’s App Store app, tap your icon at the upper right, tap Purchased, and then tap a family member to see their purchases (note that you can select Not on this iPhone/iPad to narrow the choices). Click or tap the cloud icon to download a purchased app.

Ever Wanted to Get a Custom Email Address? Here’s How (and Why)

Some facts about ourselves are difficult or impossible to change, but your email address doesn’t have to be one of them. Switching to a custom email address might seem overwhelming, and it will take some time, but it’s not that hard or expensive (and we’re always happy to help if you get stuck).

Why Consider Switching to a Custom Address?

Why would you want to take on such a task? Independence. If you’re using the email address that came from your Internet service provider, you could end up in an awkward situation if you have to move and switch ISPs. Any address that ends in @comcast.net, @anything.rr.com, @verizon.net, @earthlink.net, or the like could be problematic. You also don’t want to rely entirely on a work email address—there’s no guarantee that your employer will forward email for you indefinitely if you take a different job.

Also, an email address says something about you, much as a postal address does—there’s a difference between an address on Central Park versus one in the Bronx. If you’re not happy with what your email address implies, you might want to switch.

What can an email address reveal? Those with a free Juno, Hotmail, or Yahoo account likely signed up years ago and don’t take email very seriously. People who use an @icloud.com, @me.com, or @mac.com address are clearly Apple users, and those with an address ending in @live.com, @msn.com, or @outlook.com are probably Windows users. .edu addresses identify students, teachers, and school employees—but if you’re not one anymore, your email looks like you’re wearing a varsity jacket in your 40s. The big kahuna of email is Gmail, which boasts about 1.5 billion users worldwide now—as a result, using a Gmail address is fairly generic.

The ultimate in independence comes when you register your own domain name, which usually costs less than $20 per year at sites like 1&1 Ionos, Domain.com, easyDNS, Directnic, and Register.com. Then your address can be anything you want at your new custom domain, and you never again have to worry about being tied to your ISP or associated with a free email host.

How to Change to a Custom Address

Step 1: Register a new domain name. The hard part here is thinking of a name that hasn’t already been taken. It’s best to stick with the traditional top-level domains like .com, .net, and .org—if you get into the new ones like .beer (yes, that’s available), your email is a bit more likely to be marked as spam. Most domain registrars will also host your email for you, and if you go this route, you can skip Step 2.

Step 2: If you’re already using Gmail or another independent email provider that isn’t tied to your ISP, log in to your account at your domain registrar and configure it to forward all email to your existing email address. In this case, you can skip Steps 3 and 4.

However, if you aren’t happy with your current email provider, you’ll need to set up an account with a new one. There are lots, but many people use a paid email provider like FastMail or easyMail that usually charges less than $50 per year and supports multiple mailboxes. When you set up the account, you’ll need to create one or more new email addresses at the provider and configure MX (mail exchange) records with your domain registrar—the service will provide instructions for this.

Step 3: If you’re changing email providers as part of this process, you’ll need to configure Mail—or whatever email client you’re using—to connect to your new email account with the login credentials you set up. That’s not hard, but being able to send email that comes from your custom address can require some effort with the free email providers. Gmail provides instructions, and others that support this feature will as well. Unfortunately, iCloud won’t let you send email using a custom address.

Step 4: If you’re moving to a new email provider, you’ll need to forward your mail from your old provider to your new custom address. Most email providers and ISPs have a screen somewhere in the account settings of their Web sites that lets you enter a forwarding address.

Step 5: Tell your family, friends, and colleagues about your new email address, and update mailing lists and accounts at sites like Amazon that send you email. The forwarding you set up in the previous step will ensure you don’t miss anything during the transition, but remember that if you cancel your old ISP account, that forwarding may end immediately, so it’s important to start the process well in advance.

The details will vary depending on your choice of domain registrar and email provider, so again, if you would like additional recommendations or assistance in setting all this up, just let us know.

Need to Clear Space on an iPhone or iPad? Here’s How to Do It in iOS 12

Little is more frustrating than running out of space your iPhone or iPad. You can’t take new photos, you can’t download new apps, some things may not work at all, and iOS will nag you repeatedly about how you can “manage” your storage in Settings. Luckily, over the past few versions of iOS, Apple has significantly improved the options for clearing unnecessary data from your device.

Storage Graph

To get started clearing space, go to Settings > iPhone/iPad Storage. At the top of the screen, a graph reveals where your space is going, such as Apps, Photos, Media, Messages, Mail, Books, iCloud Drive, and Other. You can’t do anything with the graph, but it will likely reveal the main culprits.

Recommendations

Next, iOS shows recommendations for quick ways to recover space. These vary based on how you use your device, so you will likely see other options here.

Some of the possibilities include:

  • Offload Unused Apps: This choice is particularly helpful if you download a lot of apps that you later stop using. Enable it, and iOS automatically recovers space from unused apps when you’re low on storage. Each of these apps remains on your Home screen with a little cloud icon next to it, and when you next tap the app to open it, iOS re-downloads the app from the App Store. You won’t lose any documents, data, or settings associated with an offloaded app.
  • Review Downloaded Videos: Some apps, like Netflix, can download videos for offline watching. That’s great for when you’re on a long flight, but if you forget to delete the videos, they can consume a lot of space. This option shows them to you and lets you swipe left on any one to delete it.
  • Review Large Attachments: Photos, videos, and other files sent to you in Messages can take up a lot of space. This recommendation reveals them and lets you swipe left to delete those you don’t need to keep.
  • “Recently Deleted” Album: When you delete photos in the Photos app, they go into the Recently Deleted album, where they’ll be deleted automatically after up to 40 days. This recommendation lets you remove those images right away.
  • Review Personal Videos: Shooting videos with your iPhone or iPad can guzzle storage, so this recommendation shows you the videos you’ve taken in case you don’t want to keep them.

iOS’s recommendations are quite good and may be all you need to clear space quickly. However, if you need to dig deeper, you can look at the usage of individual apps.

Individual App Usage

The third and final section of the iPhone/iPad Storage screen lists every app on your device, sorted by how much space it takes up. Along with the app’s name and how much space it consumes, iOS helpfully tells you the last time you used the app. You may even see “Never Used” for older apps that you’ve carried over from previous devices but haven’t opened on this one.

When you tap an app, iOS shows more information about how much space the app and its documents occupy, and lets you tap Offload App or Delete App to recover its space. For some apps, mostly those from Apple, like Music and Podcasts, iOS also shows the data stored by the app and lets you delete any individual item (swipe left).

Focus on the apps at the top of the list—the list is sorted by size—since it will be a lot easier to realize, for instance, that you’ve never used GarageBand and recover its 1.59 GB of space than to sort through a long list of apps and their data.

With all these the tools from Apple, you should have no trouble making space on your device for more photos, videos, and apps that you actually want to use.


Social Media: Struggling with too little space on your iPhone or iPad? In iOS 12, Apple provides highly effective tools for clearing more space—read on for details!

Collaborate with Colleagues in Pages, Numbers, and Keynote

We talked last month generally about real-time collaboration and why it’s so efficient and effective—see “Stop Mailing Files Around and Use Collaborative Apps.” Now we’re going to explain how to start collaborating in Apple’s iWork suite of apps: Pages, Numbers, and Keynote. Happily, the basics are similar in all three apps.

We’ll focus on the Mac versions here (make sure you have the latest updates!), but note that the iOS versions can participate as full-fledged collaboration citizens (Apple has more details). It’s even possible to use the iCloud versions of these apps for collaboration, but with some limitations (notably that Pages documents with tracked changes can only be viewed, not edited, in iCloud).

Invite Collaborators

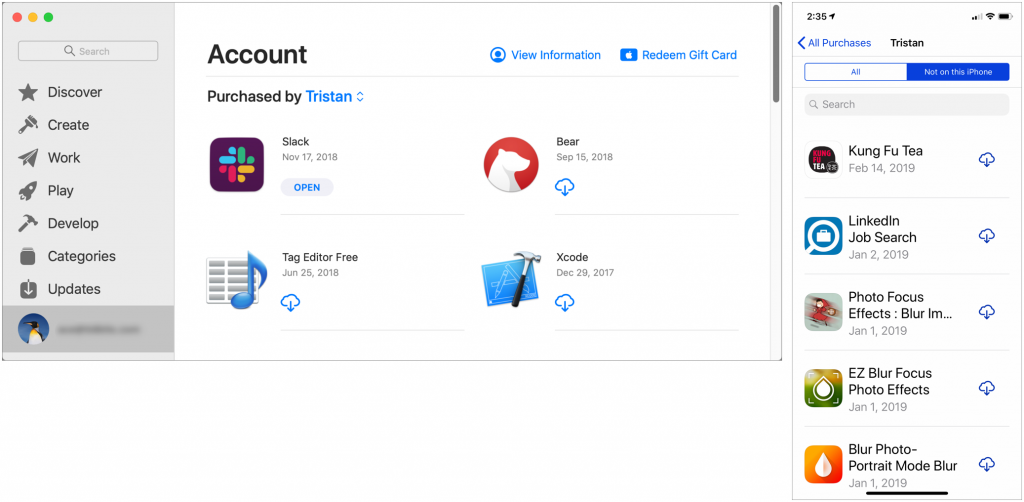
Once you have a document you want to share, the first step is to invite your collaborators. Choose Share > Collaborate with Others, or click the Collaborate button in the toolbar.

The document must be stored in iCloud Drive (or the Box file sharing service), and the iWork apps will automatically move the file there if need be. To find the file later, choose Go > iCloud Drive in the Finder and look in the folder associated with the app you’re using.

Next, the app displays the Add People dialog, where you can choose with whom you’re going to share the document, how to send the invitation, and what permissions to set.

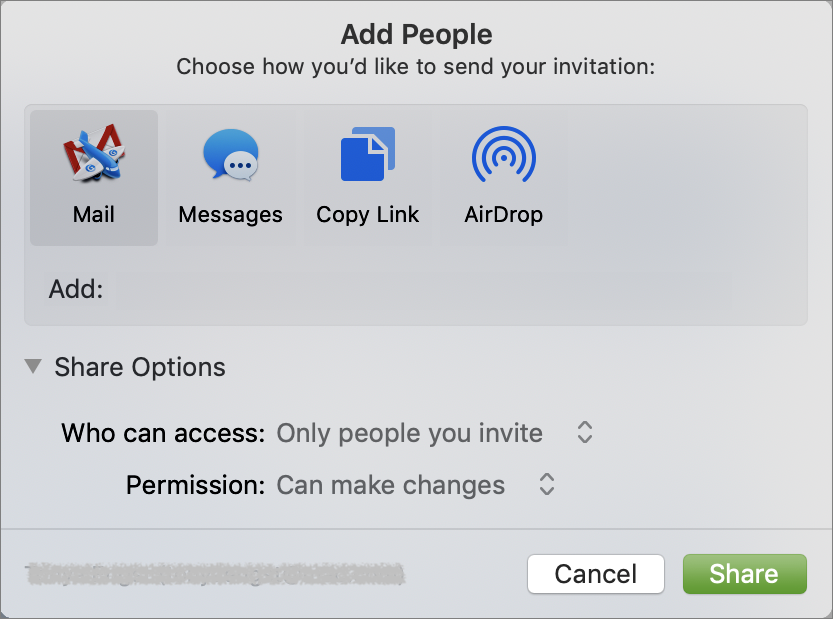
The Share Options are important. First, you can limit access to “Only people you invite” or “Anyone with the link.” With the former, the invitees must have iCloud accounts and be signed in. With the latter, you can share with anyone, even if they don’t use Apple devices.

Second, with the Permission menu, you can let collaborators make changes, or if you want them just to see the document, you can restrict them to View Only.

When you’re done, click Share to send the iCloud link via the specified channel (or copy it to the clipboard for sending in whatever way you prefer).

Accept an Invitation

When the recipient clicks the link or clicks Accept in a sharing notification, they get a dialog asking to open the document and telling them where it’s stored, in case they don’t want to work on it right away.

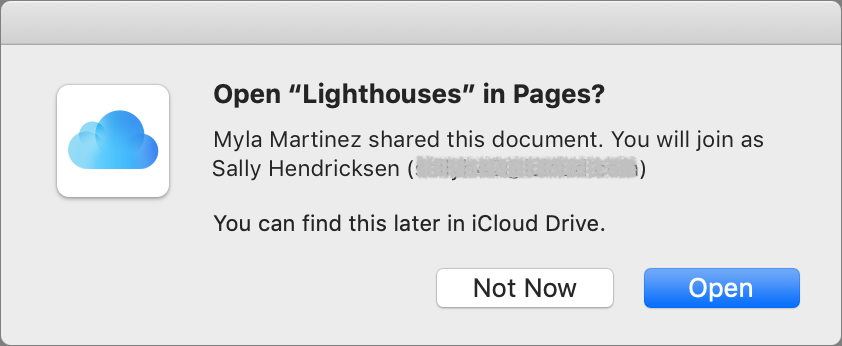
When they open the document, it will look and feel exactly like a normal document in Pages, Numbers, or Keynote.

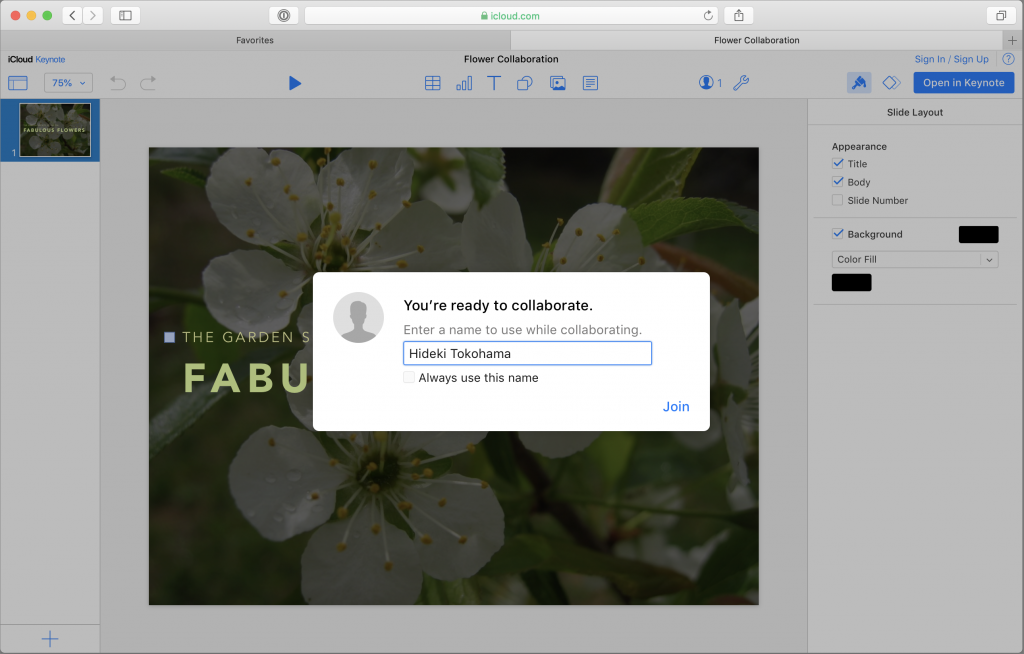
For someone who isn’t an Apple user, clicking the iCloud URL will open the document in the Web version of the appropriate app on iCloud.com. They’ll need to enter a name to identify them in the document, after which they can work in the Web app.

Add and Change Data

For the most part, you can do anything in a shared document that you can do with a normal document. There a few general limitations, such as managing styles and working with media files over 50 MB, plus some app-specific restrictions, such as working with tables of contents in Pages, transposing tables in Numbers, and changing themes in Keynote. Apple has a full list.

While you’re working, you can see who else is in the document at the same time by clicking the Collaborate button and looking for a colored dot next to a person’s name.

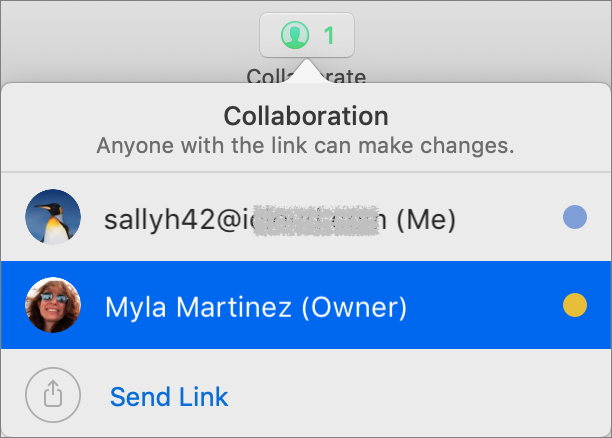
You’ll see color-coded cursors, text, and object selections as other people work, but if that’s distracting, choose View > Hide Collaboration Activity.

It can be hard to be work in a document while seeing someone else making changes, so don’t be shy about hiding collaboration activity. Or, if you are actively working with someone on a particular part of the document, consider doing so while you can talk in person or on the phone.

Add Comments

Commenting is the big win for collaboration with remote colleagues—it can save a vast amount of time to discuss a particular aspect of a document in context. To add a comment, select some text or an object, and then choose Insert > Comment or click the Comment button on the toolbar. (The controls look a bit different in iOS; Apple explains the differences.)

Comments appear as color-coded selections, boxes, or in the case of Numbers, corner triangles in cells. If they’re in the way, you can hide them by choosing View > Comments > Hide Comments. Other commands in View > Comments let you easily navigate to next and previous comments so you don’t have to find them visually.

Other collaborators can click Reply to continue the conversation right within that comment. You can edit one of your comments at any time by clicking to the right of the timestamp and choosing Edit Comment (or Edit Reply). Once the discussion has been resolved, either the person who started the comment thread or the document owner can delete the comment thread by clicking Delete.

Track Changes

Tracking who made what changes to a document is available only in Pages, and it’s hugely helpful when you need editing. Only the document owner can enable the feature by choosing Edit > Track Changes, but once that’s done, the change tracking toolbar appears above the document with controls for navigating between comments and changes, buttons for accepting or rejecting changes, and a button for pausing change tracking. A pop-up menu at the right side lets you configure whether you want to see all changes, changes other than deletions (which is generally the best setting), or what the document will look like in the end. A left-hand sidebar lists all comments and changes—show it by choosing View > Show Comments & Changes Pane.

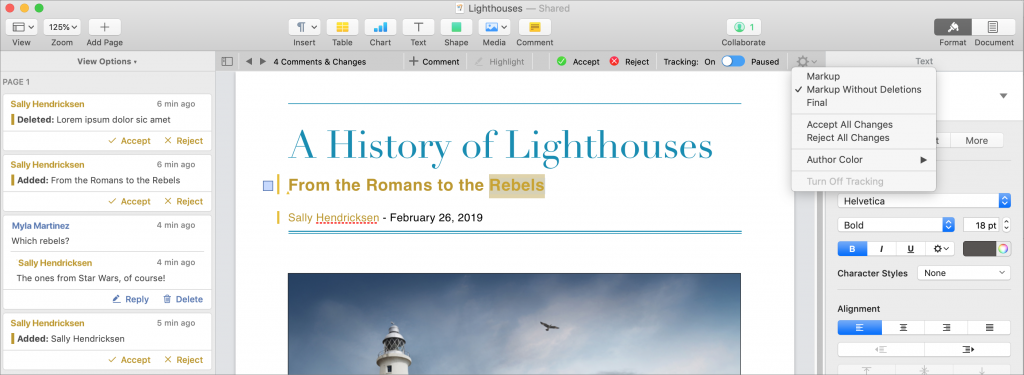
Anyone with edit access can accept or reject any particular change by clicking Accept or Reject in the Comments & Changes pane; you can also use the buttons in the change tracking toolbar to navigate from change to change, accepting and rejecting as you go. If there’s no need to deal with each change individually, use the pop-up menu’s commands to accept or reject all changes.

Needless to say, you can work on shared documents only when you’re online when you’re using the Mac or iOS version of an iWork app (if you try to edit while offline, the app will only let you edit a copy that is no longer shared). With any iCloud.com documents that you already have open, however, you can work offline, but your changes won’t appear to others until you reconnect.

When you’re done collaborating on a document, click the Collaborate button in the toolbar and then Stop Sharing (below left). Doing so immediately prevents others from making more changes and deletes the document from iCloud Drive on their devices (below right).

Simultaneous collaboration is wonderful when you’re working intensely with other people to develop a presentation, brainstorm budget estimates, or wordsmith a mission statement. In such situations, you’ll want to be able to talk at the same time. But for other sorts of projects, it’s also useful to allow people to collaborate when it’s convenient for them—the important thing is that everyone is working in the same document and can see each other’s changes and comments. If you rely on Apple’s iWork app for word processing, spreadsheets, or presentations, give their collaboration features a try!