iCloud, Google Calendar, Microsoft Exchange: Choosing a Personal Calendar Service

We Mac, iPhone, and iPad users have an embarrassment of riches when it comes to calendaring flexibility. Apple provides free calendar services via iCloud, and the Calendar app lets you add calendar accounts from a wide variety of providers. Most notable among them are Microsoft Exchange and Google Calendar, which are commonly used in the business world.

Since you can add multiple calendar accounts to the Calendar app, there’s no problem bringing your entire scheduling life together, even if your work uses Exchange and your kid’s school uses Google. But which service should you use for your primary personal calendars, which you likely need to share with your immediate family to ensure everyone is on the same scheduling page? There’s no one answer, but here’s our take.

Start by considering the platforms used by the people with whom you share calendars. Although it’s easy to share iCloud calendars with other Apple users, sharing an iCloud calendar outside the Apple ecosystem requires making it a read-only public calendar, which may not be appropriate for usability and privacy reasons. You can work around this limitation in different ways, depending on the platforms in play:

  • All Apple: If you and your family all use Apple devices, the answer is easy—stick with iCloud calendars. You can easily invite people to your shared calendars, and everyone can both see and edit events on those calendars using a Mac, iPhone, or iPad.
  • Apple and Google: What if your child’s only computing device is a school Chromebook or your spouse relies on an Android phone? In such a scenario, centralize your personal calendars on Google Calendar, where calendars can be shared read/write. If you don’t already have a free Google account, make one, log in to Google Calendar, and create and share the calendars from there.
  • Apple and Windows: Perhaps a member of your family relies on a Windows laptop. If that person installs iCloud for Windows, they can access iCloud calendars shared with their iCloud account. (Anyone can sign up for a free iCloud account, even if they don’t have an Apple device.)
  • Apple, Google, and Windows: Going for the trifecta, what if different members of your family rely on Apple devices, Android phones, and Windows PCs? The compromise option here is to fall back on Google Calendar, since both Apple devices and Windows PCs can access calendars shared from Google Calendar.

That’s the overview. Briefly, here’s how you share those calendars in iCloud and Google Calendar.

Sharing to iCloud Calendars

To share an iCloud calendar, open the Calendar app on your Mac. Control-click the calendar you want to share, and choose Share Calendar. In the Share With field of the dialog that appears, start typing the name of the person with whom you want to share, select their iCloud account from the suggestions, and click Done to send the invite.

Subscribing to a shared iCloud calendar is usually just a matter of clicking a link in an email, giving the calendar a name, and adding it to your iCloud account.

Sharing Google Calendars

To share a Google calendar, visit calendar.google.com in a Web browser. Hover the pointer over a calendar name in the sidebar, click the stacked dot button that appears, and choose Settings and Sharing. In the Settings screen, scroll down to Share With Specific People, click Add People, and enter enough of someone’s name that you can select their email address. Then adjust the permissions as desired.

There are too many variables to get into the details of subscribing to shared calendars in Google Calendar and Microsoft Outlook, but check those links for advice on getting started. And of course, if you’re having trouble working your way through all the combinations of sharing and subscribing, don’t hesitate to give us a call.

(Featured image by iStock.com/NicoElNino)

15 Ways to Solve Call Failures on Your iPhone

Sure, we know that phone calls aren’t the most common thing people do on their iPhones—especially anyone under 30—but it’s still important to be able to make and take calls. There are a wide variety of reasons that outgoing or incoming calls might fail, so the solutions vary equally as widely. Some may seem a little scattershot, but most are easy to try and set back if they don’t help.

  1. Try another location: This can’t come as news, but sometimes you’re in a bad spot for cellular coverage. Move to another area and try again.
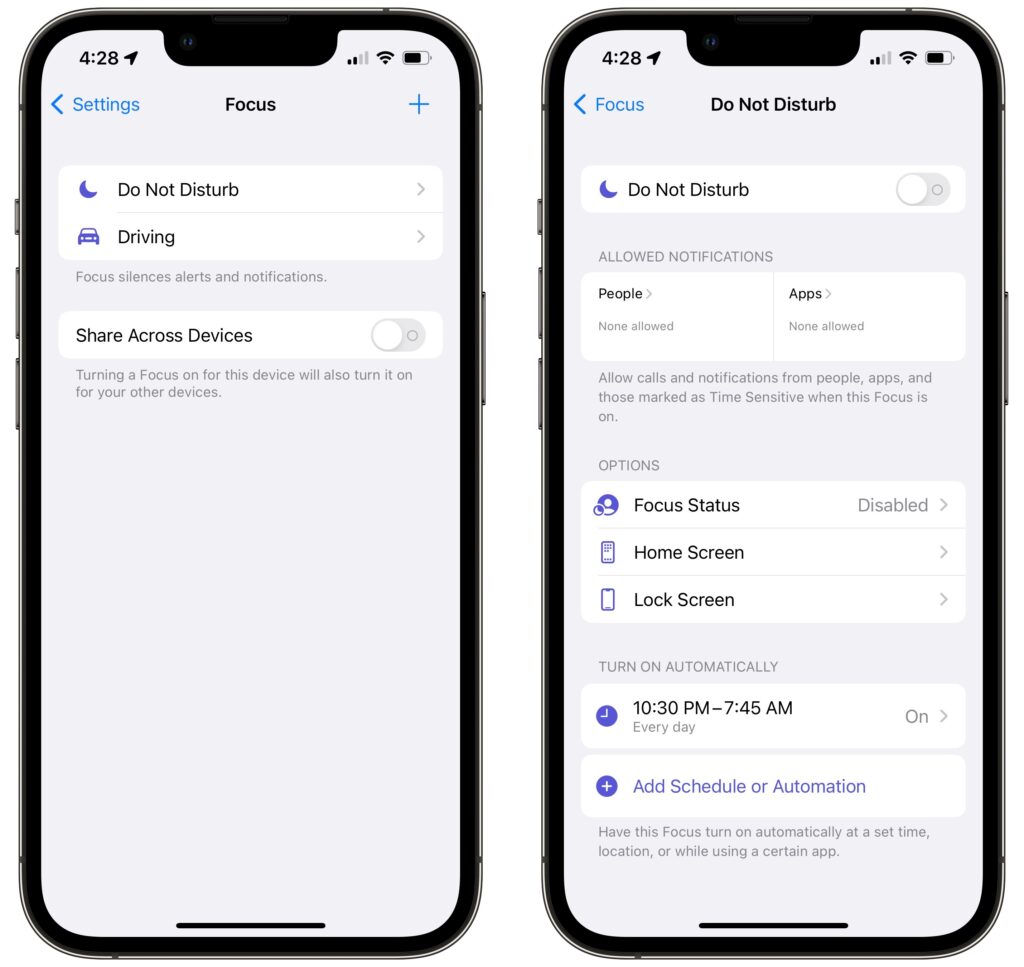
  2. Check Do Not Disturb in Focus: The Focus feature won’t prevent you from making a call but can prevent you from receiving one. Go to Settings > Focus > Do Not Disturb and make sure Do Not Disturb is off. Also, check any other Focus you created that could be blocking calls.
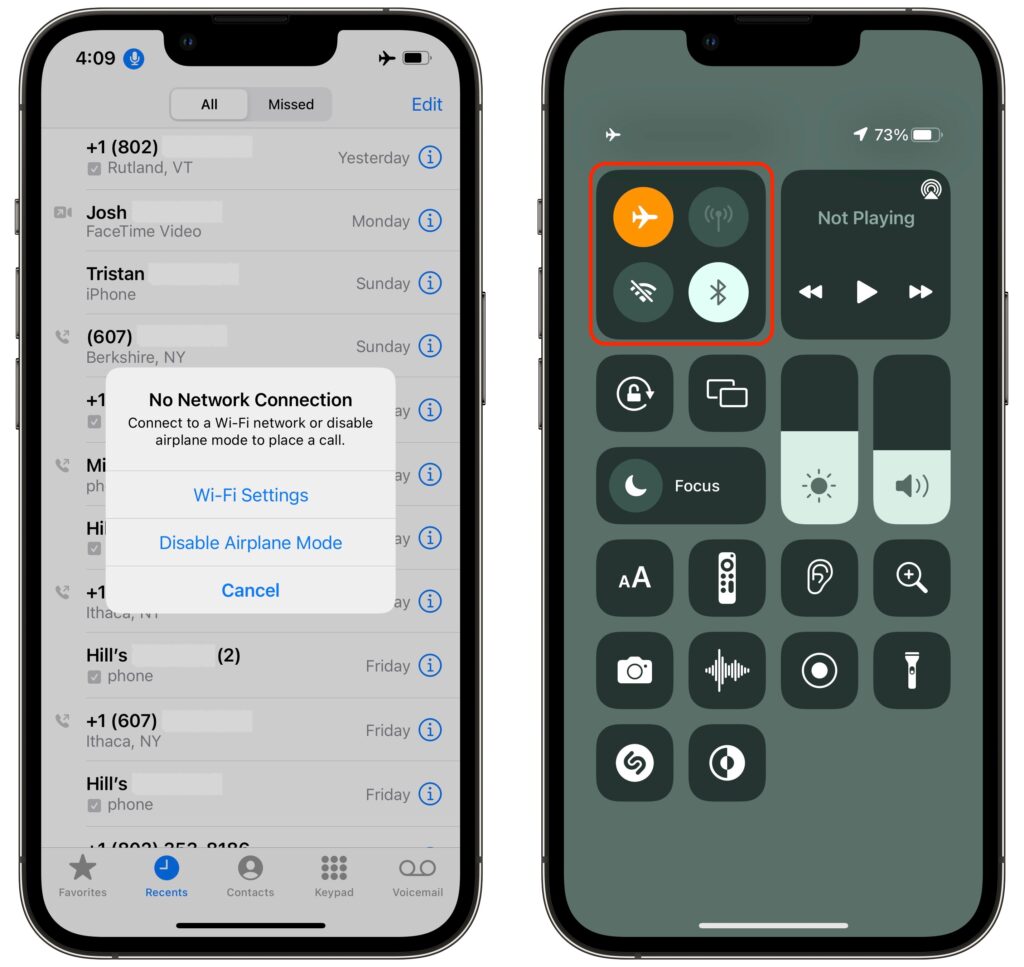
  3. Toggle Airplane mode: Although the Phone app should alert you if you try to make a call while in Airplane mode, the entire point of the feature is to block cellular access. If Airplane mode is on, turn it off, and if it’s off, turn it on briefly and back off to reset the iPhone’s radios. Note that the Wi-Fi Calling feature may let you make a call even if Airplane mode is on.
  4. Turn off Silence Unknown Callers: This feature can be a boon for avoiding telemarketers and spam calls, but it also prevents legitimate unknown calls from ringing through. Either turn it off in Settings > Phone or pay more attention to adding new numbers to Contacts.
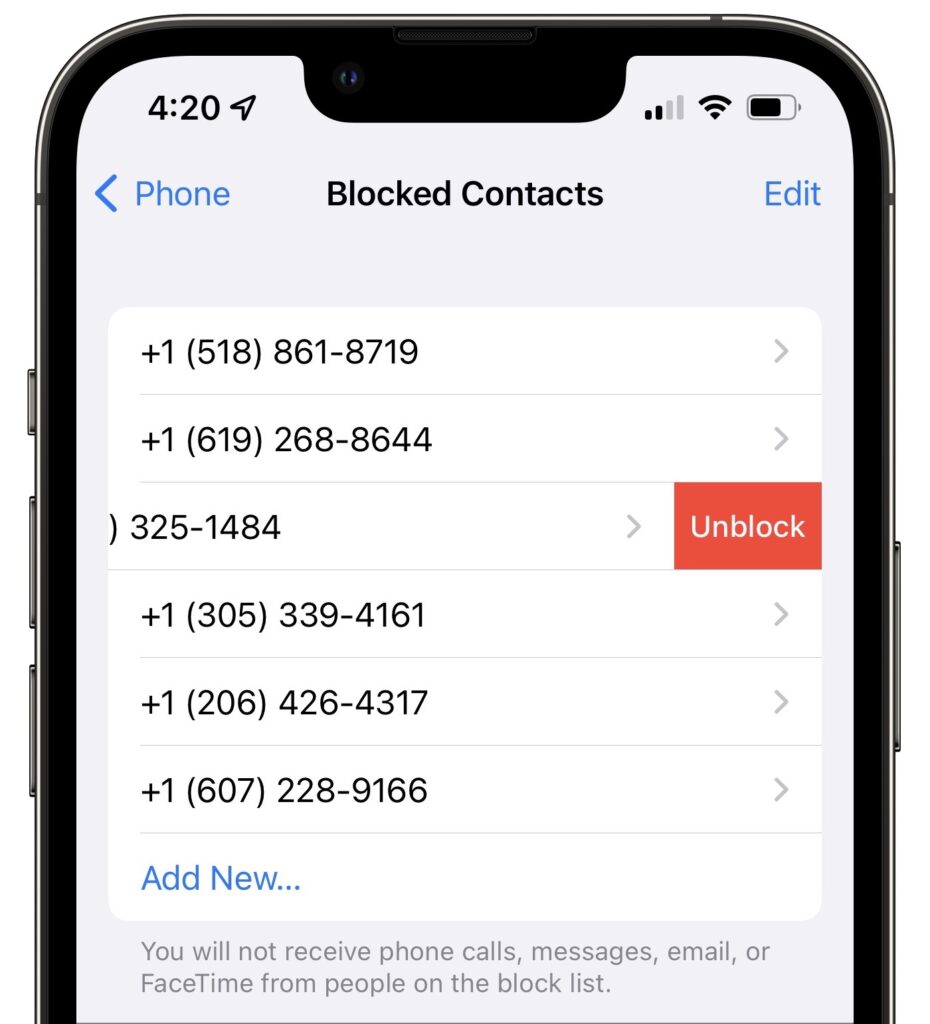
  5. Unblock the contact: In theory, you should still be able to place calls to blocked numbers, but incoming calls from blocked numbers will be sent directly to voicemail. Look for blocked contacts in Settings > Phone > Blocked Contacts and swipe left on a contact to unblock it.
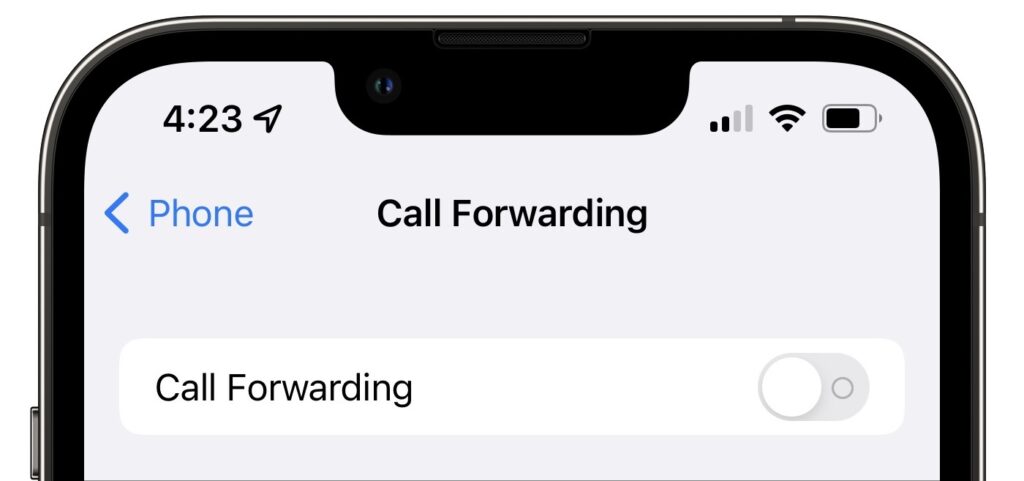
  6. Disable call forwarding: Needless to say, if you’re forwarding your calls, you won’t be receiving them. Go to Settings > Phone > Call Forwarding and make sure the switch is off.
  7. Toggle Dial Assist: The Dial Assist feature determines the correct international or local prefix when dialing, so if it gets confused, all bets are off. It can’t hurt to go to Settings > Phone, turn off Dial Assist, make a call, and then turn it back on again.
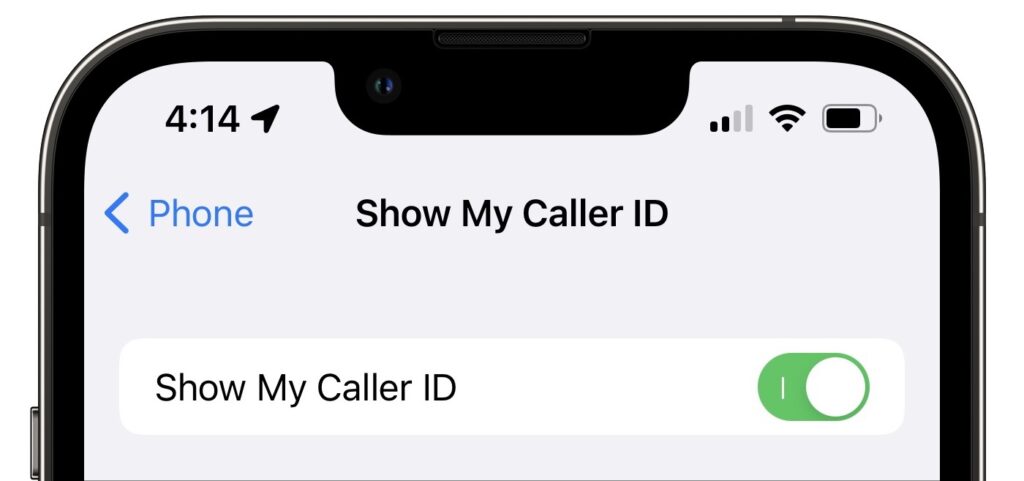
  8. Show Caller ID: Some phone systems refuse to accept calls that aren’t associated with caller ID information. Check that Show Caller ID is turned on in Settings > Phone > Show My Caller ID.
  9. Check for a carrier settings update: Carrier updates are always worth installing because they can improve network connectivity and performance and add new features like 5G or Wi-Fi Calling. If you dismiss a carrier update installation notification, you can install it later by going to Settings > General > About and following the onscreen instructions.
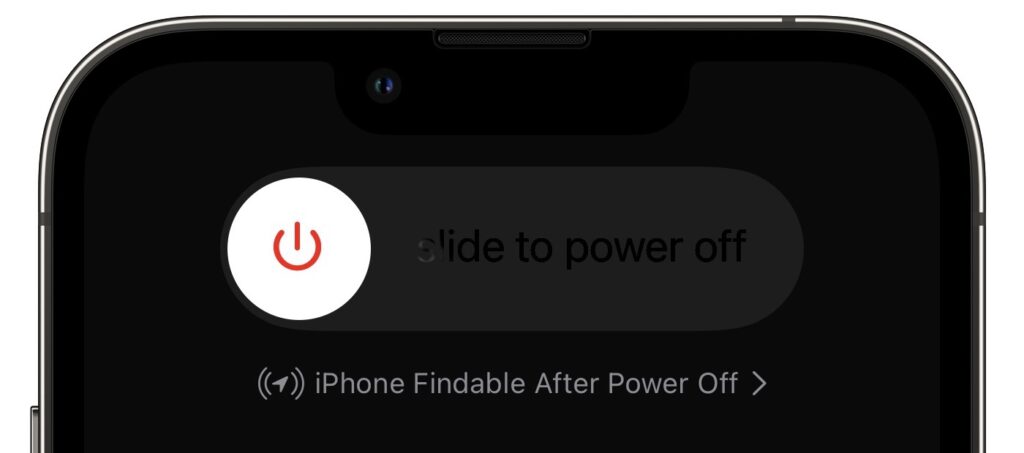
  10. Restart the iPhone: When in doubt… We know it’s a cliché, but restarting the iPhone really does solve many inexplicable problems. The easiest way to do this is to go to Settings > General > Shut Down (at the bottom) and then drag the slider. Press the side (Sleep/Wake) button on the iPhone to turn it on.
  11. Update iOS: It’s very unlikely that an iOS version would have a bug that caused problems with phone calls, but updating iOS creates enough of a clean slate that it can resolve quirky problems. Besides, it’s good to stay up-to-date for security reasons. Look in Settings > General > Software Update for any available updates.
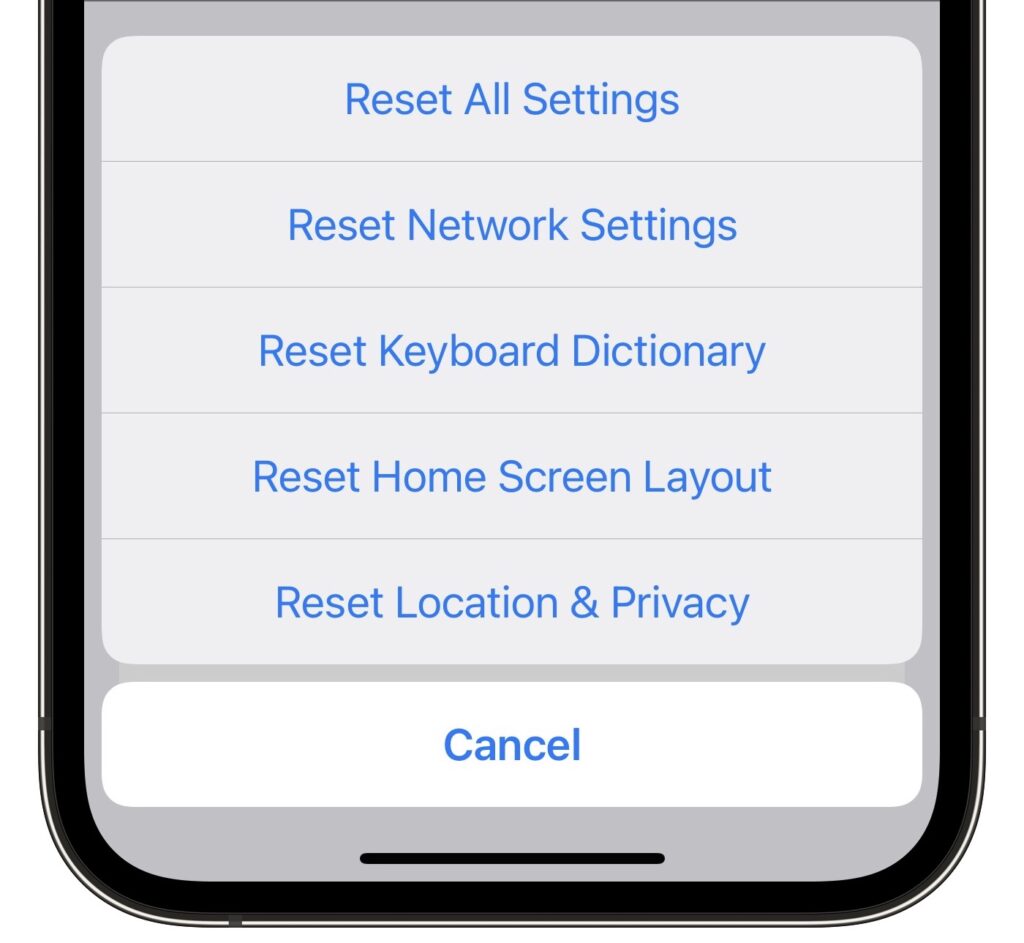
  12. Reset network settings: Leave this option for late in the troubleshooting process because it will erase your saved Wi-Fi passwords, preferred networks, and VPN settings, which will be annoying to recreate. If it becomes necessary, invoke it in Settings > General > Transfer or Reset iPhone > Reset > Reset Network Settings.
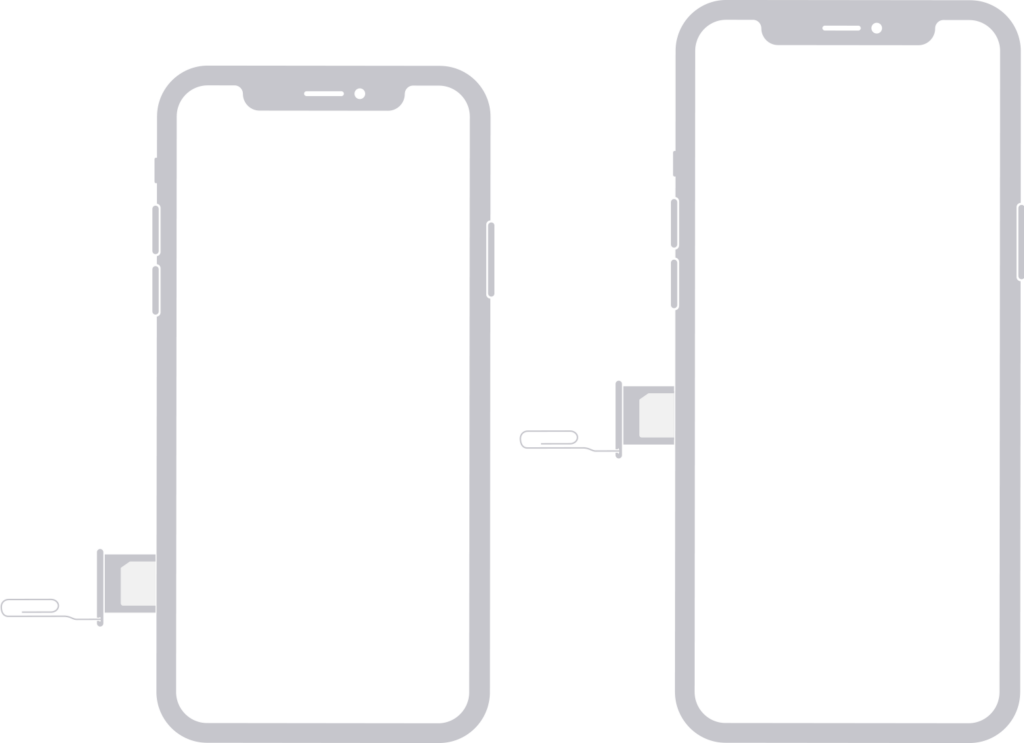
  13. Eject and reinsert SIM card: If all outgoing and incoming calls fail, it’s worth using a paperclip or SIM extraction tool to pop your SIM card out and reinsert it. Be very careful when doing this because the card is small and easily dropped.
  14. Contact your carrier: If all else fails, contact your carrier. (Yes, we see the irony here—you may have to use another phone.) There may be a problem with your account, a service outage in your area, or some other problem in their system. You might even need a new SIM card.
  15. Contact Apple support: If none of these work, your iPhone could be broken and need repair. Contact Apple support and see what they say—a replacement iPhone will almost certainly fix the problem.

We’re confident that something on this list will resolve your problem!

(Featured image by iStock.com/fizkes)


Social Media: Having problems making or receiving calls on your iPhone? We’re confident that something in this long list of fixes will resolve your problem.

Not Getting Full 5G When You Should? Try a New SIM Card

If you’ve been moving your SIM card from phone to phone over the years, you might inadvertently be preventing your current phone from taking full advantage of 5G connectivity. Cellular carriers aren’t always forthcoming about what will and will not work, but at least in the US, AT&T, T-Mobile, and Verizon all make noises about how you need a 5G-capable SIM card to use the latest and greatest 5G technologies. The solution is simple: stop by a carrier’s store or contact them to ask for a new SIM. It should be free and will take just a minute to install once the carrier support people have configured it to your phone number. Precisely where the SIM card slot is on your iPhone varies a bit by model; Apple provides full instructions.

(Featured image by iStock.com/Kuzmik_A)

Ease Vacation Navigation with Favorite Addresses in Maps

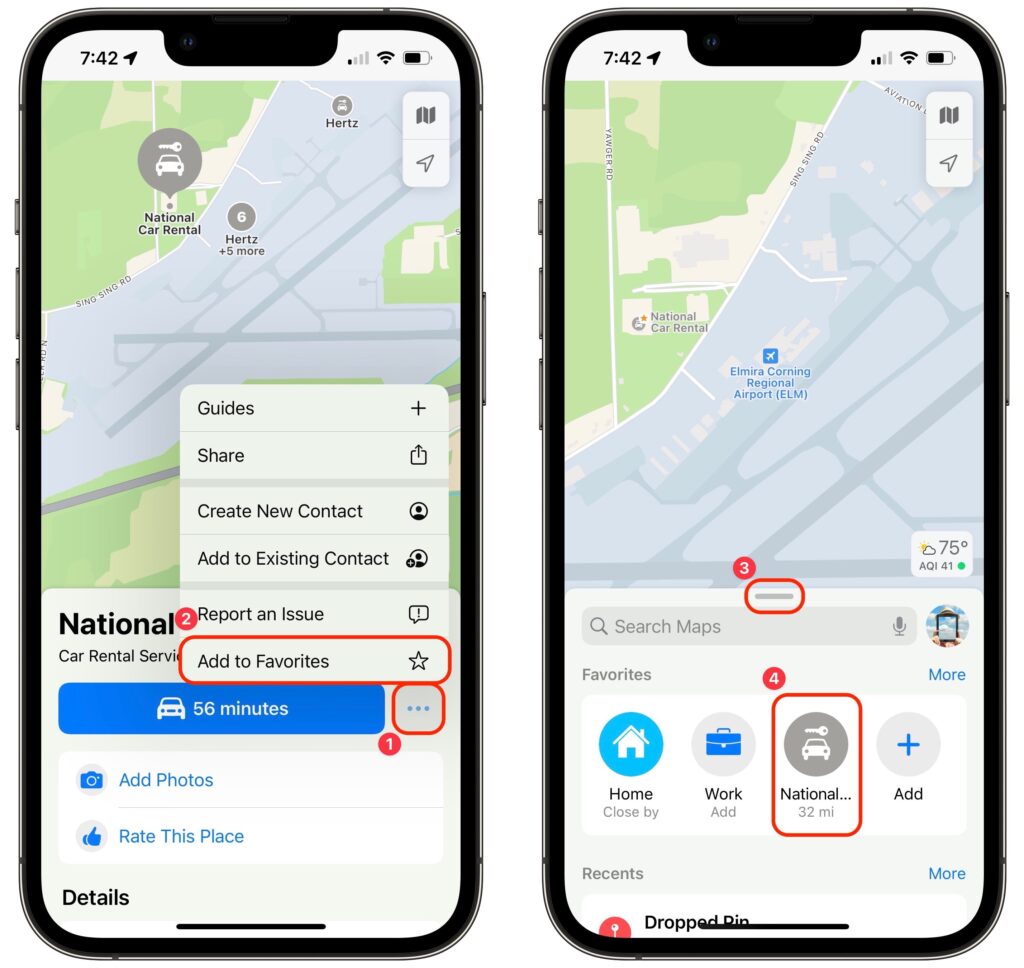
Imagine you’re on vacation, staying at an Airbnb and collecting tourist points in the surrounding area throughout the day. Since you’ll be heading back to your Airbnb regularly but may not remember its address reliably, it’s best to make it a favorite in Maps before you even leave home. That way, you can navigate to it easily without searching repeatedly or looking for it in your Recents list. Similarly, take a few minutes to add other addresses that you know you’ll need, such as the rental car dropoff spot. In Maps on the iPhone, tap the ••• button next to an address and then Add to Favorites . Then, when it’s time to navigate, swipe up on the search handle and tap the favorite to get directions.

(Featured image by iStock.com/Prostock-Studio)

Find Apple Watch Apps Faster in List View

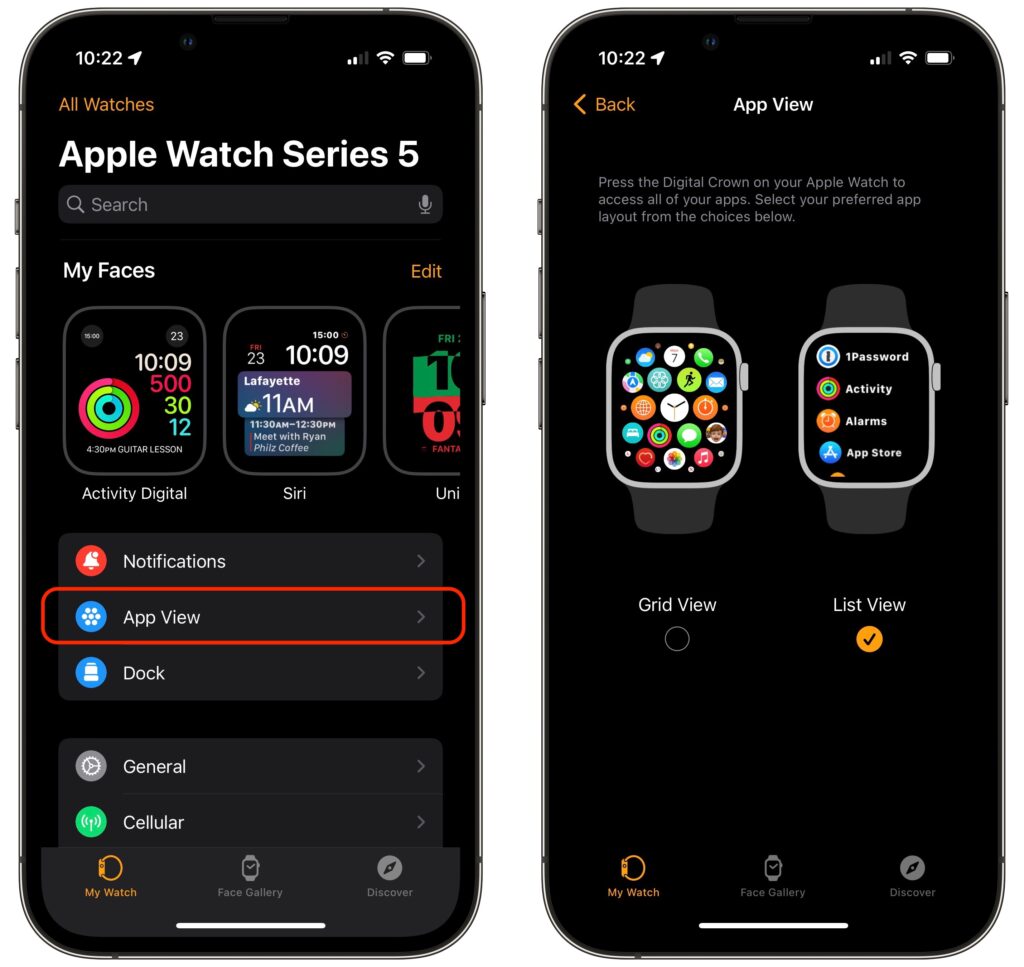
Every so often, we encounter someone struggling to find and launch an app on their Apple Watch because they have trouble seeing and interacting with the icon-centric grid view layout. If you’re in that camp, there’s a better way. In the iPhone’s Watch app, tap My Watch at the bottom, and then tap App View. Then select List View, which provides an alphabetically sorted, scrolling list of all your apps. From then on, it’s easy to press the Digital Crown to show the apps, turn it to scroll, and tap an app to launch it.

(Featured image by iStock.com/raditya)