The Hardware You’ll Need to Run Apple’s 2022 Operating Systems

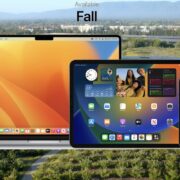
At Apple’s Worldwide Developer Conference in June, the company threw back the curtains on macOS 13 Ventura, iOS 16, iPadOS 16, and watchOS 9. These operating systems won’t be available until September or October of 2022, and we usually recommend waiting some time to upgrade—particularly for macOS.

Even so, it’s not too early to think about how these operating systems might impact your plans to buy new hardware in the next six months. Any Apple device you buy now—or have bought in the last few years—will be able to run the new operating systems. But some devices that can run the current macOS 12 Monterey, iOS 15, iPadOS 15, and watchOS 8 won’t be able to upgrade to their replacements later this year. And some older devices that can upgrade won’t support all the new features.

Here’s what you’ll need and compatibility gotchas to keep in mind.

macOS 13 Ventura

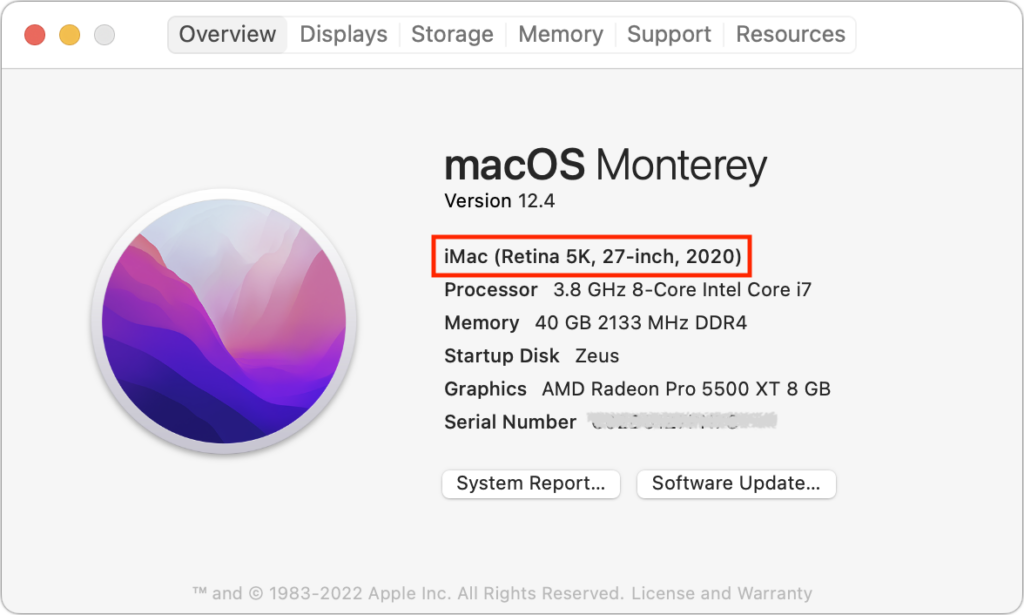
For macOS 13 Ventura, Apple has dropped support for every Mac model released before 2017. That’s in contrast to macOS 12 Monterey, which supported previous generation Macs that came out as early as 2013. If your Mac predates 2017 and you want to run Ventura, think about when it would make sense to buy a new Mac, perhaps in early 2023.

  • iMac: 2017 and later (late 2015 supported by Monterey)
  • iMac Pro: 2017 and later
  • MacBook: 2017 and later (early 2016 supported by Monterey)
  • MacBook Air: 2018 and later (early 2015 supported by Monterey)
  • MacBook Pro: 2017 and later (early 2015 supported by Monterey)
  • Mac mini: 2018 and later (late 2014 supported by Monterey)
  • Mac Pro: 2019 and later (2013 supported by Monterey)
  • Mac Studio: 2022

If you’re unsure which Mac you have, choose About This Mac from the Apple menu and look in the first line under the macOS version.

iOS 16

With iOS 16, Apple has maintained the same basic timeframe, supporting all iPhone models released in 2017 and later but dropping everything earlier, along with all iPod touch models. That means you’ll be able to run iOS 16 on these iPhones:

  • iPhone 13/mini/Pro/Pro Max: A15 Bionic
  • iPhone 12/mini/Pro/Pro Max: A14 Bionic
  • iPhone 11/mini/Pro/Pro Max: A13 Bionic
  • iPhone SE (2nd generation or later): A13 Bionic
  • iPhone XR/XS/XS Max: A12 Bionic
  • iPhone X: A11 Bionic
  • iPhone 8/8 Plus: A11 Bionic

We included each model’s chip family in the list above because that becomes important for particular features we’ll discuss later.

Practically speaking, these iOS 15-compatible devices won’t be able to upgrade to iOS 16:

    • iPod touch (all models)
    • iPhone SE (1st generation)
    • iPhone 6s/6s Plus
    • iPhone 7/7 Plus

iPadOS 16

Things get more complicated with iPadOS 16 due to there being four different iPad model types with varying capabilities. As with the iPhone models, we’ve included the chip families for reference.

  • iPad Pro 12.9-inch (1st–5th generation): A9X, A10X Fusion, A12X Bionic, A12Z Bionic, M1
  • iPad Pro 11-inch (1st–3rd generation): A12X Bionic, A12Z Bionic, M1
  • iPad Pro 10.5-inch: A10X Fusion
  • iPad Pro 9.7-inch: A9X
  • iPad Air (3rd–5th generation): A12 Bionic, A14 Bionic, M1
  • iPad (5th–8th generation): A9, A10 Fusion, A10 Fusion, A12 Bionic, A13 Bionic
  • iPad mini (5th and 6th generation): A12 Bionic, A15 Bionic

While that’s a long list, a simpler way to look at it is that only two iPad models that can run iOS 15 now won’t be able to upgrade to iOS 16:

  • iPad mini (4th generation)
  • iPad Air (2nd generation)

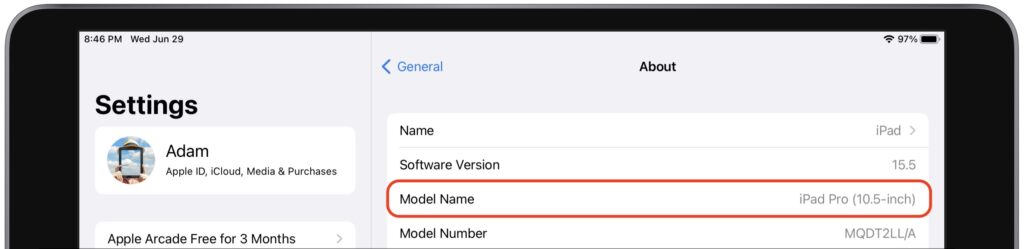
If you’re unsure which iPad model you have (this goes for the iPhone, too), look in Settings > General > About > Model Name.

watchOS 9

The upcoming watchOS 9 has a simple upgrade story. It supports the Apple Watch Series 4 through the Apple Watch Series 7, including the unnumbered Apple Watch SE. (Look in the Watch app on your iPhone if you can’t remember which model you have.) The only current model that won’t be able to upgrade is the Apple Watch Series 3. Although that model is quite old, dropping support for it is somewhat awkward since Apple continues to sell it even today as a low-cost option. If you’re planning to buy an Apple Watch soon, avoid the Series 3.

Feature-Based System Requirements

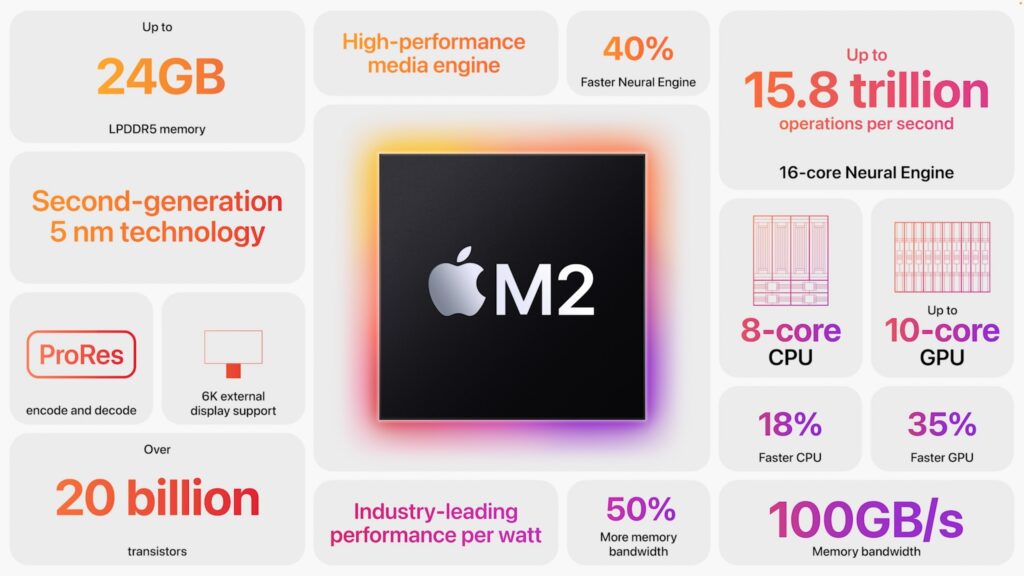
For some new features in iOS 16 and iPadOS 16, Apple has drawn a line in the sand at the A12 Bionic chip. These features will work on an iPhone or iPad with an A12 Bionic or later, but not on older devices that can still run iOS 16 and iPadOS 16. Some will also work on the Mac. These features include:

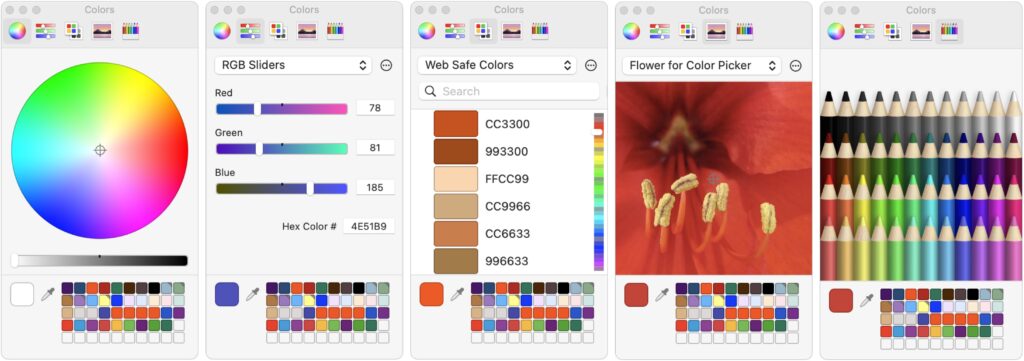
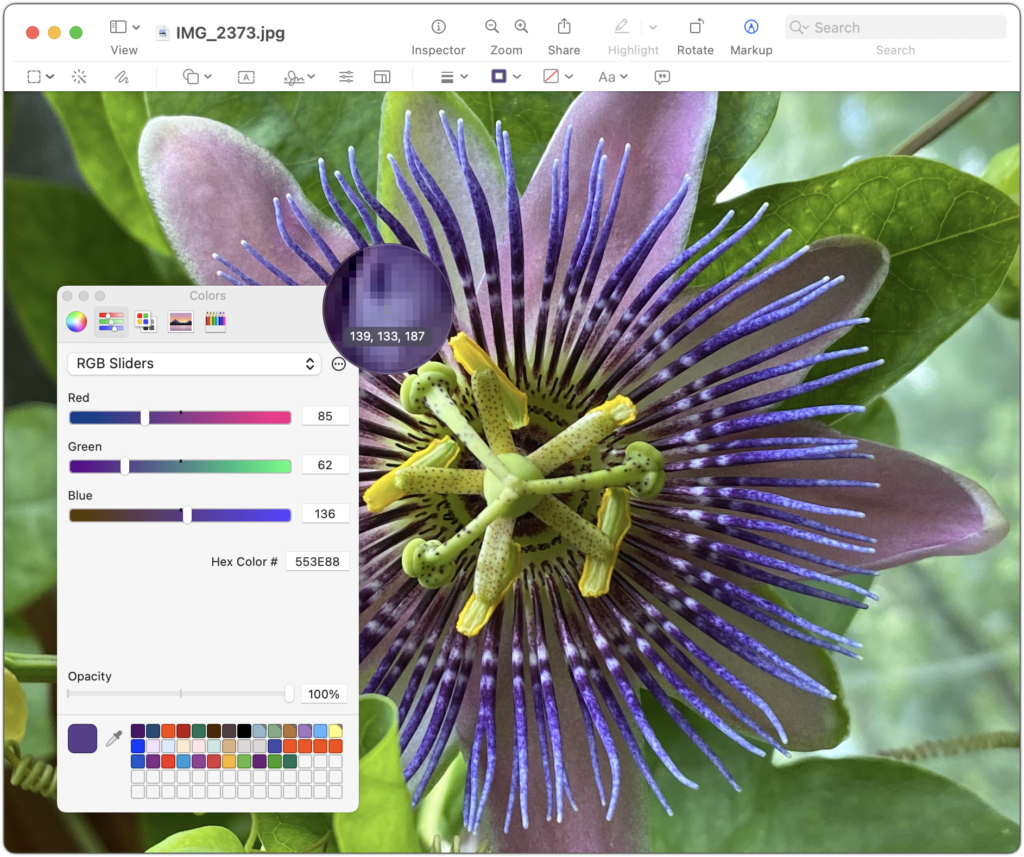
  • Lifting the subject of a photo from its background (also works on all Ventura-compatible Macs)
  • Live Text support in videos (also works on all Ventura-compatible Macs)
  • Spotlight search for images by location, people, scenes, text, and contents
  • Using dictation alongside the onscreen keyboard
  • Inserting emojis using dictation (in Ventura, requires a Mac with Apple silicon)
  • Enhanced Siri support for asking an app what voice commands it supports, hanging up calls, inserting emojis in texts, and working offline (these features won’t be available on the Mac in Ventura)
  • Recognition of birds, insects, and statues in Visual Lookup (also works on all Ventura-compatible Macs)

Some additional features have idiosyncratic system requirements:

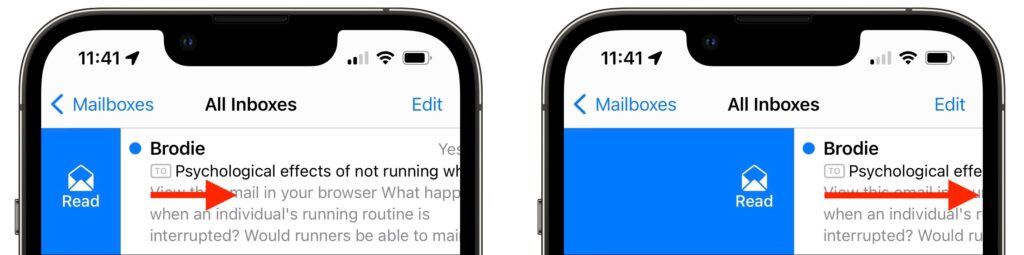
  • Live Captions that automatically generate text for any audio require an iPhone 11 or later, an iPad with A12 Bionic or later, or a Mac with Apple silicon.
  • Detection Mode in the Magnifier app, which can identify objects like doors, requires an iPhone 12 Pro or iPhone 13 Pro, an iPad Pro 12.9-inch (4th and 5th generation), or an iPad Pro 11-inch (2nd and 3rd generation).
  • The Camera app will let you blur the foreground in Portrait photos and improves the quality of Cinematic mode videos, but only for the iPhone 13 lineup.
  • The capability to use an iPhone as a webcam requires an iPhone XR or later.
  • When using an iPhone as a webcam, the Center Stage and Desk View features (the latter lets you show the other party what’s in front of you on your desk) require an iPhone 11 or later.
  • The new Studio Light feature that dims the background and lights up your face to simulate external lighting needs an iPhone 12 or later.
  • The Health app’s capability to scan medicine labels requires an iPhone XR or later.
  • Dictation can add punctuation automatically if you’re using an iPhone 11 or later, an iPad with an A12 Bionic or later, or a Mac with Apple silicon.
  • You can shrink iPad user interface elements to be smaller to fit more onto the screen with M1 iPads.
  • iPadOS 16 supports virtual memory swapping to provide up to 16 GB of memory to demanding apps, but only on M1 iPads.
  • The new Stage Manager windowing feature requires an M1 iPad in iPadOS 16 but will work with all Ventura-compatible Macs.

It can be disappointing when your fully functional Mac, iPhone, or iPad doesn’t support some snazzy new feature, but it’s better that Apple lets that device upgrade to the latest operating system rather than kicking it off the upgrade train just because it doesn’t have enough processor power for everything.

(Featured image by Apple)

Do You Keep Losing Your Pointer on a Large Screen? Try This Tip for Finding It

A large screen—or several screens!—increases productivity by helping you see more content at once. It’s a big help to refer to a Web page in one window while writing in another, for instance, or to check your calendar while composing an email. But the more screen real estate you have, the easier it is to lose track of the tiny pointer arrow. Happily, Apple added a clever trick for finding the pointer to macOS—quickly slide your finger or shake your mouse back and forth horizontally a few times to enlarge the pointer briefly.

(Featured image based on an original by iStock.com/Fanliso)

Get Some Color (On Your Mac) This Summer with the Color Picker

If you’re over 40, you probably remember the point in The Wizard of Oz where the movie switches from black-and-white to Technicolor (and if not, go see it!). It wasn’t the first color film, but the vibrant images of Dorothy’s ruby slippers, the yellow brick road, and the Emerald City helped make the movie a classic.

On the Mac, whenever you want to fill a drawing with color, colorize some text, or format spreadsheet cells in color, you need to use the Colors window, commonly called the color picker. Like many long-standing elements of the Mac experience, most people have seen and used it, but don’t realize how much it can do. How you bring it up varies by app but usually entails clicking a color button associated with styles or formats.

The Colors window has three sections: buttons for the color pickers at the top, their individual controls in the middle, and user-specified swatches at the bottom.

Color Pickers

Click the buttons at the top to switch between these pickers:

  • Color Wheel: This picker is useful for exploring a wide range of colors. Pay attention to the brightness slider at the bottom, which changes the colors in the wheel above.
  • Color Sliders: Use these sliders to specify particular grayscale brightnesses or RGB, CMYK, or HSB colors by number. You can also enter a hex color number directly. Or, you can find a color with another picker or the eyedropper tool and then look up its exact values here. Desktop publishers use this feature a lot, as do Web designers trying to determine hex colors. When matching colors with outside sources, click the gear button to choose the appropriate industry standard color palette before picking a color.
  • Color Palettes: This picker shows color swatches from different custom palettes. Use the ••• button to make, add, rename, and delete palettes. (Find them in ~/Library/Colors.) The utility of these palettes is that you can share your own color collections, enabling coworkers to use identical colors easily, or you can download and import palettes for different uses, such as land-use categories for maps.
  • Image Palettes: Click the ••• button here to load a new image, after which you can select any color in that image by clicking it. This picker could be useful for matching colors in a layout with those in a photo.
  • Pencils: They used to be crayons, but then Apple got sophisticated. Or stopped licensing the names from Crayola.

Within each color picker, it’s usually obvious how to select different colors. Click the wheel, move the sliders, enter red-green-blue percentages, and so on. The selected color, which should be applied to the selection in your drawing or text, appears in the large square color well at the bottom left. If your selection doesn’t pick up the desired color, try dragging the color well in the lower section to a corresponding color box in your app.

Eyedropper

The Colors window offers another extremely useful way to select a color: the eyedropper. Find it in the bottom portion of the window, and click it to see a circular loupe that magnifies anything under it. Move the loupe until the single pixel in the middle is over the color you want, and then click. If you press the Space bar while the loupe is showing, the loupe displays the RGB values of that pixel.

Swatch Drawer

What are those little squares to the right of the eyedropper? That area is called the swatch drawer, and it’s where you store particular color swatches that you want to use repeatedly. To create a swatch, drag the color from the big color well into a swatch square. You can pick a color swatch up and move it around, so you can arrange your swatches in a way you’ll remember. Swatches you store here become available in all Mac apps, so it’s a great way to ensure you’re using the same colors everywhere.

To use a swatch, just click it. It immediately becomes the selected color in the color well and is applied to whatever object you’re editing.

To remove a swatch, drag it to the right of the swatch squares and let go just inside the right edge of the Colors window (if this doesn’t work, expand the window to the right as much as possible before another column of squares appears, then try again).

By default, you see twenty swatch squares in two rows, but the swatch drawer has room for hundreds of squares! Expand just the drawer vertically by dragging the divider line at its top, or expand the entire window vertically or horizontally by dragging any edge or corner.

Now that we’ve looked into the heart of the color picker to provide you with more knowledge, we hope you’ll find the courage to use colors more confidently in your everyday Mac work!

(Featured image by iStock.com/barbdelgado)


Social Media: Have you found the macOS color picker confusing? Here’s how to find, set, and share colors.

Manage Email Faster in Mail by Swiping

We all get too much email, and while Mail can’t help you get less (other than by making it easy to unsubscribe from mailing lists), it does provide shortcuts for processing your mail more quickly. Regardless of whether you’re using iOS, iPadOS, or macOS, you can swipe on messages in the message list to perform various actions—some of which you can customize. It’s an efficient way to work through email quickly.

Swiping on the iPhone and iPad

In iOS and iPadOS, when you swipe a short distance right on an unread message (from left to right), Mail displays a Read button. You can either stop swiping and tap it or keep swiping to the right to mark the message as read. If the message has already been read, that button changes to Unread. This swipe is great for those who like marking messages as unread to keep them around for later processing.

Swipe left (from right to left) a short distance, and you get three buttons, More, Flag, and Archive. (If you see Trash instead of Archive, that’s fine. We talk more about configuring which buttons you see shortly.) Tap Archive to store the message in an Archive mailbox (or All Mail for Gmail users), which is good for getting it out of your face without deleting it. Flag marks the message with a flag so you can find it again easily in Mail’s Flagged mailbox—some people do this to track messages that need replies or other actions. You can also swipe all the way to the left to archive the message with one motion.

If you tap More, you get a bunch of additional options (depending on the message) that include Reply, Reply All, Forward, Archive, Flag, Mark as Read, Move Message (for filing in another folder), Trash Message, Move to Junk, Mute (to silence notifications from the thread), and Notify Me (which alerts you when anyone replies to the message).

Do you prefer to have your full swipes manage mail in a different way than the default? Go to Settings > Mail > Swipe Options and choose which button appears when you swipe right or left. You can select only one unique action for the middle swipe left button and for the swipe right action.

If you prefer to delete messages instead of archiving them, select Archive in the Swipe Right settings and it will become Trash automatically if the account requires swiping left to offer the Archive button. If you use Gmail or some other email providers, you can reverse these settings (so swiping left offers Trash and swiping right gives you Archive) by navigating to Settings > Mail > Accounts > YourAccount > Account > Advanced and selecting Deleted Mailbox under Move Discarded Messages Into.

Remember that you can undo an errant swipe action by swiping left anywhere on the screen with three fingers or by shaking the iPhone or iPad, assuming you’ve left that setting enabled in Settings > Accessibility > Touch.

Swiping on the Mac

On the Mac, swiping works similarly, but fewer options are available. You can swipe right with two fingers to mark a message as read or unread, depending on its current status, or you can swipe left to delete or archive the message. Short swipes reveal a button you can click; long swipes perform the action without needing an additional click.

As with Mail in iOS, you can toggle the delete/archive setting by choosing Mail > Preferences > Viewing. Choose Trash or Archive from the Move Discarded Messages Into pop-up menu.

That’s it! Take a few minutes to practice swiping, and before long, you’ll be marking, flagging, and archiving messages with just a flick of the finger.

(Featured image by iStock.com/Pheelings Media)


Social Media: We can’t reduce your email load, but we can show you how to process it faster by swiping on items in Mail’s message list on your iPhone, iPad, or Mac. Details at:

Apple Previews M2-Based MacBook Air and Updated 13-Inch MacBook Pro

During its Worldwide Developer Conference keynote on June 6th, Apple took a brief break from showing off new features in upcoming operating systems to throw back the curtains on its new M2 chip and a pair of laptops that use it: an all-new MacBook Air and an updated 13-inch MacBook Pro. Apple said that both laptops will be available in July.

Next Generation M2 Chip Boosts Performance, Offers More Memory

Although we’re still wrapping our heads around the insane performance offered by a Mac Studio with the M1 Ultra chip, Apple is already introducing the next generation of chips to power the Mac line, beginning with the M2. It includes an 8-core CPU and 10-core GPU, and builds on the capabilities of the M1, increasing CPU performance by 18%, GPU performance by 35%, and Neural Engine performance by 40%. It also offers up to 24 GB of unified memory (16 GB max in the M1) and expands memory bandwidth by 50%. Impressive numbers, but still well under the capabilities of the M1 Pro. We expect Apple to release an M2 Pro, M2 Max, and M2 Ultra within the next year or so.

New MacBook Air Brings Complete Redesign

Apple claims the MacBook Air is the world’s best-selling laptop, which isn’t surprising, given the model’s svelte size, zippy performance, and reasonable price point. For this revision, Apple changed the previous wedge-shaped design to a squared-off look that echoes recent Apple products like the 24-inch iMac and iPhone 13. It’s otherwise similar in size to the previous model, though just a touch thinner and lighter. It’s the same width and a bit deeper, likely because it boasts a 13.6-inch screen and a full-height function key row with Touch ID. Happily, it now charges using Apple’s MagSafe 3 technology. You can get the new MacBook Air in four finishes: silver, space gray, starlight, and midnight.

The new MacBook Air’s screen isn’t just bigger, it’s also better. It has a slightly higher resolution of 2560×1664, it’s brighter, and it supports up to 1 billion colors. In other words, it’s gorgeous, and you can supplement it with an external display up to 6K in resolution. Embedded at the top of the screen is a better webcam with a 1080p resolution instead of the previous 720p resolution. Apple also enhanced its audio capabilities with a four-speaker sound system and a three-mic array with directional beamforming.

The price of the M2-based MacBook Air starts at $1199, but additional processing power, memory, and storage are available:

  • Chip: Choose from either an M2 with an 8-core CPU and 8-core GPU or one with an 8-core CPU and 10-core GPU ($100).
  • Memory: 8 GB of unified memory is standard, but you can opt for 16 GB ($200) or 24 GB ($400).
  • Storage: The base level of SSD storage is 256 GB, with upgrades to 512 GB ($200), 1 TB ($400), or 2 TB ($800).

Like the previous M1-based MacBook Air, the new model sports two Thunderbolt/USB 4 ports on the left side (next to the MagSafe port) and a 3.5 mm headphone jack on the right side. It also supports Wi-Fi 6 wireless networking and Bluetooth 5.0.

It comes with a 30-watt USB-C power adapter, or you can pay $20 more for either a 35-watt power adapter with two USB-C ports or a 67-watt USB-C power adapter that supports the M2-based MacBook Air’s fast charging capabilities. If you opt for the higher-end M2 chip and at least 512 GB of storage, you get one of the more-capable power adapters for free.

Although the new MacBook Air is a little more expensive than a comparably configured M1-based MacBook Air, it sports better performance, more memory, a bigger and better screen, a better webcam, a larger function key row, better speakers, and MagSafe 3. Nevertheless, if you’re working on a tight budget, the least expensive M1-based MacBook Air remains available for $999, and it’s still a fine machine.

In the end, it’s hard to go wrong with the new M2-based MacBook Air when upgrading from an Intel-based Mac laptop or supplementing your desktop Mac with a laptop. It’s small, light, powerful, and cost-effective, if not a significant enough jump to warrant upgrading from an M1-based MacBook Air.

Updated 13-inch MacBook Pro Gains M2 Chip

While the new MacBook Air is a complete redesign, the updated 13-inch MacBook Pro is unchanged from its M1-based predecessor, apart from the move to the M2 chip. Since that’s the same chip that’s in the MacBook Air and the price is identical for comparable configurations, the question becomes why you’d buy the 13-inch MacBook Pro instead of the new MacBook Air.

On the plus side, the 13-inch MacBook Pro has cooling fans that enable it to maintain peak performance for sustained loads—the fanless MacBook Air will throttle itself to avoid overheating if you push it for too long. The MacBook Pro’s battery life is likely a little longer, given that it has a large battery. Finally, it has a Touch Bar instead of a function key row, which some may like.

However, the new MacBook Air’s slightly larger screen supports more colors (1 billion versus millions), and the MacBook Air has a better webcam and potentially better speakers. It’s also a little thinner and lighter.

In balance, we recommend the MacBook Air unless you love the MacBook Pro’s Touch Bar, which seems to be on the way out. The 13-inch MacBook Pro starts at $1299 for an 8-core CPU, 10-core GPU M2-based model with 8 GB of unified memory and 256 GB of SSD storage. The build-to-order options are the same as for the MacBook Air.

(Featured image by Apple)


Social Media: At its WWDC22 keynote, Apple unveiled a completely redesigned MacBook Air and an updated 13-inch MacBook Pro, both powered by the next-generation M2 chip. Read on for details: