
Make It Stop! How You Can Control Notifications on Your iPhone
Is every app on your iPhone or iPad constantly nagging you with notifications? It’s like a three-year-old saying “Look at me!” every few minutes, but on the plus side, a little work in the Settings app can quiet your device. And it won’t whine about being sent to time-out.
To get started, go to Settings > Notifications and check out the list of apps. Every app that can provide notifications appears here, so it might be a long list. Under the app’s name is a summary of what notifications it can present. That isn’t to say it will abuse that right to show you notifications—every app is different in how chatty it is. Tap an app in the list to see its notification settings.
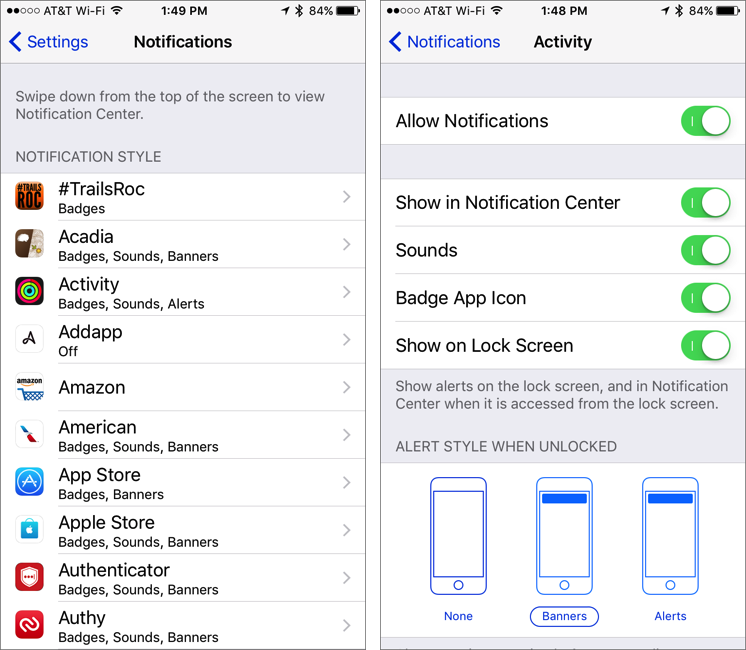
There are six notification settings available to apps, but not every app will avail itself of all of them. Here’s what these settings do:
 Allow Notifications: This is the master switch. Turn it off if you never, ever, under any circumstances, want to get a notification from the app.
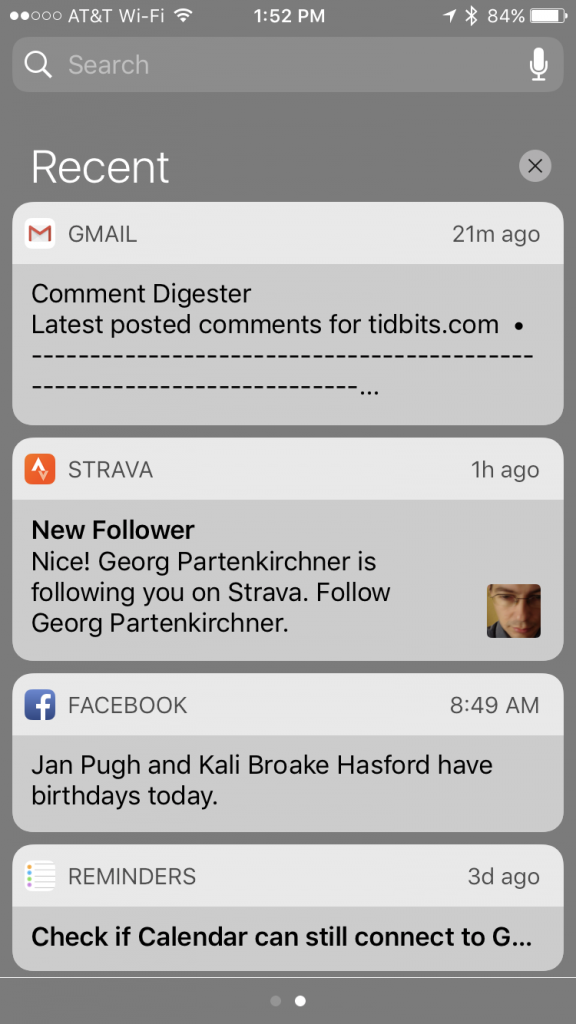
Show in Notification Center: If you swipe down from the top of the screen on an iOS device, you’ll reveal Notification Center, which collects notifications from all apps in one place. It’s a handy spot to review banner notifications you couldn’t read in time, or notifications that you never saw originally. Turn this switch off if you don’t want the app’s notifications to appear in Notification Center. In general, it’s best to leave it on.
Sounds: Those who dislike being interrupted by inscrutable noises from their pockets or purses should disable sounds. If you really don’t like sounds coming from your iPhone, turn off the ringer switch on the side.
Badge App Icon: Many apps, including Mail, Reminders, and Calendar, can tell you how many unread messages, overdue events, or other waiting items they contain. They do this by putting a red number badge on the app’s icon. If you don’t find that number useful—knowing that you have 13,862 unread email messages isn’t exactly calming—you can turn off the badge for the app.

Show on Lock Screen: Only important notifications should appear on your Lock screen, so you can see what’s happening at a glance. If you have a recipe app that likes to tell you about every new recipe, you might want to disable this option to prevent it from cluttering your Lock screen with trivialities.
Alert Style When Unlocked: The last option is the notification style the app will use when you’re actively using the device. You have three choices here: None, Banners, and Alerts. Select None if you don’t want to be bothered while you’re working on the device. Banners and alerts are similar, but banners slide down from the top of the screen, pause briefly, and then slide back up, whereas alerts stick around until you dismiss them. In general, use banners for most things, and restrict alerts to only the most important apps.
You don’t need to sit down and go through every app in the Notifications screen. Instead, just let apps do what they want by default, and take side trips to Settings > Notifications whenever an app starts to annoy you with the frequency, location, or type of notifications.

