How to Use Airline Boarding Passes on Your iPhone
Are you still using paper boarding passes when you fly? Sure, they work, but if you’ve ever panicked after accidentally putting a boarding pass in the wrong pocket, or if you’ve been embarrassed by holding up the line as you fumble through a set of boarding passes for multiple flights, consider giving mobile boarding passes on your iPhone a try. They’re easy to set up and use, but you’ll want to get started before you leave for the airport.
First, find and download the iPhone app for the airline you’re using. If your trip involves multiple airlines, you’ll need the app for each one. All the apps are free, and the only hard part is logging in, which might require figuring out an old frequent flyer number or resetting a password. Do that ahead of time.
Once you’ve set up the app, it’s time to check in for your flight, which you can usually do 24 hours before the flight. The airline app may know about your itinerary automatically, but if not, you’ll have to enter a confirmation number or ticket number from your ticket receipt manually—look for a Check In option to get started.
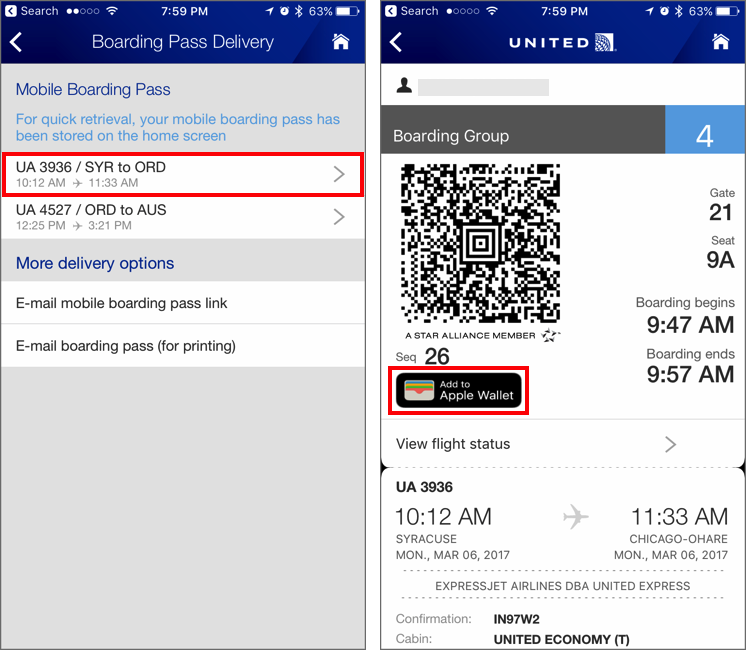
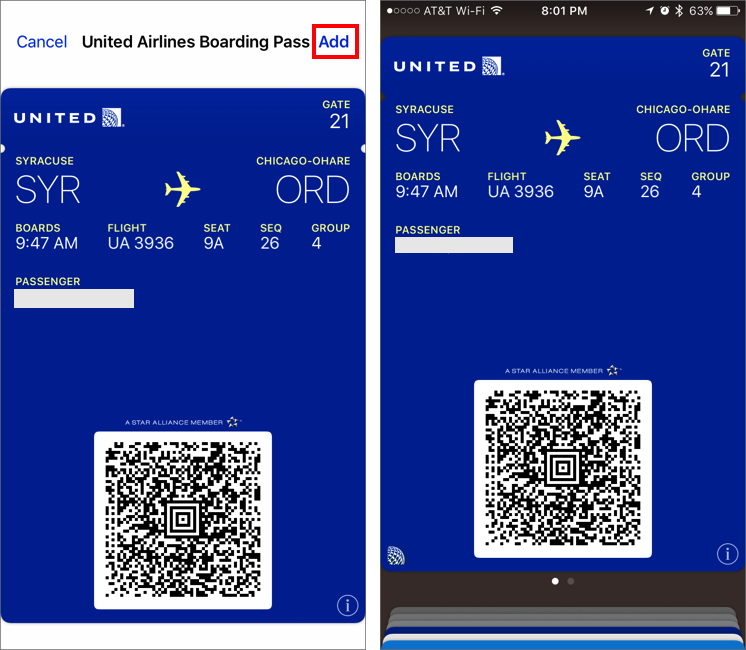
At the end of the check-in process, the app shows an Add to Wallet link or button—the specifics vary by app but should be relatively obvious. Tap it to hand the boarding pass off to Apple’s Wallet app, make sure everything looks right, and then tap the Add link in the upper-right corner. You may or may not need to do this for each boarding pass; check to see what’s in Wallet after the first one. Note that you can also add passes for other members of your traveling party, such as a child or spouse. Now you’re ready to go to the airport!
At the airport, you first need your boarding pass in the security line. Since Wallet knows your flight times, it starts displaying a notification on the iPhone’s Lock screen some hours beforehand. That notification appears every time you wake the iPhone. Swipe it to the right or 3D Touch it to display your boarding pass. Cleverly, when the boarding pass is showing, the iPhone won’t automatically lock its screen. Nevertheless, as you approach the head of the line, check that you haven’t inadvertently pressed the Sleep/Wake button on your iPhone. Then just show your iPhone screen to the boarding pass scanner.

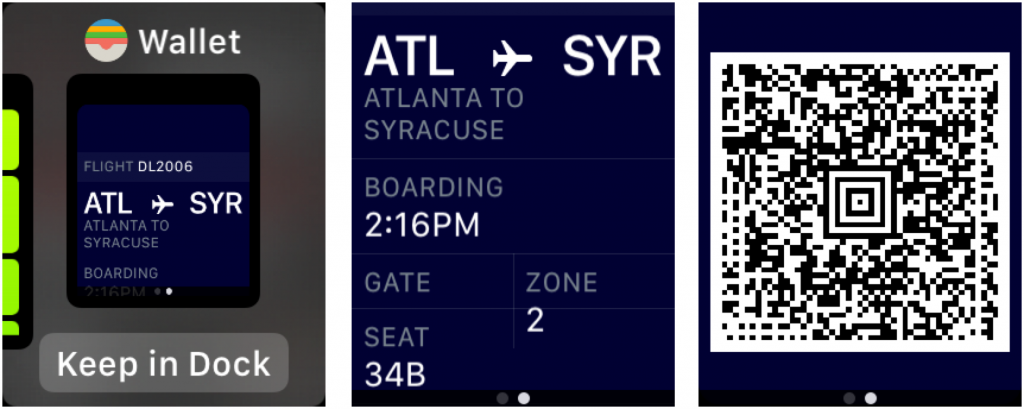
If you have an Apple Watch, you can instead bring up the Wallet app there—you might want to tap the Keep in Dock button to make it easier to get to for your return flight. The watch’s Wallet app shows the same passes that are in Wallet on the iPhone, and tapping the boarding pass displays the same information, although you have to scroll down (or rotate the digital crown) to access the QR code required for the scanner. While the Wallet app is up on the Apple Watch, the screen doesn’t turn off, so you don’t have to struggle with it when you get to the desk. With some scanners, you may have to put your arm in an awkward position for the scanner to see the watch screen; use the iPhone in such situations.
One last thing. Since many flights have multiple legs, each with a separate boarding pass, note that Wallet tries to keep them together. If you see multiple dots at the bottom of a screen showing a boarding pass, try swiping left and right to move between them. The same applies if you’re traveling with your family and have boarding passes for multiple people in your iPhone.
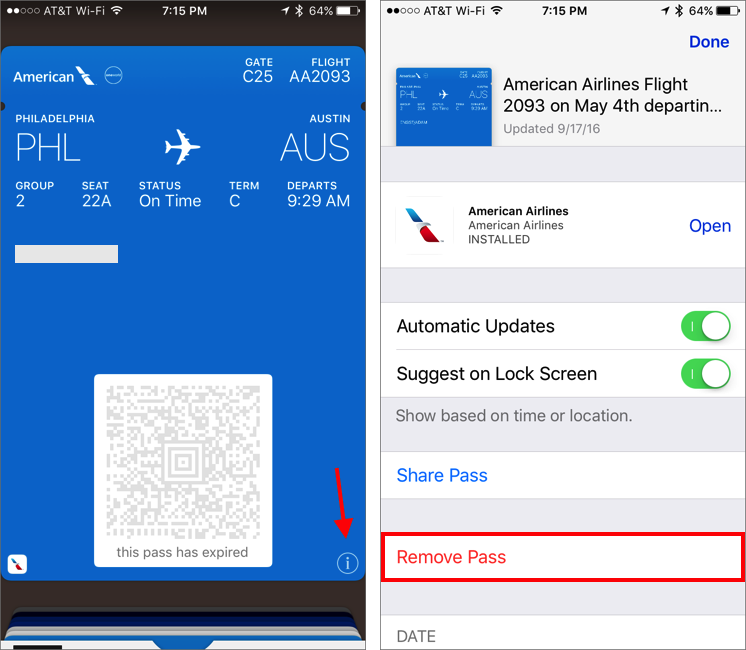
After you return home, there’s no reason to keep boarding passes in Wallet, so you can delete them. Open Wallet, tap the boarding pass, tap the i button in the lower-right corner, and then tap Remove Pass.
Many iPhone-carrying travelers find mobile boarding passes significantly easier and less stressful than old-style paper boarding passes, so give them a try. Of course, if you’re concerned that something might go wrong, go ahead and print paper boarding passes as a backup; there’s no harm in that.